# Supervisely Developer Portal
Learn how to automate and customize Supervisely, smoothly integrate it with your software and build custom computer vision apps that perfectly fit your requirements
**Website**: [https://supervisely.com](https://supervisely.com/)
**Supervisely Ecosystem**: [https://ecosystem.supervisely.com](https://ecosystem.supervisely.com/)
**Dev Documentation**: [https://developer.supervisely.com](https://developer.supervisely.com/)
**Source Code of SDK for Python**:
**Supervisely Ecosystem on GitHub**:
**Complete video course on YouTube**: [What is Supervisely?](https://supervisely.com/what-is-supervisely/#0)
## Table of contents
1. [Introduction 🔥](#introduction)
2. [Development 🧑💻](#development)
1. [What developers can do](#what-developers-can-do)
2. [Principles 🧭](#principles)
3. [Main features 💎](#main-features)
4. [Community 🌎](#community)
5. [Contribution 👏](#contribution)
6. [Partnership 🤝](#partnership)
7. [Cite this Project](#cite-this-project)
## Introduction
Every company wants to be sure that its current and future AI tasks are solvable.
The main issue with most solutions on the market is that they build as products. It's a black box developing by some company you don't really have an impact on. As soon as your requirements go beyond basic features offered and you want to customize your experience, add something that is not in line with the software owner development plans or won't benefit other customers, you're out of luck.
That is why **Supervisely is building a platform** instead of a product.
### [Supervisely Platform 🔥](https://supervisely.com/)
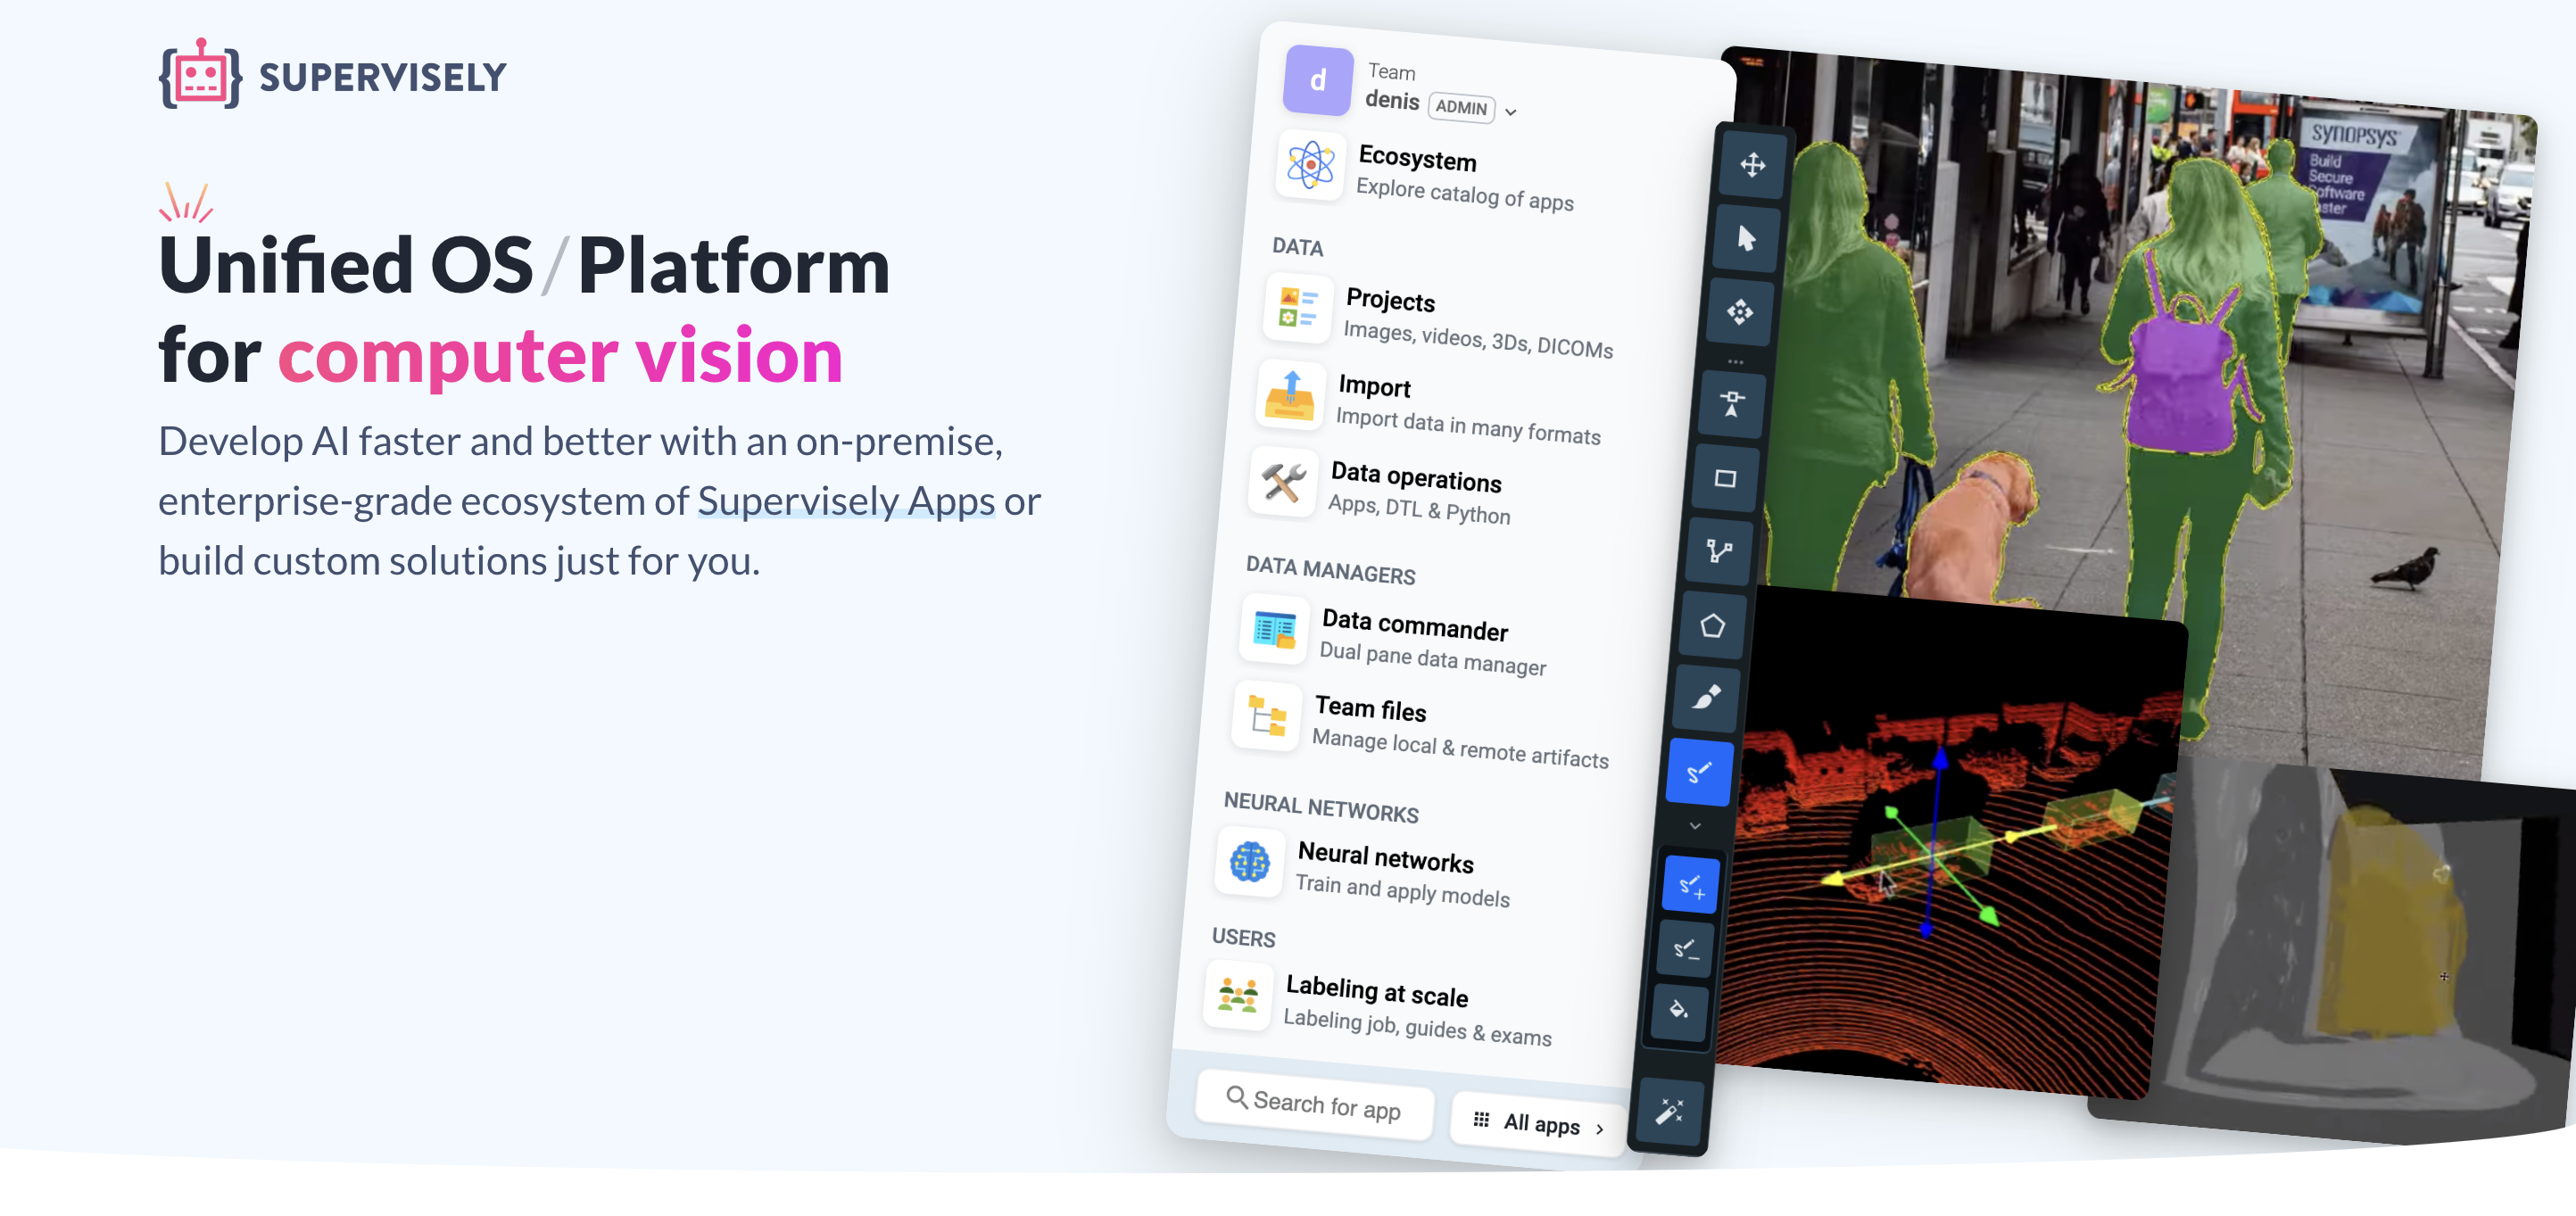
You can think of [Supervisely](https://supervisely.com/) as an Operating System available via Web Browser to help you solve Computer Vision tasks. The idea is to unify all the relevant tools within a single [Ecosystem](https://ecosystem.supervisely.com/) of apps, tools, UI widgets and services that may be needed to make the AI development process as smooth and fast as possible.
More concretely, Supervisely includes the following functionality:
* Data labeling for images, videos, 3D point cloud and volumetric medical images (dicom)
* Data visualization and quality control
* State-Of-The-Art Deep Learning models for segmentation, detection, classification and other tasks
* Interactive tools for model performance analysis
* Specialized Deep Learning models to speed up data labeling (aka AI-assisted labeling)
* Synthetic data generation tools
* Instruments to make it easier to collaborate for data scientists, data labelers, domain experts and software engineers
### [Supervisely Ecosystem](https://supervisely.com/ecosystem) 🎉

The simplicity of creating Supervisely Apps has already led to the development of [hundreds of applications](https://ecosystem.supervisely.com/), ready to be run within a single click in a web browser and get the job done.
Label your data, perform quality assurance, inspect every aspect of your data, collaborate easily, train and apply state-of-the-art neural networks, integrate custom models, automate routine tasks and more — like in a real AppStore, there should be an app for everything.
## [Development](https://developer.supervisely.com/) 🧑💻
Supervisely provides the foundation for integration, customization, development and running computer vision applications to address your custom tasks - just like in OS, like Windows or MacOS.
### What developers can do
There are different levels of integration, customization, and automation:
1. [HTTP REST API](#level-1.-http-rest-api)
2. [Python scripts for automation and integration](#level-2.-python-scripts-for-automation-and-integration)
3. [Headless apps (without UI)](#level-3.-headless-apps-without-ui)
4. [Apps with interactive UIs](#level-4.-apps-with-interactive-uis)
5. [Apps with UIs integrated into labeling tools](#level-5.-apps-with-ui-integrated-into-labeling-tools)
#### Level 1. HTTP REST API
Supervisely has a rich [HTTP REST API](https://api.docs.supervisely.com/) that covers basically every action, you can do manually. You can use **any programming language** and **any development environment** to extend and customize your Supervisely experience.
{% hint style="info" %}
For Python developers, we recommend using our [Python SDK](https://supervisely.readthedocs.io/en/latest/sdk_packages.html), because it wraps up all API methods and can save you a lot of time with built-in error handling, network re-connection, response validation, request pagination, and so on.
{% endhint %}
cURL example
There's no easier way to kick the tires than through [cURL](http://curl.haxx.se/). If you are using an alternative client, note that you are required to send a valid header in your request.
Example:
```bash
curl -H "x-api-key: " https://app.supervisely.com/public/api/v3/projects.list
```
As you can see, URL starts with `https://app.supervisely.com`. It is for Community Edition. For Enterprise Edition you have to use your custom server address.
#### Level 2. Python scripts for automation and integration
[Supervisely SDK for Python](https://supervisely.readthedocs.io/en/latest/sdk_packages.html) is specially designed to speed up development, reduce boilerplate, and lets you do anything in a few lines of Python code with Supervisely Annotatation JSON format, communicate with the platform, import and export data, manage members, upload predictions from your models, etc.
Python SDK example
Look how it is simple to communicate with the platform from your python script.
```python
import supervisely as sly
# authenticate with your personal API token
api = sly.Api.from_env()
# create project and dataset
project = api.project.create(workspace_id=123, name="demo project")
dataset = api.dataset.create(project.id, "dataset-01")
# upload data
image_info = api.image.upload_path(dataset.id, "img.png", "/Users/max/img.png")
api.annotation.upload_path(image_info.id, "/Users/max/ann.json")
# download data
img = api.image.download_np(image_info.id)
ann = api.annotation.download_json(image_info.id)
```
#### Level 3. Headless apps (without UI)
Create python apps to automate routine and repetitive tasks, share them within your organization, and provide an easy way to use them for end-users without coding background. Headless apps are just python scripts that can be run from a context menu.

It is simple and suitable for the most basic tasks and use-cases, for example:
* import and export in custom format ([example1](https://ecosystem.supervisely.com/apps/import-images-groups), [example2](https://ecosystem.supervisely.com/apps/export-as-masks), [example3](https://ecosystem.supervisely.com/apps/export-to-pascal-voc), [example4](https://ecosystem.supervisely.com/apps/render-video-labels-to-mp4))
* assets transformation ([example1](https://ecosystem.supervisely.com/apps/rasterize-objects-on-images), [example2](https://ecosystem.supervisely.com/apps/resize-images), [example3](https://ecosystem.supervisely.com/apps/change-video-framerate), [example4](https://ecosystem.supervisely.com/apps/convert_ptc_to_ptc_episodes))
* users management ([example1](https://ecosystem.supervisely.com/apps/invite-users-to-team-from-csv), [example2](https://ecosystem.supervisely.com/apps/create-users-from-csv), [example3](https://ecosystem.supervisely.com/apps/export-activity-as-csv))
* deploy special models for AI-assisted labeling ([example1](https://ecosystem.supervisely.com/apps/supervisely-ecosystem%2Fritm-interactive-segmentation%2Fsupervisely), [example2](https://ecosystem.supervisely.com/apps/supervisely-ecosystem%2Ftrans-t%2Fsupervisely%2Fserve), [example3](https://ecosystem.supervisely.com/apps/volume-interpolation))
#### Level 4. Apps with interactive UIs
Interactive interfaces and visualizations are the keys to building and improving AI solutions: from custom data labeling to model training. Such apps open up opportunities to customize Supervisely platform to any type of task in Computer Vision, implement data and models workflows that fit your organization's needs, and even build vertical solutions for specific industries on top of it.

Here are several examples:
* custom labeling interfaces with AI assistance for [images](https://ecosystem.supervisely.com/apps/dev-smart-tool-batched) and [videos](https://ecosystem.supervisely.com/apps/batched-smart-tool-for-videos)
* [interactive model performance analysis](https://ecosystem.supervisely.com/apps/semantic-segmentation-metrics-dashboard)
* [interactive NN training dashboard](https://ecosystem.supervisely.com/apps/supervisely-ecosystem%2Fmmsegmentation%2Ftrain)
* [data exploration](https://ecosystem.supervisely.com/apps/action-recognition-stats) and [visualization](https://ecosystem.supervisely.com/apps/objects-thumbnails-preview-by-class) apps
* [vertical solution](https://ecosystem.supervisely.com/collections/supervisely-ecosystem%2Fgl-metric-learning%2Fsupervisely%2Fretail-collection) for labeling products on shelves in retail
* inference interfaces [in labeling tools](https://ecosystem.supervisely.com/apps/supervisely-ecosystem%2Fnn-image-labeling%2Fannotation-tool); for [images](https://ecosystem.supervisely.com/apps/supervisely-ecosystem%2Fnn-image-labeling%2Fproject-dataset), [videos](https://ecosystem.supervisely.com/apps/apply-nn-to-videos-project) and [point clouds](https://ecosystem.supervisely.com/apps/apply-det3d-to-project-dataset); for [model ensembles](https://ecosystem.supervisely.com/apps/apply-det-and-cls-models-to-project)
#### Level 5. Apps with UI integrated into labeling tools
There is no single labeling tool that fits all tasks. Labeling tool has to be designed and customized for a specific task to make the job done in an efficient manner. Supervisely apps can be smoothly integrated into labeling tools to deliver amazing user experience (including multi tenancy) and annotation performance.

Here are several examples:
* apps designed for custom labeling workflows ([example1](https://ecosystem.supervisely.com/apps/visual-tagging), [example2](https://ecosystem.supervisely.com/apps/review-labels-side-by-side))
* NN inference is integrated for labeling automation and model predictions analysis ([example](https://ecosystem.supervisely.com/apps/supervisely-ecosystem%2Fnn-image-labeling%2Fannotation-tool))
* industry-specific labeling tool: annotation of thousands of product types on shelves with AI assistance ([retail collection](https://ecosystem.supervisely.com/collections/supervisely-ecosystem%2Fgl-metric-learning%2Fsupervisely%2Fretail-collection), [labeling app](https://ecosystem.supervisely.com/apps/ai-assisted-classification))
### Principles 🧭
Development for Supervisely builds upon these five principles:
* All in **pure Python** and build on top of your favourites libraries (opencv, requests, fastapi, pytorch, imgaug, etc ...) - easy for python developers and data scientists to build and share apps with teammates and the ML community.
* No front‑end experience is required - build **powerful** and **interactive** web-based GUI apps using the comprehensive library of ready-to-use UI widgets and components.
* **Easy to learn, fast to code,** and **ready for production**. SDK provides a simple and intuitive API by having complexity "under the hood". Every action can be done just in a few lines of code. You focus on your task, Supervisely will handle everything else - interfaces, databases, permissions, security, cloud or self-hosted deployment, networking, data storage, and many more. Supervisely has solid testing, documentation, and support.
* Everything is **customizable** - from labeling interfaces to neural networks. The platform has to be customized and extended to perfectly fit your tasks and requirements, not vice versa. Hundreds of examples cover every scenario and can be found in our [ecosystem of apps](https://ecosystem.supervisely.com/).
* Apps can be both **open-sourced or private**. All apps made by Supervisely team are [open-sourced](https://github.com/supervisely-ecosystem). Use them as examples, just fork and modify the way you want. At the same time, customers and community users can still develop private apps to protect their intellectual property.
## Main features 💎
* [Start in a minute](#start-in-a-minute)
* [Magically simple API](#magically-simple-api)
* [Customization is everywhere](#customization-is-everywhere)
* [Interactive GUI is a game-changer](#interactive-gui-is-a-game-changer)
* [Develop fast with ready UI widgets](#develop-fast-with-ready-ui-widgets)
* [Convenient debugging](#convenient-debugging)
* [Apps can be both private and public](#apps-can-be-both-private-and-public)
* [Single-click deployment](#single-click-deployment)
* [Reliable versioning - releases and branches](#reliable-versioning-releases-and-branches)
* [Supports both Github and Gitlab](#supports-both-github-and-gitlab)
* [App is just a web server, use any technology you love](#app-is-just-a-web-server-use-any-technology-you-love)
* [Built-in cloud development environment](#built-in-cloud-development-environment-coming-soon) (coming soon)
* [Trusted by Fortune 500, top researchers and developers](#trusted-by-fortune-500.-used-by-65-000-researchers-developers-and-companies-worldwide)
### Start in a minute
Supervisely's open-source SDK and app framework are straightforward to get started with. It’s just a matter of:
```bash
pip install supervisely
```
### Magically simple API
[Supervisely SDK for Python](https://supervisely.readthedocs.io/en/latest/sdk_packages.html) is simple, intuitive, and can save you hours. Reduce boilerplate and build custom integrations in a few lines of code. It has never been so easy to communicate with the platform from python.
```python
# authenticate with your personal API token
api = sly.Api.from_env()
# create project and dataset
project = api.project.create(workspace_id=123, name="demo project")
dataset = api.dataset.create(project.id, "dataset-01")
# upload data
image_info = api.image.upload_path(dataset.id, "img.png", "/Users/max/img.png")
api.annotation.upload_path(image_info.id, "/Users/max/ann.json")
# download data
img = api.image.download_np(image_info.id)
ann = api.annotation.download_json(image_info.id)
```
### Customization is everywhere
Customization is the only way to cover all tasks in Computer Vision. Supervisely allows to customizing everything from labeling interfaces and context menus to training dashboards and inference interfaces. Check out our [Ecosystem of apps](https://ecosystem.supervisely.com/) to find inspiration and examples for your next ML tool.
### Interactive GUI is a game-changer
The majority of Python programs are "command line" based. While highly experienced programmers don't have problems with it, other tech people and end-users do. This creates a digital divide, a "GUI Gap". App with graphic user interface (GUI) becomes more approachable and easy to use to a wider audience. And finally, some tasks are impossible to solve without a GUI at all.
Imagine, how it will be great if all ML tools and repositories have an interactive GUI with the RUN button ▶️. It will take minutes to start working with a top Deep Learning framework instead of spending weeks running it on your data.
🎯 Our ambitious goal is to make it possible.

### Develop fast with ready UI widgets
Hundreds of interactive UI widgets and components are ready for you. Just add to your program and populate with the data. Python devs don't need to have any front‑end experience, in our developer portal you will find needed guides, examples, and tutorials. We support the following UI widgets:
1. [Widgets made by Supervisely](https://ecosystem.supervisely.com/docs/grid-gallery) specifically for computer vision tasks, like rendering galleries of images with annotations, playing videos forward and backward with labels, interactive confusion matrices, tables, charts, ...
2. [Element widgets](https://element.eleme.io/1.4/#/en-US/component/button) - Vue 2.0 based component library
3. [Plotly](https://plotly.com/python/) Graphing Library for Python
4. You can develop your own UI widgets ([example](https://github.com/supervisely-ecosystem/dev-smart-tool-batched/blob/master/static/smarttool.js))
Supervisely team makes most of its apps publically available on [GitHub](https://github.com/supervisely-ecosystem). Use them as examples for your future apps: fork, modify, and copy-paste code snippets.
### Convenient debugging
Supervisely is made by data scientists for data scientists. We trying to lower barriers and make a friendly development environment. Especially we care about debugging as one of the most crucial steps.
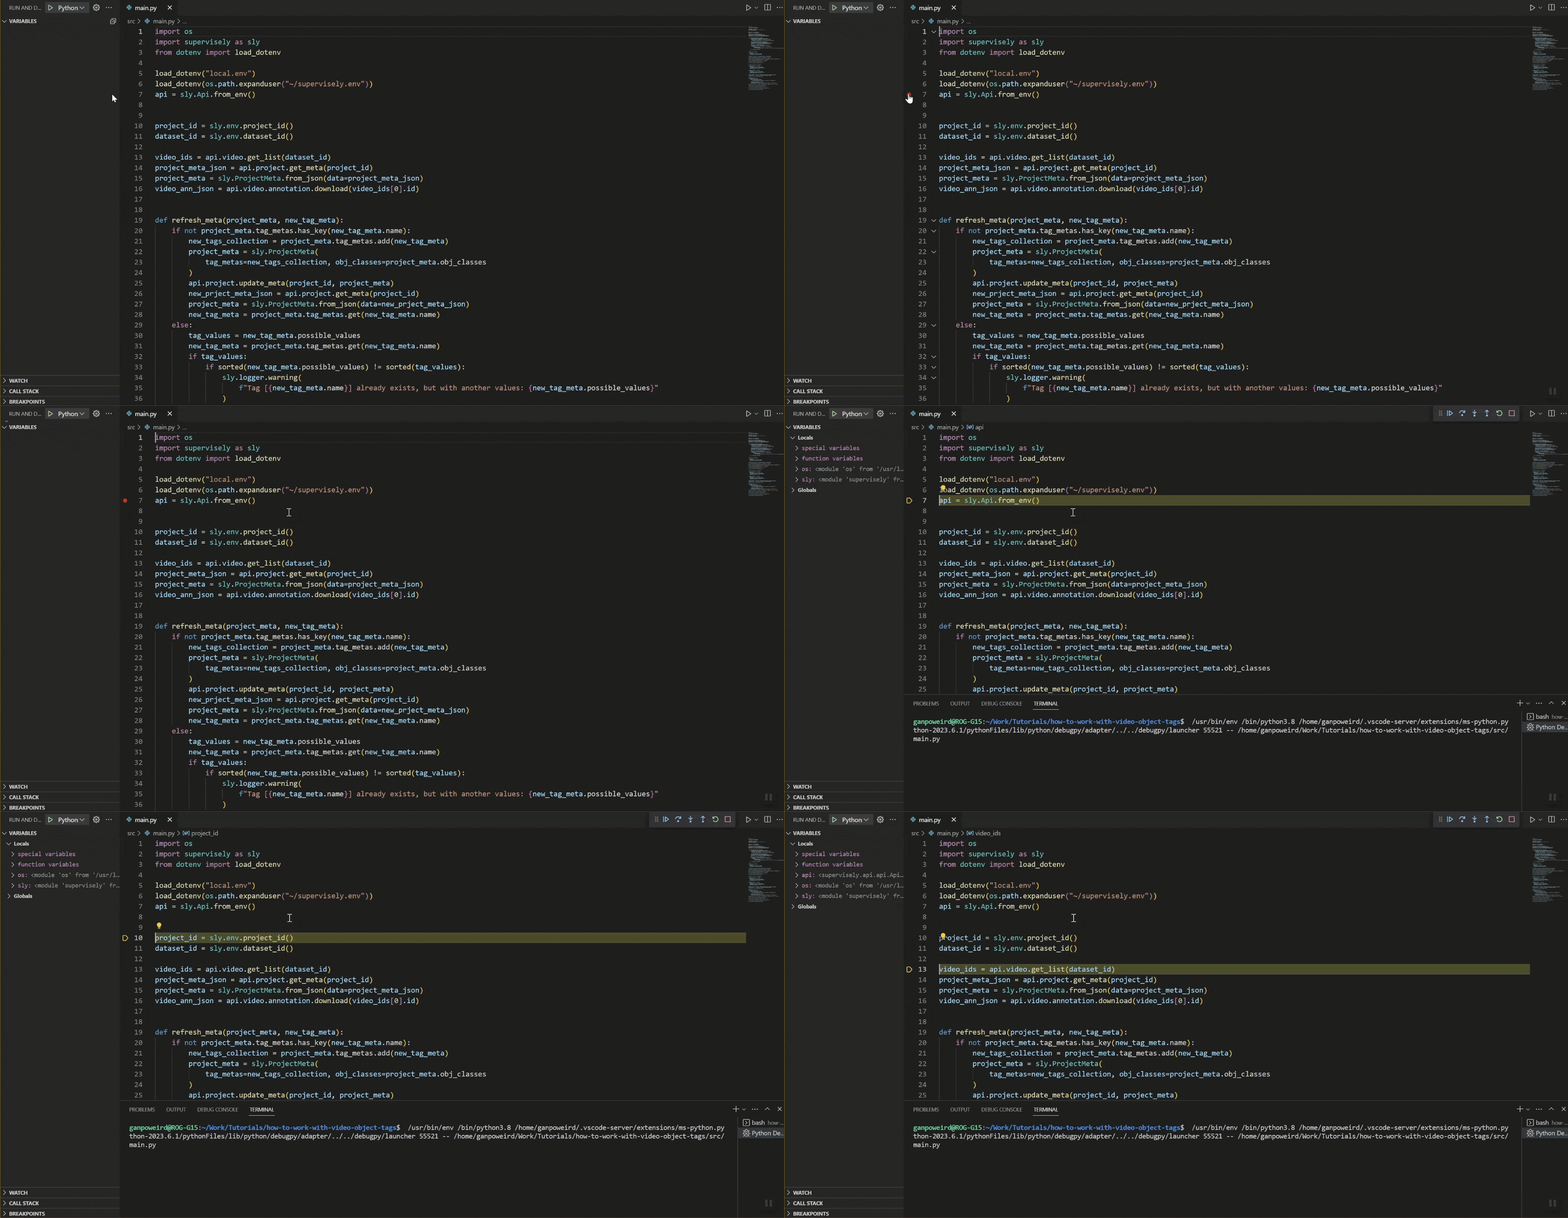
Even in complex scenarios, like developing a GUI app integrated into a labeling tool, we keep it simple - use breakpoints in your favorite IDE to catch callbacks, step through the program and see live updates without page reload. As simple as that! Supervisely handles everything else - WebSockets, authentication, Redis, RabitMQ, Postgres, ...
Watch the video below, how we debug [the app](https://ecosystem.supervisely.com/apps/supervisely-ecosystem%2Fnn-image-labeling%2Fannotation-tool) that applies NN right inside the labeling interface.
{% embed url="" %}
Easy debug even for complex integration scenarious
{% endembed %}
### Apps can be both private and public
All apps made by Supervisely team are [open-source](https://github.com/supervisely-ecosystem). Use them as examples: find on [GitHub](https://github.com/supervisely-ecosystem), fork and modify them the way you want. At the same time, customers and community users can still develop private apps to protect their intellectual property.
{% embed url="" %}
How to add private apps in Supervisely
{% endembed %}
### Single-click deployment
Supervisely app is a git repository. Just provide the link to your git repo, Supervisely will handle everything else. Now you can press `Run` button in front of your app and start it on any computer with [Supervisely Agent](https://youtu.be/aDqQiYycqyk).
### Reliable versioning - releases and branches
Users run your app on the latest stable release, and you can develop and test new features in parallel - just use git releases and branches. Supervisely automatically pull updates from git, even if the new version of an app has a bug, don't worry - users can select and run the previous version in a click.
{% embed url="" %}
Run specific version or branch of the app
{% endembed %}
### Supports both Github and Gitlab
Since Supervisely app is just a git repository, we support public and private repos from the most popular hosting platforms in the world - GitHub and GitLab.
### App is just a web server, use any technology you love
Supervisely SDK for Python provides the simplest way for python developers and data scientists to build interactive GUI apps of any complexity. Python is a recommended language for developing Supervisely apps, but not the only one. You can use any language or any technology you love, any web server can be deployed on top of the platform.
For example, even [Visual Studio Code for web](https://github.com/coder/code-server) can be run as an app (see video below).
### Built-in cloud development environment (coming soon)
In addition to the common way of development in your favorite IDE on your local computer or laptop, cloud development support will be integrated into Supervisely and **released soon** to speed up development, standardize dev environments, and lower barriers for beginners.
How will it work? Just connect your computer to your Supervisely instance and run IDE app ([JupyterLab](https://jupyter.org/) and [Visual Studio Code for web](https://github.com/coder/code-server)) to start coding in a minute. We will provide a large number of template apps that cover the most popular use cases.
{% embed url="" %}
Run Visual Studio Code on any machine in Supervisely and access it in the browser
{% endembed %}
### Trusted by Fortune 500. Used by 65 000 researchers, developers, and companies worldwide
Supervisely helps companies and researchers all over the world to build their computer vision solutions in various industries from self-driving and agriculture to medicine. Join our [Community Edition](https://app.supervisely.com/) or request [Enterprise Edition](https://supervisely.com/enterprise) for your organization.
## Community 🌎
Join our constantly growing [Supervisely community](https://app.supervisely.com/) with more than 65k+ users.
#### Have an idea or ask for help?
If you have any questions, ideas or feedback please:
1. [Give a technical feedback](https://github.com/supervisely/supervisely/issues)
2. [Join our slack](https://supervisely.com/slack)
3. [Contact us](https://supervisely.com/contact-us)
Your feedback 👍 helps us a lot and we appreciate it
## Contribution 👏
Want to help us bring Computer Vision R\&D to the next level? We encourage you to participate and speed up R\&D for thousands of researchers by
* building and expanding Supervisely Ecosystem with us
* integrating to Supervisley and sharing your ML tools and research with the entire ML community
## Partnership 🤝
We are happy to expand and increase the value of Supervisely Ecosystem with additional technological partners, researchers, developers, and value-added resellers.
Feel free to [contact us](https://supervisely.com/contact-us) if you have
* ML service or product
* unique domain expertise
* vertical solution
* valuable repositories and tools that solve the task
* custom NN models and data
Let's discuss the ways of working together, particularly if we have joint interests, technologies and customers.
## Cite this Project
If you use this project in a research, please cite it using the following BibTeX:
```
@misc{ supervisely,
title = { Supervisely Computer Vision platform },
type = { Computer Vision Tools },
author = { Supervisely },
howpublished = { \url{ https://supervisely.com } },
url = { https://supervisely.com },
journal = { Supervisely Ecosystem },
publisher = { Supervisely },
year = { 2023 },
month = { jul },
note = { visited on 2023-07-20 },
}
```
# Installation
Everything you need to know about installation of Supervisely SDK for Python
This part of the documentation covers the installation of Supervisely SDK for Python. The first step to using any software package is getting it properly installed.
## Prerequisites
### Python
You should use 🐍 **Python 3.8 or greater**, which can be installed either through the [Anaconda](https://www.anaconda.com/products/distribution) package manager, [Homebrew](https://brew.sh/), or the [Python website](https://www.python.org/downloads/mac-osx/).
### Libraries
```bash
apt-get update
apt-get install ffmpeg libgeos-dev libsm6 libxext6 libexiv2-dev libxrender-dev libboost-all-dev -y
```
## Installation
If you're working with a custom Supervisely instance, please refer to the compatibility table below to ensure that you're using the correct version of the Python SDK, which supports your instance.\
Note: the latest version of the SDK always supports the latest version of Supervisely, so it's recommended to upgrade both from time to time.
### Compatibility table
| Instance version | Python SDK version |
| :--------------: | :-------------------: |
| >=6.14.4 | supervisely>=6.73.410 |
| >=6.14.0 | supervisely>=6.73.400 |
| >=6.13.8 | supervisely>=6.73.394 |
| >=6.13.1 | supervisely>=6.73.379 |
| >=6.12.46 | supervisely>=6.73.375 |
| >=6.12.44 | supervisely>=6.73.344 |
| >=6.12.34 | supervisely>=6.73.324 |
| >=6.12.30 | supervisely>=6.73.312 |
| >=6.12.28 | supervisely>=6.73.292 |
| >=6.12.23 | supervisely>=6.73.281 |
| >=6.12.17 | supervisely>=6.73.263 |
| >=6.12.12 | supervisely>=6.73.241 |
| >=6.12.5 | supervisely>=6.73.226 |
| >=6.12.2 | supervisely>=6.73.222 |
| <=6.11.19 | supervisely>=6.73.199 |
| <=6.11.16 | supervisely>=6.73.184 |
| <=6.11.10 | supervisely<=6.73.166 |
| <=6.11.8 | supervisely<=6.73.159 |
| <=6.10.0 | supervisely<=6.73.126 |
| <=6.9.31 | supervisely<=6.73.123 |
| <=6.9.22 | supervisely<=6.73.90 |
| <=6.9.18 | supervisely<=6.73.81 |
| <=6.9.13 | supervisely<=6.73.76 |
| <=6.9.11 | supervisely<=6.72.70 |
### Pip
The latest stable version [is available on PyPI](https://pypi.org/project/supervisely/). Either add `supervisely` to your `requirements.txt` file or install with pip:
```bash
pip3 install supervisely
```
To install a specific version, use the following command:
```bash
pip3 install supervisely==6.73.126 # Remember to replace 6.73.126 with the version you need.
```
We are constantly updating our SDK by adding new features and fixing bugs. So if it is already installed on your dev environment, use the installation command with `--upgrade` flag:
```bash
pip3 install --upgrade supervisely
```
### Source code
Supervisely is actively developed on GitHub, where the code is [always available](https://github.com/supervisely/supervisely).
You can either clone the public repository:
```bash
git clone https://github.com/supervisely/supervisely.git
```
Or, download the [zipball](https://github.com/supervisely/supervisely/archive/refs/heads/master.zip):
```bash
$ curl -OL https://github.com/supervisely/supervisely/archive/refs/heads/master.zip
```
Once you have a copy of the source, you can embed it in your own Python package, or install it into your site-packages easily:
```bash
unzip master.zip
cd supervisely-master
python3 -m pip3 install .
```
## VENV
Here is a tiny bash script, that you can place at the root of your repository (for example `create_venv.sh`). It creates [venv](https://docs.python.org/3/library/venv.html) - “virtual” isolated Python installation and installs packages into that virtual installation. When you switch projects, you can simply create a new virtual environment and not have to worry about breaking the packages installed in the other environments. It is always recommended to use a virtual environment while developing Python applications.
```bash
#!/bin/bash
# learn more in documentation
# Official python docs: https://docs.python.org/3/library/venv.html
if [ -d ".venv" ]; then
echo "VENV already exists, will be removed"
rm -rf .venv
fi
echo "VENV will be created" && \
python3 -m venv .venv && \
source .venv/bin/activate && \
echo "Install requirements..." && \
pip3 install -r requirements.txt && \
echo "Requirements have been successfully installed" && \
deactivate
```
## Docker image
Supervisely SDK for python also has prebuilt [docker image](https://hub.docker.com/r/supervisely/base-py-sdk) with everything already installed.
You can use the latest version
```bash
docker pull supervisely/base-py-sdk:latest
```
or some specific on that has completely the same tag as [PIP releases](https://pypi.org/project/supervisely/), for example:
```bash
docker pull supervisely/base-py-sdk:6.33.0
```
Here are the links to dockerfiles ([base image](https://github.com/supervisely/supervisely/blob/master/base_images/py/Dockerfile), [result image](https://github.com/supervisely/supervisely/blob/master/base_images/py_sdk/Dockerfile)) where you can find the complete list of all recommended dependencies.
# Basics of authentication
Learn about the basics of authentication in Supervisely
## Basics of Authentication
The easiest and best way to authenticate with the Supervisely API is by using Basic Authentication via a personal access token.
You need only two environment variables:
1. [`SERVER_ADDRESS`](#server_address-env) - address of your Supervisely instance
2. [`API_TOKEN`](#api_token-env) - your personal access token
{% embed url="" %}
Video tutorial - basics of authentication for python developers
{% endembed %}
{% hint style="info" %}
You can try examples shown in the video for yourself: find the repository with the scripts on [GitHub](https://github.com/supervisely-ecosystem/example-creds-storage).
{% endhint %}
#### `SERVER_ADDRESS` env
If you are using [🌎](#community) **Community Edition** [🌎](#community) your server address is `https://app.supervisely.com`
If you are using 🔐 **Enterprise Edition** 🔐 you have your own instance address. You can copy the URL address from the browser or contact instance admin. For example on my private instance the address is the following:

In the example above the server address is `https://dev.supervisely.com`
#### `API_TOKEN` env
Every basic account has its own personal access token in account settings:
1. Find `Account Settings` under your name in the right top corner.
2. Go to `API Token` tab.
3. Press copy button.

You can revoke your current token and generate the new one at any time by clicking `re-generate api key` button.
#### How to use in Python
To communicate with the Supervisely platform, you first need to instantiate a client. The easiest way to do that is by calling the function [`from_env()`](https://supervisely.readthedocs.io/en/latest/sdk/supervisely.api.api.Api.html#supervisely.api.api.Api.from_env) or pass values of environment variables in the [constructor](https://supervisely.readthedocs.io/en/latest/sdk/supervisely.api.api.Api.html#supervisely.api.api.Api).
**Use `.env` file - recommended 👍**
It is the default practice to store your secrets as environment variables and keep them safe in `.env` files for local development.
1. Create .env file (recommended: `~/supervisely.env`) with the following content:
```python
SERVER_ADDRESS="https://app.supervisely.com"
API_TOKEN="4r47N...xaTatb"
```
2\. Use it the following way
```python
import os
from dotenv import load_dotenv
import supervisely as sly
if sly.is_development():
load_dotenv(os.path.expanduser("~/supervisely.env"))
api = sly.Api.from_env()
```
**Pass values into the API constructor - optional, not recommended**
```python
import supervisely as sly
api = sly.Api(server_address="https://app.supervisely.com", token="4r47N...xaTatb")
```
{% hint style="warning" %}
We do not recommend using this way in production.\
\
It is the fastest way, but remember, it is not safe to store the secrets right in your sources.\
\
Avoid (*accidentally*) committing (*exposing*) your *private keys*, *passwords* or other *sensitive details* (*by hard-coding in them in your script*) to Git by storing them as environment variables.
{% endhint %}
## Fast Authentication with CLI Tool
{% hint style="warning" %}
#### Beta. Release coming soon.
{% endhint %}
If you already use or are about to install our [Enterprise CLI Tool](/getting-started/command-line-interface/cli-tool), you will be able to do all the `.env` file preparation using just one command.
```bash
# bash
supervisely instance login [OPTIONS]
```
**Command options:**
* `-s` / `--server-address` - Server address.
* `-l` / `--login` - User login.
* `-p` / `--password` - User password.
This will help you automatically create the `.env` file. If you have this file and try to log in as a different user, the existing `.env` file will be overwritten. A backup file will be created for the previous `.env` file. Backup files will be saved for the last 5 authorizations.
More information you can find on [this page](https://github.com/supervisely/developer-portal/tree/main/getting-started/command-line-interface/cli-tool/instance.md#login)
# Intro to Python SDK
Let's try Supervisely SDK for Python and create your first python script for Supervisely automation.
In this example we will show you how it is easy to communicate with your Supervisely instance (Community or your private Enterprise installation) from python code. The tutorial illustrates basic upload-download scenario:
* create project and dataset on server
* upload image
* programmatically create annotation (two bounding boxes and tag) and upload it to image
* download image and annotation
{% hint style="info" %}
You can try this example for yourself: VSCode project config, original image, and python script for this tutorial are ready on [GitHub](https://github.com/supervisely-ecosystem/supervisely-python-sdk-example).
{% endhint %}
Watch the video tutorial here:
{% embed url="" %}
Video tutorial for beginners - introduction to Supervisely SDK for python developers
{% endembed %}
## Installation
Run the following command (learn more [here](/getting-started/installation))
```bash
pip install supervisely
```
## Input data

## Python code
### Import and authentication
Import Supervisely, initialize API with your credentials and test authentication ([learn the basics of authentication here](/getting-started/basics-of-authentication)). In this example, we use the server address of Community Edition. Change it if you have a private instance of Supervisely.
```python
import json
import supervisely as sly
api = sly.Api(server_address="https://app.supervise.ly", token="4r47N...xaTatb")
my_teams = api.team.get_list()
print(f"I'm a member of {len(my_teams)} teams")
# get first team and workspace
team = my_teams[0]
workspace = api.workspace.get_list(team.id)[0]
```
### Create project on server
Let's create an empty project `animals` with one dataset `cats`, then one class `cat` of shape Rectangle and one tag `scene` with string value and upload them into the project. Now we can use created classes and tags for labeling.
```python
project = api.project.create(workspace.id, "animals", change_name_if_conflict=True)
dataset = api.dataset.create(project.id, "cats", change_name_if_conflict=True)
print(f"Project {project.id} with dataset {dataset.id} are created")
cat_class = sly.ObjClass("cat", sly.Rectangle, color=[0, 255, 0])
scene_tag = sly.TagMeta("scene", sly.TagValueType.ANY_STRING)
project_meta = sly.ProjectMeta(obj_classes=[cat_class], tag_metas=[scene_tag])
api.project.update_meta(project.id, project_meta.to_json())
```
### Upload image
Let's upload local image `images/my-cats.jpg` to dataset.
```python
image_info = api.image.upload_path(dataset.id, name="my-cats.jpg", path="images/my-cats.jpg")
```
### Create annotation and upload to image
```python
cat1 = sly.Label(sly.Rectangle(top=875, left=127, bottom=1410, right=581), cat_class)
cat2 = sly.Label(sly.Rectangle(top=549, left=266, bottom=1500, right=1199), cat_class)
tag = sly.Tag(scene_tag, value="indoor")
ann = sly.Annotation(img_size=[1600, 1200], labels=[cat1, cat2], img_tags=[tag])
api.annotation.upload_ann(image_info.id, ann)
```
### Download data
```python
img = api.image.download_np(image_info.id) # RGB ndarray
print("image shape (height, width, channels)", img.shape)
ann_json = api.annotation.download_json(image_info.id)
print("annotaiton:\n", json.dumps(ann_json, indent=4))
```
{% hint style="info" %}
You can download the whole script using this [link](https://github.com/supervisely-ecosystem/supervisely-python-sdk-example/blob/master/main.py)
{% endhint %}
## Result
In less than 50 lines of code (including lots of comments) you can easily automate Supervisely using Python and integrate it with your software stack.
That’s just a taste of what you can do with the Supervisely SDK for Python. For more, take a look [at the reference](https://supervisely.readthedocs.io/en/latest/sdk_packages.html) and [Supervisely Annotation JSON format](https://github.com/supervisely/developer-portal/tree/main/getting-started/broken-reference/README.md).

# Environment variables
Supervisely sets default environment variables for each Supervisely Application run. You can also use these environment variables for your development and debugging.
Supervisely has the set default environment variables, Supervisely Application has access to them and we recommend using the same variables during development and debugging.
{% hint style="info" %}
Environment variables are case-sensitive.
{% endhint %}
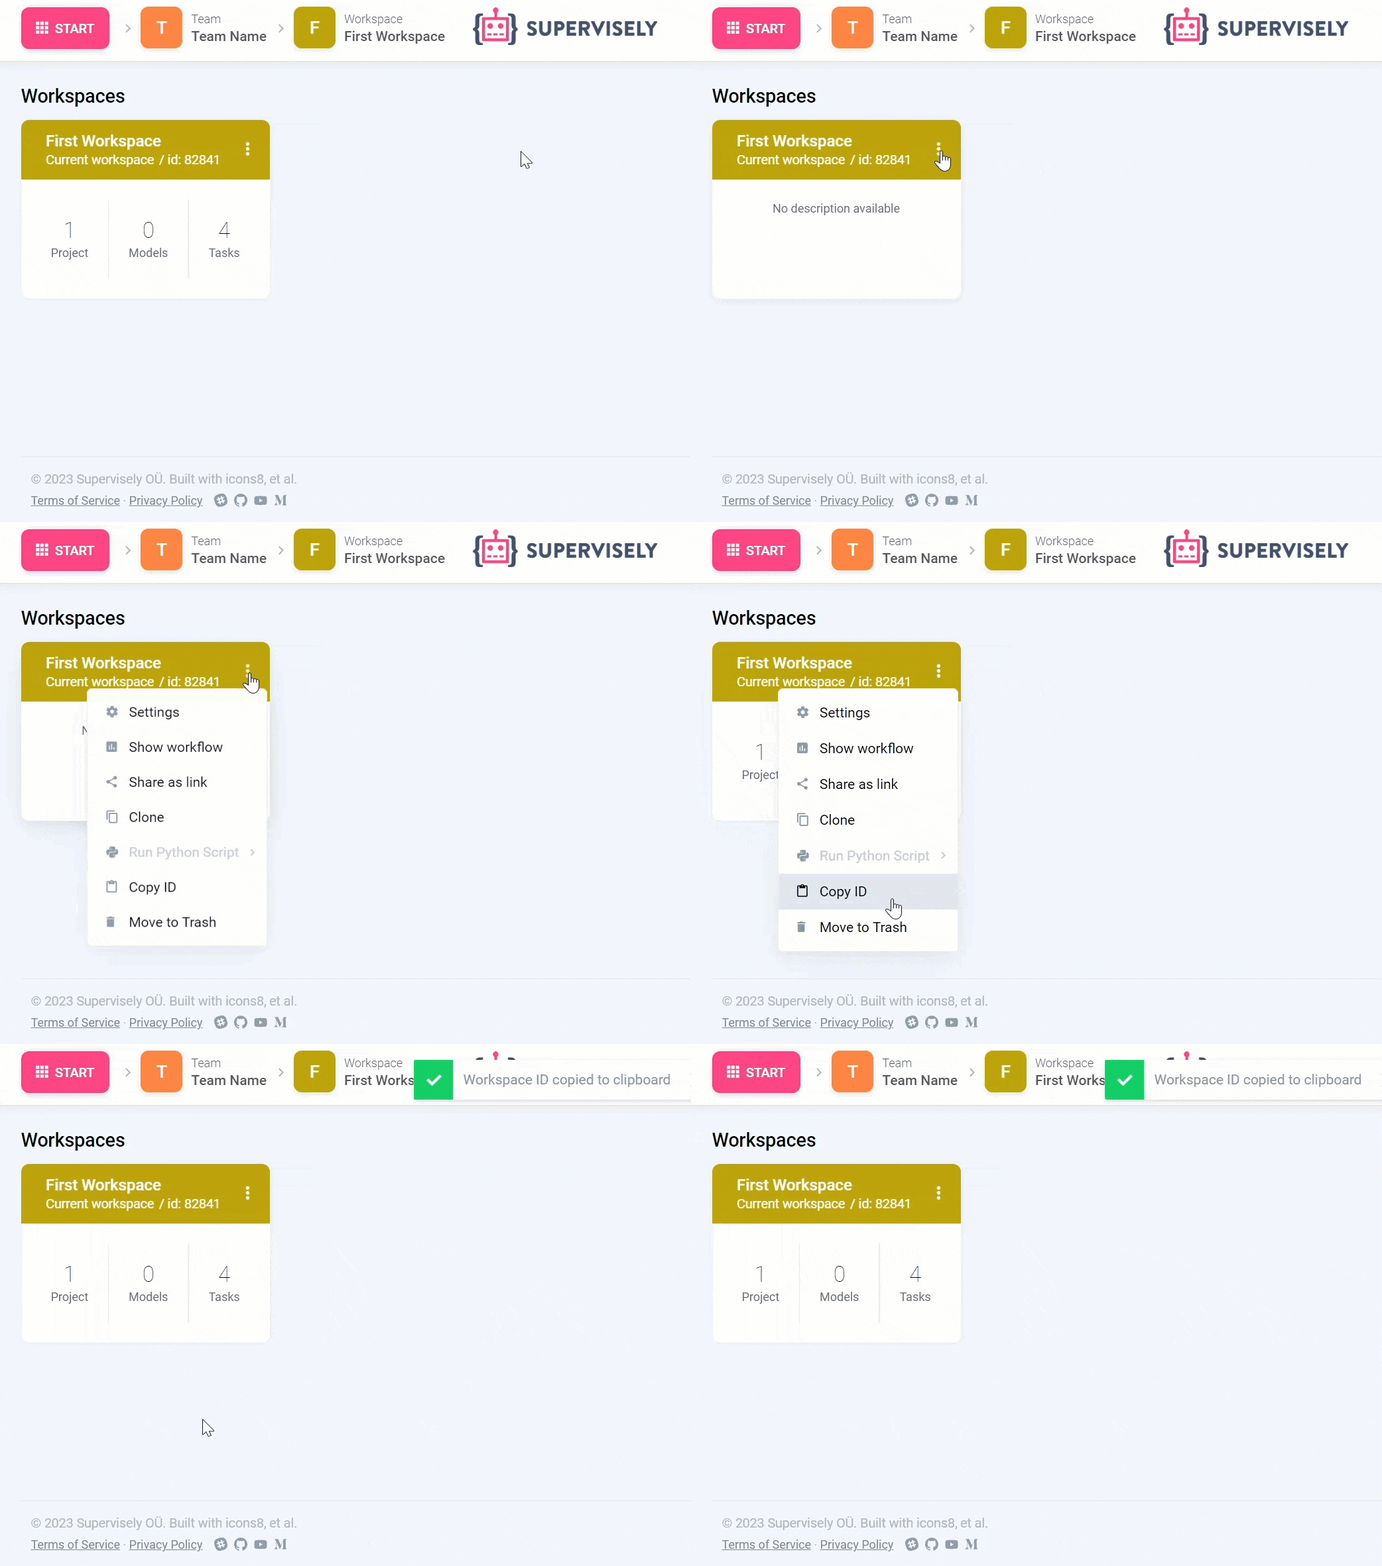
For development and debugging purposes you can manually **copy the ID to a clipboard** for every item you are working on: team, workspace, project, dataset, image, labeling job, team member, etc... Just open the context menu of the item and press **`Copy ID`** button.

## **.ENV file**
For convenient development and debugging we recommend using `.env` files to avoid hardcoding test variables into your sources and [keep private your passwords, secrets, and other sensitive information](https://developer.supervisely.com/getting-started/pages/2TS0DqIIblacweum1NCW#use-.env-file-recommended). Also, it allows avoiding accidentally committing (exposing) these values to a git repository.
Save `.env` file to `~/supervisely.env` [with your credentials](/getting-started/basics-of-authentication). The content of this file will look something like this:
```python
SERVER_ADDRESS="https://app.supervisely.com"
API_TOKEN="4r47N.....blablabla......xaTatb"
```
Also with every tutorial, guide, and demo application you will find `local.env` file that contains other environment variables used for debugging. For example:
```python
# change the Project ID to your value
PROJECT_ID=12208 # ⬅️ change it
```
And then load it in your python code using **`is_development`** method:
```python
import os
from dotenv import load_dotenv
import supervisely as sly
if sly.is_development():
load_dotenv("local.env")
load_dotenv(os.path.expanduser("~/supervisely.env"))
api = sly.Api.from_env()
```
{% hint style="info" %}
**`is_development`** and **`is_production`** methods are used to check the environment variable that tells if the app is spawned in IDE in debug mode on localhost or spawned on the platform (production mode).
{% endhint %}
## Basic usage principle
Environment variables could be read both with a pure python, and with our SDK. **`TEAM_ID`** variable will be used down below for an example, this logic cn be applied to every variable.
Read environment variable with pure python:
```python
import os
from dotenv import load_dotenv
import supervisely as sly
if sly.is_development():
load_dotenv(os.path.expanduser("~/supervisely.env"))
load_dotenv("local.env")
team_id = int(os.environ["TEAM_ID"])
```
Read environment variable with our SDK:
```python
import supervisely as sly
from dotenv import load_dotenv
if sly.is_development():
load_dotenv(os.path.expanduser("~/supervisely.env"))
load_dotenv("local.env")
team_id = sly.env.team_id()
```
{% hint style="info" %}
Keep in mind that every example in our portal features reading environment variables with SDK methods.
{% endhint %}
It is important to note that reading method for every variable in our SDK has an optional **`raise_not_found`** flag with default value `True`. It means that an exception is raised if an env variable is not found.
Sometimes it is convenient to set this argument **`raise_not_found`** as False when you, for example, wait for either **`PROJECT_ID`** or **`DATASET_ID`** variable, and you don't want an exeption to be raised every time either of those is not found.
It is also worth mentioning that it is possible to use legacy variable names, like the **`context.teamId`** for compatibility purposes.
## Video tutorial
Here is a quick demo on environment variables usage in python:
{% embed url="" %}
Video tutorial - environment variables usage for python developers
{% endembed %}
{% hint style="info" %}
You can try example shown in the video for yourself: find the repository with this app on [GitHub](https://github.com/supervisely-ecosystem/example-creds-storage).
{% endhint %}
## Environment variables
Here is a list of environment variables you could use in app development.
### **`SERVER_ADDRESS`**
address of your Supervisely instance, for Community Edition the value should be `https://app.supervisely.com`. For the Enterprise Edition the value is custom and depends on your configuration. Learn more [here](/getting-started/basics-of-authentication#server_address-env). This variable is always passed to an App.
### **`API_TOKEN`**
Your personal access token for authentication. Learn more [here](/getting-started/basics-of-authentication#api_token-env). This variable is always passed to an App.
We recommend reading **`API_TOKEN`** and **`SERVER_ADDRESS`** variables from a seperate environment file, as those variables are essential to authenticate in Supervisely platfrom, and thus are always passed to an App. Learn more about authentication [here](/getting-started/basics-of-authentication).
### **`TASK_ID`**
When you run an app on Supervisely, the platform creates a task for this app to store all relevant information for this task (logs, persistent data, cache, temporary files, ...). Task ID is needed to access this data (read or write). This variable is always passed to an App.

How to read **`TASK_ID`** from environment file with SDK:
```python
task_id = sly.env.task_id()
```
### **`TEAM_ID`**
The ID of the currently opened team. This variable is always passed to an App.

How to read **`TEAM_ID`** from environment file with SDK:
```python
team_id = sly.env.team_id()
```
Alternative env is duplicated for compatibility: **`context.teamId`**
Some Docker images do not support env names with dot `.` symbols. For such cases, the alternative variable **`CONTEXT_TEAMID`** is available starting from Agent version `>=6.7.0`.
### **`WORKSPACE_ID`**
The ID of the currently opened workspace. This variable is always passed to an App.

How to read **`WORKSPACE_ID`** from environment file with SDK:
```python
workspace_id = sly.env.workspace_id()
```
Alternative env is duplicated for compatibility: **`context.workspaceId`**
Some Docker images do not support env names with dot `.` symbols. For such cases, the alternative variable **`CONTEXT_WORKSPACEID`** is available starting from Agent version `>=6.7.0`.
### **`USER_LOGIN`**
Name of the user who run (spawned) current application session (`task_id`).
How to read **`USER_LOGIN`** from environment file with SDK:
```python
user_login = sly.env.user_login()
```
Alternative env is duplicated for compatibility: **`context.userLogin`**
Some Docker images do not support env names with dot `.` symbols. For such cases, the alternative variable **`CONTEXT_USERLOGIN`** is available starting from Agent version `>=6.7.0`.
### **`USER_ID`**
ID of the user who run (spawned) current application session (`task_id`).
How to read **`USER_ID`** from environment file with SDK:
```python
user_id = sly.env.user_id()
```
Alternative env is duplicated for compatibility: **`context.userId`**
Some Docker images do not support env names with dot `.` symbols. For such cases, the alternative variable **`CONTEXT_USERID`** is available starting from Agent version `>=6.7.0`.
### **`APP_NAME`**
Name of the app that is being spawned.
```python
app_name = sly.env.app_name()
```
The application name that you use in this variable is only used while debugging. The production name of the app is defined in configuration file.
### **`PROJECT_ID`**
It is set when an app is spawned from the context menu of a project. For apps, that are running on agents with version <= `6.6.6`, please use \*\*`modal.state.slyProjectId` \*\* or be sure that you are using the latest version of the Supervisely Agent (recommended).
How to read **`PROJECT_ID`** from environment file with SDK:
```python
project_id = sly.env.project_id()
```
Alternative env is duplicated for compatibility: **`context.projectId`**
Some Docker images do not support env names with dot `.` symbols. For such cases, the alternative variable **`CONTEXT_PROJECTID`** is available starting from Agent version `>=6.7.0`.
### **`DATASET_ID`**
It is set when an app is spawned from the context menu of a dataset. For apps, that are running on agents with version <= `6.6.6`, please use \*\*`modal.state.slyDatasetId` \*\* or be sure that you are using the latest version of the Supervisely Agent (recommended).
How to read **`DATASET_ID`** from environment file with SDK:
```python
dataset_id = sly.env.dataset_id()
```
Alternative env is duplicated for compatibility: **`context.datasetId`**
Some Docker images do not support env names with dot `.` symbols. For such cases, the alternative variable **`CONTEXT_DATASETID`** is available starting from Agent version `>=6.7.0`.
### **`FOLDER`**
It is set when an app is spawned from the context menu of a folder in Team Files. For apps, that are running on agents with version <= `6.6.9`, please use \*\*`modal.state.slyFolder` \*\* or be sure that you are using the latest version of the Supervisely Agent (recommended).
How to read **`FOLDER`** from environment file with SDK:
```python
folder = sly.env.folder()
```
Alternative env is duplicated for compatibility: **`context.slyFolder`**
Some Docker images do not support env names with dot `.` symbols. For such cases, the alternative variable **`CONTEXT_SLYFOLDER`** is available starting from Agent version `>=6.7.0`.
### **`FILE`**
It is set when an app is spawned from the context menu of a file in Team Files. For apps, that are running on agents with version <= `6.6.9`, please use \*\*`modal.state.slyFile` \*\* or be sure that you are using the latest version of the Supervisely Agent (recommended).
How to read **`FILE`** from environment file with SDK:
```python
env_file = sly.env.file()
```
Alternative env is duplicated for compatibility: **`context.slyFile`**
Some Docker images do not support env names with dot `.` symbols. For such cases, the alternative variable **`CONTEXT_SLYFILE`** is available starting from Agent version `>=6.7.0`.
# Supervisely annotation format
Detailed explanation of how we store annotations in JSON format for images, videos, point clouds, DICOMs.
In Supervisely you can annotate data from several mediums: images, videos, 3D data. To accommodate and systemize annotations for all of these formats, we created our own JSON-based Supervisely Annotation Format, which we describe in detail in this section.
#### Table of contents
1. [Project Structure](/getting-started/supervisely-annotation-format/project-structure)
2. [Project Classes and Tags](/getting-started/supervisely-annotation-format/project-classes-and-tags)
3. [Objects](/getting-started/supervisely-annotation-format/objects)
4. [Tags](/getting-started/supervisely-annotation-format/tags)
5. [Image Annotation](/getting-started/supervisely-annotation-format/images)
6. [Video Annotation](/getting-started/supervisely-annotation-format/videos)
7. [Point Cloud Annotation](/getting-started/supervisely-annotation-format/point-clouds)
8. [Point Cloud Episode Annotation](/getting-started/supervisely-annotation-format/point-cloud-episodes)
9. [Volume Annotation](/getting-started/supervisely-annotation-format/volumes)
# Project Structure
In Supervisely, all data and annotations are stored inside individual projects which consist of datasets containing files and Project Meta - a collection of classes and tags.
When downloaded, each project is converted into a folder structure that includes a `meta.json` file containing Project Meta, and dataset folders with individual annotation files (and optionally the original data files). This organization enables seamless data transfer between Supervisely and local storage using the `Supervisely Format` import plugin when needed.
This structure remains the same for every type of project in Supervisely.
## Project Structure System

**Project Folder**
On the top level we have Project folders, these are the elements visible on the main Supervisely dashboard. Inside them, they can contain only Datasets and Project Meta information, all other data has to be stored a level below in a Dataset. All datasets within a project have to contain content of the same category.
**Project Meta**
Project Meta contains essential information about the project, including **Classes** and **Tags**, which are defined project-wide and can be used for labeling in any dataset within the current project. It also includes the **Project Type** and **Settings**, which configure the labeling interface.
**Datasets**
Datasets are the second level folders inside the project, they host the individual data files and their annotations.
#### **Items**
Every data file in the project has to be stored inside a dataset. Each file as its own set of annotations.
## Downloaded Project Structure
All projects downloaded from Supervisely maintain the same basic structure, with the contents varying based on which download option you chose.
**Download Archive**
When you select one of the download option, the system automatically creates an archive with the following name structure: `project_name.tar`
**Downloaded Project**
All projects downloaded from Supervisely have the following structure:

📂 Root folder for the project named `project name`:
* 📄 `meta.json` file
* 📂 Dataset folders, each named `dataset_name`, which contains:
* 📂 `ann` folder, contains annotation files, each named `source_media_file_name.json` for the corresponding file
* 📂 `img` (`video` or `pointcloud`) folder, contains source media
* 📂 `img_info` folder, contains JSON files with representation of `ImageInfo` downloaded from instance
* 📂 `meta` optional folder, contains corresponding JSON files with metadata for images
### Project Structure Eample
The following structure is an example of a project with 2 datasets, each containing 2 images with annotations, and also meta directory with metadata for each image.
```
📦 project-name
┣ 📂 dataset-name-001
┃ ┣ 📂 ann
┃ ┃ ┣ 📄 pexels-photo-101063.png.json
┃ ┃ ┗ 📄 pexels-photo-103127.png.json
┃ ┣ 📂 img
┃ ┃ ┣ 🏞️ pexels-photo-101063.png
┃ ┃ ┗ 🏞️ pexels-photo-103127.png
┃ ┣ 📂 meta
┃ ┃ ┣ 📄 pexels-photo-101063.png.json
┃ ┃ ┗ 📄 pexels-photo-103127.png.json
┃ ┣ 📂 img_info
┃ ┃ ┣ 📄 pexels-photo-101063.png.json
┃ ┃ ┗ 📄 pexels-photo-103127.png.json
┣ 📂 dataset-name-002
┃ ┣ 📂 ann
┃ ┃ ┣ 📄 pexels-photo-100583.png.json
┃ ┃ ┗ 📄 pexels-photo-106118.png.json
┃ ┣ 📂 img
┃ ┃ ┣ 🏞️ pexels-photo-100583.png
┃ ┃ ┗ 🏞️ pexels-photo-106118.png
┃ ┗ 📂 meta
┃ ┃ ┣ 📄 pexels-photo-100583.png.json
┃ ┃ ┗ 📄 pexels-photo-106118.png.json
┃ ┣ 📂 img_info
┃ ┃ ┣ 📄 pexels-photo-100583.png.json
┃ ┃ ┗ 📄 pexels-photo-106118.png.json
┗ 📄 meta.json
```
## Extended Project Structure
A project directory may contain the following folders or files:
* 📂 `blob` optional folder, contains blob files that are used for optimized uploads of projects. These blob files are TAR archives with hundreds of thousands of small images.
* 📄 `obj_class_to_machine_color.json` - optional file for image annotation projects. Mapping between machine colors and classes in machine mask. Could be generated by applications such as [Export As Masks](https://ecosystem.supervisely.com/apps/export-as-masks)
* 📄 `key_id_map.json` - optional file, created when annotating inside the Supervisely interface. Establishes correspondence between unique identifiers (keys and IDs) of items, objects, and frames where objects are located. The project file system stores these identifiers and keys on disk, which is necessary for navigation and for using the high-level API and applications.
A dataset directory may contain the following folders or files:
* 📂 `masks_human` optional folder for image annotation projects, contains .png files with RGB semantic segmentation masks where every pixel has the color of the corresponding class. Could be generated by applications such as [Export As Masks](https://ecosystem.supervisely.com/apps/export-as-masks)
* 📂 `masks_machine` optional folder for image annotation projects, contains .png files with semantic segmentation masks (machine annotations). This files should have the same name as the original images (may have a different extension). Could be generated by applications such as [Export As Masks](https://ecosystem.supervisely.com/apps/export-as-masks)
* 📂 `masks_instances` optional folder contains BW instance segmentation masks for every object on the image. Could be generated by applications such as [Export As Masks](https://ecosystem.supervisely.com/apps/export-as-masks)
* 📄 `blob_1_offsets.pkl` optional pickle files, contain batches (lists) of `BlobImageInfo` objects, which represent file names and their offsets inside blob files. These files are used to add images to the project dataset based on their offsets.
### Understanding Blob Files and Offsets for Optimized Project Handling
Supervisely provides a powerful optimization for projects containing a large number of small image files through its blob file system. Instead of handling thousands of individual files (which can lead to significant overhead in network transfers and filesystem operations), blob files consolidate many images into a single large binary file. This approach dramatically improves upload and download speeds, especially when dealing with datasets containing tens or hundreds of thousands of images.
Complementing the blob files are offset files with the suffix `_offsets.pkl`, which store metadata about each image's location within the blob. These files contain `BlobImageInfo` objects that define the byte range representing each image in the binary.
```
📂 project-name
┣ 📂 blob
┃ ┗ 📦 small_images.tar
┣ 📂 dataset-name-001
┃ ┣ 📄 small_images_offsets.pkl
┃ ┣ 📂 ann
┃ ┃ ┣ 📄 pexels-photo-101063.png.json
┃ ┃ ┣ 📄 small-image-0000001.png.json
┃ ┃ ┣ ...
┃ ┃ ┗ 📄 small-image-0999999.png.json
┃ ┗ 📂 img
┃ ┗ 🏞️ pexels-photo-101063.png
┗ 📄 meta.json
```
#### Related:
* To learn more about the offsets file format and how to prepare it, refer to this article: [Optimized Import of Small Images](/getting-started/python-sdk-tutorials/images/optimized-import)
* To export extended Supervisely format with the blob files and offsets, use the [Export to Supervisely format: Blob](https://ecosystem.supervisely.com/apps/export-to-supervisely-format-blob) application.\
☝️ However, other applications export projects in the Supervisely format using the traditional method, downloading each image separately.
* Importing the extended Supervisely format happens automatically in applications that previously imported projects in the Supervisely format without blobs. Such as [Import Images in Supervisely Format](https://ecosystem.supervisely.com/apps/import-images-in-sly-format) application or [Auto Import](https://ecosystem.supervisely.com/apps/main-import) tool.
# Project Meta: Classes, Tags, Settings
Each project in Supervisely has a set of predetermined classes and tags. This information is called `Project Meta` and stored in a corresponding JSON-based `meta.json` file. This file contains all the necessary data from the project's classes and tags. Also, it has information about the project's type and settings:

### JSON format for project meta
```json
{
"classes": [
{
"title": "bike",
"shape": "rectangle",
"color": "#F6FF00",
"geometry_config": {},
"id": 6509759,
"hotkey": ""
},
{
"title": "car",
"shape": "polygon",
"color": "#BE55CE",
"geometry_config": {},
"id": 6509764,
"hotkey": ""
},
{
"title": "building_group",
"shape": "multipolygon",
"color": "#FF0079",
"geometry_config": {},
"id": 6509768,
"hotkey": ""
},
{
"title": "person",
"shape": "bitmap",
"color": "#00FF12",
"geometry_config": {},
"id": 6509777,
"hotkey": ""
}
],
"tags": [
{
"name": "cars_number",
"color": "#A0A08C",
"value_type": "any_number",
"id": 27855,
"hotkey": "",
"applicable_type": "all",
"classes": []
},
{
"name": "like",
"color": "#D98F7E",
"value_type": "none",
"id": 27856,
"hotkey": "",
"applicable_type": "all",
"classes": []
},
{
"name": "situated",
"color": "#855D79",
"value_type": "oneof_string",
"values": [
"inside",
"outside"
],
"id": 27857,
"hotkey": "",
"applicable_type": "all",
"classes": []
},
{
"name": "car_color",
"color": "#ED68A1",
"value_type": "any_string",
"id": 27858,
"hotkey": "",
"applicable_type": "all",
"classes": ["car"]
},
{
"name": "reviewed_at",
"color": "#5A6C8D",
"value_type": "date",
"id": 27859,
"hotkey": "",
"applicable_type": "all",
"classes": []
}
],
"projectType": "images",
"projectSettings": {
"multiView": {
"enabled": true,
"tagName": "cars_number",
"tagId": null,
"isSynced": false
}
}
}
```
### Fields definitions
* `classes`(string) - list of all possible object classes. Each class has the following fields assigned:
* `title`(string) - the unique identifier of a class
* `shape`(string) - class shape, read more [here](/getting-started/supervisely-annotation-format/objects#objects)
* `color`(string) - hex color code
* `geometry_config`(dictionary) \[optional] - additional settings of the geometry. May be used with keypoints.
* `id` (int) \[optional] - the unique identification value of the class on the server
* `hotkey` (string) \[optional] - hotkey for the Labeling Tool to quickly change active annotation class
* `tags`(string) - list of all possible tags that can be assigned to images or objects. Read more [here](/getting-started/supervisely-annotation-format/tags)
* `name`(string) - the unique identifier of a tag
* `value_type`(string) - one of the possible tag value types: `none`, `any_string`, `any_number`, `oneof_string`, `date`. The `date` type stores an ISO 8601 date-time string; `possible_values` cannot be used with it.
* `color`(string) - hex color code
* `values`(string) \[optional] - initially predefined set of possible values
* `id` (int) \[optional] - the unique identification value of the tag
* `hotkey` (string) \[optional] - hotkey for the Labeling Tool to quickly assign tag to object or image
* `applicable_type` (string) \[optional] - defines the applicability of Tag only to images (`imagesOnly`), objects (`objectsOnly`), or both (`all`). By default, tag can be assigned to both images and objects.
* `classes` (list of strings) \[optional] - defines the applicability of Tag only to certain classes
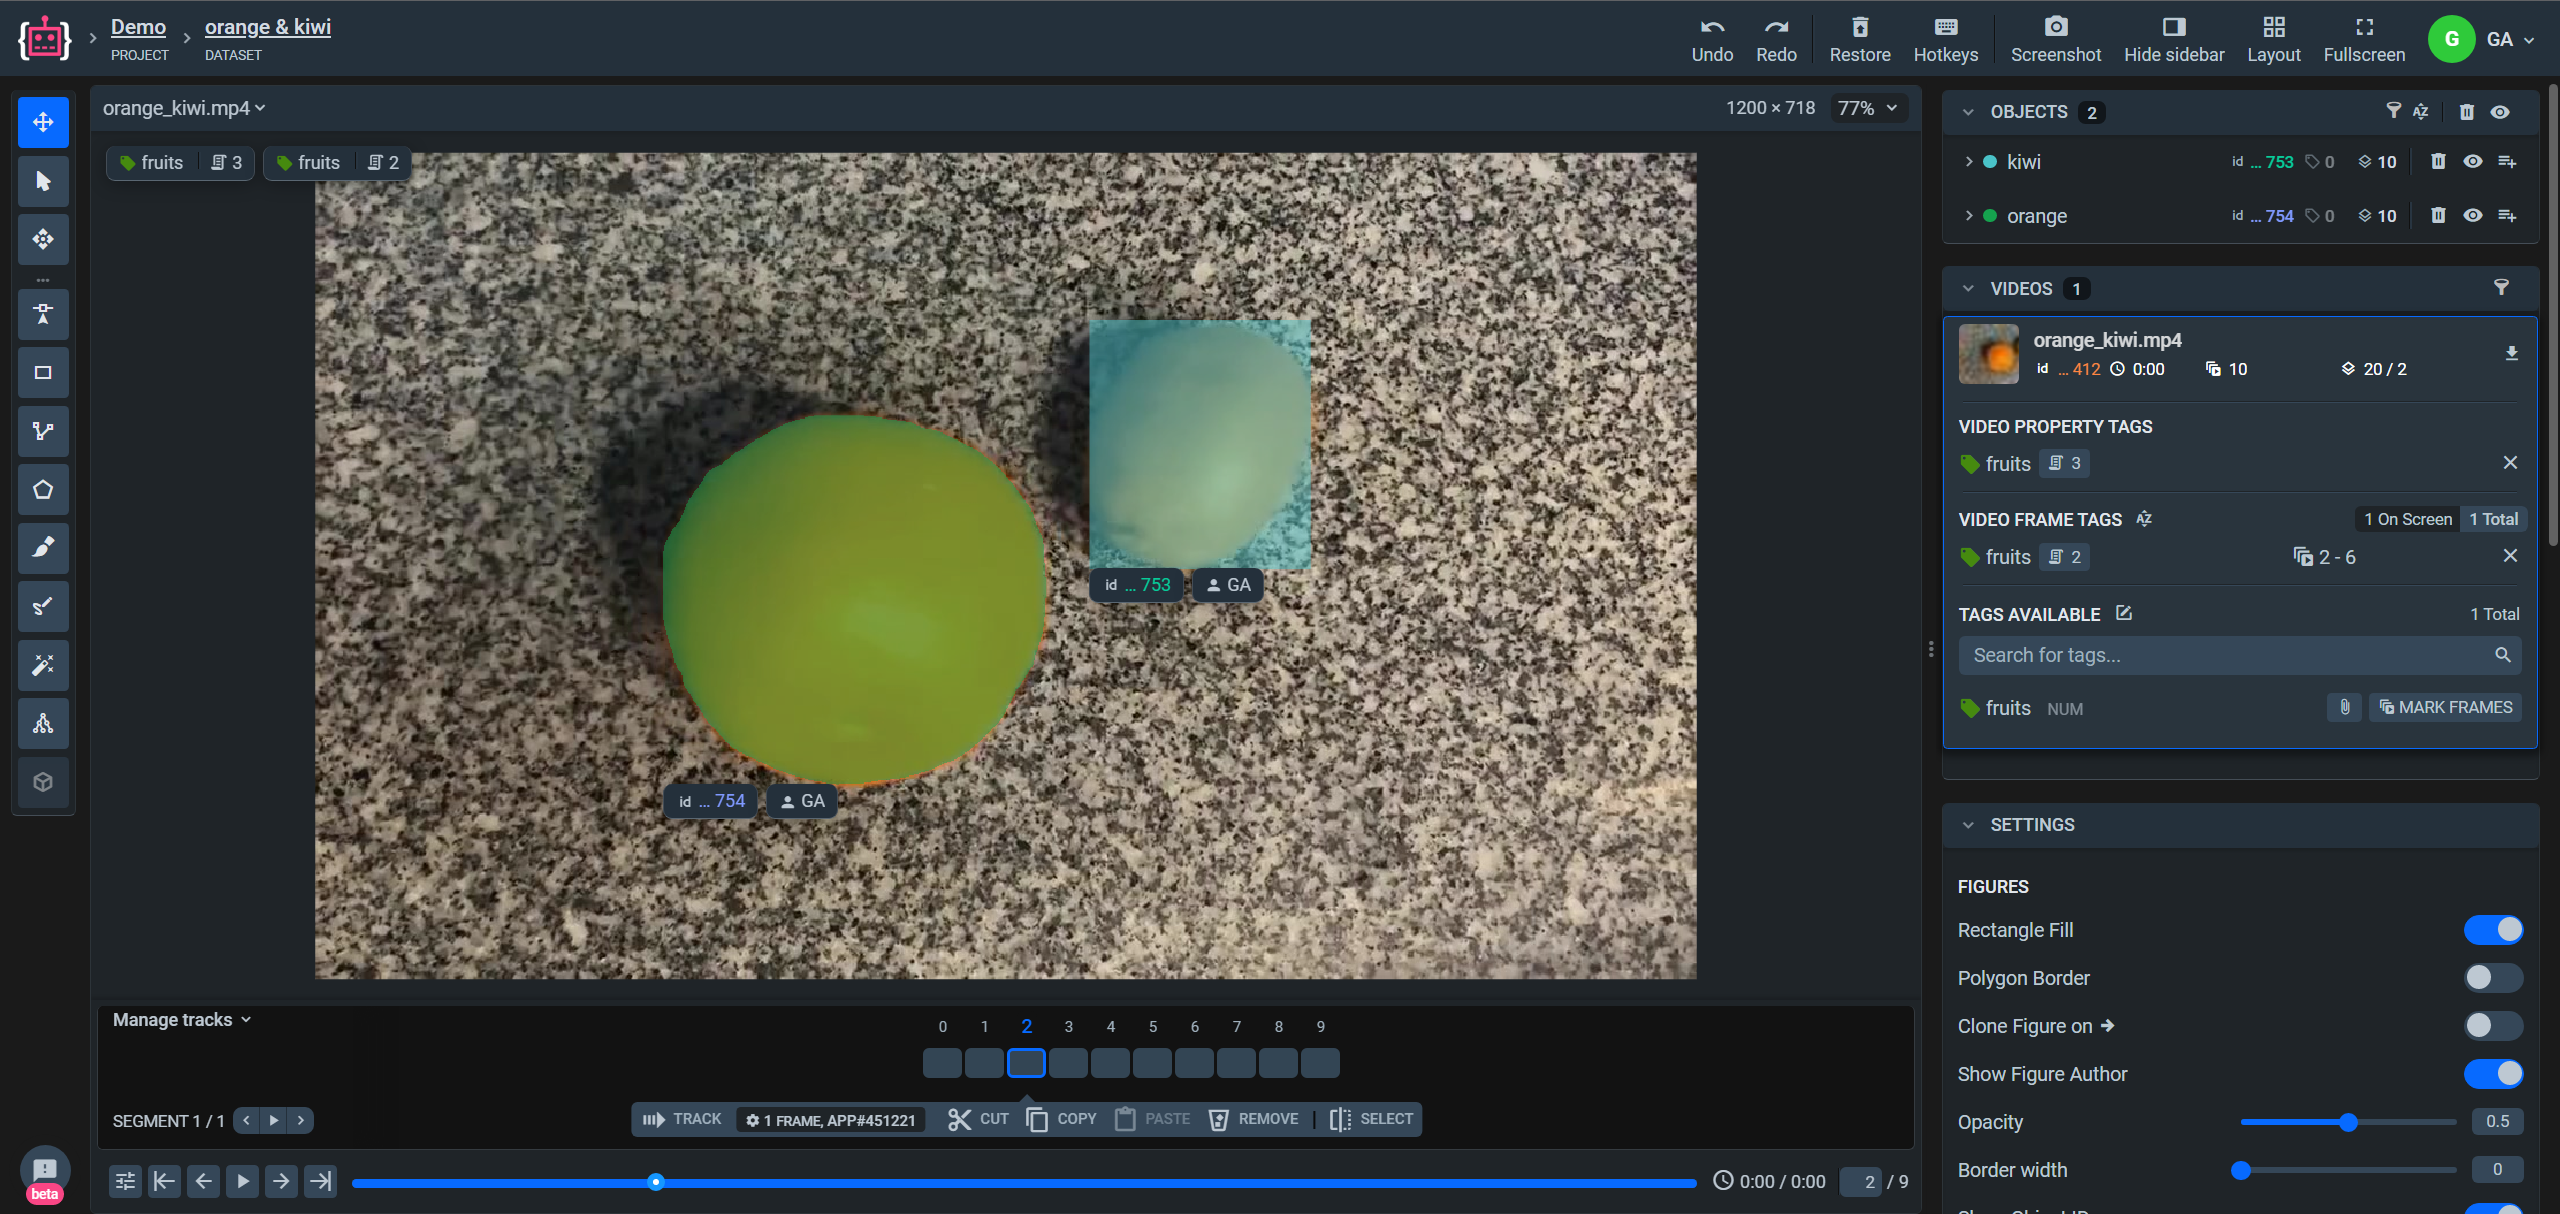
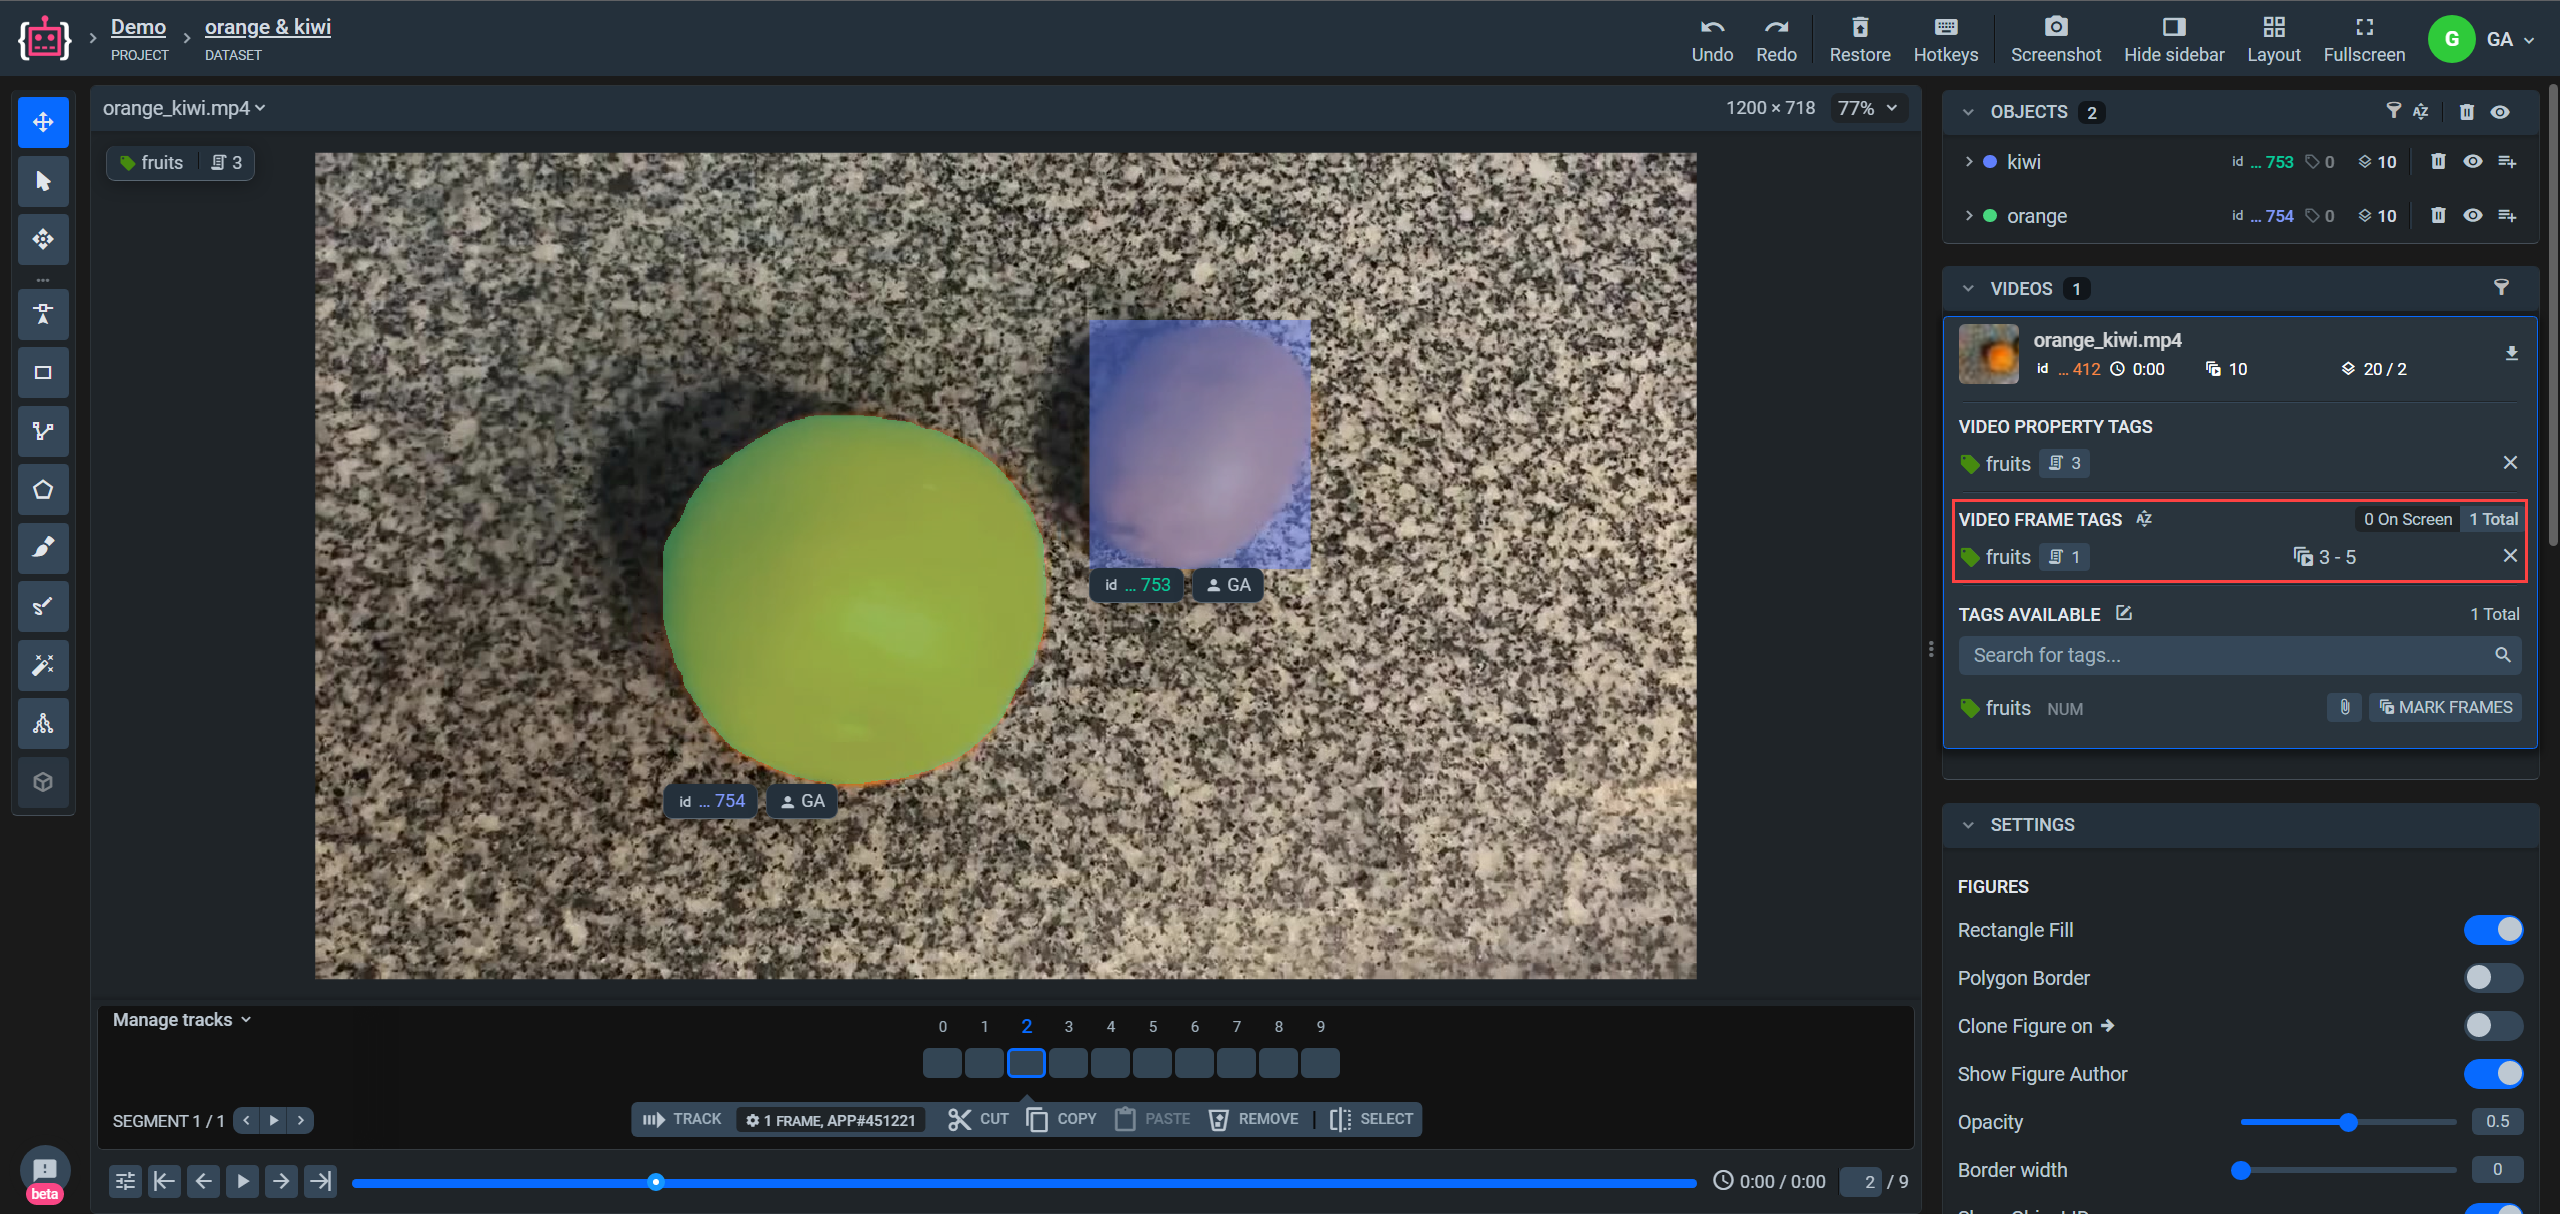
* `target_type` (string) \[optional] - Defines the scope of application. It can be applied globally for the entire duration or to individual frames, with the following values: `entitiesOnly`,`framesOnly`, `all`. Since images do not have "frames," the `all` option is used for them.
* `frame_range_min_length` (int) \[optional] - minimum length, in frames, of a finished frame-based tag. Length is inclusive, so frames 10 to 12 count as 3. `0` means no limit. Applies to videos and point cloud episodes.
* `frame_range_max_length` (int) \[optional] - maximum length, in frames, of a finished frame-based tag, on the same terms as `frame_range_min_length`. A minimum above a maximum is rejected, since such a tag could never be applied.
* `projectType`(string) - one of the possible project types: `images`, `videos`, `volumes`, `point_clouds`, and `point_cloud_episodes`
* `projectSettings`(string) \[optional] - additional project properties. For example, multiview settings. Read more [here](/getting-started/python-sdk-tutorials/images/multispectral-images#advanced-use-supervisely-format-for-multispectral-images)
* `multiView` - additional properties for the multiview mode
* `enabled`(bool) - enable multiview mode
* `tagName`(string) (optional) - the name of the tag which will be used as a group tag
* `tagId`(int) \[optional] - the ID of the tag which will be used as a group tag
* `isSynced`(bool) - enable synchronization of views for the multiview mode
Please note, that it is necessary that the group tag in `multiView` should have the corresponding `name` or the `id` in the `tags` field. Also, the `value_type` *should not be* `none`.
# Objects
## Supported Shapes
Supervisely Annotation Format supports the following figures:
* [point](#point)
* [rectangle](#rectangle)
* [polygon](#polygon-without-holes)
* [multipolygon](#multipolygon)
* [line / polyline](#polyline)
* [bitmap](#bitmap)
* [keypoint structures](#keypoint-structure)
* [cuboid](#cuboids-2d-annotation)
* [mask\_3d](#mask3d-3d-annotation)
## Coordinate System
For two-dimensional mediums (images and videos) we use the following coordinate system (it's similar to a two-dimensional NumPy coordinate system):

All numerical values are provided in pixels.
## General Fields
When generating JSON annotation files, we assign each figure a mix of general fields and fields unique for each geometric shape. Some general fields are optional: the system generates them automatically when the data is uploaded/first created. This means that these fields can be omitted during manual annotation.
**Optional fields:**
```json
"id": 503051990,
"classId": 1693352,
"labelerLogin": "alexxx",
"createdAt": "2020-08-22T09:32:48.010Z",
"updatedAt": "2020-08-22T09:33:08.926Z".
```
Fields definitions:
* `id` - unique identifier of the current object
* `classId` - unique class identifier of the current object
* `labelerLogin` - string - the name of user who created the current figure
* `createdAt` - string - date and time of figure creation
* `updatedAt` - string - date and time of the last figure update
## Point
Example:

JSON format for this shape:
```json
{
"id": 503051990,
"classId": 1693352,
"labelerLogin": "alexxx",
"createdAt": "2020-08-22T09:32:48.010Z",
"updatedAt": "2020-08-22T09:33:08.926Z",
"description": "",
"geometryType": "point",
"tags": [],
"classTitle": "point",
"points": {
"exterior": [
[1334, 907]
],
"interior": []
}
}
```
Fields definitions:
* Optional fields `id`, `classId`, `labelerLogin`, `createdAt`, `updatedAt` are described [above](#general-fields)
* `description` - string - text description (optional)
* `geometryType: "point"` - class shape
* `tags` - list of tags assigned to the current object
* `classTitle` - string - the title of the current class. It's used to identify the corresponding class shape from the `meta.json` file
* `points` - object with two fields:
* `exterior` - list of 2 values for coordinates (`x` and `y` in that order) for every figure
* `interior` - always an empty field for this type of figure
## Rectangle
Example:

JSON format for this figure:
```json
{
"id": 283051572,
"classId": 1692857,
"labelerLogin": "max",
"createdAt": "2020-08-22T09:32:48.010Z",
"updatedAt": "2020-08-22T09:33:08.926Z",
"description": "",
"geometryType": "rectangle",
"tags": [],
"classTitle": "person_bbox",
"points": {
"exterior": [
[533, 63],
[800, 830]
],
"interior": []
}
}
```
Fields definitions:
* Optional fields `id`, `classId`, `labelerLogin`, `createdAt`, `updatedAt` are described [above](#general-fields)
* `description` - string - text description (optional)
* `geometryType: "rectangle"` - class shape
* `tags` - list of tags assigned to the current object
* `classTitle` - string - the title of the current class. It's used to identify the corresponding class shape from the `meta.json` file
* `points` - object with two fields:
* `exterior` - list of two lists, each containing two coordinates (`x` and `y` in that order), with the following structure: \[\[left, top], \[right, bottom]]
* `interior` - always an empty list for this type of figure
## Polygon (without holes)
Example:

```json
{
"id": 503004154,
"classId": 1693021,
"labelerLogin": "alexxx",
"createdAt": "2020-08-21T15:15:28.092Z",
"updatedAt": "2020-08-21T15:15:37.687Z",
"description": "",
"geometryType": "polygon",
"tags": [],
"classTitle": "triangle",
"points": {
"exterior": [
[730, 2104],
[2479 402],
[3746, 1646]
],
"interior": []
}
}
```
Fields definitions:
* Optional fields `id`, `classId`, `labelerLogin`, `createdAt`, `updatedAt` are described [above](#general-fields)
* `description` - string - text description (optional)
* `geometryType: "polygon"` - class shape
* `tags` - list of tags assigned to the current object
* `classTitle` - string - the title of the current class. It's used to identify the corresponding class shape from the `meta.json` file
* `points` - object with two fields:
* `exterior` - list of points \[point1, point2, point3, etc ...] where each point is a list of two numbers (coordinates) \[col, row]
* `interior` - list of elements with the same structure as the "exterior" field. In other words, this is the list of polygons that define object holes. For polygons without holes in them, this field is empty
## Polygon (with holes)
Example:

```json
{
"id": 503004154,
"classId": 1693021,
"labelerLogin": "alexxx",
"createdAt": "2020-08-21T15:15:28.092Z",
"updatedAt": "2020-08-21T16:06:11.461Z",
"description": "",
"geometryType": "polygon",
"tags": [],
"classTitle": "triangle_hole",
"points": {
"exterior": [
[730, 2104],
[2479, 402],
[3746, 1646]
],
"interior": [
[
[1907, 1255],
[2468, 875],
[2679, 1577]
]
]
}
}
```
Fields definitions:
* Optional fields `id`, `classId`, `labelerLogin`, `createdAt`, `updatedAt` are described [above](#general-fields)
* `description` - string - text description (optional)
* `geometryType: "polygon"` - class shape
* `tags` - list of tags assigned to the current object
* `classTitle` - string - the title of the current class. It's used to identify the corresponding class shape from the `meta.json` file
* `points` - object with two fields:
* `exterior` - list of points \[point1, point2, point3, etc ...] where each point is a list of two numbers (coordinates) \[col, row]
* `interior` - list of elements with the same structure as the "exterior" field. In other words, this is the list of polygons that define object holes.
## Multipolygon
Multipolygon stores several polygon parts as one annotation object. Each part has the same `exterior` and `interior` structure as a regular polygon.
```json
{
"id": 29164747,
"classId": 214973,
"description": "",
"geometryType": "multipolygon",
"tags": [],
"classTitle": "building_group",
"parts": [
{
"exterior": [
[120, 160],
[220, 160],
[220, 260],
[120, 260]
],
"interior": []
},
{
"exterior": [
[320, 170],
[430, 170],
[430, 290],
[320, 290]
],
"interior": [
[
[350, 200],
[390, 200],
[390, 240],
[350, 240]
]
]
}
]
}
```
Fields definitions:
* Optional fields `id`, `classId`, `labelerLogin`, `createdAt`, `updatedAt` are described [above](#general-fields)
* `description` - string - text description (optional)
* `geometryType: "multipolygon"` - class shape
* `tags` - list of tags assigned to the current object
* `classTitle` - string - the title of the current class. It's used to identify the corresponding class shape from the `meta.json` file
* `parts` - list of polygon parts:
* `exterior` - list of points where each point is a list of two numbers (`x` and `y` coordinates)
* `interior` - list of holes for this part. Each hole has the same point structure as `exterior`. For parts without holes, this field is empty
## Polyline
Example:

```json
{
"id": 503049791,
"classId": 1693340,
"labelerLogin": "alexxx",
"createdAt": "2020-08-22T08:39:29.386Z",
"updatedAt": "2020-08-22T08:39:34.802Z",
"description": "",
"geometryType": "line",
"tags": [],
"classTitle": "line",
"points": {
"exterior": [
[211, 2266],
[1208, 1310],
[369, 981]
],
"interior": []
}
}
```
Fields definitions:
* Optional fields `id`, `classId`, `labelerLogin`, `createdAt`, `updatedAt` are described [above](#general-fields)
* `description` - string - text description (optional)
* `geometryType: "line"` - class shape
* `tags` - list of tags assigned to the current object
* `classTitle` - string - the title of the current class. It's used to identify the corresponding class shape from the `meta.json` file
* `points` - object with two fields:
* `exterior` - list of points \[point1, point2, point3, etc ...] where each point is a list of two numbers (coordinates) \[col, row]
* `interior` - always an empty list for this type of figure
## Bitmap
Bitmap is a figure that is described by a point of "origin"(upper left corner), which defines the location of the bitmap within the image and a "data" - Boolean matrix encoded into a string, which defines each pixel of the bitmap.
Example:

```json
{
"id": 497489556,
"classId": 1661459,
"labelerLogin": "alexxx",
"createdAt": "2020-07-24T07:30:39.202Z",
"updatedAt": "2020-07-24T07:41:12.753Z",
"description": "",
"geometryType": "bitmap",
"tags": [],
"classTitle": "person",
"bitmap": {
"data": "eJwB ... kUnW",
"origin": [535, 66]
}
}
```
Fields description:
* Optional fields `id`, `classId`, `labelerLogin`, `createdAt`, `updatedAt` are described [above](#general-fields)
* `description` - string - text description (optional)
* `geometryType: "bitmap"` - class shape
* `tags` - list of tags assigned to the current object
* `classTitle` - string - the title of the current class. It's used to identify the corresponding class shape from the `meta.json` file
* `bitmap` - object with two fields:
* `origin` - points (`x` and `y` coordinates) of the top left corner of the bitmap, i.e. the position of the bitmap within the image
* `data` - string - encoded representation of a string
A few words about `bitmap` → `data`. You can use these two python methods to convert a base64 encoded string to NumPy and vice versa.
```python
def base64_2_mask(s):
z = zlib.decompress(base64.b64decode(s))
n = np.fromstring(z, np.uint8)
mask = cv2.imdecode(n, cv2.IMREAD_UNCHANGED)[:, :, 3].astype(bool)
return mask
def mask_2_base64(mask):
img_pil = Image.fromarray(np.array(mask, dtype=np.uint8))
img_pil.putpalette([0,0,0,255,255,255])
bytes_io = io.BytesIO()
img_pil.save(bytes_io, format='PNG', transparency=0, optimize=0)
bytes = bytes_io.getvalue()
return base64.b64encode(zlib.compress(bytes)).decode('utf-8')
```
Example:
```python
import numpy as np
import cv2, zlib, base64, io
from PIL import Image
def base64_2_mask(s):
z = zlib.decompress(base64.b64decode(s))
n = np.fromstring(z, np.uint8)
mask = cv2.imdecode(n, cv2.IMREAD_UNCHANGED)[:, :, 3].astype(bool)
return mask
def mask_2_base64(mask):
img_pil = Image.fromarray(np.array(mask, dtype=np.uint8))
img_pil.putpalette([0,0,0,255,255,255])
bytes_io = io.BytesIO()
img_pil.save(bytes_io, format='PNG', transparency=0, optimize=0)
bytes = bytes_io.getvalue()
return base64.b64encode(zlib.compress(bytes)).decode('utf-8')
example_np_bool = np.ones((3, 3), dtype=bool)
example_np_bool[1][1] = False
example_np_bool[1][2] = False
print(example_np_bool)
encoded_string = mask_2_base64(example_np_bool)
print(encoded_string)
print(base64_2_mask(encoded_string))
```
Program output after executing the code:
```python
[[ True True True]
[ True False False]
[ True True True]]
'eJzrDPBz5+WS4mJgYOD19HAJAtLMIMwIInOeqf8BUmwBPiGuQPr///9Lb86/C2QxlgT5BTM4PLuRBuTwebo4hlTMSa44cOHAB6DqY0yORgq8YkAZBk9XP5d1TglNANAFGzA='
[[ True True True]
[ True False False]
[ True True True]]
```
## Keypoint structure
Keypoint structures consist of vertices (also called nodes or points) which are connected by edges (also called links or lines).
Example:

```json
{
"id": 503055304,
"classId": 1693357,
"description": "",
"geometryType": "graph",
"labelerLogin": "alexxx",
"createdAt": "2020-08-22T10:50:28.336Z",
"updatedAt": "2020-08-22T10:53:57.760Z",
"tags": [],
"classTitle": "graph",
"nodes": {
"8e20c830-ee86-450f-9d21-833eec53e3c5": {
"loc": [1017, 1556]
},
"bf89e248-7b3b-4732-888a-99d3369fbb2f": {
"loc": [1024, 394]
},
"66502c5b-8d98-492c-bb48-8ce7c4487038": {
"loc": [1026, 738]
},
"56517c2a-6053-442a-9af2-bd6f29bae987": {
"loc": [668, 574]
},
"7a40d5f7-bcc8-4e2f-bf3b-3e52d39c4206": {
"loc": [1388, 549]
}
}
}
```
Fields definitions:
* Optional fields `id`, `classId`, `labelerLogin`, `createdAt`, `updatedAt` are described [above](#general-fields)
* `description` - string - text description (optional)
* `geometryType: "graph"` - class shape
* `tags` - list of tags assigned to the current object
* `classTitle` - string - the title of the current class. It's used to identify the corresponding class shape from the `meta.json` file
* `nodes` - is a dictionary, where keys denote the names of the graph vertices and values in a dictionary, and where values denote location of a node on image
* `loc` - list of single points (`x` and `y` coordinates) of vertices
## Cuboids (2D annotation)
Example:

```json
{
"description": "",
"tags": [],
"classTitle": "Cuboid",
"faces": [
[0, 1, 2, 3],
[0, 4, 5, 1],
[1, 5, 6, 2]
],
"points": [
[277, 273],
[840, 273],
[840, 690],
[277, 690],
[688, 168],
[1200, 168],
[1200, 522]
]
}
```
Fields definitions:
* Optional fields `id`, `classId`, `labelerLogin`, `createdAt`, `updatedAt` are described [above](#general-fields)
* `description` - string - text description (optional)
* `geometryType: "graph"` - class shape
* `tags` - list of tags assigned to the current object
* `classTitle` - string - the title of the current class. It's used to identify the corresponding class shape from the `meta.json` file
* `points` - an array of points that form the cuboid. There are always 7 points in a cuboid. Each Point is presented as an array of X and Y coordinates, i.e. \[277, 690] means X is 277 and Y is 690, calculating from the top left corner of the image.
* `faces` - an array of faces that indicates how points from the `points` array are connected. There are always 3 faces in a cuboid. In the example above, you can see that face number 3 that consists of points 1, 2, 5, 6 with coordinates \[840, 273], \[840, 690], \[1200, 168], \[1200, 522].
## Mask3D (3D annotation)
Mask3D is a figure that is described by a 3D array corresponding to the dimensionality of the volume. It is used as an annotation type for volume projects. Geometry `data` stores in NRRD files and defines each pixel of the Mask3D. In the previous version whole `data` could be stored in JSON annotations as a base64 encoded string.

💡 It's strictly recommended to store whole `data` into NRRD files.
👉 To learn how to create Mask3D from NRRD files using our SDK you can read [this article](/getting-started/python-sdk-tutorials/volumes/spatial-labels-on-volumes).
Below is an example of what the object looks like in the annotation file:
```json
{
"key": "daff638a423a4bcfa34eb12e42243a87",
"objectKey": "6c1587f381bf419e9d5c2ebd5967e28f",
"geometryType": "mask_3d",
"geometry": {
"mask_3d": {
"data": "H4sIAGW9OmUC ... CYAE1Nj5QMACwC"
},
"shape": "mask_3d",
"geometryType": "mask_3d"
},
"labelerLogin": "username",
"updatedAt": "2021-11-13T08:05:28.771Z",
"createdAt": "2021-11-13T08:05:28.771Z"
}
```
Fields definitions:
* `key` -
* `objectKey` -
* `geometryType: "mask_3d"` - class shape
* `geometry` - describes geometry of the object, consist of:
* `mask_3d` - object with one field:
* `data`- string - encoded representation of a string.
* `shape: "mask_3d"` - geometry name
* `geometryType": "mask_3d"` geometry type
If the geometry data is stored in NRRD files, `mask_3d` → `data` will store an empty array represented as base64 encoded string.
# Tags
In Supervisely tags provide an option to associate some additional information with the labeled image or the labels on it. Each individual tag can be attached to a single image or a single annotation only once, but there's no limit on how many times the same tag can be attached to different parts of the scene. There are different lists of tags for images and figures in the annotation file.
When defining a tag, you assign it a name, possible values for a tag instance and what types of things it can be attached to. We support values of the following types: None (without an assigned value), Text, Number, Date, and One of.
## Tags With 'None' Value
Tags of 'none' type can't be assigned a value. Adding one manually will result in an error. Also, it [could not be used](https://github.com/supervisely/developer-portal/tree/main/getting-started/supervisely-annotation-json-format/project-classes-and-tags.md#fields-definitions) as a group tag for the multiview mode.
JSON format for 'None' tags:
```json
{
"id": 86334622,
"tagId": 28256197,
"labelerLogin": "alexxx",
"createdAt": "2020-08-23T09:51:06.246Z",
"updatedAt": "2020-08-23T09:51:06.246Z",
"name": "like",
"value": null
}
```
Fields definitions:
* `name` - string - name of the tag
* `value` - value of the current tag (always null for any tag of type 'none')
* Optional fields `id`, `tagId`, `labelerLogin`, `createdAt`, `updatedAt` will be described [below](#optional-fields)
## Tag with String('Text') Value
Tags of type 'string' can only take a string value. Adding a different type of value during manual annotation will result in an error.
JSON format for 'text' tags:
```json
{
"id": 95462538,
"tagId": 28256201,
"labelerLogin": "alexxx",
"createdAt": "2020-07-24T07:30:39.202Z",
"updatedAt": "2020-07-24T07:30:39.202Z",
"name": "car_color",
"value": "red"
}
```
Fields definitions:
* `name` - string - name of the tag
* `value` - value of current tag
* Optional fields `id`, `tagId`, `labelerLogin`, `createdAt`, `updatedAt` will be described [below](#optional-fields)
## Tag with value from a given list ('One Of')
Tag of type 'One Of' can only take a value from the list of possible values for this tag. List of possible values is set when creating the tag. Adding a value not from the list during manual annotation will result in an error.
JSON format for 'one of' tags:
```json
{
"id": 86334621,
"tagId": 28256198,
"labelerLogin": "alexxx",
"createdAt": "2020-08-23T09:51:02.843Z",
"updatedAt": "2020-08-23T09:51:02.843Z",
"name": "situated",
"value": "outside"
}
```
Fields definitions:
* `name` - string - name of the tag
* `value` - value of current tag
* Optional fields `id`, `tagId`, `labelerLogin`, `createdAt`, `updatedAt` will be described [below](#optional-fields)
## Tag with Date Value
Tags of type 'date' store a date-time value as an ISO 8601 string. In the Labeling Tool, a date picker is provided for input. The `possible_values` field cannot be used with this type.
Accepted formats:
* `2026-04-23T15:15:48`
* `2026-05-12T21:14:12.000Z`
* `2026-04-27 11:00:46`
* `2026-05-12T21:14:12+00:00`
JSON format for 'date' tags:
```json
{
"name": "reviewed_at",
"value": "2026-04-23T15:15:48"
}
```
Fields definitions:
* `name` - string - name of the tag
* `value` - ISO 8601 date-time string
* Optional fields `id`, `tagId`, `labelerLogin`, `createdAt`, `updatedAt` will be described [below](#optional-fields)
## Optional fields
The following fields are created and assigned automatically by the system when the tags are first created in it (or the data is uploaded). This means these fields are optional, and you don't have to assign them during manual annotation.
Optional fields:
```json
"id": 503051990,
"tagId": 1693352,
"labelerLogin": "alexxx",
"createdAt": "2020-08-22T09:32:48.010Z",
"updatedAt": "2020-08-22T09:33:08.926Z".
```
Fields definitions:
* `id` - unique identifier of the current object
* `tagId` - unique tag identifier of the current object
* `labelerLogin` - string - the name of user who created the current figure
* `createdAt` - string - date and time of figure creation
* `updatedAt` - string - date and time of the last figure update
## Examples
**Image tags:**

JSON format for image tags:
```json
"tags": [
{
"id": 86334622,
"tagId": 28256197,
"labelerLogin": "alexxx",
"createdAt": "2020-08-23T09:51:06.246Z",
"updatedAt": "2020-08-23T09:51:06.246Z",
"name": "like",
"value": null
},
{
"id": 86334621,
"tagId": 28256198,
"labelerLogin": "alexxx",
"createdAt": "2020-08-23T09:51:02.843Z",
"updatedAt": "2020-08-23T09:51:02.843Z",
"name": "situated",
"value": "outside"
}
]
```
Fields definitions:
* `name` - string - name of the tag
* `value` - value of current tag
* Optional fields `id`, `tagId`, `labelerLogin`, `createdAt`, `updatedAt` are described [above](#optional-fields)
#### **Object tags:**

JSON format for object tags:
```json
"tags": [
{
"id": 95462539,
"tagId": 28256199,
"labelerLogin": "alexxx",
"createdAt": "2020-07-24T07:30:39.202Z",
"updatedAt": "2020-07-24T07:30:39.202Z",
"name": "vehicle_age",
"value": "vintage"
},
{
"id": 95462538,
"tagId": 28256201,
"labelerLogin": "alexxx",
"createdAt": "2020-07-24T07:30:39.202Z",
"updatedAt": "2020-07-24T07:30:39.202Z",
"name": "car_color",
"value": "red"
}
]
```
Fields definitions:
* `name` - string - name of the tag
* `value` - value of current tag
* Optional fields `id`, `tagId`, `labelerLogin`, `createdAt`, `updatedAt` are described [above](#optional-fields)
# Image Annotation
### Structure
For each image, we store the annotations in a separate JSON file named `image_name.image_format.json` with the following file structure:
```json
{
"description": "food",
"name": "tomatoes-eggs-dish.jpg",
"size": {
"width": 2100,
"height": 1500
},
"tags": [],
"objects": []
}
```
Fields definitions:
* `name` - string - image name
* `description` - string - (optional) - This field is used to store the text we want to assign to the image. In the labeling interface it corresponds to the 'data' filed.
* `size` - stores image size. Mostly, it is used to get the image size without the actual image reading to speed up some data processing steps.
* `width` - image width in pixels
* `height` - image height in pixels
* `tags` - list of strings that will be interpreted as image [tags](/getting-started/supervisely-annotation-format/tags)
* `objects` - list of [objects on the image](/getting-started/supervisely-annotation-format/objects) which can be of different types (point, rectangle, polygon, multipolygon, line, bitmap, etc.)
## Full image annotation example with objects and tags

Example:
```json
{
"description": "",
"tags": [
{
"id": 86458971,
"tagId": 28283797,
"name": "like",
"value": null,
"labelerLogin": "alexxx",
"createdAt": "2020-08-26T09:12:51.155Z",
"updatedAt": "2020-08-26T09:12:51.155Z"
},
{
"id": 86458968,
"tagId": 28283798,
"name": "situated",
"value": "outside",
"labelerLogin": "alexxx",
"createdAt": "2020-08-26T09:07:26.408Z",
"updatedAt": "2020-08-26T09:07:26.408Z"
}
],
"size": {
"height": 952,
"width": 1200
},
"objects": [
{
"id": 497521359,
"classId": 1661571,
"description": "",
"geometryType": "bitmap",
"labelerLogin": "alexxx",
"createdAt": "2020-08-07T11:09:51.054Z",
"updatedAt": "2020-08-07T11:09:51.054Z",
"tags": [],
"classTitle": "person",
"bitmap": {
"data": "eJwBgQd++IlQTkcNChoKAAAADUlIRF",
"origin": [
535,
66
]
}
},
{
"id": 497521358,
"classId": 1661574,
"description": "",
"geometryType": "rectangle",
"labelerLogin": "alexxx",
"createdAt": "2020-08-07T11:09:51.054Z",
"updatedAt": "2020-08-07T11:09:51.054Z",
"tags": [],
"classTitle": "bike",
"points": {
"exterior": [
[
0,
236
],
[
582,
872
]
],
"interior": []
}
}
]
}
```
### How the Label Group Is Described in Project Files

1. **Project Meta**
In the **tags** section of project `meta.json`, you must include a tag named **`@label-group-id`** with the following properties:
* **`name`**: `"@label-group-id"`
* **`value_type`**: `"any_string"` (allows flexible naming for groups)
* **`applicable_type`**: `"objectsOnly"` (ensures the tag is only assigned to labeled objects)
This tag is essential for defining and managing label groups within the project, allowing grouped labels to be linked and organized effectively.
```json
{
"tags": [
{
"name": "@label-group-id",
"value_type": "any_string",
"color": "#FF0000",
"id": 222,
"hotkey": "",
"applicable_type": "objectsOnly",
"classes": [],
"target_type": "all"
}
],
... // more elements here
}
```
2. **Image Annotation**
To add an object to a label group, you must assign the `@label-group-id` tag with the corresponding group name as its value.
* This ensures that all objects with the same tag value are recognized as part of the same group.
* Grouped labels will be visually linked and managed together in the annotation interface.
```json
"objects": [
{
"classTitle": "Head Light",
"description": "",
"tags": [
{
"name": "@label-group-id",
"value": "head-light",
"labelerLogin": "supervisely",
... // more elements here
}
],
... // more elements here
}
]
```
# Video Annotation
For each video file, we store the annotations in a separate JSON file named `image_name.image_format.json` with the following file structure:
Example:

```json
{
"size": {
"height": 1080,
"width": 1920
},
"description": "",
"key": "c8168b43ae1b45c38930f456df9d0f2b",
"tags": [],
"objects": [
{
"key": "198f727d40c749eebcacc4aed299b39a",
"classTitle": "rect",
"tags": [],
"labelerLogin": "alexxx",
"updatedAt": "2020-08-23T12:06:11.963Z",
"createdAt": "2020-08-23T12:06:11.963Z"
}
],
"frames": [
{
"index": 0,
"figures": [
{
"key": "65f21690780e43b49863c3cbd07eab3a",
"objectKey": "198f727d40c749eebcacc4aed299b39a",
"geometryType": "rectangle",
"geometry": {
"points": {
"exterior": [
[
266,
420
],
[
847,
845
]
],
"interior": []
}
},
"labelerLogin": "alexxx",
"updatedAt": "2020-08-23T12:06:13.544Z",
"createdAt": "2020-08-23T12:06:13.544Z"
}
]
}
],
"framesCount": 375
}
```
**Fields definitions:**
* `size` - string - is equal to image(frame) size
* `description` - string - (optional) - this field is used to store the text we want to assign to the video. In the labeling interface it corresponds to the 'data' filed.
* `tags` - list of strings that will be interpreted as video tags
* `key` - string, unique key for a given video (used in key\_id\_map.json to get the video ID)
* `objects` - list of objects that may be present on the video
* `frames` - list of frames of which the video consists. List contains only frames with an object from the 'objects' field
* `index` - integer - number of the current frame
* `figures` - integer - list of objects which the current frame contains
* `framesCount` - integer - total number of frames in the video
* `objectKey` - string - unique key for a given object (used in key\_id\_map.json)
* `labelerLogin` - string - the name of a user who created the current figure
* `geometryType` - "cuboid\_3d" - class shape
* `geometry` - a dictionary containing indicators of location, rotation and dimensions of cuboids
**Fields definitions for objects field:**
* `key` - string, a unique key for the given object (used in key\_id\_map.json to get the object ID)
* `classTitle` - string - the title of a class. It's used to identify the class shape from the `meta.json` file
* `tags` - list of strings that will be interpreted as object tags
* `labelerLogin` - string - the name of the user that added this figure to the project
**Fields description for figures field:**
* `key` - string, a unique key for the given figure (used in key\_id\_map.json to get the figure ID)
* `objectKey` - string, a unique key for the given object (used in key\_id\_map.json to get the object ID).
* `geometryType` - "rectangle" -class shape
* `geometry` - geometry of the object
* `classTitle` - string - the title of a class. It's used to identify the class shape from the `meta.json` file
* `labelerLogin` - string - the name of the user that added this figure to the current frame
## Key id map file
Key\_id\_map.json file is optional. It is created when annotating the video inside Supervisely interface and sets the correspondence between the unique identifiers of the video, object and the frame on which the object is located. If you annotate manually, you do not need to create this file. This will not affect the work being done.
JSON format of key\_id\_map.json:
```json
{
"tags": {},
"objects": {
"198f727d40c749eebcacc4aed299b39a": 20520
},
"figures": {
"65f21690780e43b49863c3cbd07eab3a": 503130811
},
"videos": {
"c8168b43ae1b45c38930f456df9d0f2b": 157876296
}
}
```
Fields definitions:
* `objects` - dictionary, where the key is a unique string, generated inside Supervisely environment to set correspondence of current object in annotation, and values are unique integer ID corresponding to the current object
* `figures` - dictionary, where the key is a unique string, generated inside Supervisely environment to set correspondence of object on current frame in annotation, and values are unique integer ID corresponding to the current frame
* `videos` - dictionary, where the key is unique string, generated inside Supervisely environment to set correspondence of video in annotation, and value is a unique integer ID corresponding to the current video
* `tags` - dictionary, where the keys are unique strings, generated inside Supervisely environment to set correspondence of tag on current frame in annotation, and values are a unique integer ID corresponding to the current tag
# Point Clouds Annotation
3D Point Cloud labeling interface
## Project Structure Example
```
├── key_id_map.json (optional)
├── meta.json
├──
│ ├── pointcloud
│ │ ├── scene_1.pcd
│ │ ├── scene_2.pcd
│ │ └── ...
│ ├── related_images (optional)
│ │ ├── scene_1_pcd
│ │ │ ├── scene_1_cam0.png
│ │ │ ├── scene_1_cam0.png.json
│ │ │ ├── scene_1_cam0.png.figures.json (optional)
│ │ │ ├── scene_1_cam1.png
│ │ │ ├── scene_1_cam1.png.figures.json (optional)
│ │ │ └── ...
│ │ ├── scene_2_pcd
│ │ │ ├── scene_2_cam0.png
│ │ │ ├── scene_2_cam0.png.json
│ │ │ ├── scene_2_cam0.png.figures.json (optional)
│ │ │ ├── scene_2_cam1.png
│ │ │ ├── scene_2_cam1.png.json
│ │ │ ├── scene_2_cam1.png.figures.json (optional)
│ │ │ └── ...
│ │ └── ...
│ └── ann
│ ├── scene_1.pcd.json
│ ├── scene_2.pcd.json
│ └── ...
├──
│ ├── pointcloud
│ │ ├── scene_1.pcd
│ │ └── ...
│ ├── related_images (optional)
│ │ ├── scene_1_pcd
│ │ │ ├── scene_1_cam0.png
│ │ │ ├── scene_1_cam0.png.json
│ │ │ ├── scene_1_cam0.png.figures.json (optional)
│ │ │ ├── scene_1_cam1.png
│ │ │ ├── scene_1_cam1.png.json
│ │ │ ├── scene_1_cam1.png.figures.json (optional)
│ │ │ └── ...
│ │ └── ...
│ └── ann
│ ├── scene_1.pcd.json
│ └── ...
└──
```
## Main concepts
**Point cloud Project**
Point cloud Project consists of one or many datasets of point clouds.
It also includes Sensor fusion feature that supports video camera sensor in the Labeling Tool UI.
**Project Meta (meta.json)**
Project Meta contains the essential information about the project - Classes and Tags. These are defined project-wide and can be used for labeling in every dataset inside the current project.
**Datasets (\, \, ...)**
Datasets are the second level folders inside the project, they host subsets of point cloud scenes, related photo context (images) and annotations.
**Items/Point clouds (pointcloud)**
Every `.pcd` file in a sequence has to be stored inside a `pointcloud` folder of datasets.
| Key | Value |
| --- | --------------------------------------------------------- |
| x | The x coordinate of the point. |
| y | The y coordinate of the point. |
| z | The z coordinate of the point. |
| r | The red color channel component. An 8-bit value (0-255). |
| g | The green color channel component. An 8-bit value (0-255) |
| b | The blue color channel component. An 8-bit value (0-255) |
All the positional coordinates (x, y, z) are in meters. Supervisely supports all PCD encoding: ASCII, binary, binary\_compressed.
The PCD file format description can be found [here](https://pointclouds.org/documentation/tutorials/pcd_file_format.html)
**Items Annotations (ann)**
Point cloud Annotations refer to each point cloud and contains information about labels on the point clouds in the datasets.
A dataset has a list of `objects` that can be shared between some point clouds.
The list of `objects` is defined for the entire dataset, even if the object's figure occurs in only one point cloud.
`Figures` represents individual labels, attached to one single frame and its object.
```
{
"description": "",
"key": "e9f0a3ae21be41d08eec166d454562be",
"tags": [],
"objects": [
{
"key": "ecb975d70735486b90fe4fdd2be77e3b",
"classTitle": "Car",
"tags": [],
"labelerLogin": "admin",
"updatedAt": "2022-05-04T00:32:30.872Z",
"createdAt": "2022-05-04T00:32:30.872Z"
}
],
"figures": [
{
"key": "abbaec8785c1468585f6210c62bb2374",
"objectKey": "ecb975d70735486b90fe4fdd2be77e3b",
"geometryType": "cuboid_3d",
"geometry": {
"position": {
"x": 58.756710052490234,
"y": 4.623323917388916,
"z": -0.4174150526523591
},
"rotation": {
"x": 0,
"y": 0,
"z": -1.77
},
"dimensions": {
"x": 1.59,
"y": 4.28,
"z": 1.45
}
},
"labelerLogin": "admin",
"updatedAt": "2022-05-04T00:32:37.432Z",
"createdAt": "2022-05-04T00:32:37.432Z"
}
]
}
```
**Optional fields and loading** These fields are optional and are not needed when loading the project. The server can automatically fill in these fields while project is loading.
* `id` - unique identifier of the current object
* `classId` - unique class identifier of the current object
* `labelerLogin` - string - the name of user who created the current figure
* `createdAt` - string - date and time of figure creation
* `updatedAt` - string - date and time of the last figure update
Main idea of `key` fields and `id` you can see below in [Key id map file](#key-id-map-file) section.
**Fields definitions:**
* `description` - string - (optional) - this field is used to store the text to assign to the sequence.
* `key` - string, unique key for a given sequence (used in key\_id\_map.json to get the sequence ID)
* `tags` - list of strings that will be interpreted as point cloud tags
* `objects` - list of objects that may be present on the dataset
* `geometryType` - "cuboid\_3d" or other 3D geometry - class shape
**Fields definitions for `objects` field:**
* `key` - string - unique key for a given object (used in key\_id\_map.json)
* `classTitle` - string - the title of a class. It's used to identify the class shape from the `meta.json` file
* `tags` - list of strings that will be interpreted as object tags (can be empty)
**Fields description for `figures` field:**
* `key` - string - unique key for a given figure (used in key\_id\_map.json)
* `objectKey` - string - unique key to link figure to object (used in key\_id\_map.json)
* `geometryType` - "cuboid\_3d" or other 3D geometry -class shape
* `geometry` - geometry of the object
**Description for `geometry` field (cuboid\_3d):**
* `position` 3D vector of box center coordinates:
* **x** - forward in the direction of the object
* **y** - left
* **z** - up
* `dimensions` is a 3D vector that scales a cuboid from its local center along x, y, z:
* **x** - width
* **y** - length
* **z** - height
* `rotation` is a 3D Vector that rotates a cuboid along an axis in world space:
* **x** - pitch
* **y** - roll
* **z** - yaw (direction)
Rotation values bound inside \[**-pi** ; **pi**] When `yaw = 0` box direction will be strict `+y`
## Key id map file
The basic idea behind key-id-map is that it maps the unique identifiers of entities from Supervisely to local entities keys. It is needed for such local data manipulations as cloning entities and reassigning relations between them. Examples of entities in `key_id_map.json`: datasets (videos), tags, objects, figures.
```
{
"tags": {},
"objects": {
"198f727d40c749eebcacc4aed299b39a": 20520
},
"figures": {
"65f21690780e43b49863c3cbd07eab3a": 503130811
},
"videos": {
"e9f0a3ae21be41d08eec166d454562be": 42656
}
}
```
* `objects` - dictionary, where the key is a unique string, generated inside Supervisely environment to set mapping of current object in annotation, and values are unique integer ID related to the current object
* `figures` - dictionary, where the key is a unique string, generated inside Supervisely environment to set mapping of object on current frame in annotation, and values are unique integer ID related to the current frame
* `videos` - dictionary, where the key is unique string, generated inside Supervisely environment to set mapping of dataset in annotation, and value is a unique integer ID related to the current sequence
* `tags` - dictionary, where the keys are unique strings, generated inside Supervisely environment to set mapping of tag on current frame in annotation, and values are a unique integer ID related to the current tag
* **Key** - [generated by python3 function `uuid.uuid4().hex`](https://docs.python.org/3/library/uuid.html#uuid.uuid4). The unique string. All key values and ID's should be unique inside single project and can not be shared between frames\sequences.
* **Value** - returned by server integer identifier while uploading object / figure / sequence / tag
## Format of frame\_pointcloud\_map.json
This file stores mapping between point cloud files and annotation frames in the correct order.
```
{
"0" : "frame1.pcd",
"1" : "frame2.pcd",
"2" : "frame3.pcd"
}
```
**Keys** - frame order number\
**Values** - point cloud name (with extension)
## Photo context image annotation file
```
{
"name": "host-a005_cam4_1231201437716091006.jpeg",
"entityId": 2359620,
"meta": {
"deviceId": "CAM_BACK_LEFT",
"timestamp": "2019-01-11T03:23:57.802Z",
"sensorsData": {
"extrinsicMatrix": [
-0.8448329028461443,
-0.5350302199120708,
0.00017334762588639086,
-0.012363736761232369,
-0.0035124448582330757,
0.005222293412494302,
-0.9999801949951969,
-0.16621728572112304,
0.5350187183638307,
-0.8448167798004226,
-0.006291229448121315,
-0.3527897896721229
],
"intrinsicMatrix": [
882.42699274,
0,
602.047851885,
0,
882.42699274,
527.99972239,
0,
0,
1
]
}
}
}
```
**Fields description:**
* name - string - Name of image file
* entityId (OPTIONAL) - integer >= 1 ID of the Point Cloud in the system, that photo attached to. Doesn't required while uploading.
* deviceId - string - Device ID or name.
* timestamp - (OPTIONAL) - string - Time when the frame occurred in ISO 8601 format
* sensorsData - Sensors data such as Pinhole camera model parameters. See wiki: [Pinhole camera model](https://en.wikipedia.org/wiki/Pinhole_camera_model) and [OpenCV docs for 3D reconstruction](https://docs.opencv.org/2.4/modules/calib3d/doc/camera_calibration_and_3d_reconstruction.html).
* intrinsicMatrix - Array of number - 3x3 flatten matrix (dropped last zeros column) of intrinsic parameters in row-major order, also called camera matrix. It's used to denote camera calibration parameters. See [Intrinsic parameters](https://en.wikipedia.org/wiki/Camera_resectioning#Intrinsic_parameters).
* extrinsicMatrix - Array of number - 4x3 flatten matrix (dropped last zeros column) of extrinsic parameters in row-major order, also called joint rotation-translation matrix. It's used to denote the coordinate system transformations from 3D world coordinates to 3D camera coordinates. See [Extrinsic\_parameters](https://en.wikipedia.org/wiki/Camera_resectioning#Extrinsic_parameters).
## Photo context 2D figures file
This file is optional and only exists if the photo context image has figures on it. It is created upon downloading a pointclouds/pointcloud episodes project. You can also provide this file upon photocontext upload to load the figures to the server.
```json
[
{
"id": 8120872,
"classId": null,
"updatedAt": "2025-06-16T14:57:06.250Z",
"createdAt": "2025-06-16T14:56:51.786Z",
"entityId": 1018554,
"projectId": 1553,
"datasetId": 10812,
"meta": {},
"geometryType": "bitmap",
"geometry": {
"bitmap": {
"data": "eNpNWHk8lPv3N49nNGN9zAgVeTCWKMvtezP2B5OlorQqskxXKjuFss1TmhmU...",
"origin": [
135,
175
]
}
},
"geometryMeta": {
"bbox": [
175,
135,
374,
782
]
},
"tags": [],
"area": "71589",
"priority": 1,
"objectKey": "bd5680d6-76b6-4f13-a2ff-6da001144b27"
}
]
```
**Fields description:**
* `id` - integer - ID of the figure in the Supervisely platform.
* `classId` - integer - ID of the annotation class figure corresponds to.
* `entityId` - integer - ID of the photocontext image in the system, that figures are attached to.
* `projectId` - integer - ID of the project figure is created in.
* `datasetId` - integer - ID of the dataset figure is created in.
* `geometryType` - string - geometry shape name.
* `geometry` - data of the geometry, depends on the geometry shape.
* `geometryMeta` - field used to store geometry-related metadata, such as a bounding box of a bitmap.
* `area` - string - area of the geometry.
* `priority` - integer - priorty order of the geometry used for overlaying bitmaps.
* `tags` - list of tags attached to the figure.
* `objectKey` - string - UUID identifier of the object in a KeyMapID.
## Related apps
1\. [Import Point Cloud Project](https://ecosystem.supervisely.com/apps/import-pointcloud-project) app.
[](https://user-images.githubusercontent.com/97401023/193620195-6481801e-0fc5-4ac3-858f-cb3a294defac.png)
2\. [Export pointclouds project in Supervisely format](https://ecosystem.supervisely.com/apps/export-pointclouds-project-in-supervisely-format) app.
[](https://user-images.githubusercontent.com/97401023/193619296-df4ea2b2-e26c-42c2-b98a-bbe578c67fdb.png)
## Example projects
1\. [Demo pointcloud project](https://ecosystem.supervisely.com/projects/demo-pointcloud-project)
[](https://user-images.githubusercontent.com/97401023/193617265-431aa000-ae57-4beb-aa9b-8ba31d755b74.png)
2\. [Demo pointcloud project with labels](https://ecosystem.supervisely.com/projects/demo-pointcloud-project-annotated)
[](https://user-images.githubusercontent.com/97401023/193617359-2b929837-901e-4d98-92b8-cecb32d8f3af.png)
# Point Cloud Episode Annotation

## Project Structure Example
```
├── key_id_map.json (optional)
├── meta.json
├──
│ ├── annotation.json
│ ├── frame_pointcloud_map.json
│ ├── pointcloud
│ │ ├── scene_1.pcd
│ │ ├── scene_2.pcd
│ │ └── ...
│ └── related_images (optional)
│ ├── scene_1_pcd
│ │ ├── scene_1_cam0.png
│ │ ├── scene_1_cam0.png.json
│ │ ├── scene_1_cam0.png.figures.json (optional)
│ │ ├── scene_1_cam1.png
│ │ ├── scene_1_cam1.png.json
│ │ ├── scene_1_cam1.png.figures.json (optional)
│ │ └── ...
│ ├── scene_2_pcd
│ │ ├── scene_2_cam0.png
│ │ ├── scene_2_cam0.png.json
│ │ ├── scene_2_cam0.png.figures.json (optional)
│ │ ├── scene_2_cam1.png
│ │ ├── scene_2_cam1.png.json
│ │ ├── scene_2_cam1.png.figures.json (optional)
│ │ └── ...
│ └── ...
├──
│ ├── annotation.json
│ ├── frame_pointcloud_map.json
│ ├── pointcloud
│ │ ├── scene_1.pcd
│ │ └── ...
│ └── related_images (optional)
│ ├── scene_1_pcd
│ │ ├── scene_1_cam0.png
│ │ ├── scene_1_cam0.png.json
│ │ ├── scene_1_cam0.png.figures.json
│ │ └── ...
│ ├── scene_2_pcd
│ │ ├── scene_2_cam0.png
│ │ ├── scene_2_cam0.png.json
│ │ ├── scene_2_cam0.png.figures.json
│ │ └── ...
│ └── ...
└──
```
## Main concepts
**Point cloud Episodes Project**
Point cloud Episodes (PCE) Project consists of one or many sequences of frames. Each sequence is called an episode/dataset in Supervisely.
PCE also includes Sensor fusion feature that supports video camera sensor in the Labeling Tool UI.
**Project Meta (meta.json)**
Project Meta contains the essential information about the project - Classes and Tags. These are defined project-wide and can be used for labeling in every episode inside the current project.
**Episodes/Datasets (\, \, ...)**
Episodes are the second level folders inside the project, they host a sequence of frames (point clouds), related photo context (images) and annotations.
**Items/Point clouds (pointcloud)**
Every `.pcd` file in a sequence has to be stored inside a `pointcloud` folder of episodes.
| Key | Value |
| --- | --------------------------------------------------------- |
| x | The x coordinate of the point. |
| y | The y coordinate of the point. |
| z | The z coordinate of the point. |
| r | The red color channel component. An 8-bit value (0-255). |
| g | The green color channel component. An 8-bit value (0-255) |
| b | The blue color channel component. An 8-bit value (0-255) |
All the positional coordinates (x, y, z) are in meters. Supervisely supports all PCD encoding: ASCII, binary, binary\_compressed.
The PCD file format description can be found [here](https://pointclouds.org/documentation/tutorials/pcd_file_format.html)
**Items Annotation (annotation.json)**
Point cloud Episode Annotation contains the information for the entire episode including labels on all point clouds (frames) in the episode and objects. The mapping between frame numbers and point cloud names is specified in the file `frame_pointcloud_map.json` which guarantees the order.
An episode contains a list of objects that are used to track labels between frames. The list of objects is defined for the entire episode
Figures represent individual labels on frames. Label contains information about the geometry, frame number and object that it belongs to.
```json
[
{
"description": "",
"key": "e9f0a3ae21be41d08eec166d454562be",
"tags": [],
"objects": [
{
"key": "6663ca1d20c74bea83bd48c24568989d",
"classTitle": "car",
"tags": []
}],
"framesCount": 48,
"frames": [
{
"index": 0,
"figures": [
{
"key": "cb8e067dadfc423aa8575a0c4e62de33",
"objectKey": "6663ca1d20c74bea83bd48c24568989d",
"geometryType": "cuboid_3d",
"geometry": {
"position": {
"x": -10.863547325134277,
"y": -93.57706451416016,
"z": -4.598618030548096
},
"rotation": {
"x": 0,
"y": 0,
"z": 3.250733629393711
},
"dimensions": {
"x": 1.978,
"y": 4.607,
"z": 1.552
}
}
}
]
},
{
"index": 1,
"figures": [
{
"key": "71e0fe52dc4f4f6aaf059ad095f43c1f",
"objectKey": "6663ca1d20c74bea83bd48c24568989d",
"labelerLogin": "username",
"updatedAt": "2021-11-11T17:19:11.448Z",
"createdAt": "2021-11-11T16:53:03.670Z",
"geometryType": "cuboid_3d",
"geometry": {
"position": {
"x": -11.10418701171875,
"y": -91.33098602294922,
"z": -4.5446248054504395
},
"rotation": {
"x": 0,
"y": 0,
"z": 3.24780199600921
},
"dimensions": {
"x": 1.978,
"y": 4.607,
"z": 1.552
}
}
}
]
}
]
}
]
```
**Optional fields and loading** These fields are optional and are not needed when loading the project. The server can automatically fill in these fields while project is loading.
* `id` - unique identifier of the current object
* `classId` - unique class identifier of the current object
* `labelerLogin` - string - the name of user who created the current figure
* `createdAt` - string - date and time of figure creation
* `updatedAt` - string - date and time of the last figure update
Main idea of `key` fields and `id` you can see below in [Key id map file](#key-id-map-file) section.
**Fields definitions:**
* `description` - string - (optional) - this field is used to store the text to assign to the sequence.
* `key` - string, unique key for a given sequence (used in key\_id\_map.json to get the sequence ID)
* `tags` - list of strings that will be interpreted as episode tags
* `objects` - list of objects that may be present on the episode
* `frames` - list of frames of which the episode consists. List contains only frames with an object from the 'objects' field
* `index` - integer - number of the current frame
* `figures` - list of figures in the current frame.
* `framesCount` - integer - total number of frames in the episode
* `geometryType` - "cuboid\_3d" or other 3D geometry - class shape
**Fields definitions for `objects` field:**
* `key` - string - unique key for a given object (used in key\_id\_map.json)
* `classTitle` - string - the title of a class. It's used to identify the class shape from the `meta.json` file
* `tags` - list of strings that will be interpreted as object tags (can be empty)
**Fields description for `figures` field:**
* `key` - string - unique key for a given figure (used in key\_id\_map.json)
* `objectKey` - string - unique key to link figure to object (used in key\_id\_map.json)
* `geometryType` - "cuboid\_3d" or other 3D geometry -class shape
* `geometry` - geometry of the object
**Description for `geometry` field (cuboid\_3d):**
* `position` 3D vector of box center coordinates:
* **x** - forward in the direction of the object
* **y** - left
* **z** - up
* `dimensions` is a 3D vector that scales a cuboid from its local center along x,y,z:
* **x** - width
* **y** - length
* **z** - height
* `rotation` is a 3D Vector that rotates a cuboid along an axis in world space:
* **x** - pitch
* **y** - roll
* **z** - yaw (direction)
### Cuboid direction vector
Rotation values bound inside \[**-pi** ; **pi**] When `yaw = 0` box direction will be strict `+y`
## Key id map file
The basic idea behind key-id-map is that it maps the unique identifiers of entities from Supervisely to local entities keys. It is needed for such local data manipulations as cloning entities and reassigning relations between them. Examples of entities in `key_id_map.json`: datasets (videos/episodes), tags, objects, figures.
```json
{
"tags": {},
"objects": {
"198f727d40c749eebcacc4aed299b39a": 20520
},
"figures": {
"65f21690780e43b49863c3cbd07eab3a": 503130811
},
"videos": {
"e9f0a3ae21be41d08eec166d454562be": 42656
}
}
```
* `objects` - dictionary, where the key is a unique string, generated inside Supervisely environment to set mapping of current object in annotation, and values are unique integer ID related to the current object
* `figures` - dictionary, where the key is a unique string, generated inside Supervisely environment to set mapping of object on current frame in annotation, and values are unique integer ID related to the current frame
* `videos` - dictionary, where the key is unique string, generated inside Supervisely environment to set mapping of episode (dataset) in annotation, and value is a unique integer ID related to the current sequence
* `tags` - dictionary, where the keys are unique strings, generated inside Supervisely environment to set mapping of tag on current frame in annotation, and values are a unique integer ID related to the current tag
* **Key** - [generated by python3 function `uuid.uuid4().hex`](https://docs.python.org/3/library/uuid.html#uuid.uuid4). The unique string. All key values and id's should be unique inside single project and can not be shared between frames\sequences.
* **Value** - returned by server integer identifier while uploading object / figure / sequence / tag
## Format of frame\_pointcloud\_map.json
This file stores mapping between point cloud files and annotation frames in the correct order.
```json
{
"0" : "frame1.pcd",
"1" : "frame2.pcd",
"2" : "frame3.pcd"
}
```
**Keys** - frame order number\
**Values** - point cloud name (with extension)
## Photo context image annotation file
```json
{
"name": "host-a005_cam4_1231201437716091006.jpeg",
"entityId": 2359620,
"meta": {
"deviceId": "CAM_BACK_LEFT",
"timestamp": "2019-01-11T03:23:57.802Z",
"sensorsData": {
"extrinsicMatrix": [
-0.8448329028461443,
-0.5350302199120708,
0.00017334762588639086,
-0.012363736761232369,
-0.0035124448582330757,
0.005222293412494302,
-0.9999801949951969,
-0.16621728572112304,
0.5350187183638307,
-0.8448167798004226,
-0.006291229448121315,
-0.3527897896721229
],
"intrinsicMatrix": [
882.42699274,
0,
602.047851885,
0,
882.42699274,
527.99972239,
0,
0,
1
]
}
}
}
```
**Fields description:**
* name - string - Name of image file
* entityId (OPTIONAL) - integer >= 1 ID of the Point Cloud in the system, that photo attached to. Doesn't require while uploading.
* deviceId - string - Device ID or name.
* timestamp - (OPTIONAL) - string - Time when the frame occurred in ISO 8601 format
* sensorsData - Sensors data such as Pinhole camera model parameters. See wiki: [Pinhole camera model](https://en.wikipedia.org/wiki/Pinhole_camera_model) and [OpenCV docs for 3D reconstruction](https://docs.opencv.org/2.4/modules/calib3d/doc/camera_calibration_and_3d_reconstruction.html).
* intrinsicMatrix - Array of number - 3x3 flatten matrix (dropped last zeros column) of intrinsic parameters in row-major order, also called camera matrix. It's used to denote camera calibration parameters. See [Intrinsic parameters](https://en.wikipedia.org/wiki/Camera_resectioning#Intrinsic_parameters).
* extrinsicMatrix - Array of number - 4x3 flatten matrix (dropped last zeros column) of extrinsic parameters in row-major order, also called joint rotation-translation matrix. It's used to denote the coordinate system transformations from 3D world coordinates to 3D camera coordinates. See [Extrinsic\_parameters](https://en.wikipedia.org/wiki/Camera_resectioning#Extrinsic_parameters).
## Photo context 2D figures file
This file is optional and only exists if the photo context image has figures on it. It is created upon downloading a pointclouds/pointcloud episodes project. You can also provide this file upon photocontext upload to load the figures to the server.
```json
[
{
"id": 8120872,
"classId": null,
"updatedAt": "2025-06-16T14:57:06.250Z",
"createdAt": "2025-06-16T14:56:51.786Z",
"entityId": 1018554,
"projectId": 1553,
"datasetId": 10812,
"meta": {},
"geometryType": "bitmap",
"geometry": {
"bitmap": {
"data": "eNpNWHk8lPv3N49nNGN9zAgVeTCWKMvtezP2B5OlorQqskxXKjuFss1TmhmU...",
"origin": [
135,
175
]
}
},
"geometryMeta": {
"bbox": [
175,
135,
374,
782
]
},
"tags": [],
"area": "71589",
"priority": 1,
"objectKey": "bd5680d6-76b6-4f13-a2ff-6da001144b27"
}
]
```
**Fields description:**
* `id` - integer - ID of the figure in the Supervisely platform.
* `classId` - integer - ID of the annotation class figure corresponds to.
* `entityId` - integer - ID of the photocontext image in the system, that figures are attached to.
* `projectId` - integer - ID of the project figure is created in.
* `datasetId` - integer - ID of the dataset figure is created in.
* `geometryType` - string - geometry shape name.
* `geometry` - data of the geometry, depends on the geometry shape.
* `geometryMeta` - field used to store geometry-related metadata, such as a bounding box of a bitmap.
* `area` - string - area of the geometry.
* `priority` - integer - priorty order of the geometry used for overlaying bitmaps.
* `tags` - list of tags attached to the figure.
* `objectKey` - string - UUID identifier of the object in a KeyMapID.
## Related apps
1. [Import Supervisely point cloud episodes](https://ecosystem.supervise.ly/apps/import-pointcloud-episode) app.

1. [Export Supervisely point cloud episodes](https://ecosystem.supervise.ly/apps/export-pointcloud-episode) app.

## Example projects
1. [Demo LYFT 3D dataset annotated](https://app.supervise.ly/ecosystem/projects/demo-lyft-3d-dataset-annotated) - demo sample from [Lyft](https://level-5.global/data) dataset with labels.

1. [Demo LYFT 3D dataset](https://app.supervise.ly/ecosystem/projects/demo-lyft-3d-dataset) - demo sample from [Lyft](https://level-5.global/data) dataset without labels.

1. [Demo KITTI point cloud episodes annotated](https://app.supervise.ly/ecosystem/projects/demo-kitti-3d-episodes-annotated) - demo sample from [KITTI 3D](https://www.cvlibs.net/datasets/kitti/eval_tracking.php) dataset with labels.

1. [Demo KITTI point cloud episodes](https://app.supervise.ly/ecosystem/projects/demo-kitti-3d-episodes) - demo sample from [KITTI 3D](https://www.cvlibs.net/datasets/kitti/eval_tracking.php) dataset without labels.

# Volumes Annotation

## Project Structure Example
Root 📁 `project_name` folder named with the project name
* 📄 `meta.json` file
* 📄 `key_id_map.json` file (optional)
* 📁 `dataset_name` folders, each named with the dataset name and containing:
* 📁 `volume` folder, contains source volume files in [`.nrrd` file-format](https://teem.sourceforge.net/nrrd/index.html), for example `CTChest.nrrd`
* 📁 `ann` - folder, with annotations for volumes. (named as volume + `.json`) for example `CTChest.nrrd.json`
* 📁 `mask` optional folder, created automatically while downloading project.
* 📁 folders, named according to volume (`CTChest.nrrd`), which contains an additional data files with geometries for annotation objects of class type `Mask3D` stored in [NRRD file format](https://teem.sourceforge.net/nrrd/index.html), named with hex hash code of objects from key\_id\_map. For example: `daff638a423a4bcfa34eb12e42243a87.nrrd`
* 📁 `interpolation` ℹ️ optional folder, created automatically while downloading project.
* 📁 folders, named according to volume (`CTChest.nrrd`), which contains an additional data files in [STL file format](https://en.wikipedia.org/wiki/STL_\(file_format\)), named with hex hash code of objects from key\_id\_map. For example: `24a56a26ed784e648d3dd6c5186b46ca.stl`
ℹ️ - It is recommended to upload 3D objects as Mask3D and not to use STL. But if you already have a prepared STL file, all STL interpolations will be automatically converter to a Mask3D object during project upload.
## Format of Annotations
**Example:**
annotation JSON file - `/project_name/dataset_name/ann/CTChest.nrrd.json`
```json
{
"volumeMeta": {
"ACS": "RAS",
"intensity": {"max": 3071, "min": -3024},
"windowWidth": 6095,
"rescaleSlope": 1,
"windowCenter": 23.5,
"channelsCount": 1,
"dimensionsIJK": {"x": 512, "y": 512, "z": 139},
"IJK2WorldMatrix": [
0.7617189884185793, 0, 0, -194.238403081894,
0, 0.7617189884185793, 0, -217.5384061336518,
0, 0, 2.5, -347.7500000000001,
0, 0, 0, 1
],
"rescaleIntercept": 0
},
"key": "bfed5ee444d849118d7aabc350248cb8",
"tags": [],
"objects": [
{
"key": "f1f495a8e0a64fd7a63efbd78af8ef56",
"classTitle": "lung_bitmap",
"tags": [],
"labelerLogin": "username",
"createdAt": "2021-11-13T08:05:28.771Z",
"updatedAt": "2021-11-13T08:05:28.771Z"
},
{
"key": "9a0367647d6c48a6bc104a8b8b276adb",
"classTitle": "lung_rectangle",
"tags": []
},
{
"key": "6c1587f381bf419e9d5c2ebd5967e28f",
"classTitle": "lung_mask3d",
"tags": [],
"labelerLogin": "username",
"createdAt": "2021-11-13T08:05:28.771Z",
"updatedAt": "2021-11-13T08:05:28.771Z"
}
],
"planes": [
{
"name": "axial",
"normal": {
"x": 0,
"y": 0,
"z": 1
},
"slices": [
{
"index": 51,
"figures": [
{
"key": "4c68e29372ef4e3a9c87a233ffabd3dd",
"objectKey": "f1f495a8e0a64fd7a63efbd78af8ef56",
"geometryType": "bitmap",
"geometry": {
"bitmap": {
"data": "eJwBp ... AADUlIRFIAAACeA==",
"origin": [
156,
275
]
}
},
"labelerLogin": "username",
"createdAt": "2021-11-13T08:05:28.771Z",
"updatedAt": "2021-11-13T08:05:28.771Z"
}
]
},
{
"index": 68,
"figures": [
{
"key": "9bddbbceaa6646cf894e80d3bffd7a55",
"objectKey": "9a0367647d6c48a6bc104a8b8b276adb",
"description": "",
"geometryType": "rectangle",
"geometry": {
"points": {
"exterior":[[305, 380], [167, 256]],
"interior": []
}
}
}
]
}
]
}
],
"spatialFigures": [
{
"key": "daff638a423a4bcfa34eb12e42243a87",
"objectKey": "6c1587f381bf419e9d5c2ebd5967e28f",
"geometryType": "mask_3d",
"geometry": {
"mask_3d": {
"data": "H4sIAGW9OmUC ... CYAE1Nj5QMACwC",
"space_origin": [194, 218, -348]
},
"shape": "mask_3d",
"geometryType": "mask_3d"
},
"labelerLogin": "username",
"updatedAt": "2021-11-13T08:05:28.771Z",
"createdAt": "2021-11-13T08:05:28.771Z"
}
]
}
```
### Annotation JSON fields definitions:
* `volumeMeta` - metadata for 3D reconstruction of volume
* `key` - string - a unique identifier of given object represented as `UUID.hex` value (used in `key_id_map.json` to get the object ID)
* `tags` - list of strings that will be interpreted as volume tags
* `objects` - list of objects that may be present on the volume
* `planes` - a list of figures that defined in these planes: [`coronal, sagittal, axial`](https://www.slicer.org/wiki/Coordinate_systems#Anatomical_coordinate_system)
* `spatialFigures` - list of 3D figures may be present as the volume annotation
#### `volumeMeta` fields description:
* `ACS` - string - "RAS" or "LPS" - name of type of [Anatomical coordinate system](https://www.slicer.org/wiki/Coordinate_systems#Anatomical_coordinate_system) i.e. RAS means is Right-Anterior-Superior
```
╔════════╦════════════╗
║ Common ║ Anatomical ║
╠════════╬════════════╣
║ Left ║ Left ║
║ Right ║ Right ║
║ Up ║ Superior ║
║ Down ║ Inferior ║
║ Front ║ Anterior ║
║ Back ║ Posterior ║
╚════════╩════════════╝
```
* `intensity` - `{"min": int, "max": int}` - intensity range. Depends on the device getting the data
* `windowWidth` - float - Specify a linear conversion. Window Width contains the width of the window
* `windowCenter` - float - Specify a linear conversion. Window Center contains the value that is the center of the window
* `channelsCount` - float - channel count of your image data. Default: 1
* `dimensionsIJK` - dict {"x": int, "y": int, "z": int} - dimensions of volume described as vector in [IJK notation](https://en.wikipedia.org/wiki/Unit_vector)
* `IJK2WorldMatrix` - matrix to transform coordinates from IJK to world (Cartesian). See [here](https://www.slicer.org/wiki/Coordinate_systems#Image_transformation)
Grayscale transformations to be applied to Pixel Data are defined by the equivalent of the Modality LUT and Rescale Intercept, Value of Interest Attributes, Photometric Interpretation and the equivalent of the Presentation LUT.
`units = m*SV + b`
* `rescaleSlope` - float - m in the equation specified by Rescale Intercept
* `rescaleIntercept` - float - The value "b" in the relationship between stored values (SV) in Pixel Data and the output units specified in Rescale Type.
#### `objects` fields description:
* `key` - string - a unique identifier of given object represented as `UUID.hex` value (used in `key_id_map.json` to get the object ID)
* `classTitle` - string - the title of a class. It's used to identify the class shape from the `meta.json` file
* `tags` - list of strings that will be interpreted as object tags
* `labelerLogin` - string - the name of the user that added this figure to the project
* `updatedAt` - string - the date and time when the `object` was updated (ISO 8601 format)
* `createdAt` - string - the date and time when the `object` was updated (ISO 8601 format)
#### `planes` fields description:
* `name` - string - the name of the plane, where the figures are placed. Can be [coronal, sagittal or axial](https://www.slicer.org/wiki/Coordinate_systems#Anatomical_coordinate_system)

* `normal` - dict with x, y, z as keys and 0/1 as values - normal is direction by axis, chosen according to plane name
* sagittal - x
* coronal - y
* axial - z
The value is binary `(int 0 or 1)` and one plane must be selected.
* `slices` - list of slices on the plane. Each list contain index and may contain figures.
#### `slices` fields description:
* `index` - int value of slice index
* `figures` - list of figures placed on slice. It can be [bitmap](/getting-started/supervisely-annotation-format/objects#bitmap) or [rectangle](/getting-started/supervisely-annotation-format/objects#rectangle).
#### `spatialFigures` fields description
This list contains 3D objects of type [Mask3D](/getting-started/supervisely-annotation-format/objects#mask3d-3d-annotation)
* `key` - string - unique key for a given figure (used in `key_id_map.json`)
* `objectKey` - string - unique key to link figure to object (used in `key_id_map.json`)
* `geometryType` - `mask_3d` or other 3D geometry-class shape
* `geometry` - geometry of the object
## NRRD files in `mask` folder
These files contain geometry for 3D annotation objects, every file name must be the same as figure key to which it belongs.
Example:
`/project_name/dataset_name/mask/CTChest.nrrd/daff638a423a4bcfa34eb12e42243a87.nrrd` connected with spatial figure `"key": "daff638a423a4bcfa34eb12e42243a87"`
Definitions for its fields can be found [here](https://teem.sourceforge.net/nrrd/format.html)
## Key id map file
`/project_name/key_id_map.json` file is optional. It is created when annotating the volume inside Supervisely interface and sets the correspondence between the unique identifiers of the object and the volume on which the figure is located. If you annotate manually, you do not need to create this file. This will not affect the work being done.
JSON file format of `key_id_map.json`:
```json
{
"tags": {},
"objects": {
"198f727d40c749eebcacc4aed299b39a": 20520
},
"figures": {
"65f21690780e43b49863c3cbd07eab3a": 503130811
},
"videos": {
"e9f0a3ae21be41d08eec166d454562be": 42656
}
}
```
* `objects` - dictionary, where the key is a unique string, generated inside Supervisely environment to set mapping of current object in annotation, and value is unique integer ID related to the current object
* `figures` - dictionary, where the key is a unique string, generated inside Supervisely environment to set mapping of object on volume in annotation, and value is unique integer ID related to the current volume
* `videos` - dictionary, where the key is unique string, generated inside Supervisely environment to set mapping of volumes in annotation, and value is a unique integer ID related to the current volume
* `tags` - dictionary, where the keys are unique strings, generated inside Supervisely environment to set mapping of tag on current volume in annotation, and value is a unique integer ID related to the current tag
* **Key** - generated by [python3 function `uuid.uuid4().hex`](https://docs.python.org/3/library/uuid.html#uuid.uuid4). The unique string. All key and ID values should be unique inside single project and can not be shared between entities.
* **Value** - returned by server integer identifier while uploading object / figure / volume / tag.
# Python SDK tutorials
# Images
# Images
## Introduction
In this tutorial we will focus on working with images using Supervisely SDK.
You will learn how to:
1. [upload images from local directory to Supervisely dataset.](#upload-images-from-local-directory-to-supervisely)
2. [upload images to Supervisely as NumPy matrix.](#upload-images-as-numpy-matrix)
3. [get information about images by id or name.](#get-information-about-images)
4. [download images from Supervisely to local directory.](#download-images-to-local-directory)
5. [download images from Supervisely as NumPy matrix.](#download-images-as-rgb-numpy-matrix)
6. [get and update image metadata](#get-and-update-image-metadata)
7. [remove images from Supervisely.](#remove-images-from-supervisely)
8. [custom image sorting for Image Labeling Toolbox](#custom-image-sorting-for-image-labeling-toolbox)
📗 Everything you need to reproduce [this tutorial is on GitHub](https://github.com/supervisely-ecosystem/tutorial-image): source code and demo data.
## How to debug this tutorial
**Step 1.** Prepare `~/supervisely.env` file with credentials. [Learn more here.](/getting-started/basics-of-authentication)
**Step 2.** Clone [repository](https://github.com/supervisely-ecosystem/tutorial-image) with source code and demo data and create [Virtual Environment](https://docs.python.org/3/library/venv.html).
```
git clone https://github.com/supervisely-ecosystem/tutorial-image.git
cd tutorial-image
./create_venv.sh
```
**Step 3.** Open repository directory in Visual Studio Code.
```
code -r .
```
**Step 4.** Change workspace ID in `local.env` file by copying the ID from the context menu of the workspace.
```
WORKSPACE_ID=654 # ⬅️ change value
```
**Step 5.** Start debugging `src/main.py`.
### Import libraries
```python
import os
from dotenv import load_dotenv
import supervisely as sly
```
### Init API client
First, we load environment variables with credentials and init API for communicating with Supervisely Instance.
```python
if sly.is_development():
load_dotenv("local.env")
load_dotenv(os.path.expanduser("~/supervisely.env"))
api = sly.Api()
```
### Get variables from environment
In this tutorial, you will need an workspace ID that you can get from environment variables. [Learn more here](/getting-started/environment-variables#workspace_id)
```python
workspace_id = sly.env.workspace_id()
```
### Create new project and dataset
Create new project.
**Source code:**
```python
project = api.project.create(workspace_id, "Fruits", change_name_if_conflict=True)
print(f"Project ID: {project.id}")
```
**Output:**
```python
# Project ID: 15599
```
Create new dataset.
**Source code:**
```python
dataset = api.dataset.create(project.id, "Fruits ds1")
print(f"Dataset ID: {dataset.id}")
```
**Output:**
```python
# Dataset ID: 53465
```
## Upload images from local directory to Supervisely
### Upload single image.
**Source code:**
```python
original_dir = "src/images/original"
path = os.path.join(original_dir, "lemons.jpg")
meta = {"my-field-1": "my-value-1", "my-field-2": "my-value-2"}
image = api.image.upload_path(
dataset.id,
name="Lemons",
path=path,
meta=meta # optional
)
print(f'Image "{image.name}" uploaded to Supervisely with ID:{image.id}')
```
**Output:**
```python
# Image "Lemons.jpeg" uploaded to Supervisely platform with ID:17539453
```
### Upload list of images.
✅ Supervisely API allows uploading multiple images in a single request. The code sample below sends fewer requests and it leads to a significant speed-up of our original code.
**Source code:**
```python
names = [
"grapes-1.jpg",
"grapes-2.jpg",
"oranges-2.jpg",
"oranges-1.jpg",
]
paths = [os.path.join(original_dir, name) for name in names]
upload_info = api.image.upload_paths(dataset.id, names, paths)
print(f"{len(upload_info)} images successfully uploaded to Supervisely platform")
```
**Output:**
```python
# 4 images successfully uploaded to Supervisely platform
```
## Upload images as NumPy matrix
### Single image
**Source code:**
```python
img_np = sly.image.read(path)
np_image_info = api.image.upload_np(dataset.id, name="Lemons-np.jpeg", img=img_np)
print(f"Image successfully uploaded as NumPy matrix to Supervisely (ID: {np_image_info.id})")
```
**Output:**
```python
# Image successfully uploaded as NumPy matrix to Supervisely (ID: 17539458)
```
### Upload list of images
**Source code:**
```python
names_np = [f"np-{name}" for name in names]
images_np = [sly.image.read(img_path) for img_path in paths]
np_images_info = api.image.upload_nps(dataset.id, names_np, images_np)
print(f"{len(images_np)} images successfully uploaded to platform as NumPy matrix")
```
**Output:**
```python
# 4 images successfully uploaded to platform as NumPy matrix
```
## Get information about images
### Single image
Get information about image from Supervisely by id.
**Source code:**
```python
image_info = api.image.get_info_by_id(image.id)
print(image_info)
```
**Output:**
```python
# ImageInfo(
# id=17539453,
# name='Lemons.jpeg',
# link=None,
# hash='0jirgXvKGTJ8Yi0I9nCdf9MllQ9jP3Les1fD7/dt+Zk=',
# mime='image/jpeg',
# ext='jpeg',
# size=66066,
# width=640,
# height=427,
# labels_count=0,
# dataset_id=54008,
# created_at='2022-12-23T15:57:35.707Z',
# updated_at='2022-12-23T15:57:35.707Z',
# meta={},
# path_original='nAXBxaxQJRARr0Ljkj6FfREj1Fq89.jpg',
# full_storage_url='https://dev.supervisely.com/h5unublic/images/original/3/e/OK/d8Y7NnEj1Fq89.jpg',
# tags=[]
# )
```
You can also get information about image from Supervisely by name.
**Source code:**
```python
image_name = get_file_name(image.name)
image_info_by_name = api.image.get_info_by_name(dataset.id, image_name)
print(f"image name - {image_info_by_name.name}")
```
**Output:**
```python
# image name - Lemons.jpeg
```
### Get all images from dataset.
Get information about image from Supervisely by id.
**Source code:**
```python
image_info_list = api.image.get_list(dataset.id)
print(f"{len(image_info_list)} images information received.")
```
**Output:**
```python
# 10 images information received.
```
## Download images to local directory
### Single image
Download image from Supervisely to local directory by id.
**Source code:**
```python
save_path = os.path.join(result_dir, image_info.name)
api.image.download_path(image_info.id, save_path)
print(f"Image has been successfully downloaded to '{save_path}'")
```
**Output:**
```python
# Image has been successfully downloaded to 'src/images/result/Lemons.jpeg'
```
### Download list of images to local directory
Download list of images from Supervisely to local directory by ids.
**Source code:**
```python
image_ids = [img.id for img in image_info_list]
image_names = [img.name for img in image_info_list]
save_paths = [os.path.join(result_dir, img_name) for img_name in image_names]
api.image.download_paths(dataset.id, image_ids, save_paths)
print(f"{len(image_info_list)} images has been successfully downloaded.")
```
**Output:**
```python
# 10 images has been successfully downloaded.
```
## Download images as RGB NumPy matrix
### Single image
Download image from Supervisely to local directory by id.
**Source code:**
```python
image_np = api.image.download_np(image_info.id)
print(f"Image downloaded as RGB NumPy matrix. Image shape: {image_np.shape}")
```
**Output:**
```python
# Image downloaded as RGB NumPy matrix. Image shape: (427, 640, 3)
```
### Download list of images as RGB NumPy matrix
Download list of images from Supervisely to local directory by ids.
**Source code:**
```python
image_np = api.image.download_nps(dataset.id, image_ids)
print(f"{len(image_np)} images downloaded in RGB NumPy matrix.")
```
**Output:**
```python
# 10 images downloaded in RGB NumPy matrix.
```
## Get and update image metadata
### Get image metadata from server
**Source code:**
```python
image_info = api.image.get_info_by_id(image.id)
meta = image_info.meta
print(meta)
```
**Output:**
```python
# {'my-field-1': 'my-value-1', 'my-field-2': 'my-value-2'}
```
### Update image metadata
**Source code:**
```python
new_meta = {"my-field-3": "my-value-3", "my-field-4": "my-value-4"}
new_image_info = api.image.update_meta(id=image.id, meta=new_meta)
print(new_image_info["meta"])
```
**Output:**
```python
# {'my-field-3': 'my-value-3', 'my-field-4': 'my-value-4'}
```
### Get metadata in Image labeling toolbox
You can also get image metadata in Image labeling toolbox interface
## Remove images from Supervisely
### Remove one image.
Remove image from Supervisely by id
**Source code:**
```python
api.image.remove(image.id)
print(f"Image (ID: {image.id}) successfully removed")
```
**Output:**
```python
# Image (ID: 17539453) successfully removed
```
### Remove list of images.
Remove list of images from Supervisely by ids.
**Source code:**
```python
images_to_remove = api.image.get_list(dataset.id)
remove_ids = [img.id for img in images_to_remove]
api.image.remove_batch(remove_ids)
print(f"{len(remove_ids)} images successfully removed.")
```
**Output:**
```python
# 9 images successfully removed.
```
## Custom image sorting for Image Labeling Toolbox
To enhance the usability of working with images in the Image Labeling Toolbox, a custom sorting parameter can be added for project images. This parameter will define the order of images in the interface list.
1. Sort button
2. Sorting parameter
### Upload list of images with added custom sorting parameter
The best and fastest way to accomplish this is to use context manager `ImageApi.add_custom_sort` This context manager allows you to set the `sort_by` attribute of `ImageApi` object for the duration of the context, then delete it. If nested functions support this functionality, each image they process will automatically receive a custom sorting parameter based on the available meta object.\
Currently, almost all image uploading methods support this functionality. Methods that support it have a corresponding description in the docstring.
**Source code:**
```python
original_dir = "src/images/original"
names = ["Oranges 1", "Oranges 2"]
paths = [os.path.join(original_dir, "oranges-1.jpg"), os.path.join(original_dir, "oranges-2.jpg")]
metas = [{"key-1": "a", "my-key": "b"}, {"key-1": "c", "my-key": "f"}]
with api.image.add_custom_sort(key="my-key"):
image_infos = api.image.upload_paths(
dataset.id,
names=names,
paths=paths,
metas=metas
)
for i in image_infos:
print(f"{i.name}: {i.meta}")
```
**Output:**
```python
# Oranges 1.jpeg: {'key-1': 'a', 'my-key': 'b', 'customSort': 'b'}
# Oranges 2.jpeg: {'key-1': 'c', 'my-key': 'f', 'customSort': 'f'}
```
### Upload whole images project in Supervisely format with added custom sorting parameter
It is also recommended to use a context manager for uploading the entire project. The only difference from the previous point is that there is no need to pass meta in dictionaries. It can be stored either in image info files or in meta files within the project structure. To learn more about the project structure and its files, see the [Project Structure](/getting-started/supervisely-annotation-format/project-structure) section.
**Source code:**
```python
from supervisely.project.upload import upload
project_dir = "src/images_project"
project_name = "Project with Sorting"
with api.image.add_custom_sort(key="my-key"):
upload(project_dir, api, workspace_id, project_name)
project_info = api.project.get_info_by_name(workspace_id, project_name)
dataset_info = api.dataset.get_list(project_info.id)[0]
images_infos = api.image.get_list(dataset_info.id)
for i in images_infos:
print(f"{i.name}: {i.meta}")
```
**Output:**
```python
# oranges-2.jpg: {'my-key': '5', 'customSort': '5'}
# oranges-1.jpg: {'my-key': '4', 'customSort': '4'}
# grapes-2.jpg: {'my-key': '1', 'customSort': '1'}
# lemons.jpg: {'my-key': '5', 'customSort': '5'}
# grapes-1.jpg: {'my-key': '2', 'customSort': '2'}
```
### Add custom sorting parameter to meta object
Here are several ways to modify meta for images
#### 1. Add parameter to meta dict and update meta on server
**Source code:**
```python
meta = {"key-1": "a", "my-key": "b"}
new_meta = api.image.update_custom_sort(meta, "sort-value")
new_image_info = api.image.update_meta(id=images_infos[0].id, meta=new_meta)
print(new_image_info["meta"])
```
**Output:**
```python
# {'key-1': 'a', 'my-key': 'b', 'customSort': 'sort-value'}
```
#### 2. Set directly on server
**Source code:**
```python
api.image.set_custom_sort(new_image_info["id"], "new-sort-value")
updated_image_info = api.image.get_info_by_id(new_image_info["id"])
print(updated_image_info.meta)
```
**Output:**
```python
# {'key-1': 'a', 'my-key': 'b', 'customSort': 'new-sort-value'}
```
#### 3. Set directly on server in bulk
Same as the previous case, but for more than one image
**Source code:**
```python
image_ids = [image.id for image in images_infos]
sort_values = ["1st", "2nd", "3rd", "4th", "5th"]
api.image.set_custom_sort_bulk(image_ids, sort_values)
images_infos = api.image.get_list(dataset_info.id)
for i in images_infos:
print(f"{i.name}: {i.meta}")
```
**Output:**
```python
# oranges-2.jpg: {'key-1': 'a', 'my-key': 'b', 'customSort': '1st'}
# oranges-1.jpg: {'my-key': '4', 'customSort': '2nd'}
# grapes-2.jpg: {'my-key': '1', 'customSort': '3rd'}
# lemons.jpg: {'my-key': '5', 'customSort': '4th'}
# grapes-1.jpg: {'my-key': '2', 'customSort': '5th'}
```
# Image and object tags
How to tag image and object using Supervisely SDK
## Introduction
In this tutorial we will be focusing on working with tags using Supervisely SDK. We'll go through complete cycle from creating TagMeta in project to assigning Tags to images and objects directly.
You will learn:
1. how to create tags for different tasks and scenarios with various parameters.
2. how to create tags (`sly.TagMeta`) in project
3. how to assign tags (`sly.Tag`) to images and objects
📗 Everything you need to reproduce [this tutorial is on GitHub](https://github.com/supervisely-ecosystem/tutorial-working-with-tags): source code and demo data.
## How to debug this tutorial
**Step 1.** Prepare `~/supervisely.env` file with credentials. [Learn more here.](/getting-started/basics-of-authentication#how-to-use-in-python)
**Step 2.** Clone [repository](https://github.com/supervisely-ecosystem/tutorial-working-with-tags) with source code and demo data and create [Virtual Environment](https://docs.python.org/3/library/venv.html).
```
git clone https://github.com/supervisely-ecosystem/tutorial-working-with-tags
cd tutorial-working-with-tags
./create_venv.sh
```
**Step 3.** Open repository directory in Visual Studio Code.
```
code -r .
```
**Step 4.** Get [**Lemons (Annotated)**](https://ecosystem.supervisely.com/projects/lemons-annotated) project from ecosystem. Lemons (Annotated) is an example project with annotated lemons and kiwi fruits, with 6 images in it.
**Step 5.** change ✅ project ID ✅ in `local.env` file by copying the ID from the context menu of the project.
```
PROJECT_ID=111 # ⬅️ change value
```
**Step 6.** Start debugging `src/main.py`
## **Part 1.** Tag Meta
### Import libraries
```python
import os
from dotenv import load_dotenv
import supervisely as sly
```
### Init API client
Init API for communicating with Supervisely Instance. First, we load environment variables with credentials and project ID:
```python
load_dotenv("local.env")
load_dotenv(os.path.expanduser("~/supervisely.env"))
api = sly.Api()
```
### Create Tag Meta
TagMeta object contains general information about Tag. In order to create Tag itself you must create TagMeta object (information about tags that we will create and assign to images or objects) with parameters such as:
* name (required) - name of the Tag.
* value\_type (required)- restricts Tag to have a certain value type. Available value types:
* NONE = "none"
* ANY\_STRING = "any\_string"
* ANY\_NUMBER = "any\_number"
* ONEOF\_STRING = "oneof\_string"
* DATE = "date"
* possible\_values (required if value type is "oneof\_string") - list of possible Tag values.
* color (optional) - color of the Tag, must be an RGB value, if not specified, random color will be generated.
* applicable\_to (optional) - defines if Tag can be assigned to only images, to only objects or both. By default tag can be assigned to both images and objects.
* applicable\_classes (optional) - defines applicability of Tag only to certain classes. List of strings (class names).
Let's start with creating a simple TagMeta for showcasing, it can be applied to both images and objects, and also to any class. We won't use it for our project later. Tags with value type "none" can be used as "train" and "val" tags for example.
```python
tag_meta = sly.TagMeta(
name="simple_tag",
value_type=sly.TagValueType.NONE
)
print(tag_meta)
# Name: simple_tag
# Value type: none
# Possible values: None
# Hotkey
# Applicable to all
# Applicable classes []
```
Let's make this TagMeta applicable only to images. We can recreate TagMeta with additional parameters. Most supervisely classes are immutable, so you have to assign or reassign them to variables.
```python
tag_meta = sly.TagMeta(
name="simple_tag",
value_type=sly.TagValueType.NONE,
applicable_to=sly.TagApplicableTo.IMAGES_ONLY
)
print(tag_meta)
# Name: simple_tag
# Value type: none
# Possible values: None
# Hotkey
# Applicable imagesOnly
# Applicable classes []
```
Now let's create a few TagMetas with different value types that we will apply to our project.
We can start with creating fruit name TagMeta with "any\_string" value type. This Tag can be assigned only to objects of classes "lemon" and "kiwi".
```python
fruit_name_tag_meta = sly.TagMeta(
name="name",
applicable_to=sly.TagApplicableTo.OBJECTS_ONLY,
value_type=sly.TagValueType.ANY_STRING,
applicable_classes=["lemon", "kiwi"]
)
print(fruit_name_tag_meta)
# Name: name
# Value type: any_string
# Possible values: None
# Hotkey
# Applicable to objectsOnly
# Applicable classes ["lemon", "kiwi"]
```
Create fruit size TagMeta with "oneof\_string" value type. This Tag can be assigned only to objects of any classes and has possible values.
```python
fruit_size_tag_meta = sly.TagMeta(
name="size",
applicable_to=sly.TagApplicableTo.OBJECTS_ONLY,
value_type=sly.TagValueType.ONEOF_STRING,
possible_values=["small", "medium", "big"]
)
print(fruit_size_tag_meta)
# Name: size
# Value type: oneof_string
# Possible values: ["small", "medium", "big"]
# Hotkey
# Applicable to objectsOnly
# Applicable classes []
```
Now we create a TagMeta with "any\_string" value type to enter the origin of the fruit into it. This Tag can be assigned only to objects of classes "lemon" and "kiwi".
```python
fruit_origin_tag_meta = sly.TagMeta(
name="imported_from",
value_type=sly.TagValueType.ANY_STRING,
applicable_to=sly.TagApplicableTo.OBJECTS_ONLY,
applicable_classes=["lemon", "kiwi"]
)
print(fruit_origin_tag_meta)
# Name: imported_from
# Value type: any_string
# Possible values: None
# Hotkey
# Applicable to objectsOnly
# Applicable classes ["lemon", "kiwi"]
```
And one more TagMeta with "any\_number" value type for counting total fruits on image. This Tag is applicable only to images.
```python
fruits_count_tag_meta = sly.TagMeta(
name="fruits_count",
value_type=sly.TagValueType.ANY_NUMBER,
applicable_to=sly.TagApplicableTo.IMAGES_ONLY
)
print(fruits_count_tag_meta)
# Name: fruits_count
# Value type: any_number
# Possible values: None
# Hotkey
# Applicable to imagesOnly
# Applicable classes []
```
Create a TagMeta with "date" value type to record a review timestamp. Value must be an ISO 8601 date-time string. `possible_values` cannot be used with this type.
```python
reviewed_at_tag_meta = sly.TagMeta(
name="reviewed_at",
value_type=sly.TagValueType.DATE,
applicable_to=sly.TagApplicableTo.IMAGES_ONLY
)
print(reviewed_at_tag_meta)
# Name: reviewed_at
# Value type: date
# Possible values: None
# Hotkey
# Applicable to imagesOnly
# Applicable classes []
```
Bring all created TagMetas together in a list
```python
tag_metas = [fruit_name_tag_meta, fruit_size_tag_meta, fruit_origin_tag_meta, fruits_count_tag_meta, reviewed_at_tag_meta]
```
## **Part 2.** Add TagMetas to project
Get project meta from server
```python
project_id = sly.env.project_id()
project_meta_json = api.project.get_meta(id=project_id)
project_meta = sly.ProjectMeta.from_json(data=project_meta_json)
```
Check that created Tag Metas don't already exist in project meta, and if not, add them to project meta.
```python
for tag_meta in tag_metas:
if tag_meta not in project_meta.tag_metas:
project_meta = project_meta.add_tag_meta(new_tag_meta=tag_meta)
```
Update project meta on Supervisely instance after adding Tag Metas to project meta.
```python
api.project.update_meta(id=project_id, meta=project_meta)
```
## **Part 3.** Create Tags and update annotation on server
```python
# get list of datasets in our project
datasets = api.dataset.get_list(project_id)
dataset_ids = [dataset.id for dataset in datasets]
# iterate over all images in project datasets
for dataset_id in dataset_ids:
# get list of images in dataset
images_infos = api.image.get_list(dataset_id=dataset_id)
for image_info in images_infos:
# get image id from image info
image_id = image_info.id
# download annotation
ann_json = api.annotation.download_json(image_id=image_id)
ann = sly.Annotation.from_json(data=ann_json, project_meta=project_meta)
# create and assign Tag to image
fruits_count_tag = sly.Tag(meta=fruits_count_tag_meta, value=len(ann.labels))
ann = ann.add_tag(fruits_count_tag)
# iterate over objects in annotation and assign appropriate tag
new_labels = []
for label in ann.labels:
new_label = None
if label.obj_class.name == "lemon":
name_tag = sly.Tag(meta=fruit_name_tag_meta, value="lemon")
size_tag = sly.Tag(meta=fruit_size_tag_meta, value="medium")
origin_tag = sly.Tag(meta=fruit_origin_tag_meta, value="Spain")
new_label = label.add_tags([name_tag, size_tag, origin_tag])
elif label.obj_class.name == "kiwi":
name_tag = sly.Tag(meta=fruit_name_tag_meta, value="kiwi")
size_tag = sly.Tag(meta=fruit_size_tag_meta, value="small")
origin_tag = sly.Tag(meta=fruit_origin_tag_meta, value="Italy")
new_label = label.add_tags([name_tag, size_tag, origin_tag])
if new_label:
new_labels.append(new_label)
# update and upload ann to Supervisely instance
ann = ann.clone(labels=new_labels)
api.annotation.upload_ann(img_id=image_id, ann=ann)
```
## Retrieve images with object tags of interest
Sometimes, you may need to filter your images to retrieve only those that feature specific tags or meet certain criteria.
The code snippet below demonstrates how to get images featuring objects with multiple tags attached:
```python
target_imageids = []
# Iterate over each dataset
for dataset in api.dataset.get_list(project_id):
# Get only images that contain object tags
filters = [{"type": "objects_tag", "data": {"include": True}}]
images = api.image.get_filtered_list(dataset.id, filters)
# Iterate over images in batches
for batch_infos in sly.batched(images, batch_size=500):
batch_ids = [info.id for info in batch_infos]
# Download annotations for batch images
ann_infos = api.annotation.download_batch(dataset.id, batch_ids)
# Extract image ID if any object on an image contains more than 1 tag
for ann_info in ann_infos:
ann = sly.Annotation.from_json(ann_info.annotation, project_meta)
if any([len(label.tags) > 1 for label in ann.labels]):
target_imageids.append(ann_info.image_id)
print(target_imageids)
# [31927, 31933, 31968, 32009, 32155, 32366]
```
## Advanced API
Advanced API allows user to manage tags directly on images or objects without downloading annotation data from server.
Get project meta again after updating it with new tags.
```python
project_meta_json = api.project.get_meta(id=project_id)
project_meta = sly.ProjectMeta.from_json(data=project_meta_json)
```
### Create TagCollection from image Tags without downloading annotation
Get image id from image info (see [part 3](#part-3.-create-tags-and-update-annotation-on-server))
```python
image_id = image_info.id
```
Get image tags
```python
image_tags = image_info.tags
print(f"{image_info.name} tags: {image_tags}")
# IMG_1836.jpeg tags:
# [
# {
# 'entityId': 3315606,
# 'tagId': 369190,
# 'id': 2298259,
# 'value': 3,
# 'labelerLogin': 'cxnt',
# 'createdAt': '2022-10-04T15:43:12.155Z',
# 'updatedAt': '2022-10-04T15:43:12.155Z'
# }
# ]
```
Create TagCollection from image tags
```python
tag_collection = sly.TagCollection().from_api_response(
data=image_tags, tag_meta_collection=project_meta.tag_metas
)
print(tag_collection)
# +--------------+------------+-------+
# | Name | Value type | Value |
# +--------------+------------+-------+
# | fruits_count | any_number | 3 |
# +--------------+------------+-------+
```
### Add Tag directly to image
Get image tag ID from project meta
```python
fruits_count_tag_meta = project_meta.get_tag_meta("fruits_count")
```
Add Tag to image using Tag supervisely ID from project meta
```python
api.image.add_tag(image_id=image_id, tag_id=fruits_count_tag_meta.sly_id, value=3)
```
### Add Tags to objects directly
```python
ann_json = api.annotation.download_json(image_id=image_id)
ann = sly.Annotation.from_json(data=ann_json, project_meta=project_meta)
# iterate over objects in annotation and add appropriate tag
for label in ann.labels:
# get figure sly id
figure_id = label.geometry.sly_id
# get tag sly id
tag_meta = project_meta.get_tag_meta("imported_from")
if label.obj_class.name == "lemon":
api.advanced.add_tag_to_object(tag_meta_id=tag_meta.sly_id, figure_id=figure_id, value="Spain")
elif label.obj_class.name == "kiwi":
api.advanced.add_tag_to_object(tag_meta_id=tag_meta.sly_id, figure_id=figure_id, value="Italy")
```
### Add Tag to set of images
With api.image.add\_tag\_batch() method you can add a tag to a list of images without need to update annotation of each image one by one.
```python
# get tag meta from project meta
tag_meta = project_meta.get_tag_meta("fruits")
# create a list of images ids from images infos
image_ids = [image_info.id for image_info in images_infos]
# get tag meta id
tag_meta_id = tag_meta.sly_id
# update tags in batches.
api.image.add_tag_batch(image_ids, tag_meta_id, value=None, tag_meta=tag_meta)
```
# Spatial labels on images
How to create bounding boxes, polygons, masks, points and polylines in Python
## Introduction
In this tutorial, you will learn how to programmatically create classes and labels of different shapes and upload them to Supervisely platform. Supervisely supports different types of shapes / geometries for image annotation:
* bounding box (rectangle)
* polygon
* multipolygon
* mask (also known as bitmap)
* polyline
* point
* keypoints (also known as graph, skeleton, landmarks) - will be covered in other tutorials
* cuboids - will be covered in other tutorials
Learn more [about Supervisely Annotation JSON format here](https://github.com/supervisely/developer-portal/tree/main/getting-started/python-sdk-tutorials/images/broken-reference/README.md).


{% hint style="info" %}
Everything you need to reproduce [this tutorial is on GitHub](https://github.com/supervisely-ecosystem/spatial-labels): source code, Visual Studio Code configuration, and a shell script for creating virtual env.
{% endhint %}
## How to debug this tutorial
**Step 1.** Prepare `~/supervisely.env` file with credentials. [Learn more here.](https://developer.supervisely.com/getting-started/python-sdk-tutorials/images/pages/2TS0DqIIblacweum1NCW#use-.env-file-recommended)
**Step 2.** Clone [repository](https://github.com/supervisely-ecosystem/spatial-labels) with source code and demo data and create [Virtual Environment](https://docs.python.org/3/library/venv.html).
```bash
git clone https://github.com/supervisely-ecosystem/spatial-labels
cd spatial-labels
./create_venv.sh
```
**Step 3.** Open repository directory in Visual Studio Code.
```bash
code -r .
```
**Step 4.** change ✅ workspace ID ✅ in `local.env` file by copying the ID from the context menu of the workspace. A new project with annotated images will be created in the workspace you define:
```python
WORKSPACE_ID=506 # ⬅️ change value
```

**Step 5.** Start debugging `src/main.py`

## Python Code
### Import libraries
```python
import os
import cv2
import supervisely as sly
from dotenv import load_dotenv
```
### Init API client
Init api for communicating with Supervisely Instance. First, we load environment variables with credentials and workspace ID:
```python
load_dotenv("local.env")
load_dotenv(os.path.expanduser("~/supervisely.env"))
api = sly.Api.from_env()
```
With next lines we will check the you did everything right - API client initialized with correct credentials and you defined the correct workspace ID in `local.env`.
```python
workspace_id = sly.env.workspace_id()
workspace = api.workspace.get_info_by_id(workspace_id)
if workspace is None:
print("you should put correct workspaceId value to local.env")
raise ValueError(f"Workspace with id={workspace_id} not found")
```
### Create project
Create empty project with name **"Demo"** with one dataset **"berries"** in your workspace on server. If the project with the same name exists in your dataset, it will be automatically renamed (Demo\_001, Demo\_002, etc ...) to avoid name collisions.
```python
project = api.project.create(workspace.id, name="Demo", change_name_if_conflict=True)
dataset = api.dataset.create(project.id, name="berries")
print(f"Project has been sucessfully created, id={project.id}")
```
### Create annotation classes
```python
strawberry = sly.ObjClass("strawberry", sly.Rectangle, color=[0, 0, 255])
raspberry = sly.ObjClass("raspberry", sly.Polygon, color=[0, 255, 0])
blackberry = sly.ObjClass("blackberry", sly.Bitmap, color=[255, 255, 0])
berry_center = sly.ObjClass("berry_center", sly.Point, color=[0, 255, 255])
separator = sly.ObjClass("separator", sly.Polyline) # color will be generated randomly
```
Color will be automatically generated if the class was created without `color` argument.
The next step is to create ProjectMeta - a collection of annotation classes and tags that will be available for labeling in the project.
```python
project_meta = sly.ProjectMeta(
obj_classes=[strawberry, raspberry, blackberry, berry_center, separator]
)
```
And finally, we need to set up classes in our project on server:
```python
api.project.update_meta(project.id, project_meta.to_json())
```
### Create rectangle
Strawberry will be labeled with a bounding box.
```python
bbox = sly.Rectangle(top=127, left=1726, bottom=1087, right=2560)
label1 = sly.Label(geometry=bbox, obj_class=strawberry)
```
### Create polygon
Raspberry will be labeled with a polygon.
```python
polygon = sly.Polygon(
exterior=[
[941, 663],
[976, 874],
[934, 1096],
[819, 1196],
[698, 1228],
[527, 1081],
[439, 1090],
[331, 980],
[359, 808],
[452, 698],
[549, 612],
[762, 564],
[879, 605],
]
)
label2 = sly.Label(geometry=polygon, obj_class=raspberry)
```
### Create masks
Every blackberry will be labeled with a mask. So we are going to create three masks from the following black and white images:
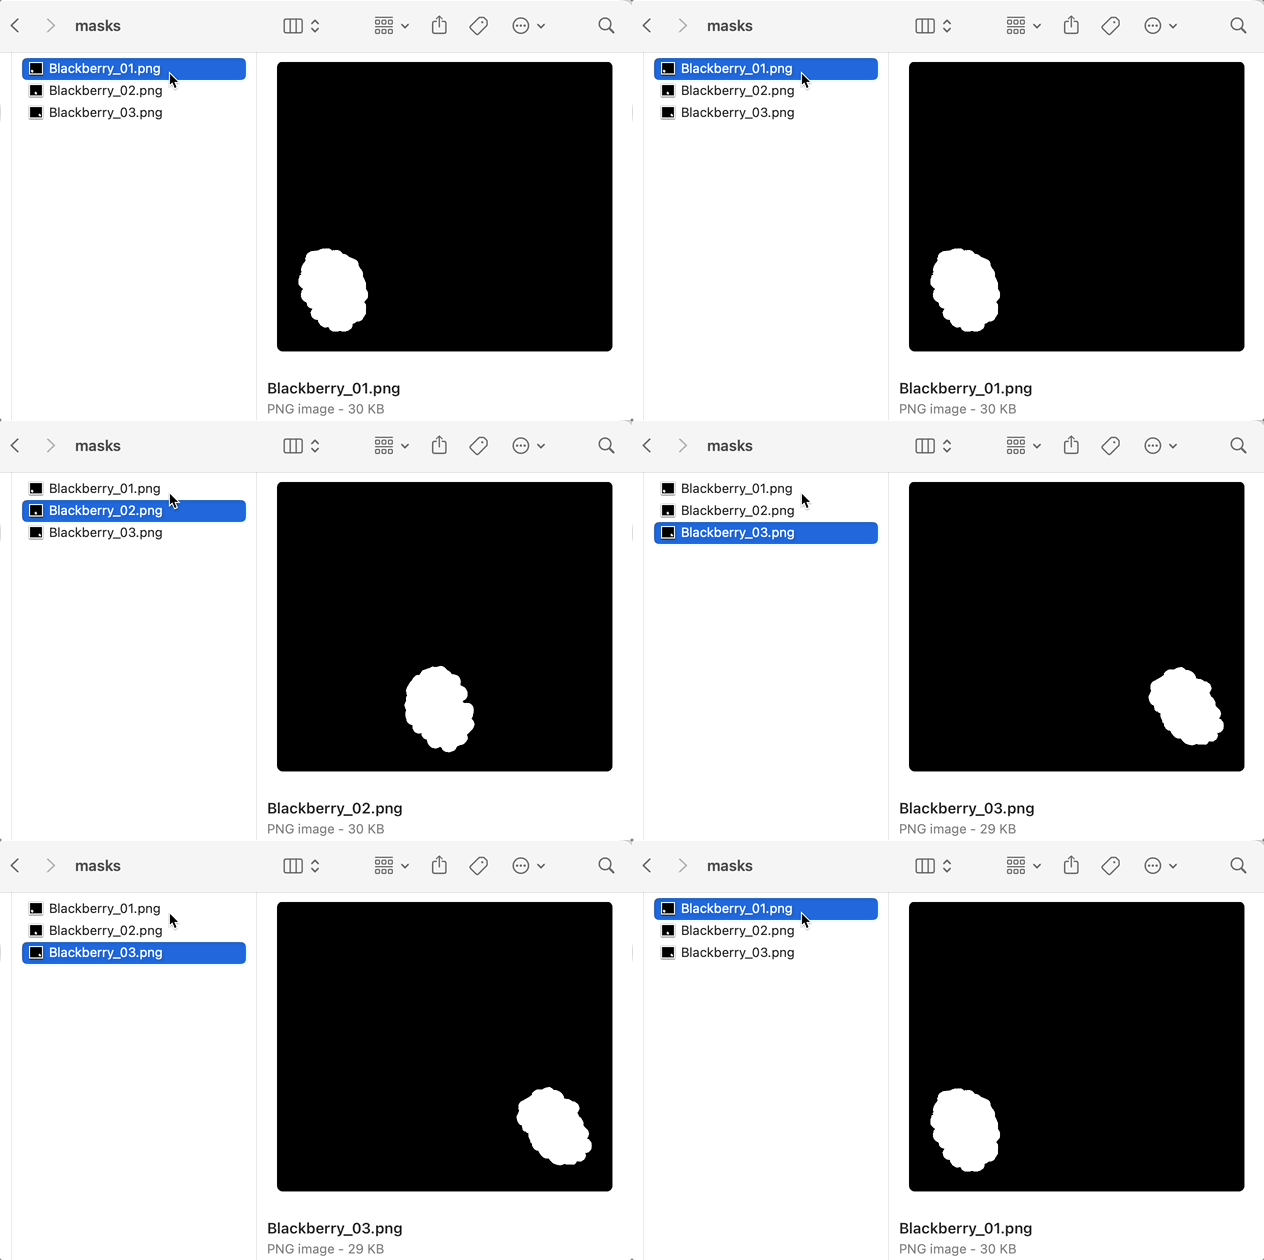
Supervisely SDK allows creating masks from NumPy arrays with the following values:
* `0` - nothing, `1` - pixels of target mask
* `0` - nothing, `255` - pixels of target mask
* `False` - nothing, `True` - pixels of target mask
{% hint style="info" %}
Mask has to be the same size as the image
{% endhint %}
```python
labels_masks = []
for mask_path in [
"data/masks/Blackberry_01.png",
"data/masks/Blackberry_02.png",
"data/masks/Blackberry_03.png",
]:
# read only first channel of an image
image_black_and_white = cv2.imread(mask_path)[:, :, 0]
# supports masks with values (0, 1) or (0, 255) or (False, True)
mask = sly.Bitmap(image_black_and_white)
label = sly.Label(geometry=mask, obj_class=blackberry)
labels_masks.append(label)
```
### Create image annotation
```python
image_path = "data/berries-01.jpg"
height, width = cv2.imread(image_path).shape[0:2]
# result image annotation
all_labels = [label1, label2]
all_labels.extend(labels_masks)
ann = sly.Annotation(img_size=[height, width], labels=all_labels)
```
### Upload image with annotation
Upload image to the dataset on server:
```python
image_name = sly.fs.get_file_name_with_ext(image_path)
image_info = api.image.upload_path(dataset.id, image_name, image_path)
print(f"Image has been sucessfully uploaded, id={image_info.id}")
```
Upload annotation to the image on server:
```python
api.annotation.upload_ann(image_info.id, ann)
print(f"Annotation has been sucessfully uploaded to the image {image_name}")
```
### Create points
Let's create points for every berry on the second image and place them to the centers of the berries.
```python
labels_points = []
for [row, col] in [
[1313, 313],
[1714, 1061],
[1318, 1851],
[554, 1912],
[190, 808],
[941, 1094],
]:
point = sly.Point(row, col)
label = sly.Label(geometry=point, obj_class=berry_center)
labels_points.append(label)
```
### Create polyline
```python
polyline = sly.Polyline(
[[883, 443], [1360, 803], [1395, 1372], [928, 1676], [458, 1372], [552, 554]]
)
label_line = sly.Label(geometry=polyline, obj_class=separator)
```
### Upload the second image with annotation
```python
image_path = "data/berries-02.jpg"
height, width = cv2.imread(image_path).shape[0:2]
# result image annotation
ann = sly.Annotation(img_size=[height, width], labels=[*labels_points, label_line])
# upload image to the dataset on server
image_name = sly.fs.get_file_name_with_ext(image_path)
image_info = api.image.upload_path(dataset.id, image_name, image_path)
print(f"Image has been sucessfully uploaded, id={image_info.id}")
# upload annotation to the image on server
api.annotation.upload_ann(image_info.id, ann)
print(f"Annotation has been sucessfully uploaded to the image {image_name}")
```
In the [GitHub repository for this tutorial](https://github.com/supervisely-ecosystem/spatial-labels), you will find the [full python script](https://github.com/supervisely-ecosystem/spatial-labels/blob/master/src/main.py).
## Recap
In this tutorial we learned how to
* quickly configure python development for Supervisely
* how to create a project and dataset with classes of different shapes
* how to initialize rectangles, masks, polygons, polylines, and points
* how to construct Supervisely annotation and upload it with an image to server
# Multipolygons
How to create, upload, download, draw, and split Multipolygon labels in Python SDK
## Introduction
In this tutorial, you will learn how to work with `sly.Multipolygon` in Supervisely Python SDK. Multipolygon is useful when one label must contain several separate polygon parts, for example one building group, one road island object, or one instance split into disconnected visible regions.
You will learn how to:
1. Create a `Multipolygon` from several `Polygon` objects.
2. Add a Multipolygon class to project meta.
3. Upload an image annotation with a Multipolygon label.
4. Download and deserialize the annotation.
5. Draw the label locally.
6. Convert a Multipolygon label into separate Polygon labels.
{% hint style="info" %}
Supervisely Python SDK version `6.74.10` or newer is required.
{% endhint %}
## Prepare credentials
Prepare `~/supervisely.env` with credentials and load it before creating the API client.
```python
import os
from dotenv import load_dotenv
import supervisely as sly
load_dotenv(os.path.expanduser("~/supervisely.env"))
api = sly.Api.from_env()
```
## Create a project and class
```python
workspace_id = sly.env.workspace_id()
project = api.project.create(
workspace_id,
name="Multipolygon tutorial",
change_name_if_conflict=True,
)
dataset = api.dataset.create(project.id, name="ds0")
buildings = sly.ObjClass(
name="building_group",
geometry_type=sly.Multipolygon,
color=[255, 0, 121],
)
meta = sly.ProjectMeta(obj_classes=[buildings])
api.project.update_meta(project.id, meta.to_json())
```
## Create a Multipolygon
A Multipolygon is created from two or more polygon parts. Each part can have its own holes.
```python
part_1 = sly.Polygon(
exterior=[
[80, 80],
[80, 220],
[220, 220],
[220, 80],
]
)
part_2 = sly.Polygon(
exterior=[
[280, 100],
[280, 250],
[450, 250],
[450, 100],
],
interior=[
[
[330, 145],
[330, 195],
[390, 195],
[390, 145],
]
],
)
multipolygon = sly.Multipolygon([part_1, part_2])
label = sly.Label(multipolygon, buildings)
```
## Upload image and annotation
```python
image_path = "data/city.jpg"
image_info = api.image.upload_path(dataset.id, "city.jpg", image_path)
image_np = sly.image.read(image_path)
annotation = sly.Annotation(img_size=image_np.shape[:2], labels=[label])
api.annotation.upload_ann(image_info.id, annotation)
```
## Download and deserialize annotation
```python
meta_json = api.project.get_meta(project.id)
meta = sly.ProjectMeta.from_json(meta_json)
ann_info = api.annotation.download(image_info.id)
ann = sly.Annotation.from_json(ann_info.annotation, meta)
downloaded_label = ann.labels[0]
downloaded_geometry = downloaded_label.geometry
print(type(downloaded_geometry).__name__)
print(len(downloaded_geometry.parts))
```
## Draw Multipolygon locally
```python
canvas = image_np.copy()
ann.draw_pretty(canvas, thickness=3)
sly.image.write("multipolygon_preview.jpg", canvas)
```
## Convert Multipolygon to polygons
Use `Label.convert()` when you need one Polygon label per Multipolygon part.
```python
polygon_class = sly.ObjClass("building_part", sly.Polygon, color=[0, 255, 0])
polygon_labels = downloaded_label.convert(polygon_class)
print(len(polygon_labels))
print([type(label.geometry).__name__ for label in polygon_labels])
```
You can also get polygon geometries directly:
```python
polygons = downloaded_geometry.to_polygons()
```
## JSON structure
In Supervisely annotation JSON, Multipolygon uses `geometryType: "multipolygon"` and stores parts in the `parts` field.
```json
{
"classTitle": "building_group",
"description": "",
"geometryType": "multipolygon",
"tags": [],
"parts": [
{
"exterior": [[80, 80], [220, 80], [220, 220], [80, 220]],
"interior": []
},
{
"exterior": [[280, 100], [450, 100], [450, 250], [280, 250]],
"interior": [
[[330, 145], [390, 145], [390, 195], [330, 195]]
]
}
]
}
```
## Recap
In this tutorial, you created a Multipolygon class, uploaded and downloaded a Multipolygon label, rendered it locally, and converted it into separate Polygon labels.
# Keypoints (skeletons)
How to create keypoints annotation in Python using Supervisely
## Introduction
In this tutorial we will show you how to use sly.GraphNodes class to create data annotation for pose estimation / keypoints detection task. The tutorial illustrates basic upload-download scenario:
* create project and dataset on server
* upload image
* programmatically create annotation and upload it to image
* download image and annotation
ℹ️ Everything you need to reproduce [this tutorial is on GitHub](https://github.com/supervisely-ecosystem/keypoints-labeling-example): source code, Visual Studio Code configuration, and a shell script for creating virtual env.
## How to debug this tutorial
**Step 1.** Prepare `~/supervisely.env` file with credentials. [Learn more here.](/getting-started/basics-of-authentication)
**Step 2.** Clone [repository](https://github.com/supervisely-ecosystem/keypoints-labeling-example) with source code and demo data and create [Virtual Environment](https://docs.python.org/3/library/venv.html).
```bash
git clone https://github.com/supervisely-ecosystem/keypoints-labeling-example
cd keypoints-labeling-example
./create_venv.sh
```
**Step 3.** Open repository directory in `Visual Studio Code`
```bash
code -r .
```
**Step 4.** Start debugging `src/main.py`

## Python Code
## Importing Necessary Libraries
Import necessary libraries:
```python
import supervisely as sly
from supervisely.geometry.graph import Node, KeypointsTemplate
import os
import json
from dotenv import load_dotenv
```
Before we will start creating our project, let's learn how to create keypoints template - we are going to use it in our project.
## Working With Keypoints Template
We will need an image to create and visualize our keypoints template.
Image for building keypoints template:

Create keypoints template:
```python
# initialize template
template = KeypointsTemplate()
# add nodes
template.add_point(label="nose", row=635, col=427)
template.add_point(label="left_eye", row=597, col=404)
template.add_point(label="right_eye", row=685, col=401)
template.add_point(label="left_ear", row=575, col=431)
template.add_point(label="right_ear", row=723, col=425)
template.add_point(label="left_shoulder", row=502, col=614)
template.add_point(label="right_shoulder", row=794, col=621)
template.add_point(label="left_elbow", row=456, col=867)
template.add_point(label="right_elbow", row=837, col=874)
template.add_point(label="left_wrist", row=446, col=1066)
template.add_point(label="right_wrist", row=845, col=1073)
template.add_point(label="left_hip", row=557, col=1035)
template.add_point(label="right_hip", row=743, col=1043)
template.add_point(label="left_knee", row=541, col=1406)
template.add_point(label="right_knee", row=751, col=1421)
template.add_point(label="left_ankle", row=501, col=1760)
template.add_point(label="right_ankle", row=774, col=1765)
# add edges
template.add_edge(src="left_ankle", dst="left_knee")
template.add_edge(src="left_knee", dst="left_hip")
template.add_edge(src="right_ankle", dst="right_knee")
template.add_edge(src="right_knee", dst="right_hip")
template.add_edge(src="left_hip", dst="right_hip")
template.add_edge(src="left_shoulder", dst="left_hip")
template.add_edge(src="right_shoulder", dst="right_hip")
template.add_edge(src="left_shoulder", dst="right_shoulder")
template.add_edge(src="left_shoulder", dst="left_elbow")
template.add_edge(src="right_shoulder", dst="right_elbow")
template.add_edge(src="left_elbow", dst="left_wrist")
template.add_edge(src="right_elbow", dst="right_wrist")
template.add_edge(src="left_eye", dst="right_eye")
template.add_edge(src="nose", dst="left_eye")
template.add_edge(src="nose", dst="right_eye")
template.add_edge(src="left_eye", dst="left_ear")
template.add_edge(src="right_eye", dst="right_ear")
template.add_edge(src="left_ear", dst="left_shoulder")
template.add_edge(src="right_ear", dst="right_shoulder")
```
Visualize your keypoints template:
```python
template_img = sly.image.read("images/girl.jpg")
template.draw(image=template_img, thickness=7)
sly.image.write("images/template.jpg", template_img)
```

#### Explore Keypoints Template in JSON Format
You can also transfer your template to json:
```python
template_json = template.to_json()
```
Click to see the example of template in json format
```json
{
"nodes": {
"nose": {
"label": "nose",
"loc": [635, 427],
"color": "#0000FF"
},
"left_eye": {
"label": "left_eye",
"loc": [597, 404],
"color": "#0000FF"
},
"right_eye": {
"label": "right_eye",
"loc": [685, 401],
"color": "#0000FF"
},
"left_ear": {
"label": "left_ear",
"loc": [575, 431],
"color": "#0000FF"
},
"right_ear": {
"label": "right_ear",
"loc": [723, 425],
"color": "#0000FF"
},
"left_shoulder": {
"label": "left_shoulder",
"loc": [502, 614],
"color": "#0000FF"
},
"right_shoulder": {
"label": "right_shoulder",
"loc": [794, 621],
"color": "#0000FF"
},
"left_elbow": {
"label": "left_elbow",
"loc": [456, 867],
"color": "#0000FF"
},
"right_elbow": {
"label": "right_elbow",
"loc": [837, 874],
"color": "#0000FF"
},
"left_wrist": {
"label": "left_wrist",
"loc": [446, 1066],
"color": "#0000FF"
},
"right_wrist": {
"label": "right_wrist",
"loc": [845, 1073],
"color": "#0000FF"
},
"left_hip": {
"label": "left_hip",
"loc": [557, 1035],
"color": "#0000FF"
},
"right_hip": {
"label": "right_hip",
"loc": [743, 1043],
"color": "#0000FF"
},
"left_knee": {
"label": "left_knee",
"loc": [541, 1406],
"color": "#0000FF"
},
"right_knee": {
"label": "right_knee",
"loc": [751, 1421],
"color": "#0000FF"
},
"left_ankle": {
"label": "left_ankle",
"loc": [501, 1760],
"color": "#0000FF"
},
"right_ankle": {
"label": "right_ankle",
"loc": [774, 1765],
"color": "#0000FF"
}
},
"edges": [
{
"src": "left_ankle",
"dst": "left_knee",
"color": "#00FF00"
},
{
"src": "left_knee",
"dst": "left_hip",
"color": "#00FF00"
},
{
"src": "right_ankle",
"dst": "right_knee",
"color": "#00FF00"
},
{
"src": "right_knee",
"dst": "right_hip",
"color": "#00FF00"
},
{
"src": "left_hip",
"dst": "right_hip",
"color": "#00FF00"
},
{
"src": "left_shoulder",
"dst": "left_hip",
"color": "#00FF00"
},
{
"src": "right_shoulder",
"dst": "right_hip",
"color": "#00FF00"
},
{
"src": "left_shoulder",
"dst": "right_shoulder",
"color": "#00FF00"
},
{
"src": "left_shoulder",
"dst": "left_elbow",
"color": "#00FF00"
},
{
"src": "right_shoulder",
"dst": "right_elbow",
"color": "#00FF00"
},
{
"src": "left_elbow",
"dst": "left_wrist",
"color": "#00FF00"
},
{
"src": "right_elbow",
"dst": "right_wrist",
"color": "#00FF00"
},
{
"src": "left_eye",
"dst": "right_eye",
"color": "#00FF00"
},
{
"src": "nose",
"dst": "left_eye",
"color": "#00FF00"
},
{
"src": "nose",
"dst": "right_eye",
"color": "#00FF00"
},
{
"src": "left_eye",
"dst": "left_ear",
"color": "#00FF00"
},
{
"src": "right_eye",
"dst": "right_ear",
"color": "#00FF00"
},
{
"src": "left_ear",
"dst": "left_shoulder",
"color": "#00FF00"
},
{
"src": "right_ear",
"dst": "right_shoulder",
"color": "#00FF00"
}
]
}
```
{% hint style="success" %}
Now, when we have successfully created keypoints template, we can start creating keypoints annotation for our project.
{% endhint %}
## Programmatically Create Keypoints Annotation
Authenticate (learn more [here](/getting-started/basics-of-authentication)):
```python
load_dotenv(os.path.expanduser('~/supervisely.env'))
api = sly.Api.from_env()
my_teams = api.team.get_list()
team = my_teams[0]
workspace = api.workspace.get_list(team.id)[0]
```
Input image:

Create project and dataset:
```python
project = api.project.create(workspace.id, "Human Pose Estimation", change_name_if_conflict=True)
dataset = api.dataset.create(project.id, "Person with dog", change_name_if_conflict=True)
print(f"Project {project.id} with dataset {dataset.id} are created")
```
Now let's create annotation class using our keypoints template as a geometry config (unlike other supervisely geometry classes, sly.GraphNodes requires geometry config to be passed - it is necessary for object class initialization):
```python
person = sly.ObjClass("person", geometry_type=sly.GraphNodes, geometry_config=template)
project_meta = sly.ProjectMeta(obj_classes=[person])
api.project.update_meta(project.id, project_meta.to_json())
```
You can also go to Supervisely platform and check that class with shape "Keypoints" was successfully added to your project:

Upload image:
```python
image_info = api.image.upload_path(
dataset.id, name="person_with_dog.jpg", path="images/person_with_dog.jpg"
)
```
Build keypoints graph:
```python
nodes = [
sly.Node(label="nose", row=146, col=670),
sly.Node(label="left_eye", row=130, col=644),
sly.Node(label="right_eye", row=135, col=701),
sly.Node(label="left_ear", row=137, col=642),
sly.Node(label="right_ear", row=142, col=705),
sly.Node(label="left_shoulder", row=221, col=595),
sly.Node(label="right_shoulder", row=226, col=738),
sly.Node(label="left_elbow", row=335, col=564),
sly.Node(label="right_elbow", row=342, col=765),
sly.Node(label="left_wrist", row=429, col=555),
sly.Node(label="right_wrist", row=438, col=784),
sly.Node(label="left_hip", row=448, col=620),
sly.Node(label="right_hip", row=451, col=713),
sly.Node(label="left_knee", row=598, col=591),
sly.Node(label="right_knee", row=602, col=715),
sly.Node(label="left_ankle", row=761, col=573),
sly.Node(label="right_ankle", row=766, col=709),
]
```
Label the image:
```python
input_image = sly.image.read("images/person_with_dog.jpg")
img_height, img_width = input_image.shape[:2]
label = sly.Label(sly.GraphNodes(nodes), person)
ann = sly.Annotation(img_size=[img_height, img_width], labels=[label])
api.annotation.upload_ann(image_info.id, ann)
```
You can check that keypoints annotation was successfully created in Annotation Tool:

Download data:
```python
image = api.image.download_np(image_info.id)
ann_json = api.annotation.download_json(image_info.id)
```
Draw annotation:
```python
ann = sly.Annotation.from_json(ann_json, project_meta)
output_path = "images/person_with_dog_labelled.jpg"
ann.draw_pretty(image, output_path=output_path, thickness=7)
```
Result:

# Multispectral images
## Introduction
In this tutorial, you will learn how to import multispectral images to Supervisely using Python SDK and get the advantage of the grouped view in the labeling interface, which allows you to synchronize the view, zooming, panning, and labeling of images in one group.
{% hint style="info" %}
You can also import multispectral images using [Import Multispectral Images](https://ecosystem.supervisely.com/apps/import-multispectral-images) app from Supervisely Ecosystem.
{% endhint %}
You will learn how to:
1. [Upload an image as channels](#upload-an-image-as-channels)
2. [Upload a multichannel tiff image as channels](#upload-a-multichannel-tiff-image-as-channels)
3. [Upload nrrd image as channels](#upload-nrrd-image-as-channels)
4. [Upload a pair of RGB and thermal images without splitting them into channels](#upload-a-pair-of-rgb-and-thermal-images-without-splitting-them-into-channels)
5. [Upload RGB image, its channels and depth image](#upload-rgb-image-its-channels-and-depth-image)
6. [Upload grayscale and UV images](#upload-grayscale-and-uv-images)
7. [Upload RGB image, thermal image and channels of thermal image](#upload-rgb-image-thermal-image-and-channels-of-thermal-image)
8. [Upload RGB image and two MRI images](#upload-rgb-image-and-two-mri-images)
For the [advanced level](#advanced-use-supervisely-format-for-multispectral-images), you can use supervisely annotation JSON format to download and upload projects with multispectral images.
{% hint style="info" %}
Everything you need to reproduce [this tutorial is on GitHub](https://github.com/supervisely-ecosystem/import-multispectral-images-tutorial): source code and additional app files.
{% endhint %}
## How to debug this tutorial
**Step 1.** Prepare `~/supervisely.env` file with credentials. [Learn more here.](/getting-started/basics-of-authentication)
**Step 2.** Clone the [repository](https://github.com/supervisely-ecosystem/import-multispectral-images-tutorial) with source code and demo data and create a [Virtual Environment](https://docs.python.org/3/library/venv.html).
```
git clone https://github.com/supervisely-ecosystem/import-multispectral-images-tutorial.git
cd import-multispectral-images-tutorial
sh create_venv.sh
```
**Step 3.** Open the repository directory in Visual Studio Code.
```
code -r .
```
**Step 4.** Change the Team ID and Workspace ID in the `main.py` file by copying the ID from the context menu.
```python
team_id = 448
workspace_id = 690
```
**Step 5.** Start debugging `src/main.py`.
{% hint style="info" %}
Supervisely instance version >= 6.8.54\
Supervisely SDK version >= 6.72.201\\
In the tutorial, Supervisely Python SDK version is not directly defined in the requirements.txt. But when developing your app, we recommend defining the SDK version in the requirements.txt.
{% endhint %}
### Import libraries
```python
import cv2
import os
import tifffile
import supervisely as sly
import nrrd
from dotenv import load_dotenv
```
### Enter your Team ID and Workspace ID
```python
team_id = 448
workspace_id = 690
```
### Init API client
```python
load_dotenv(os.path.expanduser("~/supervisely.env"))
api = sly.Api.from_env()
```
### Create a new project and dataset
```python
project = api.project.create(workspace_id, "Multispectral images", change_name_if_conflict=True)
dataset = api.dataset.create(project.id, "ds0")
```
### Set multispectral settings for the project
To enable grouping of images, including view, zooming, panning and labeling, you need to set multispectral settings for the project. You can do it with just one line of code:
```python
api.project.set_multispectral_settings(project.id)
```
And now we're ready to upload images.
## How to upload multispectral images
In this tutorial, we'll be using the `api.image.upload_multispectral` method to upload images to Supervisely.
```python
def upload_multispectral(
dataset_id: int,
image_name: str,
channels: Optional[List[np.ndarray]] = None,
rgb_images: Optional[List[str]] = None,
) -> List[ImageInfo]:
```
| Parameters | Type | Description |
| :---------: | :---------------------------------: | :--------------------------------------------------------: |
| dataset\_id | int | ID of the dataset to upload |
| image\_name | str | Name of the image will be used as name of the images group |
| channels | Optional\[List\[np.ndarray]] = None | List of channels as 2d numpy arrays. |
| rgb\_images | Optional\[List\[str]] = None | List of paths to RGB images. |
So, the method uploads images (which can be passed as channels or RGB images) to Supervisely and returns a list of `ImageInfo` objects. RGB images as paths or channels as NumPy arrays can be passed to the method or both at the same time. The result will be a group of images in both cases.
{% hint style="info" %}
Below, you will find examples of different ways to load multispectral data. However, it is important to note that you can group the images in any way you like: split them into channels, load them as a whole, or both at the same time. It is entirely up to you.
{% endhint %}
### Upload an image as channels
**Input:** 1 RGB image in PNG format.\
**Output:** 3 images in a group with the name `demo1.png` in Supervisely.\\

```python
image_name = "demo1.png"
image = cv2.imread(f"demo_data/{image_name}")
# Extract channels as 2d numpy arrays: channels = [a, b, c]
channels = [image[:, :, i] for i in range(image.shape[2])]
image_infos = api.image.upload_multispectral(dataset.id, image_name, channels)
```
We'll do this operation for other cases too, so let's take a closer look at the code:
1. The `image_name` will be used as a group name in the labeling interface and it can be any string.
2. Then we read the image from the disk using OpenCV.
3. Now we're splitting the image into channels, and preparing a list of channels as NumPy arrays.
4. Finally, we upload the channels to Supervisely using the `api.image.upload_multispectral` method.
5. The method returns a list of `ImageInfo` objects, which contain information about the uploaded images. Learn more about `ImageInfo` [here](https://supervisely.readthedocs.io/en/latest/sdk/supervisely.api.image_api.ImageInfo.html).
So, those are the steps we'll be doing for all the other cases.
### Upload a multichannel tiff image as channels
**Input:** 1 multichannel tiff image.\
**Output:** 7 images in a group with the name `demo2.tif` in Supervisely.\\

```python
image_name = "demo2.tif"
image = tifffile.imread(f"demo_data/{image_name}")
# Extract channels as 2d numpy arrays: channels = [a, b, c, d, e, f]
channels = [image[:, :, i] for i in range(image.shape[2])]
image_infos = api.image.upload_multispectral(dataset.id, image_name, channels)
```
### Upload nrrd image as channels
{% hint style="info" %}
In this tutorial, we'll be uploading the channels of nrrd image as separate images. But Supervisely supports high-dimensional nrrd images, so you can upload them as is without splitting them into channels.
{% endhint %}
**Input:** 1 nrrd image.\
**Output:** 7 images in a group with the name `demo3.nrrd` in Supervisely.\\

```python
image_name = "demo3.nrrd"
image, header = nrrd.read(f"demo_data/{image_name}")
# Extract channels as 2d numpy arrays: channels = [a, b, c, d, e, f]
channels = [image[:, :, i] for i in range(image.shape[2])]
image_infos = api.image.upload_multispectral(dataset.id, image_name, channels)
```
### Upload a pair of RGB and thermal images without splitting them into channels
**Input:** 1 RGB image and 1 thermal image in PNG format.\
**Output:** 2 images in a group with the name `demo4.png` in Supervisely.\\

```python
image_name = "demo4.png"
images = ["demo_data/demo4-rgb.png", "demo_data/demo4-thermal.png"]
image_infos = api.image.upload_multispectral(dataset.id, image_name, rgb_images=images)
```
As you can see, in this case, we don't extract any channels since we need to upload only images, not channels. So, we pass the list of image paths to the `rgb_images` parameter.
### Upload RGB image, its channels, and depth image
**Input:** 1 RGB image and 1 depth image in PNG format.\
**Output:** 5 images in a group with the name `demo5.png` in Supervisely.\\

```python
image_name = "demo5.png"
images = ["demo_data/demo5-rgb.png", "demo_data/demo5-depths.png"]
image = cv2.imread(images[0])
# Extract channels as 2d numpy arrays: channels = [a, b, c]
channels = [image[:, :, i] for i in range(image.shape[2])]
image_infos = api.image.upload_multispectral(dataset.id, image_name, channels, images)
```
Here, we uploaded one image both as channels and as an image. So, we pass the list of image paths to the `rgb_images` parameter and the list of channels to the `channels` parameter.
### Upload grayscale and UV images
**Input:** 1 grayscale image and 1 UV image in PNG format.\
**Output:** 2 images in a group with the name `demo6.png` in Supervisely.\\
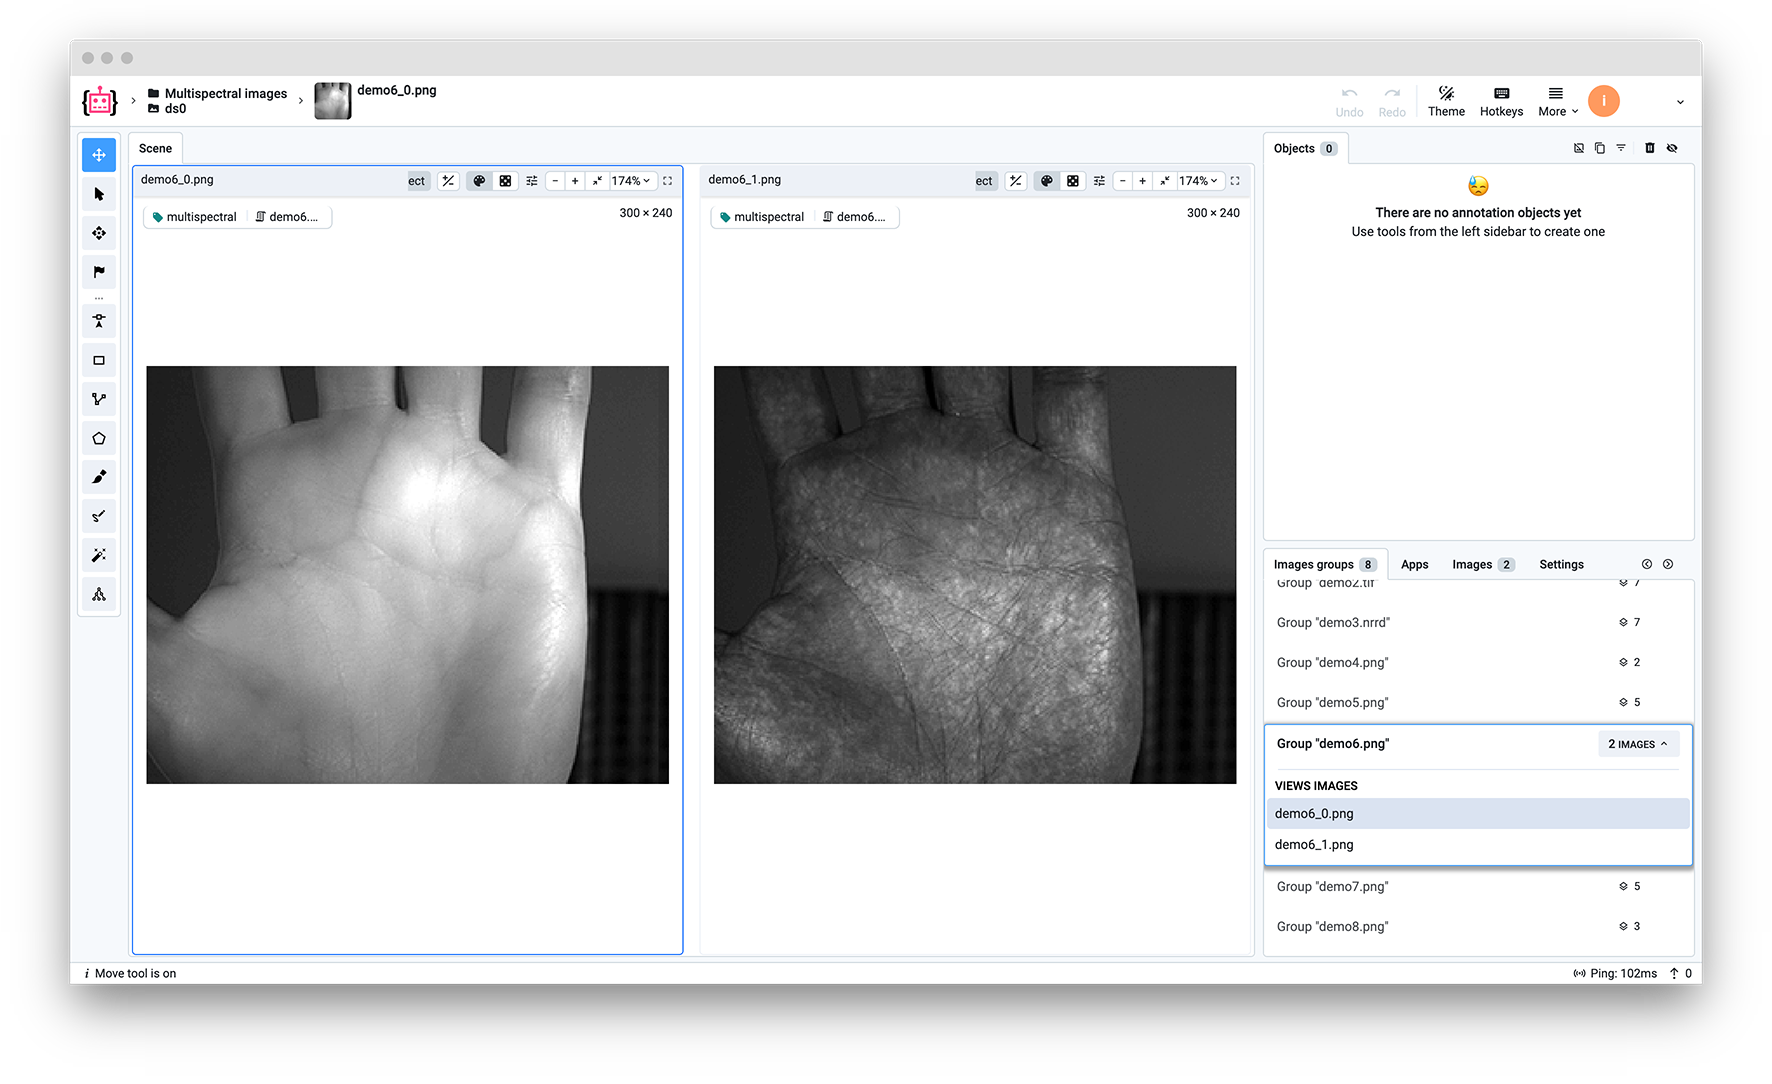
```python
image_name = "demo6.png"
images = ["demo_data/demo6-grayscale.png", "demo_data/demo6-uv.png"]
image_infos = api.image.upload_multispectral(dataset.id, image_name, rgb_images=images)
```
### Upload RGB image, thermal image, and channels of thermal image
**Input:** 1 RGB image and 1 thermal image in PNG format.\
**Output:** 5 images in a group with the name `demo7.png` in Supervisely.\\

```python
image_name = "demo7.png"
images = ["demo_data/demo7-rgb.png", "demo_data/demo7-thermal.png"]
image = cv2.imread(images[1])
# Extract channels as 2d numpy arrays: channels = [a, b, c]
channels = [image[:, :, i] for i in range(image.shape[2])]
image_infos = api.image.upload_multispectral(dataset.id, image_name, channels, images)
```
### Upload RGB image and two MRI images
**Input:** 1 RGB image and 2 MRI images in PNG format.\
**Output:** 3 images in a group with the name `demo8.png` in Supervisely.\\

```python
image_name = "demo8.png"
images = ["demo_data/demo8-rgb.png", "demo_data/demo8-mri1.png", "demo_data/demo8-mri2.png"]
image_infos = api.image.upload_multispectral(dataset.id, image_name, rgb_images=images)
```
## Grouped view in the labeling interface
So now, that we've uploaded all the images, let's take a look at the labeling interface.
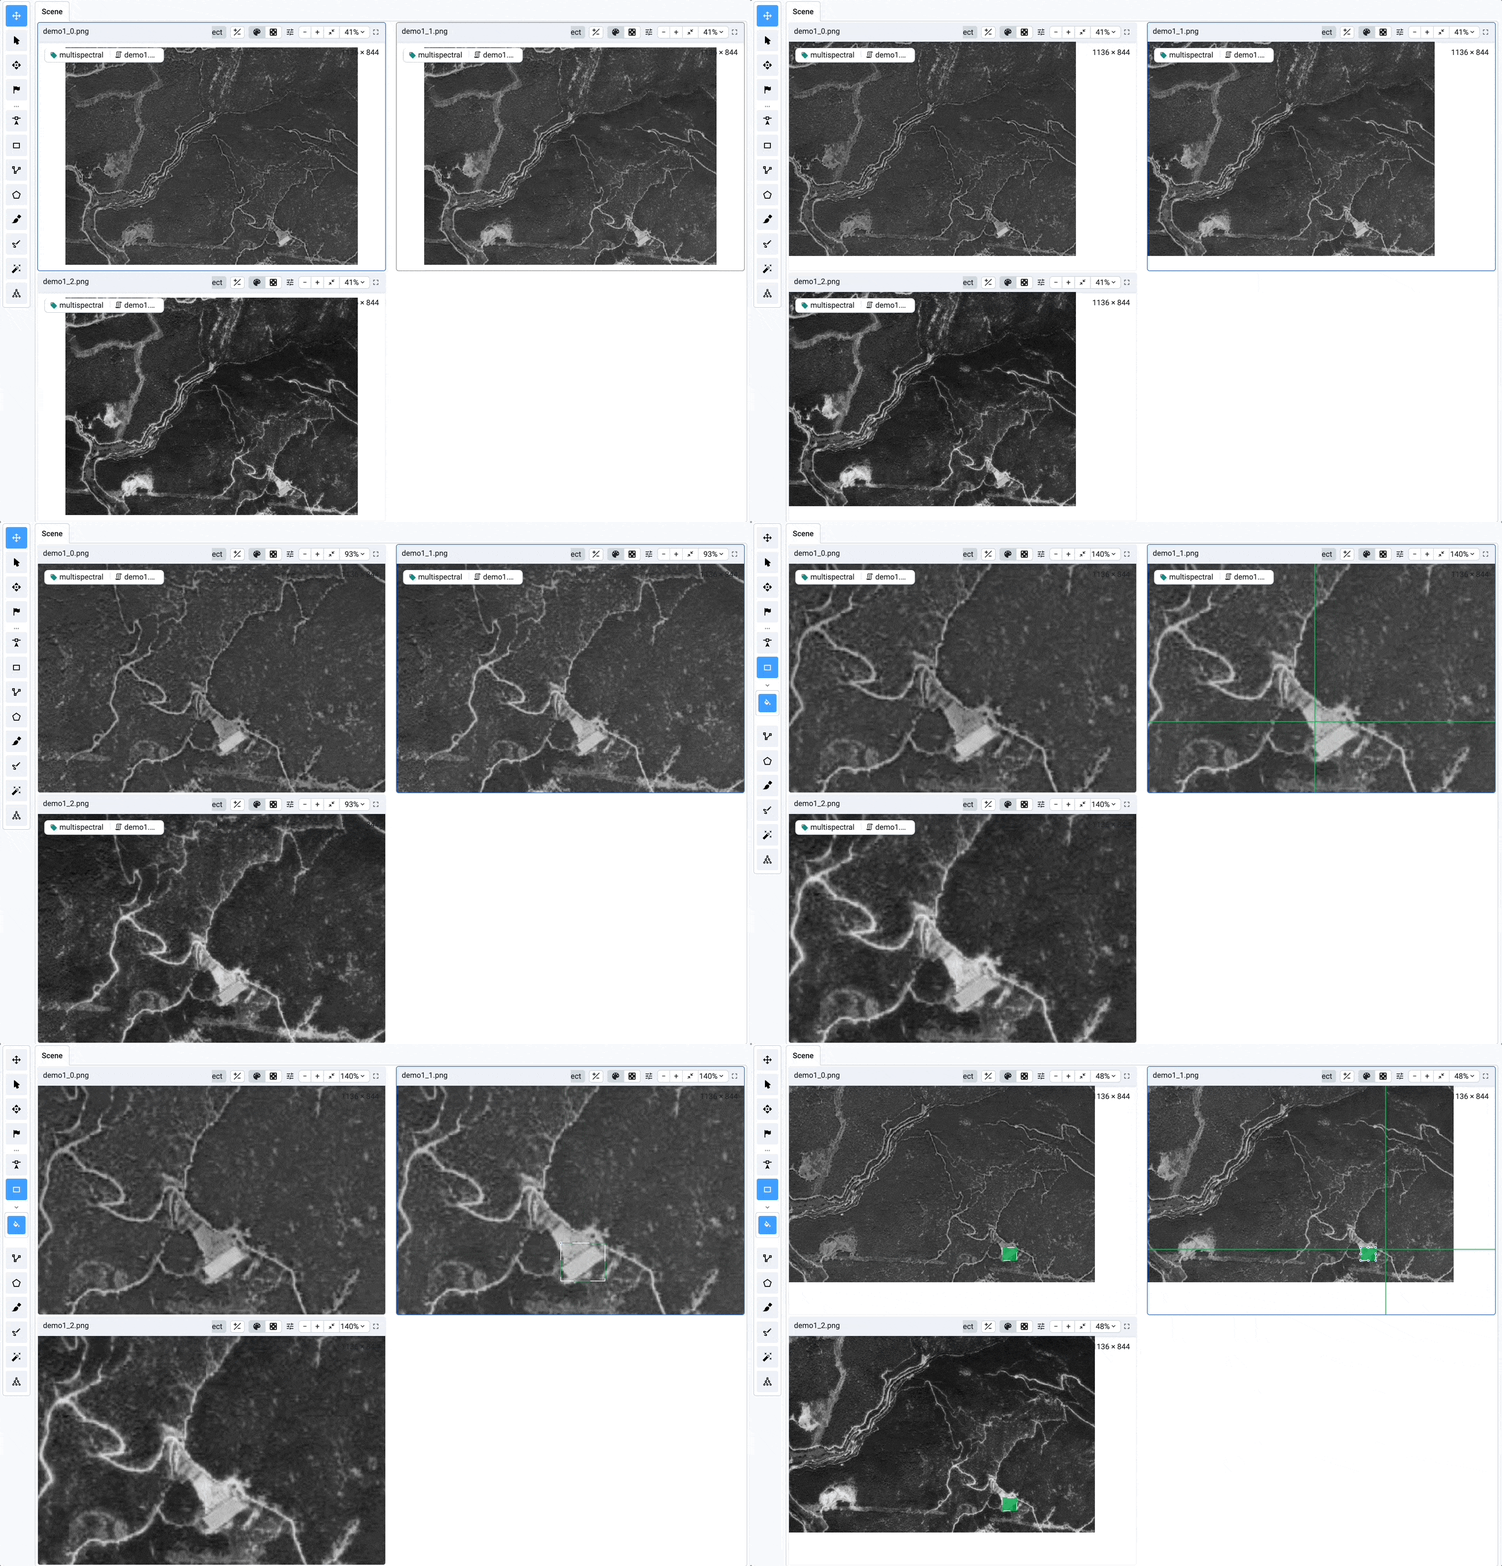
As you can see, all the images are grouped by the name of the group, which is the name of the image we passed to the `image_name` parameter. We can zoom, pan, and label images in one group at the same time. So, whenever you create a label on one image, it will be automatically created on all the other images in the group. You can edit label on another image in the group, and it will be automatically updated on all the other images in the group. Just a reminder: we set the multispectral settings for the project at the beginning of the tutorial with the `api.project.set_multispectral_settings` method, which enables this grouped view.
## Summary
In this tutorial, you learned how to upload multispectral images to Supervisely using Python SDK and get the advantage of the grouped view in the labeling interface, which allows you to synchronize the view, zooming, panning, and labeling of images in one group. Let's recap the steps we did:
1. Create a new project and dataset.
2. Set multispectral settings for the project using the `api.project.set_multispectral_settings` method.
3. Upload images using the `api.image.upload_multispectral` method.
And that's it! Now you can upload your multispectral images to Supervisely using Python SDK.
## (Advanced) Use supervisely format for multispectral images
{% hint style="info" %}
You can always use [Export to Supervisely format](https://ecosystem.supervisely.com/apps/export-to-supervisely-format) to download to the local directory of your favorite multispectral project with the preserved multiview settings and then easily upload it as a new project to the [Import images in Supervisely format](https://ecosystem.supervisely.com/apps/import-images-in-sly-format)
{% endhint %}
From the developer's point of view, the [Supervisely annotation JSON format](https://github.com/supervisely/developer-portal/tree/main/getting-started/python-sdk-tutorials/images/broken-reference/README.md) gives you easy access to the necessary parameters while grouping the images. To feel the power of this instrument, let's imagine the situation when you have already downloaded the project and opened the `meta.json` file:
```json
{
"classes": [
{
"title": "leaf",
"shape": "bitmap",
"color": "#FB00ED",
"geometry_config": {},
"id": 6509759,
"hotkey": ""
}
],
"tags": [
{
"name": "im_id",
"value_type": "any_number",
"color": "#0F8A2D",
"id": 27855,
"hotkey": "",
"applicable_type": "all",
"classes": []
},
{
"name": "band",
"value_type": "any_string",
"color": "#9F7A2F",
"id": 27856,
"hotkey": "",
"applicable_type": "all",
"classes": []
}
],
"projectType": "images",
"projectSettings": {
"multiView": {
"enabled": true,
"tagName": "im_id",
"tagId": 27855,
"isSynced": false
}
}
}
```
This is very easy to see, if you want to group your images by the `band` tag instead of `im_id` (sync mode on), simply change your `projectSettings` this way:
```json
"projectSettings": {
"multiView": {
"enabled": true,
"tagName": "band",
"tagId": 27856,
"isSynced": true
}
}
```
Moreover, you can additionally enhance your tags with `hotkey`, or specify the tag `classes`. See the explanation of every field [here](https://github.com/supervisely/developer-portal/tree/main/getting-started/python-sdk-tutorials/images/broken-reference/README.md).
To download and upload a project using Supervisely SDK, use the following code:
```python
import supervisely as sly
from tqdm import tqdm
load_dotenv(os.path.expanduser("~/supervisely.env"))
api = sly.Api.from_env()
# id of your workspace and project from environmental variables
# see https://developer.supervisely.com/getting-started/environment-variables
WORKSPACE_ID = sly.env.workspace_id()
PROJECT_ID = sly.env.project_id()
your_dir = "/your/multiview/project/dir"
project_info = api.project.get_info_by_id(PROJECT_ID)
pbar = tqdm(desc="Download Project", total=project_info.items_count)
sly.download_project(api, PROJECT_ID, your_dir, progress_cb=pbar)
project_fs = sly.read_project(your_dir)
pbar = tqdm(desc="Upload Project", total=project_fs.total_items)
sly.upload_project(project_fs.directory, api, WORKSPACE_ID, progress_cb=pbar)
```
# Multiview images
## Introduction
This easy-to-follow tutorial will show you how to upload multiview images and label groups to Supervisely using Python SDK and get the advantage of the multiview image annotaion in the Supervisely Labeling Toolbox, which allows you to label images quickly and efficiently on one screen. You will learn how to enable multiview in the project settings, upload multiview images and explore the multiview in the labeling interface.
{% hint style="success" %}
In this tutorial, we will show you how to do it programmatically using Python, but you can also do it manually in the Web UI using [Import Images Groups](https://ecosystem.supervisely.com/apps/import-images-groups) app from Supervisely Ecosystem or using our Import Wizard in the Web UI. Here is an illustrated example of how to do it:
{% endhint %}

## How to debug this tutorial
{% hint style="info" %}
Everything you need to reproduce [this tutorial is on GitHub](https://github.com/supervisely-ecosystem/import-multiview-images-tutorial): source code and additional app files.
{% endhint %}
**Step 1.** Prepare `~/supervisely.env` file with credentials. [Learn more here.](/getting-started/basics-of-authentication)
**Step 2.** Clone the [repository](https://github.com/supervisely-ecosystem/import-multiview-images-tutorial) with source code and demo data and create a [Virtual Environment](https://docs.python.org/3/library/venv.html).
```
git clone https://github.com/supervisely-ecosystem/import-multiview-images-tutorial.git
cd import-multiview-images-tutorial
sh create_venv.sh
```
**Step 3.** Open the repository directory in Visual Studio Code.
```
code -r .
```
**Step 4.** Change the Workspace ID in the `local.env` file by copying the ID from the context menu.
```python
WORKSPACE_ID=942 # ⬅️ change value
```
**Step 5.** Start debugging `src/main.py`.
{% hint style="info" %}
Supervisely instance version >= 6.9.14\
Supervisely SDK version >= 6.72.214
In the tutorial, Supervisely Python SDK version is not directly defined in the requirements.txt. But when developing your app, we recommend defining the SDK version in the requirements.txt.
{% endhint %}
### Import libraries
```python
import os
from dotenv import load_dotenv
import supervisely as sly
```
### Load environment variables
```python
if sly.is_development():
load_dotenv("local.env")
load_dotenv(os.path.expanduser("~/supervisely.env"))
workspace_id = sly.env.workspace_id()
```
### Init API client
```python
api = sly.Api.from_env()
```
### Explore the directory with images
here is the structure of the directory with images (`src/images`):
```
📂 images
┣ 📂 audi
┃ ┣ 🏞️ audi_01.jpg
┃ ┣ 🏞️ audi_02.jpg
┃ ┗ 🏞️ audi_03.jpg
┣ 📂 mercedes
┃ ┣ 🏞️ mercedes_01.jpg
┃ ┣ 🏞️ mercedes_02.jpg
┃ ┣ 🏞️ mercedes_03.jpg
┃ ┣ 🏞️ mercedes_04.jpg
┃ ┣ 🏞️ mercedes_05.jpg
┃ ┗ 🏞️ mercedes_06.jpg
┣ 📂 renault
┃ ┣ 🏞️ renault_01.jpg
┃ ┣ 🏞️ renault_02.jpg
┃ ┣ 🏞️ renault_03.jpg
┃ ┗ 🏞️ renault_04.jpg
┗ 📂 ford
┣ 🏞️ ford_01.jpg
┣ 🏞️ ford_02.jpg
┣ 🏞️ ford_03.jpg
┣ 🏞️ ford_04.jpg
┗ 🏞️ ford_05.jpg
```
### Create a new project and dataset
```python
project = api.project.create(workspace_id, "Grouped cars", change_name_if_conflict=True)
dataset = api.dataset.create(project.id, "ds0")
```
## Enable multiview in the project settings
```python
api.project.set_multiview_settings(project.id)
```
You can also enable multiview in the Image Labeling Tool interface:

And now we're ready to upload images.
## How to upload multiview images
In this tutorial, we'll be using the `api.image.upload_multiview_images` method to upload multiview images to Supervisely.
```python
def upload_multiview_images(
dataset_id: int,
group_name: str,
paths: Optional[List[str]] = None,
metas: Optional[List[Dict]] = None,
progress_cb: Optional[Union[tqdm, Callable]] = None,
links: Optional[List[str]] = None,
conflict_resolution: Optional[Literal["rename", "skip", "replace"]] = "rename",
force_metadata_for_links: Optional[bool] = False,
) -> List[ImageInfo]:
```
| Parameters | Type | Description |
| :-------------------------: | :-----------------------------------: | :----------------------------------------------: |
| dataset\_id | int | ID of the dataset to upload |
| group\_name | str | Name of the group (tag value) |
| paths | Optional\[List\[str]] | List of paths to the images (optional) |
| metas | Optional\[List\[Dict]] | List of image metas (optional) |
| progress\_cb | Optional\[Union\[tqdm, Callable]] | Function for tracking upload progress (optional) |
| links | Optional\[List\[str]] | List of links to the images (optional) |
| conflict\_resolution | Literal\["rename", "skip", "replace"] | Conflict resolution strategy (optional) |
| force\_metadata\_for\_links | Optional\[bool] | Force metadata for links (optional) |
So, the method uploads images to Supervisely and returns a list of `ImageInfo` objects.
## Upload multiview images
```python
for group_dir in os.scandir("src/images"):
if not group_dir.is_dir():
continue
images_paths = sly.fs.list_files(group_dir.path, valid_extensions=sly.image.SUPPORTED_IMG_EXTS)
api.image.upload_multiview_images(dataset.id, group_dir.name, images_paths)
```
## Group existing images for multiview
{% hint style="info" %}
Available starting from version `v6.73.236` of the Supervisely Python SDK.
{% endhint %}
If you already have images uploaded to Supervisely and you want to group them for multiview, you can use the `api.image.group_images_for_multiview` method.
```python
images = [2389126, 2389127, 2389128, 2389129, 2389130, ...]
for idx, batch_ids in enumerate(sly.batched(images, batch_size=6)):
api.image.group_images_for_multiview(batch_ids, f"group_{idx}")
```
{% hint style="success" %}
* Default tag name is `multiview`. You can change it by passing the `multiview_tag_name` argument.
* If the tag does not exist, it will be created automatically.
* Automatically enables multiview mode in the project settings.
{% endhint %}
## Grouped view in the labeling interface
So now, that we've uploaded all the images, let's take a look at the labeling interface.

As you can see, the images in the Labeling tool are grouped in the same way as in your images in folders (images from one folder are combined into one group). When importing, each image from the folders will be assigned tags with the same values, which allows them to be grouped into one group.
Multiview labeling can be very useful when annotating objects of multiple classes simultaneously on several images. You don't need to shift your attention to find the necessary class every time you switch between images, allowing you to increase efficiency and save time and effort.

## How to upload label groups
{% hint style="info" %}
Available starting from version `v6.73.293` of the Supervisely Python SDK.
{% endhint %}
There are many cases when you need to group labels together. For example, if you have some labels captured from different perspectives that represent one object on different images and you want to analyze the object as a whole and not as separate instances, you can join them into a single group.
**Label group** - is a simple group of objects, that displays the relationship between objects and helps you to quickly locate the object on different images and to avoid labeling the same object multiple times.

Using the `api.annotation.append_labels_group` method, you can upload labels as a group to images.
```python
def append_labels_group(
self,
dataset_id: int,
image_ids: List[int],
labels: List[Label],
project_meta: Optional[ProjectMeta] = None,
group_name: Optional[str] = None,
) -> None:
```
| Parameters | Type | Description |
| :-----------: | :--------------------: | :--------------------------------------------------------------------: |
| dataset\_id | int | Destination Dataset ID |
| image\_ids | List\[int] | Multiview images IDs |
| labels | List\[Label] | group of labels (should be the same length as images\_ids) |
| project\_meta | Optional\[ProjectMeta] | Project Meta (optional). Provide to avoid extra API calls |
| group\_name | Optional\[str] | Group name (optional). Labels will be assigned by tag with this value. |
Let's group it all together and upload local images and labels to Supervisely using this method.
Our sample data directory structure:
```
📂 data
┣ 📂 images
┃ ┣ 🏞️ car_01.jpeg
┃ ┣ 🏞️ car_02.jpeg
┃ ┗ 🏞️ car_03.jpeg
┗ 📂 masks
┣ 🏞️ car_01.png
┣ 🏞️ car_02.png
┗ 🏞️ car_03.png
```

⬇️ You can download this sample here: [data.zip](https://github.com/supervisely/developer-portal/releases/download/untagged-6cc0d25bd610d680cc0d/data.zip)
Follow the code below to upload images and labels to Supervisely.
```python
project_id = 56
dataset_id = 196
# GET PROJECT META
meta = sly.ProjectMeta.from_json(api.project.get_meta(project_id, with_settings=True))
# GET OBJ CLASS FROM META BY NAME
obj_cls = meta.get_obj_class("car")
# OR CREATE NEW OBJ CLASS IF NOT EXISTS
# obj_cls = sly.ObjClass(name="car", geometry_type=sly.Rectangle, color=[255, 0, 0])
# UPDATE PROJECT META IF CREATING NEW OBJ CLASS
# meta = meta.add_obj_classes([obj_cls])
# api.project.update_meta(project_id, meta.to_json())
# SET MULTIVIEW SETTINGS
api.project.set_multiview_settings(project_id)
# GET IMAGES AND MASKS PATHS
image_dir = os.path.join("data", "images")
mask_dir = os.path.join("data", "masks")
# SORT PATHS FOR CORRECT LABELS ORDER
image_paths = sorted([os.path.join(image_dir, path) for path in os.listdir(image_dir)])
mask_paths = sorted([os.path.join(mask_dir, path) for path in os.listdir(mask_dir)])
# CREATE LABELS
labels = []
for image_path, mask_path in zip(image_paths, mask_paths):
# READ MASK
bitmap = sly.Bitmap.from_path(mask_path)
# CREATE LABEL
label = sly.Label(geometry=bitmap, obj_class=obj_cls)
labels.append(label)
# UPLOAD IMAGES
image_infos = api.image.upload_multiview_images(dataset_id, "white_car", image_paths)
images_ids = [image_info.id for image_info in image_infos]
# APPEND LABELS TO IMAGES
api.annotation.append_labels_group(
dataset_id=dataset_id,
image_ids=images_ids,
labels=labels,
project_meta=meta,
)
```

## Summary
In this tutorial, you learned how to upload multiview images and label groups to Supervisely using Python SDK and get the advantage of the multiview image annotation in the labeling interface, which allows you to label images quickly and efficiently on one screen. Let's recap the steps we did:
1. Create a new project and dataset.
2. Set multiview settings for the project using the `api.project.set_multiview_settings` method.
3. Upload images using the `api.image.upload_multiview_images` method.
4. Group existing images for multiview using the `api.image.group_images_for_multiview` method.
5. Upload label groups using the `api.annotation.append_labels_group` method.
And that's it! Now you can upload your multview images to Supervisely using Python SDK.
# Overlay images
## Introduction
In this tutorial, you will learn how to upload source images together with one or multiple overlay images for each source image using Python SDK. Overlay images are displayed as additional visual layers in the labeling interface and are linked to their parent (source) images.
In the Overlay labeling interface, overlay visibility is controlled by adjustable opacity.

## Recommended input structure
Both directory and archive are supported.
```
📦input_folder
┣ 📂dataset_name
┃ ┣ 📂ann
┃ ┃ ┣ 📄scene_01.jpg.json
┃ ┃ ┗ 📄scene_02.jpg.json
┃ ┣ 📂img
┃ ┃ ┣ 🖼️scene_01.jpg
┃ ┃ ┗ 🖼️scene_02.jpg
┃ ┗ 📂overlay
┃ ┣ 📂scene_01.jpg
┃ ┃ ┣ 🖼️mask.png
┃ ┃ ┗ 🖼️heatmap.png
┃ ┗ 📂scene_02.jpg
┃ ┗ 🖼️mask.png
```
* Parent images are stored in `img`.
* Parent image annotations are stored in `ann` as `image_name.ext.json`.
* Overlay images are stored in `overlay//`.
* Overlay images do not require annotation files.
## How to upload overlay images with Python SDK
Use `api.image.upload_overlay_images`.
```python
def upload_overlay_images(
dataset_id: int,
names: List[str],
paths: Optional[List[str]] = None,
links: Optional[List[str]] = None,
hashes: Optional[List[str]] = None,
overlay_names: Optional[List[List[str]]] = None,
overlay_paths: Optional[List[List[str]]] = None,
overlay_links: Optional[List[List[str]]] = None,
overlay_hashes: Optional[List[List[str]]] = None,
batch_size: Optional[int] = 50,
conflict_resolution: Optional[Literal["rename", "skip", "replace"]] = "rename",
force_metadata_for_links: Optional[bool] = False,
) -> Tuple[List[ImageInfo], List[List[ImageInfo]]]:
```
| Parameters | Type | Description |
| :-------------------------: | :-----------------------------------: | :--------------------------------------------------------------------------------------------------------: |
| dataset\_id | int | ID of the dataset to upload |
| names | List\[str] | Parent image names |
| paths | Optional\[List\[str]] | List of local paths to parent images (optional) |
| links | Optional\[List\[str]] | List of remote links to parent images (optional) |
| hashes | Optional\[List\[str]] | List of hashes for parent images already in storage (optional) |
| overlay\_names | Optional\[List\[List\[str]]] | Overlay names grouped by parent index (`overlay_names[i]` corresponds to `names[i]`) |
| overlay\_paths | Optional\[List\[List\[str]]] | Local overlay paths grouped by parent index (optional) |
| overlay\_links | Optional\[List\[List\[str]]] | Remote overlay links grouped by parent index (optional) |
| overlay\_hashes | Optional\[List\[List\[str]]] | Overlay hashes grouped by parent index (optional) |
| batch\_size | Optional\[int] | Number of items uploaded in one batch (for links/hashes) |
| conflict\_resolution | Literal\["rename", "skip", "replace"] | Conflict resolution strategy (optional) |
| force\_metadata\_for\_links | Optional\[bool] | Force metadata retrieval for images uploaded by links (if `False`, metadata can be temporarily incomplete) |
So, the method uploads parent images and linked overlay images to Supervisely and returns a tuple with parent `ImageInfo` list and grouped overlay `ImageInfo` lists.
### Important rules
* Exactly one source for parent images must be provided: `paths` or `links` or `hashes`.
* Exactly one source for overlays must be provided: `overlay_paths` or `overlay_links` or `overlay_hashes`.
* Parent and overlay lists must have consistent lengths.
## Example: upload from local paths
```python
import os
from dotenv import load_dotenv
import supervisely as sly
if sly.is_development():
load_dotenv(os.path.expanduser("~/supervisely.env"))
api = sly.Api.from_env()
workspace_id = 123
project = api.project.create(workspace_id, "Overlay demo", change_name_if_conflict=True)
dataset = api.dataset.create(project.id, "ds0")
names = ["scene_01.jpg", "scene_02.jpg"]
paths = [
"demo_data/img/scene_01.jpg",
"demo_data/img/scene_02.jpg",
]
overlay_names = [
["scene_01_mask.png", "scene_01_heatmap.png"],
["scene_02_mask.png"],
]
overlay_paths = [
["demo_data/overlay/scene_01.jpg/scene_01_mask.png", "demo_data/overlay/scene_01.jpg/scene_01_heatmap.png"],
["demo_data/overlay/scene_02.jpg/scene_02_mask.png"],
]
parent_infos, overlay_infos_grouped = api.image.upload_overlay_images(
dataset_id=dataset.id,
names=names,
paths=paths,
overlay_names=overlay_names,
overlay_paths=overlay_paths,
)
```
## Result in labeling interface
After upload, each parent image in the dataset has one or multiple linked overlays that can be displayed in the new Overlay labeling interface.
# Advanced: Optimized Import
## Overview
This tutorial explains how to optimize the import of small images to Supervisely using blob files. This approach is more efficient for uploading and downloading numerous very small images compared to standard methods.
## Understanding the Blob Import Approach
When dealing with large quantities of small images (e.g., thousands of images under 100KB each), importing them individually is inefficient. The blob approach combines multiple images into a single archive file, making transfer and storage more efficient.
### What is a Blob File?
A blob file in Supervisely is essentially a `.tar` archive that contains multiple images bundled together. Instead of storing and transferring each image as a separate file, these images are packed into a single large file (the blob).
This approach:
* Reduces the number of network requests needed for transfers
* Minimizes filesystem overhead when dealing with many small files
### What is an Offset File?
An offset file `.pkl` is a companion file to the blob archive that contains metadata about where each image is located within the blob file.
Specifically:
* It maps each image filename to its exact byte position (start and end offsets) in the blob file
* Allows direct extraction of specific images without scanning the entire archive
* Stored as a Python pickle file containing batches of dictionaries with image names as keys and offset positions as values
These two files work together to provide efficient storage and random access to large collections of small images.
Benefits include:
* Faster import and export speeds
* Reduced server load
* More efficient storage on disk
## Offset Representation
The `BlobImageInfo` [class](https://supervisely.readthedocs.io/en/latest/sdk/supervisely.api.image_api.BlobImageInfo.html#supervisely.api.image_api.BlobImageInfo) represents image metadata within a blob storage file. It contains information about where the image data is located in the blob file, defined by byte offsets. This class provides methods to manipulate and convert blob image information to formats suitable for storage and API interactions.
### Methods
| Method | Description |
| ----------------------------------------------------------------------------------------- | ------------------------------------------------------------------------------------------------------------------ |
| `from_image_info(cls, image_info: ImageInfo) -> BlobImageInfo` | Static method to create a BlobImageInfo instance from an ImageInfo object. |
| `add_team_file_id(self, team_file_id: int)` | Adds a team file ID to the BlobImageInfo instance. This ID links the image to the blob file in team storage. |
| `to_dict(self, team_file_id: int = None) -> Dict` | Converts BlobImageInfo to a dictionary format suitable for serialization. Includes team\_file\_id if provided. |
| `from_dict(cls, data: Dict) -> BlobImageInfo` | Static method to create a BlobImageInfo instance from a dictionary representation. |
| `load_from_pickle_generator(cls, file_path: str) -> Generator[BlobImageInfo, None, None]` | Static method that creates a generator yielding BlobImageInfo instances from a pickle file containing offset data. |
| `dump_to_pickle(cls, blob_image_infos: List[BlobImageInfo], path: str) -> None` | Static method that saves a list of BlobImageInfo instances to a pickle file. |
| `offsets_dict(self) -> Dict[str, int]` | Property that returns a dictionary with the offset start and end values for the image data in the blob file. |
## Blob Methods Reference
Here's a comprehensive table of methods related to blob operations in Supervisely:
| Method | Module | Description |
| ------------------------------------ | -------------- | ---------------------------------------------------------------------------- |
| `save_blob_offsets_pkl()` | `fs.py` | Generates a pickle file with image offsets in a blob archive |
| `get_file_offsets_batch_generator()` | `fs.py` | Creates a generator that yields batches of image offsets from a blob archive |
| `upload_by_offsets()` | `image_api.py` | Uploads images to Supervisely using offsets from a blob file |
| `upload_by_offsets_generator()` | `image_api.py` | Generator version of upload\_by\_offsets for memory-efficient uploads |
| `get_blob_offsets_file()` | `image_api.py` | Downloads a blob offsets file from Team Files |
| `download_blob_file()` | `image_api.py` | Downloads a blob file from Supervisely by project ID and download ID |
| `upload_blob_images()` | `image_api.py` | Uploads images from a blob file to a dataset using file offsets |
| `download_blob_files_async()` | `image_api.py` | Asynchronously downloads multiple blob files to specified paths |
| `add_blob_file()` | `project.py` | Adds a blob file to a local project structure |
| `get_blob_img_bytes()` | `project.py` | Get image bytes from blob file while working with `Dataset` |
| `get_blob_img_np()` | `project.py` | Get image as numpy array from blob file while working with `Dataset` |
| `create_blob_readme()` | `project.py` | Creates documentation for a blob-based project structure |
This table covers the core methods you'll use when working with blob files in Supervisely, from creating and uploading blobs to downloading and processing them.
## Preparing Data for Blob Import
First, let's prepare our images and annotations:
```python
import os
import supervisely as sly
from pathlib import Path
from supervisely.project.project import TF_BLOB_DIR
from tqdm import tqdm
# Set paths
imgs_path = "your_local_images_dir"
anns_path = "your_local_annotations_dir"
blob_dir = "blob_archive_dir"
tar_name = "images.tar"
tar_path = f"{blob_dir}/{tar_name}"
sly.fs.mkdir(blob_dir)
meta_path = "path_to_meta_json" # Meta must contain all the classes used in the annotations
# Get number of images in directory
images_count = len(
[
f
for f in os.scandir(imgs_path)
if f.is_file() and f.name.lower().endswith(tuple(sly.image.SUPPORTED_IMG_EXTS))
]
)
print(f"Found {images_count} images in {imgs_path}")
# Create a tar archive from your images
sly.fs.archive_directory(imgs_path, tar_path)
# Create offsets file for the archive
# This is important for efficient blob operations
offsets_path = sly.fs.save_blob_offsets_pkl(
blob_file_path=tar_path,
output_dir=blob_dir
)
print(f"Created offsets file: {offsets_path}")
# You can also create offsets for specific images using filters
# For example, to include only JPEG files:
def filter_jpeg_only(filename):
return filename.lower().endswith(('.jpg', '.jpeg'))
filtered_offsets_path = sly.fs.save_blob_offsets_pkl(
blob_file_path=tar_path,
output_dir=blob_dir,
filter_func=filter_jpeg_only
)
print(f"Created filtered offsets file: {filtered_offsets_path}")
# Another example: filter by name pattern
def filter_by_pattern(filename):
return "car" in filename.lower() or "vehicle" in filename.lower()
pattern_offsets_path = sly.fs.save_blob_offsets_pkl(
blob_file_path=tar_path,
output_dir=blob_dir,
filter_func=filter_by_pattern
)
```
## Uploading to Team Files
After preparing the `.tar` and offsets `.pkl` files, upload it to Team Files:
```python
api = sly.Api.from_env()
team_id = 123 # Replace with your team ID
workspace_id = 345 # Replace with your workspace ID
# Upload blob file to team files
remote_path = "/" + os.path.join(TF_BLOB_DIR, tar_name)
blob_tf_info = api.file.upload(team_id, tar_path, remote_path)
# Upload file with offsets to team files
offsets_file_name = Path(offsets_path).name
remote_offsets_path = "/" + os.path.join(TF_BLOB_DIR, offsets_file_name)
offsetst_tf_info = api.file.upload(team_id, offsets_path, remote_offsets_path)
```
{% hint style="success" %}
Once blob files are uploaded to Team Files, you can reuse them for multiple projects without re-uploading the images.
{% endhint %}
This approach helps optimize the import process for multiple projects since you don't need to re-upload the original images each time. By simply creating and uploading different offset files, you can import different subsets of images from the same blob archive.
## Creating a Project with Blob Images
Now create a project and dataset, then upload the blob images:
```python
# Create project and dataset
project = api.project.create(team_id, "Blob Images Project", change_name_if_conflict=True)
dataset = api.dataset.create(project.id, "dataset_1")
# Upload images by offsets from the blob file to dataset
dataset_images = api.image.upload_blob_images(
dataset=dataset,
blob_file=blob_tf_info,
progress_cb=tqdm(desc="Uploading images", total=images_count),
return_image_infos_generator=True,
)
```
## Adding Annotations to Blob Images
After uploading images, add annotations:
```python
# Upload metadata for project
meta_json = sly.json.load_json_file(meta_path)
api.project.update_meta(project.id, meta_json)
# Assuming annotations are already prepared in Supervisely format
# Upload annotations in batches to avoid high memory usage
# Batch size already set in the function, but you can split batches manually if needed
# Process images in batches
i = 1
for batch_images in dataset_images:
print(f"Processing annotations batch {i}, size: {len(batch_images)}")
ids_batch = []
ann_batch = []
# Process each image in the current batch
for img_info in batch_images:
# Construct the path to the corresponding annotation file
ann_file = os.path.join(anns_path, f"{img_info.name}.json")
if os.path.exists(ann_file):
# Load the annotation from file
ids_batch.append(img_info.id)
ann_batch.append(ann_file)
else:
print(f"Annotation file for image '{img_info.name}' is not found. Skipping.")
# Upload batch of annotations
ann_progress_cb = tqdm(desc=f"Uploading annotations batch {i}", total=len(ids_batch))
api.annotation.upload_paths(ids_batch, ann_batch, ann_progress_cb)
i += 1
```
## Upload Project in Supervisely Format with Blob Files
A typical blob-based project structure looks like this:
```
📂 project-name
┣ 📂 blob
┃ ┗ 📦 small_images.tar
┣ 📂 dataset-name-001
┃ ┣ 📄 small_images_offsets.pkl
┃ ┣ 📂 ann
┃ ┃ ┣ 📄 small-image-0000001.png.json
┃ ┃ ┣ ...
┃ ┃ ┗ 📄 small-image-0999999.png.json
┗ 📄 meta.json
```
For detailed information about blob project structure, refer to the extended [Project Structure documentation](/getting-started/supervisely-annotation-format/project-structure#understanding-blob-files-and-offsets-for-optimized-project-handling).
If you already have a local Supervisely project with blob files, you can upload it directly to the platform:
```python
workspace_id = 345
# Path to your local project with blob structure
local_project_path = "/path/to/local/blob/project"
# Upload the project with progress tracking
project_id, project_name = sly.upload_project(
dir=local_project_path,
api=api,
workspace_id=workspace_id,
project_name="My Blob Project",
)
print(f"Project '{project_name}' has been uploaded. Project ID: {project_id}")
```
The `upload` method automatically handles blob files in your local project structure. During upload:
1. Blob archives (`.tar` files) are uploaded to Team Files
2. Offset files (`.pkl`) are uploaded alongside the archives
3. Images are registered in the platform using blob references instead of uploading each file
4. All annotations are preserved with their connections to the blob images
This approach is significantly faster than standard upload methods for projects with many small images.
## Downloading a Blob Project
To download a project that contains blob images:
```python
# Download the entire project efficiently
local_project_dir = "downloaded_project"
sly.download_fast(
api=api,
project_id=project_id,
dest_dir=local_project_dir,
download_blob_files=True # Important for blob images
)
```
## Working with Local Blob Project
Access the downloaded project and iterate through it:
```python
project_fs = sly.Project(local_project_dir, sly.OpenMode.READ)
# Iterate through datasets and extract images forom blob
for dataset_fs in project_fs:
dataset_fs: sly.Dataset
print(f"Dataset: {dataset_fs.name}")
extracted_images_dir = os.path.join(dataset_fs.directory, "extracted_images")
sly.fs.mkdir(extracted_images_dir)
for item_name in dataset_fs.get_items_names():
# Get annotation and image bytes
ann = dataset_fs.get_ann(item_name, project_fs.meta)
img = dataset_fs.get_blob_img_bytes(item_name)
if img is None:
print(f"Image not found for item: {item_name}")
else:
# Save the image to the extracted images directory in dataset
with open(os.path.join(extracted_images_dir, item_name), "wb") as f:
f.write(img)
# Process images and annotations as needed
```
## Quick Dataset Import with Blob
The Supervisely SDK provides a highly optimized method for importing blob datasets called `quick_import`. This method offers significant performance advantages compared to standard import methods **\~14x faster import speed**
All you need to use this method is to specify the locations of the required files in your local storage:
* Blob archive (.tar file)
* Offsets file (.pkl file)
* Annotation files list
```python
meta_path = "/path/to/meta.json"
# Get all annotation files
anns_dir = os.path.join(blob_dir, "dataset", "ann")
anns = []
for dirpath, _, filenames in os.walk(anns_dir):
for filename in filenames:
anns.append(os.path.join(dirpath, filename))
# Create project and dataset
project = api.project.create(
WORKSPACE_ID,
"Quick Import",
type=sly.ProjectType.IMAGES,
change_name_if_conflict=True,
)
dataset = api.dataset.create(project.id, "ds1")
# Set the project meta to properly import annotations
project_meta = sly.ProjectMeta.from_json(sly.json.load_json_file(meta_path))
meta = api.project.update_meta(project.id, meta=project_meta)
# Import dataset
api.dataset.quick_import(
dataset=dataset,
blob_path=tar_path, # from the code above
offsets_path=offsets_path, # from the code above
anns=anns,
project_meta=meta,
project_type=sly.ProjectType.IMAGES,
)
```
## Performance Comparison
A blob project with 30000 small images (\~4KB each) can be:
* Uploaded `~2x` faster than standard uploads, `~x14` especially using Quick Import
* Downloaded `~4x` faster than standard downloads, `~22x` especially using fast methods
## Best Practices
1. Use blob approach for collections with many small images
2. Batch operations in groups of 10000 images
3. Always save image metadata when downloading
4. Monitor memory usage when processing thousands of images
# Advanced: Export
This advanced tutorial will guide you through various methods of downloading images and annotations from Supervisely. We'll cover everything from basic downloads to optimized approaches for large projects, with performance benchmarks to illustrate the benefits of different techniques.
{% hint style="warning" %}
This tutorial uses Supervisely Python SDK version v6.73.349. The code examples provided are compatible with this specific version. Using the exact or newer version ensures you'll get the expected results. You can install it using:
```bash
pip install supervisely==6.73.349
```
{% endhint %}
## Basic Downloads
### Project Metadata
{% hint style="info" %}
The easiest way is to create a `.env` file that stores your **SERVER\_ADDRESS** and **API\_TOKEN**. This makes it simpler to initialize the `api` client as you work through code snippets in this tutorial. You can learn more about this in this [section](/getting-started/basics-of-authentication)
{% endhint %}
Project metadata contains essential information about your project, including classes, tags, and other configurations.
```python
import supervisely as sly
# Initialize API client
api = sly.Api.from_env()
# Get project metadata with project settings by ID
project_id = 12345
project_meta_json = api.project.get_meta(project_id, with_settings=True)
project_meta = sly.ProjectMeta.from_json(project_meta_json)
# Display project classes and tags
print("Project Classes:")
for obj_class in project_meta.obj_classes:
print(f"- {obj_class.name} ({obj_class.geometry_type.name()})")
print("\nProject Tags:")
for tag_meta in project_meta.tag_metas:
print(f"- {tag_meta.name}")
```
### Single Image and Annotation
Here's how to download a single image and its annotation:
```python
import os
import supervisely as sly
api = sly.Api.from_env()
# Define project and dataset IDs
project_id = 12345
dataset_id = 67890
# Get first image info
image_infos = api.image.get_list(dataset_id)
image_info = image_infos[0]
image_id = image_info.id
# Download numpy array
img_np = api.image.download_np(image_id)
print(f"Downloaded image numpy array: {image_info.name}, shape: {img_np.shape}")
# or download image and save locally if needed
save_dir = "downloaded_data"
sly.fs.mkdir(save_dir)
save_path = os.path.join(save_dir, image_info.name)
api.image.download(image_id, save_path)
print(f"Downloaded image file: {image_info.name}, path: {save_path}")
# Download annotation in JSON format and save
ann_json = api.annotation.download_json(image_id)
save_path = os.path.join(save_dir, image_info.name + ".json")
sly.json.dump_json_file(ann_json, save_path)
print(f"Downloaded annotation file: {save_path}")
# or convert to Annotation object
ann = sly.Annotation.from_json(ann_json, project_meta)
print(f"Downloaded annotation object with {len(ann.labels)} labels")
```
### Annotation JSON Format
Supervisely allows you to download annotations in JSON format, which is particularly useful for custom processing or integration with other tools.
1. **Flexibility**: JSON format provides the raw data structure, allowing you to parse and process it according to your specific needs.
2. **Completeness**: JSON format includes all metadata and additional information that might be stripped in specific export formats.
3. **Interoperability**: JSON is a universal format that can be easily converted to other formats or used directly in various applications.
To learn more about Supervisely image annotation format, read the [Image Annotation](/getting-started/supervisely-annotation-format) docs.
## Batch Downloads
### Multiple Images and Annotations
For better performance, download multiple images and annotations in batches. Almost all our methods that download multiple images or annotations at once use batches at a low level. The batch size is optimized for efficient operation across different instances and is set to 50.
```python
import supervisely as sly
from tqdm import tqdm
api = sly.Api.from_env()
project_id = 12345
dataset_id = 67890
# Get image IDs from dataset
image_infos = api.image.get_list(dataset_id)
image_ids = [image_info.id for image_info in image_infos[:100]] # First 100 images
# Download images. This method is optimized and will download all images batch by batch.
images_progress = tqdm(total=len(image_ids), desc="Downloading images")
images = api.image.download_nps(dataset_id, image_ids, progress_cb=images_progress)
# Download annotations for all images,
annotation_progress = tqdm(total=len(image_ids), desc="Downloading annotations")
batch_anns = api.annotation.download_batch(dataset_id, image_ids, progress_cb=annotation_progress)
```
### Setting Batch Size
Batch size significantly affects download performance. Here's how to set it and understand its impact:
```python
import re
import time
from typing import List, Optional
from requests_toolbelt import MultipartDecoder
from tqdm import tqdm
import supervisely as sly
from supervisely.api.annotation_api import ApiField
from supervisely.imaging import image
api = sly.Api.from_env()
dataset_id = 67890
image_infos = api.image.get_list(dataset_id)
image_ids = [image_info.id for image_info in image_infos[:1000]] # Test with 1000 images
# Test different batch sizes
batch_sizes = [10, 50, 100, 200]
for batch_size in batch_sizes:
sly.api_constants.DOWNLOAD_BATCH_SIZE = batch_size
progress_cb = tqdm(total=len(image_ids), desc=f"Download images: {batch_size}")
start_time = time.monotonic()
img_nps = api.image.download_nps(dataset_id, image_ids, progress_cb=progress_cb)
elapsed_time = time.monotonic() - start_time
print(f"Batch size: {batch_size}, Time: {elapsed_time:.2f} seconds")
```
Following results was obtained on [Pascal VOC 2012](https://datasetninja.com/pascal-voc-2012) dataset which you could download from [datasetninja.com](https://datasetninja.com/)
| Batch size | Time (seconds) |
| ---------- | -------------- |
| 10 | 210 |
| 50 | 44 |
| 100 | 33 |
| 200 | 31 |
Batch size affects:
* Network efficiency: Larger batches reduce overhead from multiple requests
* Memory usage: Very large batches consume more RAM
* Error handling: Smaller batches are easier to retry if errors occur
The optimal batch size depends on your network conditions, server load, and image sizes. Generally, batch sizes between 50-100 work well for most cases.
## Entire Project Downloads
### Downloading in Supervisely Format
To download a complete project, you can use the convenient `download_fast` function that handles all the details for you.
This function provides significant advantages over manual download approaches:
* Uses a smart approach to choose between asynchronous downloading or standard method
* Downloads the complete structure with all metadata
* Preserves the Supervisely format for easy re-import later
* Automatically handles batching and resource management
* Provides options for customizing exactly what gets downloaded
{% hint style="success" %}
🚀 It works `~8x` faster than the standard download method
{% endhint %}
```python
import supervisely as sly
api = sly.Api.from_env()
project_id = 12345
save_path = 'Pascal_VOC_2012'
sly.fs.mkdir(save_path)
sly.download_fast(
api=api,
project_id=project_id,
dest_dir=save_path,
)
```
Read the signature of the `download_fast` function in the [Python SDK](https://supervisely.readthedocs.io/en/latest/sdk/supervisely.project.download.download_fast.html)
### Downloading in Specific Formats
When downloading data from Supervisely, it is initially exported in the native Supervisely format. For projects with thousands of small images, Supervisely offers an optimized approach using "blob files".
However, you can easily convert data from the classic Supervisely format to other popular formats immediately after downloading. The SDK provides built-in conversion utilities that make it simple to transform your data into formats like COCO, YOLO, Pascal VOC, and more.
#### Extended Supervisely Format with Blobs
This download method is only available for projects that were originally uploaded using the blob format.
```python
import supervisely as sly
api = sly.Api.from_env()
project_id = 12345
output_dir = "blob_project"
sly.fs.mkdir(output_dir)
# Download project with blob files (much faster for projects with many small images)
sly.download_fast(
api=api,
project_id=project_id,
dest_dir=output_dir,
download_blob_files=True # Important for blob images
)
```
The blob approach packages many small images into a single archive file, reducing filesystem operations and network requests.
{% hint style="success" %}
☄️ Can be up to `~22x` faster than standard downloads for projects with thousands of small images (under 100KB each).
{% endhint %}
For more detailed information about working with blob files, including how to upload and process blob-based projects, please refer to [documentation on working with blob files](/getting-started/python-sdk-tutorials/images/optimized-import).
You can also use the application from the ecosystem that will download a project of this format: [Export to Supervisely format: Blob](https://app.supervisely.com/ecosystem/apps/supervisely-ecosystem/export-to-supervisely-format-blob)
#### Popular formats like COCO, YOLO, Pascal VOC etc.
After downloading classic Supervisely format, you can convert the data to popular formats like COCO, YOLO, or Pascal VOC:
```python
import supervisely as sly
api = sly.Api.from_env()
project_id = 12345
# Define download path
output_dir = "downloaded_project"
sly.fs.mkdir(output_dir)
# Download the project in Supervisely format
print("Downloading project in Supervisely format...")
sly.download_fast(
api=api,
project_id=project_id,
dest_dir=output_dir,
)
print(f"Project saved to: {output_dir}")
# After downloading, you can open the project to access its contents
project_fs = sly.Project(output_dir, sly.OpenMode.READ)
```
Then you can convert the project to other formats in two ways:
* Using the sly.convert functions
* Using the Project object
{% tabs %}
{% tab title="COCO" %}
COCO format supports geometry types like rectangles, bitmaps, polygons, and graph nodes
```python
# 1. Convert to COCO format
print("\nConverting to COCO format...")
coco_output_dir = "coco_format"
sly.convert.project_to_coco(output_dir, coco_output_dir)
# or
project_fs.to_coco(coco_output_dir)
print(f"COCO format saved to: {coco_output_dir}")
```
{% endtab %}
{% tab title="YOLO" %}
YOLO format supports:
* Detection task: rectangles, bitmaps, polygons, graph nodes, polylines, alpha masks
* Segmentation task: polygons, bitmaps, alpha masks - Pose estimation task: graph nodes
```python
# 2. Convert to YOLO format for detection
print("\nConverting to YOLO format for detection...")
yolo_output_dir = "yolo_format"
sly.convert.project_to_yolo(output_dir, yolo_output_dir, task_type="detect")
# or
project_fs.to_yolo(yolo_output_dir, task_type="detect")
print(f"YOLO format saved to: {yolo_output_dir}")
```
{% endtab %}
{% tab title="Pascal VOC" %}
Pascal VOC format supports standard Pascal VOC annotation structure
```python
# 3. Convert to Pascal VOC format
print("\nConverting to Pascal VOC format...")
pascal_output_dir = "pascal_voc_format"
sly.convert.project_to_pascal_voc(output_dir, pascal_output_dir)
# or
project_fs.to_pascal_voc(pascal_output_dir)
print(f"Pascal VOC format saved to: {pascal_output_dir}")
```
{% endtab %}
{% endtabs %}
You can also convert specific datasets
```python
# For example, to convert a specific dataset to Pascal VOC format:
for ds in project_fs.datasets:
sly.convert.dataset_to_pascal_voc(dataset=ds, meta=project_fs.meta, dest_dir=pascal_output_dir)
# or
ds.to_pascal_voc(project_fs.meta, dest_dir=pascal_output_dir)
```
These conversion utilities make it easy to use your Supervisely data with other frameworks and tools without needing to implement custom converters.
## Working with Datasets
### Dataset Hierarchy
Supervisely supports hierarchical dataset structures. See the special article that explains how to work with projects that have hierarchical datasets - [Iterate over a project](/getting-started/python-sdk-tutorials/common/iterate-over-a-project)
Here's how to navigate and work with them:
{% tabs %}
{% tab title="Iterate Through Dataset Tree" %}
```python
import supervisely as sly
api = sly.Api.from_env()
project_id = 172
# Use the tree() method to efficiently iterate through the dataset hierarchy
print("Dataset Hierarchy (using tree method):")
for parents, dataset in api.dataset.tree(project_id):
# parents is a list of parent dataset names, empty list for root datasets
indent = " " * len(parents)
if not parents:
print(f"{indent}- {dataset.name} (ID: {dataset.id})")
else:
parent_path = " > ".join(parents)
print(f"{indent}|- {dataset.name} (ID: {dataset.id}, Path: {parent_path})")
# Output will look like this:
# - DS1 (ID: 328)
# |- DS1-1 (ID: 383, Path: DS1)
# |- DS1-1-1 (ID: 384, Path: DS1 > DS1-1)
# - DS2 (ID: 382)
# |- DS2-1 (ID: 385, Path: DS2)
# |- DS2-1-1 (ID: 774, Path: DS2 > DS2-1)
# |- DS2-1-1-1 (ID: 775, Path: DS2 > DS2-1 > DS2-1-1)
```
{% endtab %}
{% tab title="Dictionary Structure" %}
```python
import json
import supervisely as sly
api = sly.Api.from_env()
project_id = 172
# Get the dataset tree as a dictionary structure
original_tree = api.dataset.get_tree(project_id)
# Convert tree to use dataset `[ID] Name` as keys instead of DatasetInfo objects for better representation
def convert_tree_to_id_keys(tree: dict) -> dict:
id_tree = {}
for dataset_info, children in tree.items():
id_tree[f"[{dataset_info.id}] {dataset_info.name}"] = {
"children": convert_tree_to_id_keys(children) if children else {}
}
return id_tree
dataset_tree = convert_tree_to_id_keys(original_tree)
# You can now navigate this tree structure programmatically
print("\nDataset Tree Structure (using get_tree method): ")
print(json.dumps(dataset_tree, indent=2))
# Output will look like this:
# {
# "[328] DS1": {
# "children": {
# "[383] DS1-1": {
# "children": {
# "[384] DS1-1-1": {
# "children": {}
# }
# }
# }
# }
# },
# "[382] DS2": {
# "children": {
# "[385] DS2-1": {
# "children": {
# "[774] DS2-1-1": {
# "children": {
# "[775] DS2-1-1-1": {
# "children": {}
# }
# }
# }
# }
# }
```
{% endtab %}
{% tab title="Flat List" %}
```python
import supervisely as sly
api = sly.Api.from_env()
project_id = 172
# Get all datasets including nested ones with recursive=True
print("\nAll Datasets (Flat List):")
all_datasets = api.dataset.get_list(project_id, recursive=True)
for ds in all_datasets:
parent_info = f"(Parent ID: {ds.parent_id})" if ds.parent_id is not None else "(Root)"
print(f"- [{ds.id}] {ds.name} {parent_info}")
# Output will look like this:
# - [328] DS1 (Root)
# - [382] DS2 (Root)
# - [383] DS1-1 (Parent ID: 328)
# - [384] DS1-1-1 (Parent ID: 383)
# - [385] DS2-1 (Parent ID: 382)
# - [774] DS2-1-1 (Parent ID: 385)
# - [775] DS2-1-1-1 (Parent ID: 774)
```
{% endtab %}
{% tab title="Nested of a Parent" %}
```python
import supervisely as sly
api = sly.Api.from_env()
project_id = 172
dataset_id = 385 # Specify parent dataset ID
# Get only nested datasets of a specific parent dataset
print(f"\nNested Datasets for Dataset ID {dataset_id}:")
nested_datasets = api.dataset.get_nested(project_id, dataset_id)
for ds in nested_datasets:
print(f"- [{ds.id}] {ds.name} (Parent ID: {ds.parent_id})")
# Output will look like this:
# - [774] DS2-1-1 (Parent ID: 385)
# - [775] DS2-1-1-1 (Parent ID: 774)
```
{% endtab %}
{% endtabs %}
### Downloading Specific Datasets
To download specific datasets from a project, you can use the convenient `download_fast` mentioned above.
When you specify a dataset ID, the function will:
* Create the folder structure up to the parent dataset level
* Download only the images and annotations for the specified dataset
* Skip downloading images from parent datasets in the hierarchy
* Skip downloading any nested child datasets that might exist under your specified dataset
If you need to download an entire branch of the dataset hierarchy (a dataset and all its nested children), you would need to provide all the relevant dataset IDs in the `dataset_ids` parameter.
```python
import supervisely as sly
api = sly.Api.from_env()
project_id = 10
dataset_ids = [39]
save_path = 'Pascal_VOC_2012/train'
sly.fs.mkdir(save_path)
sly.download_fast(
api=api,
project_id=project_id,
dest_dir=save_path,
dataset_ids=dataset_ids,
)
```
## Dataset Images Asynchronous Downloads
### Download Methods
For better performance, you can use asynchronous methods even in a synchronous context:
```python
import supervisely as sly
coroutine = download_nps_async(img_ids)
img_nps = sly.run_coroutine(coroutine)
```
The table below lists various asynchronous methods available in the Supervisely SDK for downloading images in different formats and output types. These methods can significantly improve download performance compared to their synchronous counterparts, especially when working with large datasets.
| Method | Description |
| -------------------------------- | ------------------------------------------------------------------------------------------------------------ |
| `download_np_async` | Downloads a single image as numpy array |
| `download_nps_async` | Downloads multiple images as numpy arrays |
| `download_path_async` | Downloads a single image to a specified path |
| `download_paths_async` | Downloads multiple images to specified paths |
| `download_bytes_single_async` | Downloads a single image as bytes |
| `download_bytes_many_async` | Downloads multiple images as bytes in parallel (one request per image) |
| `download_bytes_generator_async` | Downloads multiple images as bytes using a single batch request, yielding results through an async generator |
### Performance Comparison
Let's compare synchronous and asynchronous download methods, for example as numpy array:
{% tabs %}
{% tab title="One by one" %}
```python
import supervisely as sly
from time import monotonic
from tqdm import tqdm
api = sly.Api.from_env()
dataset_id = 1037458
# Get image IDs for testing
image_infos = api.image.get_list(dataset_id)
img_ids = [info.id for info in image_infos[:1000]] # Using first 1000 images
print(f"Testing download performance with {len(img_ids)} images...")
# 1. Synchronous download (one by one)
start_time = monotonic()
img_nps = []
progress = tqdm(total=len(img_ids), desc="Sync download")
for img_id in img_ids:
img_nps.append(api.image.download_np(img_id))
progress.update(1)
sync_time = monotonic() - start_time
print(f"Synchronous download took {sync_time:.2f} seconds")
```
{% endtab %}
{% tab title="Batch by batch" %}
```python
import supervisely as sly
from time import monotonic
from tqdm import tqdm
api = sly.Api.from_env()
dataset_id = 1037458
# Get image IDs for testing
image_infos = api.image.get_list(dataset_id)
img_ids = [info.id for info in image_infos[:1000]] # Using first 1000 images
print(f"Testing download performance with {len(img_ids)} images...")
# 2. Batch synchronous download with predefined batch sizes: 50
start_time = monotonic()
progress = tqdm(total=len(img_ids), desc=f"Batch download")
img_nps = api.image.download_nps(dataset_id, img_ids, progress_cb=progress)
batch_time = monotonic() - start_time
print(f"Batch download took {batch_time:.2f} seconds")
```
{% endtab %}
{% tab title="Asynchronous" %}
```python
import supervisely as sly
from time import monotonic
from tqdm import tqdm
api = sly.Api.from_env()
dataset_id = 1037458
# Get image IDs for testing
image_infos = api.image.get_list(dataset_id)
img_ids = [info.id for info in image_infos[:1000]] # Using first 1000 images
print(f"Testing download performance with {len(img_ids)} images...")
# 3. Asynchronous download
start_time = monotonic()
progress = tqdm(total=len(img_ids), desc="Async download")
# Run async function in synchronous context
img_nps = sly.run_coroutine(api.image.download_nps_async(img_ids))
async_time = monotonic() - start_time
print(f"Asynchronous download took {async_time:.2f} seconds")
```
{% endtab %}
{% tab title="Calculate speedups" %}
```python
# Calculate speedups
print("\nSpeedup compared to synchronous download:")
batch_speedup = sync_time / batch_time
print(f"Batch: {batch_speedup:.2f}x faster")
async_speedup = sync_time / async_time
print(f"Asynchronous: {async_speedup:.2f}x faster")
```
{% endtab %}
{% endtabs %}
{% hint style="success" %}
**Images**
The performance improvement from synchronous to batch to asynchronous methods can be dramatic:
* Batch: `~2.5x` speedup
* 🚀 Asynchronous: `~15x` speedup
{% endhint %}
Results was obtained on [Pascal VOC 2012](https://datasetninja.com/pascal-voc-2012) dataset which you could download from [datasetninja.com](https://datasetninja.com/)
| Method | Description | Pros | Cons | Best For |
| --------------------- | ------------------------------- | --------------------------------------------- | ------------------------------------- | ------------------------- |
| Single download | Download one image at a time | Simple to implement, minimal memory usage | Very slow for many images | Small projects, debugging |
| Batch download | Download images in groups | Better network utilization, simple API | Blocking operation | Medium-sized projects |
| Asynchronous download | Non-blocking parallel downloads | Highest performance, efficient resource usage | Limited by network/system performance | Large projects |
Using asynchronous downloads with proper concurrency control (via semaphores) enables you to get the best possible performance while managing system resource usage.
## Advanced Annotation Downloads
### Synchronous Annotation Downloads
First, we'll compare what speed increase we get when downloading annotations in batches with a fixed size of 50. This size remains constant since an optimal value has been chosen that will work efficiently for any instance configuration.
{% tabs %}
{% tab title="One by one" %}
```python
import supervisely as sly
from time import monotonic
from tqdm import tqdm
api = sly.Api.from_env()
dataset_id = 1037458
# Get image IDs
image_infos = api.image.get_list(dataset_id)
img_ids = [info.id for info in image_infos[:1000]] # Using first 1000 images
print(f"Testing annotation download performance with {len(img_ids)} images...")
# 1. Synchronous download (one by one)
start_time = monotonic()
anns = []
progress = tqdm(total=len(img_ids), desc="Sync download")
for img_id in img_ids:
anns.append(api.annotation.download(img_id))
progress.update(1)
sync_time = monotonic() - start_time
print(f"Synchronous annotations download took {sync_time:.2f} seconds")
```
{% endtab %}
{% tab title="Batch by batch" %}
```python
import supervisely as sly
from time import monotonic
from tqdm import tqdm
api = sly.Api.from_env()
dataset_id = 1037458
# Get image IDs
image_infos = api.image.get_list(dataset_id)
img_ids = [info.id for info in image_infos[:1000]] # Using first 1000 images
print(f"Testing annotation download performance with {len(img_ids)} images...")
# 2. Batch synchronous download with predefined batch sizes: 50
start_time = monotonic()
progress = tqdm(total=len(img_ids), desc=f"Batch download")
anns = api.annotation.download_batch(dataset_id, img_ids, progress_cb=progress)
batch_time = monotonic() - start_time
print(f"Batch download took {batch_time:.2f} seconds")
```
{% endtab %}
{% tab title="Calculate speedups" %}
```python
# Calculate speedups
batch_speedup = sync_time / batch_time
print(f"Speedup of batch download: {batch_speedup:.2f}x faster")
```
{% endtab %}
{% endtabs %}
### Asynchronous Annotation Downloads
There are two methods for asynchronous annotation downloading that are used depending on the types of annotations in your dataset images.
| Method | Best For |
| ---------------------- | ---------------------------------------------------- |
| `download_batch_async` | Standard annotations for normal-sized images |
| `download_bulk_async` | Small or simple annotations for smaller-sized images |
{% hint style="info" %}
To apply these methods effectively, you can separate images into different lists based on their size information.
{% endhint %}
{% tabs %}
{% tab title="Multiple in parallel" %}
```python
import supervisely as sly
from time import monotonic
from tqdm import tqdm
import asyncio
api = sly.Api.from_env()
dataset_id = 1037458
# Get image IDs
image_infos = api.image.get_list(dataset_id)
img_ids = [info.id for info in image_infos[:1000]] # Using first 1000 images
print(f"Testing annotation download performance with {len(img_ids)} images...")
# Method 3: Download multiple annotations in parallel (one request per image)
# Adjust the number of concurrent requests depending on your instance limitations
semaphore = asyncio.Semaphore(4)
progress = tqdm(total=len(img_ids), desc=f"Async Batch download")
download_coroutine = api.annotation.download_batch_async(
dataset_id,
img_ids,
progress_cb=progress,
semaphore=semaphore,
)
start_time = monotonic()
anns = sly.run_coroutine(download_coroutine)
async_batch_time = monotonic() - start_time
print(f"Downloaded {len(anns)} annotations in {async_batch_time:.2f} seconds")
```
{% endtab %}
{% tab title="Multiple batches in parallel" %}
```python
import supervisely as sly
from time import monotonic
from tqdm import tqdm
import asyncio
api = sly.Api.from_env()
dataset_id = 1037458
# Get image IDs
image_infos = api.image.get_list(dataset_id)
img_ids = [info.id for info in image_infos[:1000]] # Using first 1000 images
print(f"Testing annotation download performance with {len(img_ids)} images...")
# Method 4: Download multiple annotations in parallel in batches
tasks = []
progress = tqdm(total=len(img_ids), desc=f"Async Bilk download")
for batch in sly.batched(img_ids):
download_coroutine = api.annotation.download_bulk_async(
dataset_id,
batch,
progress_cb=progress,
)
tasks.append(download_coroutine)
start_time = monotonic()
anns_batches = sly.run_coroutine(asyncio.gather(*tasks))
anns = []
for batch_result in anns_batches:
anns.extend(batch_result)
async_bulk_time = monotonic() - start_time
print(f"Downloaded {len(anns)} annotations in {async_bulk_time:.2f} seconds")
```
{% endtab %}
{% tab title="Calculate speedups" %}
```python
# Calculate speedups
async_batch_speedup = sync_time / async_batch_time
print(f"Speedup of async batch download: {async_batch_speedup:.2f}x faster")
async_bulk_speedup = sync_time / async_bulk_time
print(f"Speedup of async batch download: {async_bulk_speedup:.2f}x faster")
```
{% endtab %}
{% endtabs %}
Following results was obtained on [Pascal VOC 2012](https://datasetninja.com/pascal-voc-2012) dataset which you could download from [datasetninja.com](https://datasetninja.com/)
{% hint style="success" %}
**Annotations**
The performance improvement from synchronous to batch to asynchronous methods:
* Batch: `~3.5x` speedup
* Asynchronous: `~8x` speedup
* 🧨 Asynchronous batch: `~19x` speedup
Your specific speedup may differ from these benchmarks depending on: number of annotations on images, complexity of annotations, image size (annotation size), network conditions, server load.
{% endhint %}
The benefits of asynchronous downloading:
1. **Parallel processing**: Multiple batches can be downloaded simultaneously
2. **Better resource utilization**: Network I/O doesn't block the application
3. **Improved throughput**: Especially noticeable with many small files
4. **Reduced total processing time**: Significant reduction for large datasets
### Choosing the Right Async Method
For best performance, consider these guidelines:
1. Use `semaphore` to control concurrency (typically 5-20 concurrent downloads)
2. The `download_bulk_async` method is generally fastest for datasets with many small annotations
3. For complex annotations with alpha masks or large bitmaps, `download_batch_async` with a smaller semaphore value may work better
4. When using `ApiContext`, the methods automatically use the project metadata to avoid redundant API calls:
```python
# Optimize downloads with ApiContext
project_id = api.dataset.get_info_by_id(dataset_id).project_id
project_meta = api.project.get_meta(project_id)
with sly.ApiContext(api, dataset_id=dataset_id, project_id=project_id, project_meta=project_meta):
annotations = sly.run_coroutine(download_bulk_async())
```
## Figures Download
When working with datasets that have large numbers of annotations, downloading figures in bulk can significantly improve performance. Supervisely provides dedicated API methods for this purpose.
The bulk figure download approach is particularly effective when:
* You need to analyze annotation distribution without loading full data
* You're developing a custom export pipeline to another format
* You need to visualize or process specific types of annotations
* Your dataset contains many images with hundreds or thousands of annotations
### Understanding Figures vs Annotations
In Supervisely's data model:
* **Annotations** contain all information about labeled objects, including tags and metadata
* **Figures** represent the geometric shapes that define objects in images (rectangles, polygons, bitmaps, etc.)
For many ML tasks, you might only need the geometric information without all the associated metadata.
### Basic Figures Download
`FigureInfo` represents detailed information about a figure: geometry, tags, metadata etc.\
Here's how to get `FigureInfo` for images in a dataset.
```python
import supervisely as sly
from tqdm import tqdm
api = sly.Api.from_env()
# Define dataset ID
dataset_id = 254737
# Download all figures for a dataset
# Returns a dictionary where keys are image IDs and values are lists of figures
figures_dict = api.image.figure.download(dataset_id)
figure_ids = []
# Process each image's figures
for image_id, figures in figures_dict.items():
print(f"Image ID: {image_id}, Number of figures: {len(figures)}")
for figure in figures:
print(f" - Figure ID: {figure.id}, Class ID: {figure.class_id}, Type: {figure.geometry_type}")
figure_ids.append(figure.id)
```
### Optimized Figures Download
For large datasets, you can skip downloading the geometry data initially to speed up the process.
For example, when you need to filter figures by class. You download lightweight `FigureInfo`s, process it, and get a list of figures you need.
```python
import supervisely as sly
from tqdm import tqdm
from supervisely.geometry.alpha_mask import AlphaMask
api = sly.Api.from_env()
# Define dataset ID
dataset_id = 254737
# Download only figures info without geometries
figures_dict = api.image.figure.download(dataset_id, skip_geometry=True)
# Collect figure IDs
figures_ids = []
for image_id, figures in figures_dict.items():
for figure in figures:
if figure.geometry_type == AlphaMask.name():
figures_ids.append(figure.id)
print(f"Found {len(figures_ids)} AlphaMask figures in the dataset")
```
### Working with AlphaMask Geometries
For advanced cases like `AlphaMask` geometries, you'll need to handle the download separately:
```python
# Then download only the geometries you need in batches
progress = tqdm(total=len(figures_ids), desc="Downloading geometries")
geometries = api.image.figure.download_geometries_batch(figures_ids, progress_cb=progress)
# Process geometries
for figure_id, geometry in zip(figures_ids, geometries):
# Your processing code here
pass
```
The bulk geometry download offers several advantages:
1. **Reduced network overhead**: Only essential figure data is transferred
2. **Faster processing**: Server-side filtering minimizes data transfer
3. **Lower memory usage**: Only relevant geometry information is returned
4. **Simplified post-processing**: Data is already in the required format
### Advanced: Asynchronous Downloads
For even better performance with large datasets (containing approximately 1.2 million figures in total), you can use asynchronous downloads:
```python
import supervisely as sly
api = sly.Api.from_env()
figures_dict = api.image.figure.download_fast(dataset_id)
alpha_ids = []
for image_id, figures in figures_dict.items():
for figure in figures:
if figure.geometry_type == AlphaMask.name():
alpha_ids.append(figure.id)
progress = tqdm(total=len(alpha_ids), desc="Downloading AlphaMask geometries")
# Download geometries asynchronously
download_coroutine = api.image.figure.download_geometries_batch_async(alpha_ids, progress_cb=progress)
geometries = sly.run_coroutine(download_coroutine)
print(f"Downloaded {len(geometries)} geometries")
```
{% hint style="success" %}
**Figures**
The performance improvement from synchronous to asynchronous method:
* Synchronous without geometries: `~1.3x`
* 💪 Asynchronous: `~5x`
* 💪 Asynchronous without geometries: `~6x`
{% endhint %}
### Performance Tips for Figure Downloads
1. **Use `skip_geometry=True`** when you only need figure metadata initially
2. **Process figures by type** - some geometry types might need special handling
3. **Download geometries in batches** (optimal batch size is typically 50-200)
4. **Use asynchronous methods** for large datasets with many figures
5. **Consider memory constraints** when downloading many complex geometries
## Conclusion
When downloading data from Supervisely, choosing the right method can dramatically impact performance.\
Single downloads are simple but inefficient for large datasets, suitable only for debugging or working with a few images.\
Batch downloads offer a good balance of simplicity and performance for medium-sized projects, improving network utilization while remaining easy to implement. For large-scale projects with thousands of images or annotations, asynchronous downloads deliver the best performance - up to `~20x` faster than sequential downloads - by efficiently utilizing network resources and processing multiple requests in parallel.
Remember to use semaphores to control concurrency and consider the specific characteristics of your data (image sizes, annotation complexity) when selecting a download method. By implementing the appropriate download strategy for your project's scale, you can significantly reduce processing time and improve overall workflow efficiency.
# AI Search
## Overview
This tutorial demonstrates how to use the Supervisely Python SDK to work with AI Search functionality. AI Search allows you to intelligently search for images within a project using semantic similarity, leveraging CLIP embeddings stored in a dedicated vector database (Qdrant).
## Prerequisites
### Instance Requirements
**Minimum Instance Version:** `6.14.4`
For AI Search functionality to work properly, your Supervisely instance must have the following services running:
* `Embeddings Generator` - Handles the calculation of CLIP embeddings for images
* `Embeddings Auto-Updater` - Automatically updates embeddings when new images are added
* `Qdrant Vector Database` - Configured to store and retrieve the calculated embeddings for projects
* `CLIP Service Application` - Provides the neural network model for generating image embeddings
{% hint style="info" %}
These services are typically configured by your instance administrator. If AI Search is not working, contact your administrator to ensure all required services are properly deployed and running.
{% endhint %}
### SDK Setup
Before starting, ensure you have set up your development environment and installed Supervisely SDK version `6.73.413` or higher
To install the required SDK version:
```bash
pip install supervisely>=6.73.413
```
### Initialize API Client
Once you have your credentials configured, initialize the API client:
```python
import os
from dotenv import load_dotenv
import supervisely as sly
# Load secrets and create API object from .env file (recommended)
# Learn more here: https://developer.supervisely.com/getting-started/basics-of-authentication
if sly.is_development():
load_dotenv(os.path.expanduser("~/supervisely.env"))
api = sly.Api.from_env()
```
## Core Methods
### Calculate Embeddings
The `calculate_embeddings` method initiates an asynchronous calculation of CLIP embeddings for all images in the specified project. The embeddings are generated and stored in the Qdrant vector database for AI Search operations.
```python
project_id = 123456
api.project.calculate_embeddings(id: project_id)
```
Parameters:
| Argument | Type | Description |
| -------- | ----- | --------------------------------------------------------------------------------- |
| `id` | `int` | Required. The unique identifier of the project for which to calculate embeddings. |
Returns:
* `None`
Notes:
* Before calculating embeddings, ensure that the project has the `embeddings_enabled` flag set to `True` using the `enable_embeddings()` method. Otherwise, the calculation request will not be processed.
* This method sends a request to the `Embeddings Generator` service and returns immediately. The actual calculation happens asynchronously in the background.
* Embeddings must be calculated before AI Search can be performed on the project.
* The calculation time depends on the number of images in the project and the performance of your instance.
* Progress can be tracked through the `ProjectInfo` where `embeddings_in_progress` should be `False` and `embeddings_updated_at` timestamp should be present to indicate completion.
* If the `Embeddings Auto-Updater` service is running, new images added to the project will have embeddings calculated automatically.
### Perform AI Search
The `perform_ai_search` method executes an AI-powered search within a project using one of three mutually exclusive search modes:
* semantic text search
* image similarity search
* diverse sampling
```python
project_id = 123456
perform_ai_search(project_id: project_id)
```
Parameters:
| Argument | Type | Description |
| ------------------- | --------------------------------------- | ------------------------------------------------------------------------------------------------------------------------------------------------------------ |
| `project_id` | `int` | Required. Unique identifier of the project to search within. |
| `dataset_id` | `Optional[int]` | Optional. Restricts the search to images within this dataset. Default is `None` (searches entire project). |
| `image_id` | `Optional[List[int]]` | Optional. IDs of a reference image for similarity search. Finds images visually similar to this images. |
| `prompt` | `Optional[str]` | Optional. Natural language text for semantic search. Finds images matching this description. |
| `method` | `Optional[str]` | Optional. Sampling method for diverse search: `"centroids"` (representative samples from clusters), `"random"` (evenly across clusters). |
| `limit` | `Optional[int]` | Optional. Maximum number of images to return. Default is `100`. |
| `clustering_method` | `Optional[Literal["kmeans", "dbscan"]]` | Optional. Clustering method for results: `"kmeans"` or `"dbscan"`. If `None`, no clustering is applied. |
| `num_clusters` | `Optional[int]` | Optional. Number of clusters to create if `clustering_method` is specified. Required for `"kmeans"` method. |
| `image_id_scope` | `Optional[List[int]]` | Optional. List of image IDs to limit the search scope. If `None`, search is performed across all images unless other filters are set. |
| `threshold` | `Optional[float]` | Optional. Similarity threshold. Only images with similarity above this value are returned. In search results, this parameter is also referred to as `score`. |
Returns:
* The ID `int` of the created entities collection containing search results, or `None` if no collection was created (e.g., no results found).
Raises:
* `ValueError`: If more than one of prompt, image\_id, or method is provided (they are mutually exclusive).
* `ValueError`: If method is provided but is not one of the allowed values ("centroids" or "random").
Notes:
* Only one search mode parameter (`prompt`, `image_id`, or `method`) can be used per search.
* The returned collection ID can be used to retrieve the actual image results using the image API methods.
* Collections created by AI Search are temporary and will be overwritten by subsequent searches unless explicitly saved.
* Embeddings must be calculated for the project before performing any search operations.
## Complete Examples
### Enable AI Search for a Project
```python
import supervisely as sly
import time
api = sly.Api.from_env()
project_id = 123456
# Enable embeddings for the project
api.project.enable_embeddings(project_id)
print(f"Embeddings enabled for project {project_id}")
# Start calculating embeddings
api.project.calculate_embeddings(project_id)
print("Embeddings calculation started...")
# Check and wait until process is finished
while api.project.get_embeddings_in_progress(project_id):
time.sleep(10)
print("AI Search is now enabled and ready!")
```
### Text Prompt Search
```python
from supervisely.api.entities_collection_api import CollectionTypeFilter
project_id = 123456
prompt = "person riding a bicycle in the park"
limit = 20
# Perform text-based search
collection_id = api.project.perform_ai_search(project_id=project_id, prompt=prompt, limit=limit)
if collection_id:
print(f"Search completed! Collection ID: {collection_id}")
# Get collection info
images = api.entities_collection.get_items(
collection_id, collection_type=CollectionTypeFilter.AI_SEARCH
)
print(f"Found {len(images)} similar images")
# Display results
for idx, img in enumerate(images[:5]): # Show first 5
print(f"{idx+1}. {img.name} (ID: {img.id})")
else:
print("No results found")
```
### Image Similarity Search
```python
from supervisely.api.entities_collection_api import CollectionTypeFilter
project_id = 123456
reference_image_id = 789012
limit = 20
# Get the reference image info
ref_image = api.image.get_info_by_id(reference_image_id)
print(f"Reference image: {ref_image.name}")
# Search for similar images
collection_id = api.project.perform_ai_search(
project_id=project_id, image_id=reference_image_id, limit=limit
)
if collection_id:
# Get similar images
similar_images = api.entities_collection.get_items(
collection_id, collection_type=CollectionTypeFilter.AI_SEARCH
)
print(f"Found {len(similar_images)} similar images:")
for img in similar_images[:10]: # Show top 10
if img.id != reference_image_id: # Skip the reference image itself
print(f"- {img.name} (ID: {img.id})")
else:
print("No results found")
```
### Diverse Search
```python
from supervisely.api.entities_collection_api import CollectionTypeFilter
project_id = 123456
limit = 20
method = "centroids"
# Perform diverse search
collection_id = api.project.perform_ai_search(project_id=project_id, method=method, limit=limit)
if collection_id:
print(f"Diverse search completed! Collection ID: {collection_id}")
print(f"Method used: {method}")
# Get diverse samples
diverse_images = api.entities_collection.get_items(
collection_id, collection_type=CollectionTypeFilter.AI_SEARCH
)
print(f"\nRetrieved {len(diverse_images)} diverse samples")
# Group by dataset for analysis
datasets = {}
for img in diverse_images:
ds_id = img.dataset_id
if ds_id not in datasets:
datasets[ds_id] = []
datasets[ds_id].append(img)
print("\nDistribution across datasets:")
for ds_id, imgs in datasets.items():
ds_info = api.dataset.get_info_by_id(ds_id)
print(f"- {ds_info.name}: {len(imgs)} images")
else:
print("No results found")
```
## Other Embeddings Methods
Here's a comprehensive table of all embeddings-related methods in the Supervisely SDK:
| Method | Module | Description | Parameters | Returns |
| ------------------------------ | ------------- | --------------------------------------------------- | ----------------------------------------------------------------------------------------------------------------------------- | -------------------------------- |
| `enable_embeddings()` | `api.project` | Enable embeddings for the project |
id: int - Project ID silent: bool = True
| `None` |
| `disable_embeddings()` | `api.project` | Disable embeddings for the project |
id: int - Project ID silent: bool = True
| `None` |
| `is_embeddings_enabled()` | `api.project` | Check if embeddings are enabled for the project. |
id: int - Project ID
| `bool` |
| `set_embeddings_in_progress()` | `api.project` | Set embeddings calculation status |
id: int - Project ID in\_progress: bool
| `None` |
| `get_embeddings_in_progress()` | `api.project` | Get embeddings calculation status |
id: int - Project ID
| `bool` |
| `set_embeddings_updated_at()` | `api.project` | Set the timestamp when embeddings were last updated |
id: int - Project ID timestamp: Optional\[str] = None silent: bool = True
| `None` |
| `get_embeddings_updated_at()` | `api.project` | Get the timestamp when embeddings were last updated | `id: int` - Project ID | `str` - YYYY-MM-DDTHH:MM:SS.fffZ |
## Possible Use Cases
### Integration with Annotation Workflow
```python
import time
from supervisely.api.entities_collection_api import CollectionTypeFilter
def create_annotation_job_from_search(project_id: int, prompt: str, annotator_id: int):
"""Create annotation job from AI search results."""
# Ensure embeddings are calculated before performing AI search
api.project.calculate_embeddings(project_id)
while api.project.get_embeddings_in_progress(project_id) is True:
print("Waiting for embeddings to be calculated...")
time.sleep(10)
# Search for images
collection_id = api.project.perform_ai_search(project_id=project_id, prompt=prompt, limit=100)
if not collection_id:
print("No images found")
return None
# Get images from collection
images = api.entities_collection.get_items(
collection_id=collection_id, collection_type=CollectionTypeFilter.AI_SEARCH
)
# Map images by their dataset
dataset_to_images = {}
for img in images:
ds_id = img.dataset_id
if ds_id not in dataset_to_images:
dataset_to_images[ds_id] = []
dataset_to_images[ds_id].append(img)
# Create a new dataset for annotation
dataset_name = f"annotation_job_{prompt.replace(' ', '_')}"
dataset = api.dataset.create(
project_id,
dataset_name,
change_name_if_conflict=True,
)
# Copy images to annotation dataset
for src_ds_id, image_infos in dataset_to_images.items():
if not image_infos:
continue
# Copy images with annotations to the new dataset
api.image.copy_batch_optimized(
src_dataset_id=src_ds_id,
src_image_infos=image_infos,
dst_dataset_id=dataset.id,
with_annotations=True,
)
# Create labeling job
jobs = api.labeling_job.create(
name=f"Annotate {prompt}",
dataset_id=dataset.id,
user_ids=[annotator_id],
readme=f"Annotate all objects matching: {prompt}",
)
print(f"Created annotation jobs: {len(jobs)} for dataset {dataset_name}")
for job in jobs:
print(f"Job ID: {job.id}, Name: {job.name}")
return [job.id for job in jobs]
```
### Active Learning Sample Selection
```python
import time
from supervisely.api.entities_collection_api import CollectionTypeFilter
def select_diverse_training_samples(project_id: int, sample_size: int = 100):
"""Select diverse samples for active learning."""
# Ensure embeddings are calculated before performing AI search
api.project.calculate_embeddings(project_id)
while api.project.get_embeddings_in_progress(project_id) is True:
print("Waiting for embeddings to be calculated...")
time.sleep(10)
# Get diverse samples using centroids method
collection_id = api.project.perform_ai_search(
project_id=project_id,
method="centroids",
clustering_method="kmeans",
limit=sample_size,
num_clusters=10,
)
if collection_id:
# Get selected images
diverse_samples = api.entities_collection.get_items(
collection_id=collection_id, collection_type=CollectionTypeFilter.AI_SEARCH
)
# Map images by their dataset
dataset_to_images = {}
for img in diverse_samples:
ds_id = img.dataset_id
if ds_id not in dataset_to_images:
dataset_to_images[ds_id] = []
dataset_to_images[ds_id].append(img)
# Create training dataset
training_dataset = api.dataset.create(
project_id,
f"active_learning_batch_{len(diverse_samples)}",
change_name_if_conflict=True,
)
# Move samples to training dataset.
for src_ds_id, image_infos in dataset_to_images.items():
if not image_infos:
continue
api.image.move_batch_optimized(
src_dataset_id=src_ds_id,
src_image_infos=image_infos,
dst_dataset_id=training_dataset.id,
with_annotations=True,
progress_cb=tqdm(desc=f"Moving images to training dataset", total=len(image_infos)),
)
print(f"Selected {len(diverse_samples)} diverse samples for training")
print(f"Training dataset ID: {training_dataset.id}")
# Recalculate embeddings after moving images
api.project.calculate_embeddings(project_id)
return training_dataset.id
return None
# Example usage
project_id = 123456
training_dataset_id = select_diverse_training_samples(project_id, sample_size=200)
```
### Quality Control in Manufacturing
```python
import time
from supervisely.api.entities_collection_api import CollectionTypeFilter
def find_defective_products(project_id: int, defect_description: str):
"""Find potentially defective products using AI search."""
# Ensure embeddings are calculated before performing AI search
api.project.calculate_embeddings(project_id)
while api.project.get_embeddings_in_progress(project_id) is True:
print("Waiting for embeddings to be calculated...")
time.sleep(10)
# Search for defects using text description
collection_id = api.project.perform_ai_search(
project_id=project_id, prompt=defect_description, limit=20
)
if collection_id:
# Get all potentially defective items
defective_images = api.entities_collection.get_items(
collection_id=collection_id, collection_type=CollectionTypeFilter.AI_SEARCH
)
# Map defective images by their dataset
dataset_to_images = {}
for img in defective_images:
ds_id = img.dataset_id
if ds_id not in dataset_to_images:
dataset_to_images[ds_id] = []
dataset_to_images[ds_id].append(img)
# Create a dataset for review
dataset_name = f"potential_defects_{defect_description.replace(' ', '_')}"
dataset = api.dataset.create(project_id, dataset_name, change_name_if_conflict=True)
# Copy images to review dataset
for src_ds_id, image_infos in dataset_to_images.items():
if not image_infos:
continue
# Copy images with annotations to the new dataset
api.image.copy_batch_optimized(
src_dataset_id=src_ds_id,
src_image_infos=image_infos,
dst_dataset_id=dataset.id,
with_annotations=True,
)
print(f"Created review dataset '{dataset_name}' with {len(defective_images)} images")
return dataset.id
return None
# Example usage
project_id = 123456
defect_type = "scratched surface metal parts"
review_dataset_id = find_defective_products(project_id, defect_type)
```
## Summary
The AI Search functionality in Supervisely provides powerful capabilities for:
1. **Semantic Search**: Find images based on natural language descriptions
2. **Similarity Search**: Locate visually similar images
3. **Diverse Sampling**: Get representative samples from your dataset
4. **Dataset Exploration**: Understand the diversity and structure of your data
{% hint style="success" %}
**Key points to remember**
* Always enable and calculate embeddings before using AI Search
* Use appropriate search methods based on your use case
* Manage collections efficiently to avoid clutter
* Leverage batch operations for large-scale tasks
* Monitor embeddings status and update as needed
{% endhint %}
For more information, refer to the [AI Search](https://docs.supervisely.com/data-organization/project-dataset/ai-search) documentation, which provides a visual overview of how AI Search works.
# Geospatial Data
## Introduction
This tutorial walks through a complete geospatial data workflow in Supervisely: downloading satellite imagery, DTM elevation tiles, and OpenStreetMap vector annotations; storing geographic context in image metadata and dataset custom data; labeling with multi-layer interfaces and AI assistance; and exporting annotated data back to OSM XML format.
Everything in this workflow is built on standard Supervisely primitives — images with metadata, datasets with custom data, and object annotations. No special project types or external geodata infrastructure are required. The result is a fully reproducible pipeline where geographic context travels with the data at every step and any Supervisely platform feature can be applied without modification.
The [Satellite, DTM & OSM Downloader](https://ecosystem.supervisely.com/apps/slyosm/import_osm) and [Export to OSM Format](https://ecosystem.supervisely.com/apps/slyosm/export_to_osm) apps implement this pipeline end to end. This article explains the underlying mechanics so you can reproduce, extend, or integrate any part of it using the Python SDK.
{% hint style="info" %}
Source code for both apps is available at [github.com/supervisely-ecosystem/slyosm](https://github.com/supervisely-ecosystem/slyosm).
{% endhint %}
## Prerequisites
**Step 1.** Prepare `~/supervisely.env` with your credentials. [Learn more here.](https://github.com/supervisely/developer-portal/tree/main/getting-started/getting-started/basics-of-authentication.md)
**Step 2.** Install dependencies.
```bash
pip install supervisely pyproj numpy
```
**Step 3.** Initialize the API client.
```python
import os
from dotenv import load_dotenv
import supervisely as sly
if sly.is_development():
load_dotenv("local.env")
load_dotenv(os.path.expanduser("~/supervisely.env"))
api = sly.Api.from_env()
```
## Architecture Overview
The geospatial pipeline relies on two storage mechanisms built into the Supervisely API:
| Storage | What is stored | API |
| --------------------------------- | -------------------------------------------------------------------------------------- | ------------------------------------------ |
| **Image metadata** (`meta` field) | Per-image geographic context: center coordinates, homography matrix, CRS, bounding box | `api.image.upload_path(..., meta={...})` |
| **Dataset custom data** | OSM class mapping shared across all images in the dataset | `api.dataset.update_custom_data(id, data)` |
This separation is deliberate. Geographic context is per-image because each tile covers a different location. The OSM class mapping is per-dataset because it is the same for every image downloaded in one session — changing it between images would make annotations inconsistent.
## OSM Class Mapping
The OSM class mapping defines which OpenStreetMap features are downloaded, how they map to Supervisely object classes, and which OSM tags are written when annotations are exported back to `.osm` files.
### Structure
The mapping is a list of class specification objects stored as a JSON array. Each entry describes one Supervisely object class:
```python
osm_class_specs = [
{
"name": "building",
"geometry": "polygon",
"tags": {"building": True},
"default_tag": {"building": "yes"},
"color": [180, 180, 180],
},
{
"name": "road_main",
"geometry": "line",
"tags": {"highway": ["motorway", "trunk", "primary", "secondary", "tertiary"]},
"default_tag": {"highway": "secondary"},
"buffer_m": 5.0,
"color": [240, 93, 66],
},
{
"name": "water",
"geometry": "polygon",
"tags": {"natural": "water"},
"default_tag": {"natural": "water"},
"color": [0, 130, 200],
},
{
"name": "forest",
"geometry": "polygon",
"tags": {"natural": "wood", "landuse": "forest", "landcover": "trees"},
"default_tag": {"natural": "wood"},
"color": [34, 139, 34],
},
]
```
| Field | Required | Description |
| ------------- | -------- | ----------------------------------------------------------------------------------------- |
| `name` | Yes | Supervisely object class name |
| `geometry` | Yes | `"polygon"`, `"line"`, or `"point"` |
| `tags` | Yes | OSM tag filters. Value can be a string, boolean, or list of strings |
| `default_tag` | Yes | Single OSM tag written when exporting annotations to `.osm` files |
| `buffer_m` | No | Expand lines and points by this many meters to produce a polygon footprint in Supervisely |
| `color` | No | RGB color `[R, G, B]` for the Supervisely object class |
### Saving the Mapping to a Dataset
```python
dataset_info = api.dataset.get_info_by_id(dataset_id)
custom_data = dict(dataset_info.custom_data or {})
custom_data["osm_class_specs"] = osm_class_specs
custom_data["slyosm_schema_version"] = 1
api.dataset.update_custom_data(dataset_id, custom_data)
```
### Reading the Mapping Back
```python
dataset_info = api.dataset.get_info_by_id(dataset_id)
custom_data = dataset_info.custom_data or {}
specs = custom_data.get("osm_class_specs", [])
schema_version = custom_data.get("slyosm_schema_version", 0)
print(f"Found {len(specs)} class specs (schema v{schema_version})")
for spec in specs:
print(f" {spec['name']} — geometry={spec['geometry']}, tags={spec['tags']}")
```
The export app reads from this key automatically. If the key is absent it falls back to the built-in default mapping, so existing datasets without custom data continue to work.
## Image Geo Metadata
Every georeferenced image uploaded by the downloader app carries a `geo` object inside its `meta` field. This payload contains everything needed to project pixel coordinates back to longitude/latitude at export time.
### Geo Payload Structure
```python
geo = {
# Scene center in WGS84
"center_lat": 48.8566,
"center_lon": 2.3522,
# 3×3 homography matrix: pixel (col, row) → local CRS (x, y) in meters
# Applied as: [x, y, 1]^T = H @ [col, row, 1]^T
"pixel_to_local_h": [
[0.489, -0.002, -250.3],
[0.001, 0.489, -249.8],
[0.0, 0.0, 1.0 ],
],
# Azimuthal equidistant CRS centered on the scene, as WKT or ProjJSON
"local_crs_wkt": "PROJCRS[\"...\"]",
# Image dimensions
"image_size_px": {"width": 1024, "height": 1024},
# Approximate bounding box: [min_lon, min_lat, max_lon, max_lat]
"bbox_left_bottom_right_top": [2.317, 48.833, 2.396, 48.880],
# Rotation applied to the tile bounding box, in degrees
"rotation_deg": 0.0,
}
```
{% hint style="info" %}
The local CRS is an azimuthal equidistant projection centered on the scene center. It maps the scene to a flat plane in meters, which is valid for tiles up to a few kilometers across. The homography matrix maps directly from pixel space to this local metric space. To reach WGS84 longitude/latitude, apply the homography then transform with pyproj.
{% endhint %}
### Uploading an Image with Geo Metadata
```python
import json
import numpy as np
from pyproj import CRS, Transformer
# Build the local CRS centered on the scene
center_lat, center_lon = 48.8566, 2.3522
local_crs = CRS.from_proj4(
f"+proj=aeqd +lat_0={center_lat} +lon_0={center_lon} +units=m"
)
# Compute the pixel→local homography from the four corner points
# (src: pixel corners, dst: local metric corners — omitted for brevity)
pixel_to_local_h = np.eye(3) # replace with actual computed homography
geo_meta = {
"center_lat": center_lat,
"center_lon": center_lon,
"pixel_to_local_h": pixel_to_local_h.tolist(),
"local_crs_wkt": local_crs.to_wkt(),
"image_size_px": {"width": 1024, "height": 1024},
"bbox_left_bottom_right_top": [2.317, 48.833, 2.396, 48.880],
"rotation_deg": 0.0,
}
image_info = api.image.upload_path(
dataset_id=dataset_id,
name="paris_48_8566_2_3522.png",
path="/path/to/tile.png",
meta={"geo": geo_meta},
)
print(f"Uploaded image id={image_info.id}")
```
### Reading Geo Metadata from an Existing Image
```python
image_info = api.image.get_info_by_id(image_id)
image_meta = image_info.meta or {}
geo = image_meta.get("geo")
if geo is None:
print("Image has no geo metadata — not a georeferenced tile.")
else:
print(f"Center: {geo['center_lat']:.6f}, {geo['center_lon']:.6f}")
print(f"Bbox: {geo['bbox_left_bottom_right_top']}")
h = np.asarray(geo["pixel_to_local_h"])
print(f"Homography:\n{h}")
```
### Projecting Pixel Coordinates to WGS84
```python
from pyproj import CRS, Transformer
geo = image_info.meta["geo"]
# Reconstruct the transform
local_crs = CRS.from_wkt(geo["local_crs_wkt"])
to_wgs84 = Transformer.from_crs(local_crs, "EPSG:4326", always_xy=True)
h = np.asarray(geo["pixel_to_local_h"])
def pixel_to_lonlat(col: float, row: float):
point_h = np.array([col, row, 1.0])
local = h @ point_h
local_x, local_y = local[0] / local[2], local[1] / local[2]
lon, lat = to_wgs84.transform(local_x, local_y)
return lon, lat
# Example: center pixel of a 1024×1024 image
lon, lat = pixel_to_lonlat(512, 512)
print(f"Center pixel → {lat:.6f}°N, {lon:.6f}°E")
```
## Creating a Georeferenced Project
Here is a minimal end-to-end example that creates a project, adds object classes from the OSM mapping, saves the class mapping to the dataset, and uploads a georeferenced image.
```python
import supervisely as sly
api = sly.Api.from_env()
# 1. Create project and dataset
project = api.project.create(
workspace_id, "geo_dataset", change_name_if_conflict=True
)
dataset = api.dataset.create(project.id, "berlin_grid")
# 2. Build project meta from OSM class specs
obj_classes = [
sly.ObjClass("building", sly.Polygon, color=[180, 180, 180]),
sly.ObjClass("road_main", sly.Polygon, color=[240, 93, 66]),
sly.ObjClass("water", sly.Polygon, color=[0, 130, 200]),
sly.ObjClass("forest", sly.Polygon, color=[34, 139, 34]),
]
meta = sly.ProjectMeta(obj_classes=sly.ObjClassCollection(obj_classes))
api.project.update_meta(project.id, meta.to_json())
# 3. Save OSM class mapping to dataset custom data
api.dataset.update_custom_data(dataset.id, {
"osm_class_specs": osm_class_specs, # defined earlier
"slyosm_schema_version": 1,
})
# 4. Upload image with geo metadata
image_info = api.image.upload_path(
dataset_id=dataset.id,
name="berlin_52_5200_13_4050.png",
path="/path/to/tile.png",
meta={"geo": geo_meta}, # defined earlier
)
print(f"Project: {project.id}, Dataset: {dataset.id}, Image: {image_info.id}")
```
## Labeling Interfaces
Because each downloaded tile is a standard Supervisely image with object annotations, all labeling toolbox modes are available without any additional setup.
### Multiview
When the downloader app runs in **Multiview** mode, the satellite image and the DTM elevation image are uploaded as a linked pair using `api.image.upload_multiview_images`. Both images appear side by side in the labeling toolbox. Annotations are shared — a polygon drawn on the satellite view is visible on the DTM view and vice versa.
This is useful when elevation context is needed to make annotation decisions, for example distinguishing embankments from roads, identifying vegetation by canopy height, or locating buildings in shadow.
[Learn more about Multiview labeling →](https://docs.supervisely.com/labeling/labeling-toolbox/multi-view-images)
### Overlay
In **Overlay** mode, a single composited image is uploaded with the DTM blended on top of the satellite layer. The annotator can adjust DTM transparency on the fly in the labeling interface.
[Learn more about Overlay mode →](https://docs.supervisely.com/labeling/labeling-toolbox/overlay)
### Choosing a Mode Programmatically
The downloader app exposes interface mode as a configurable parameter. To replicate this in your own pipeline, upload either a single image (satellite-only or DTM-only) or a multiview pair:
```python
# Satellite only — standard upload
api.image.upload_path(dataset.id, "tile_sat.png", path_sat, meta={"geo": geo_meta})
# Multiview — satellite + DTM as a linked pair
api.project.set_multiview_settings(project.id)
api.image.upload_multiview_images(
dataset_id=dataset.id,
group_name="tile_001",
paths=[path_sat, path_dtm],
metas=[{"geo": geo_meta}, {"geo": geo_meta}],
)
```
## AI-Assisted Annotation
Georeferenced datasets are standard Supervisely image datasets, so every AI feature on the platform works without modification.
**Smart Tool** — interactive segmentation model that produces polygon or mask output from a few clicks. Effective for consistently shaped features like building footprints, water bodies, and agricultural fields that repeat across many tiles.
**Auto Labeling** — run any model from the Supervisely Ecosystem on your geospatial dataset to pre-annotate tiles in batch. Use the resulting annotations as a starting point for human review rather than annotating from scratch.
**NN training** — train or fine-tune a model directly on your geospatial dataset within the platform, then apply it to newly downloaded tiles. The geographic metadata in image `meta` is preserved through the training pipeline and remains available for export afterward.
## Exporting to OSM Format
The [Export to OSM Format](https://ecosystem.supervisely.com/apps/slyosm/export_to_osm) app reads geo metadata from each image and the OSM class mapping from the dataset, then projects polygon and line annotations back to WGS84 coordinates and writes standard OSM XML files.
### Output Archive Structure
```
img/
tile_001.png
tile_002.png
ann/
tile_001.png.json ← Supervisely annotation JSON
tile_002.png.json
osm/
tile_001.png.osm ← OSM XML, ready for JOSM or osmium
tile_002.png.osm
```
### Running the Export via SDK
The export logic is importable directly. To run it programmatically:
```python
from import_osm.src.slyosm.osm_export import export_dataset_to_supervisely_dir
from pathlib import Path
result = export_dataset_to_supervisely_dir(
api=api,
dataset_id=dataset_id,
output_dir=Path("/tmp/my_export"),
)
print(f"Exported {len(result.images)} image(s), {len(result.failures)} failure(s)")
for img in result.images:
print(f" {img.image_name}: osm={'yes' if img.osm_path else 'skipped (no geo)'}")
```
### OSM XML Output Format
Each `.osm` file is a standard [OSM XML](https://wiki.openstreetmap.org/wiki/OSM_XML) file compatible with [JOSM](https://josm.openstreetmap.de/), osmium, Overpass API, and any other OSM tooling. Polygon annotations become closed ways or multipolygon relations (when holes are present). Line annotations become open ways. All IDs are negative, following OSM convention for locally generated data.
```xml
...
...
```
## Dataset Custom Data Reference
The following keys are written and read by the slyosm apps. Use the same schema if you are integrating your own pipeline.
| Key | Type | Description |
| ----------------------- | ------------ | --------------------------------------------- |
| `osm_class_specs` | `list[dict]` | OSM class mapping array (see structure above) |
| `slyosm_schema_version` | `int` | Schema version, currently `1` |
```python
# Full read-write example
dataset_info = api.dataset.get_info_by_id(dataset_id)
custom_data = dict(dataset_info.custom_data or {})
# Read
specs = custom_data.get("osm_class_specs", [])
# Modify — add a new class
specs.append({
"name": "solar_panel",
"geometry": "polygon",
"tags": {"generator:source": "solar"},
"default_tag": {"generator:source": "solar"},
"color": [255, 215, 0],
})
# Write back
custom_data["osm_class_specs"] = specs
api.dataset.update_custom_data(dataset_id, custom_data)
```
## Summary
This tutorial covered the complete geospatial data workflow in Supervisely using standard SDK primitives:
1. **OSM class mapping** is stored in dataset custom data under `osm_class_specs` and read automatically by the export app — change it once per dataset, not per image.
2. **Geographic context** is stored in image metadata under the `geo` key as a homography matrix, local CRS, and bounding box — enough to round-trip any pixel coordinate to WGS84 and back.
3. **Labeling** works in Multiview, Overlay, or standard single-image mode — all Supervisely tools and AI features apply without modification.
4. **Export** produces standard OSM XML files alongside original images and Supervisely annotation JSONs, ready to open in [JOSM](https://josm.openstreetmap.de/) or any other OSM tool.
The full source code is available in the [slyosm repository](https://github.com/supervisely-ecosystem/slyosm).
# Videos
# Videos
## Introduction
In this tutorial we will focus on working with videos using Supervisely SDK.
You will learn how to:
1. [upload one or more videos to Supervisely dataset.](#upload-videos-from-local-directory-to-supervisely)
2. [get information about videos by id or name.](#get-information-about-videos)
3. [download video from Supervisely.](#download-video)
4. [get video metadata](#get-video-metadata)
5. [download one or more frames of video and save to local directory as images.](#download-video-frames-as-images)
6. [download one or more frames of video as RGB NumPy matrix.](#download-video-frames-as-rgb-numpy-matrix)
7. [remove videos from Supervisely.](#remove-videos-from-supervisely)
8. [choose from the available codecs, extensions and containers.](#information-about-available-codecs-extensions-and-containers)
9. [exract frames from videos correctly using the OpenCV library.](#how-to-exract-frames-from-videos-correctly-using-the-opencv-library) 📗 Everything you need to reproduce [this tutorial is on GitHub](https://github.com/supervisely-ecosystem/tutorial-video): source code and demo data.
## How to debug this tutorial
**Step 1.** Prepare `~/supervisely.env` file with credentials. [Learn more here.](/getting-started/basics-of-authentication)
**Step 2.** Clone [repository](https://github.com/supervisely-ecosystem/tutorial-video) with source code and demo data and create [Virtual Environment](https://docs.python.org/3/library/venv.html).
```
git clone https://github.com/supervisely-ecosystem/tutorial-video.git
cd tutorial-video
./create_venv.sh
```
**Step 3.** Open repository directory in Visual Studio Code.
```
code -r .
```
**Step 4.** Change workspace ID in `local.env` file by copying the ID from the context menu of the workspace.
```
WORKSPACE_ID=654 # ⬅️ change value
```
**Step 5.** Start debugging `src/main.py`.
### Import libraries
```python
import os
from dotenv import load_dotenv
from pprint import pprint
import supervisely as sly
```
### Init API client
First, we load environment variables with credentials and init API for communicating with Supervisely Instance.
```python
if sly.is_development():
load_dotenv("local.env")
load_dotenv(os.path.expanduser("~/supervisely.env"))
api = sly.Api()
```
### Get variables from environment
In this tutorial, you will need an workspace ID that you can get from environment variables. [Learn more here](/getting-started/environment-variables#workspace_id)
```python
workspace_id = sly.env.workspace_id()
```
### Create new project and dataset
Create new project.
**Source code:**
```python
project = api.project.create(
workspace_id, "Animals", type=ProjectType.VIDEOS, change_name_if_conflict=True
)
print(f"Project ID: {project.id}")
```
**Output:**
```python
# Project ID: 15599
```
Create new dataset.
**Source code:**
```python
dataset = api.dataset.create(project.id, "Birds")
print(f"Dataset ID: {dataset.id}")
```
**Output:**
```python
# Dataset ID: 53465
```
## Upload videos from local directory to Supervisely
### Upload single video.
**Source code:**
```python
original_dir = "src/videos/original"
path = os.path.join(original_dir, "Penguins.mp4")
video = api.video.upload_path(
dataset.id,
name="Penguins",
path=path
)
print(f'Video "{video.name}" uploaded to Supervisely with ID:{video.id}')
```
**Output:**
```python
# Video "Penguins" uploaded to Supervisely platform with ID:17539140
```
### Upload list of videos.
✅ Supervisely API allows uploading multiple videos in a single request. The code sample below sends fewer requests and it leads to a significant speed-up of our original code.
**Source code:**
```python
names = ["Flamingo.mp4", "Swans.mp4", "Toucan.mp4"]
paths = [os.path.join(original_dir, name) for name in names]
upload_info = api.video.upload_paths(dataset.id, names, paths)
print(f"{len(upload_info)} videos successfully uploaded to Supervisely platform")
```
**Output:**
```python
# 3 videos successfully uploaded to Supervisely platform
```
## Get information about videos
### Single video.
Get information about video from Supervisely by id.
**Source code:**
```python
video_info = api.video.get_info_by_id(video.id)
print(video_info)
```
**Output:**
```python
# VideoInfo(
# id=17539140,
# name="Penguins",
# hash="6aTUVnuyfGqIuMxH8l1t1yvkmn/9iuWbHUOE7iebhYk=",
# link=None,
# team_id=435,
# workspace_id=654,
# project_id=15748,
# dataset_id=53751,
# path_original="/h5un6l2bnaz1vj8a9qgms4-public/videos/U/O/LF/T7tiPVoBUyFaM.mp4",
# frames_to_timecodes=[],
# frames_count=413,
# frame_width=640,
# frame_height=360,
# created_at="2022-12-21T23:09:54.191Z",
# updated_at="2022-12-21T23:09:54.191Z",
# tags=[],
# file_meta={},
# custom_data={},
# processing_path="1/1703793",
# )
```
You can also get information about video from Supervisely by name.
**Source code:**
```python
video_info_by_name = api.video.get_info_by_name(dataset.id, video.name)
print(f"Video name - '{video_info_by_name.name}'")
```
**Output:**
```python
# Video name - 'Penguins'
```
### Get all videos from dataset.
Get information about video from Supervisely by id.
**Source code:**
```python
video_info_list = api.video.get_list(dataset.id)
print(f"{len(video_info_list)} videos information received.")
```
**Output:**
```python
# 4 videos information received.
```
## Download video
Download video from Supervisely to local directory by id. **Source code:**
```python
save_path = os.path.join(result_dir, f"{video_info.name}.mp4")
api.video.download_path(video_info.id, save_path)
print(f"Video has been successfully downloaded to '{save_path}'")
```
**Output:**
```python
# Video has been successfully downloaded to 'src/videos/result/Penguins.mp4'
```
## Get video metadata
### Get video metadata from file
**Source code:**
```python
video_path = "src/videos/result/Penguins.mp4"
file_info = sly.video.get_info(video_path)
pprint(file_info)
```
**Output:**
```python
{
"duration": 16.52,
"formatName": "mov,mp4,m4a,3gp,3g2,mj2",
"size": "1599101",
"streams": [
{
"codecName": "h264",
"codecType": "video",
"duration": 16.52,
"framesCount": 413,
"framesToTimecodes": [],
"height": 360,
"index": 0,
"rotation": 0,
"startTime": 0,
"width": 640
}
]
}
```
### Get video metadata from server
**Source code:**
```python
video_info = api.video.get_info_by_id(video.id)
pprint(video_info.file_meta)
```
**Output:**
```python
{
"codecName": "h264",
"codecType": "video",
"duration": 16.52,
"formatName": "mov,mp4,m4a,3gp,3g2,mj2",
"framesCount": 413,
"framesToTimecodes": [],
"height": 360,
"index": 0,
"mime": "video/mp4",
"rotation": 0,
"size": "1599101",
"startTime": 0,
"streams": [],
"width": 640
}
```
## Download video frames as images
Download single frame of video as image from Supervisely to local directory.
**Source code:**
```python
frame_idx = 15
file_name = "frame.png"
save_path = os.path.join(result_dir, file_name)
api.video.frame.download_path(video_info.id, frame_idx, save_path)
print(f"Video frame has been successfully downloaded as image to '{save_path}'")
```
**Output:**
```python
# Video frame has been successfully downloaded as image to 'src/videos/result/frame.png'
```
Download multiple frames in a single requests from Supervisely and save as images to local directory.
**Source code:**
```python
frame_indexes = [5, 10, 20, 30, 45]
save_paths = [os.path.join(result_dir, f"frame_{idx}.png") for idx in frame_indexes]
api.video.frame.download_paths(video_info.id, frame_indexes, save_paths)
print(f"{len(frame_indexes)} images has been successfully downloaded to '{save_path}'")
```
**Output:**
```python
# 5 images has been successfully downloaded to 'src/videos/result/frame.png'
```
## Download video frames as RGB NumPy matrix
You can also download video frame as RGB NumPy matrix.
**Source code:**
```python
video_frame_np = api.video.frame.download_np(video_info.id, frame_idx)
print(f"Video frame downloaded as RGB NumPy matrix. Frame shape: {video_frame_np.shape}")
```
**Output:**
```python
# Video frame downloaded as RGB NumPy matrix. Frame shape: (360, 640, 3)
```
Download multiple frames in a single requests from Supervisely as RGB NumPy matrix.
**Source code:**
```python
video_frames_np = api.video.frame.download_nps(video_info.id, frame_indexes)
print(f"{len(video_frames_np)} video frames downloaded in RGB NumPy matrix.")
```
**Output:**
```python
# 5 video frames downloaded as RGB NumPy matrix.
```
{% hint style="info" %}
If server-side metadata is unavailable, `api.video.frame.download_path` will fail. Use [`stream_video_frames_to_dir`](/getting-started/python-sdk-tutorials/videos/stream-video-frames) to decode frames directly from the raw video stream via **PyAV** — no server-side metadata required.
{% endhint %}
## Remove videos from Supervisely
### Remove one video.
Remove video from Supervisely by id
**Source code:**
```python
api.video.remove(video_info.id)
print(f"Video (ID: {video_info.id}) successfully removed.")
```
**Output:**
```python
# Video (ID: 17536607) has been successfully removed.
```
### Remove list of videos.
Remove list of videos from Supervisely by ids.
**Source code:**
```python
videos_to_remove = api.video.get_list(dataset.id)
remove_ids = [video.id for video in videos_to_remove]
api.video.remove_batch(remove_ids)
print(f"{len(videos_to_remove)} videos successfully removed.")
```
**Output:**
```python
# 3 videos have been successfully removed.
```
## Information about available codecs, extensions, and containers.
> **Note:** Only basic video codecs are available in the Community Edition, for additional video codecs you can try the Enterprise Edition.
**The Enterprise Edition** allows you to use the full range of extensions, containers and codecs listed below without any limits.
* extensions: *.avi, .mp4, .3gp, .flv, .webm, .wmv, .mov, .mkv*
* containers: *mp4, webm, ogg, ogv*
* codecs: *h264, vp8, vp9*
In the Community Edition, it is recommended to use *vp9, h264* codecs with *mp4* container.
## How to exract frames from videos correctly using the OpenCV library.
In case you need to exract frames from videos, you should be aware of one important detail of the OpenCV library. According to [issue #15499](https://github.com/opencv/opencv/issues/15499), different versions of the OpenCV library have different values of the `CAP_PROP_ORIENTATION_AUTO` flag. This may cause that VideoCapture to ignore video orientation metadata. To avoid incorrect extraction of frames from videos, it is recommended to directly define flag `CAP_PROP_ORIENTATION_AUTO`:
```python
cap = cv2.VideoCapture(filepath)
# set CAP_PROP_ORIENTATION_AUTO flag for VideoCapture
cap.set(cv2.CAP_PROP_ORIENTATION_AUTO, 1)
while cap.isOpened():
success, frame = cap.read()
if not success:
print("Can't receive frame (stream end?). Exiting ...")
break
# cv2.imshow(f"{frame.shape[:2]}", frame)
if cv2.waitKey(1) & 0xFF == ord("q"):
break
# Release everything if job is finished
cap.release()
# cv2.destroyAllWindows()
```
# Video and object tags
How to create, add, update and remove tags from Video and its objects, and how to constrain frame-based tags by length.
## **Introduction**
In this tutorial, you will learn how to create new tags for Video, its objects or frames and assign them, update its values or remove at all using the Supervisely SDK.
Supervisely supports different types of tags:
* NONE
* ANY\_NUMBER
* ANY\_STRING
* ONEOF\_STRING
* DATE
And could be applied to:
* ALL
* IMAGES\_ONLY - in our case this indicates Videos
* OBJECTS\_ONLY
You can find all the information about those types in the [Tags in Annotations](https://developer.supervisely.com/api-references/supervisely-annotation-json-format/tags) section and [SDK](https://supervisely.readthedocs.io/en/latest/sdk/supervisely.annotation.tag_meta.TagMeta.html) documentation.
You can learn more about working with Video using [Supervisely SDK](https://developer.supervisely.com/getting-started/python-sdk-tutorials/video) and what [Annotations for Video](https://developer.supervisely.com/api-references/supervisely-annotation-json-format/individual-video-annotations) are.
{% hint style="info" %}
Everything you need to reproduce [this tutorial is on GitHub](https://github.com/supervisely-ecosystem/how-to-work-with-video-object-tags): source code, Visual Studio Code configuration, and a shell script for creating virtual env.
{% endhint %}
## **How to debug this tutorial**
**Step 1.** Prepare `~/supervisely.env` file with credentials. [Learn more here.](https://developer.supervisely.com/getting-started/python-sdk-tutorials/videos/pages/2TS0DqIIblacweum1NCW#use-.env-file-recommended)
**Step 2.** Clone [repository](https://github.com/supervisely-ecosystem/how-to-work-with-video-object-tags) with source code and create [Virtual Environment](https://docs.python.org/3/library/venv.html).
```bash
git clone https://github.com/supervisely-ecosystem/how-to-work-with-video-object-tags
cd how-to-work-with-video-object-tags
./create_venv.sh
```
**Step 3.** Open repository directory in Visual Studio Code.
```bash
code -r .
```
**Step 4.** Create video project, for example, using this tutorial [Spatial labels on videos](https://developer.supervisely.com/getting-started/python-sdk-tutorials/spatial-labels-on-videos).
There you see project classes after project initialization.
Project tags metadata after its initialization. This data is empty.
Visualization in Labeling Tool before we starting add tags.
**Step 5.** Change Workspace ID in `local.env` file by copying the ID from the context menu of the workspace. Do the same for Project ID and Dataset ID .
```python
WORKSPACE_ID=82841 # ⬅️ change value
PROJECT_ID=240755 # ⬅️ change value
DATASET_ID=778169 # ⬅️ change value
```
**Step 6.** Start debugging `src/main.py`
## **Python Code**
### **Import libraries**
```python
import os
import supervisely as sly
from dotenv import load_dotenv
```
### **Init API client**
Init `api` for communicating with Supervisely Instance. First, we load environment variables with credentials, Project and Dataset IDs:
```python
load_dotenv("local.env")
load_dotenv(os.path.expanduser("~/supervisely.env"))
api = sly.Api.from_env()
```
With next lines we will get values from `local.env`.
```python
project_id = sly.env.project_id()
dataset_id = sly.env.dataset_id()
```
By using these IDs, we can retrieve the project metadata and annotations, and define the values needed for the following operations.
```python
video_ids = api.video.get_list(dataset_id)
project_meta_json = api.project.get_meta(project_id)
project_meta = sly.ProjectMeta.from_json(data=project_meta_json)
video_ann_json = api.video.annotation.download(video_ids[0].id)
```
### **Define function to work with metadata**
This function is used to recreate the source project metadata with new tag metadata. Right after updating the metadata, we need to obtain added metadata again to work with it in the next steps. In case a tag with the `tag_name` already exists in the metadata, we could just use it if it fits our requirements. If this tag doesn't meet our requirements, it would be better to create a new one with a different name.
```python
def refresh_meta(project_meta, new_tag_meta):
if not project_meta.tag_metas.has_key(new_tag_meta.name):
new_tags_collection = project_meta.tag_metas.add(new_tag_meta)
project_meta = sly.ProjectMeta(
tag_metas=new_tags_collection, obj_classes=project_meta.obj_classes
)
api.project.update_meta(project_id, project_meta)
new_prject_meta_json = api.project.get_meta(project_id)
project_meta = sly.ProjectMeta.from_json(data=new_prject_meta_json)
new_tag_meta = project_meta.tag_metas.get(new_tag_meta.name)
else:
tag_values = new_tag_meta.possible_values
new_tag_meta = project_meta.tag_metas.get(new_tag_meta.name)
if tag_values:
if sorted(new_tag_meta.possible_values) != sorted(tag_values):
sly.logger.warning(
f"Tag [{new_tag_meta.name}] already exists, but with another values: {new_tag_meta.possible_values}"
)
return new_tag_meta, project_meta
```
### **Create new tag metadata for video**
Here, we are creating metadata for a video tag and using the function from the previous step to insert it into our project.
```python
video_tag_meta = sly.TagMeta(
name="fruits",
value_type=sly.TagValueType.ANY_NUMBER,
applicable_to=sly.TagApplicableTo.ALL,
)
new_tag_meta, project_meta = refresh_meta(project_meta, video_tag_meta)
```
### **Create new tag for video and its frames**
When you pass information from tag metadata using its ID to the object, a new tag is created and appended.
To add a tag with value, you must define the `value` argument with possible values.
If you want to add a tag to frames, you must define the `frame_range` argument.
```python
api.video.tag.add_tag(new_tag_meta.sly_id, video_ids[0].id, value=3)
tag_info = api.video.tag.add_tag(new_tag_meta.sly_id, video_ids[0].id, value=2, frame_range=[2, 6])
```
Visualization in Labeling Tool with new tags.
### **Update tag value and frame range for video**
Also, if you need to correct tag values or frames, you can easily do so as follows:
```python
api.video.tag.update_value(tag_id=tag_info["id"], tag_value=1)
api.video.tag.update_frame_range(tag_info["id"], [3, 5])
```
### **Delete tag**
To remove a tag, all you need is its ID.
```python
api.video.tag.remove_from_video(tag_info["id"])
```
Please note that you are only deleting the tag from the object. To remove a tag from the project (`TagMeta`), you need to use other SDK methods.
### **Create new tag metadatas for objects in video**
The process is the same as for video, but now we strictly define the `applicable_to` parameter to specify which entities these tags can be added to. It is not necessary and depends solely on your desire to limit the types other than objects.
```python
orange_object_tag_meta = sly.TagMeta(
name="orange",
value_type=sly.TagValueType.ONEOF_STRING,
applicable_to=sly.TagApplicableTo.OBJECTS_ONLY,
possible_values=["small", "big"],
)
kiwi_object_tag_meta = sly.TagMeta(
name="kiwi",
value_type=sly.TagValueType.ONEOF_STRING,
applicable_to=sly.TagApplicableTo.OBJECTS_ONLY,
possible_values=["medium", "small"],
)
orange_new_tag_meta, project_meta = refresh_meta(project_meta, orange_object_tag_meta)
kiwi_new_tag_meta, _ = refresh_meta(project_meta, kiwi_object_tag_meta)
```
### **Create new tag for object and frames with this object**
There's nothing new that you haven't seen already, just added some lines to handle objects according to their classes. Collects only oranges tag ids for further processing.
```python
project_objects = video_ann_json.get("objects")
created_tag_ids = {}
orange_ids = []
for object in project_objects:
if object["classTitle"] == "orange":
tag_id = api.video.object.tag.add(
orange_new_tag_meta.sly_id, object["id"], value="big", frame_range=[2, 6]
)
created_tag_ids[object["id"]] = tag_id
orange_ids.append(object["id"])
elif object["classTitle"] == "kiwi":
api.video.object.tag.add(kiwi_new_tag_meta.sly_id, object["id"], value="medium")
```
Visualization in Labeling Tool with new tags.
### **Update tag value and frame range for object**
To correct tag values for the first orange in list, do so as follows:
```python
tag_id_to_operate = created_tag_ids.get(orange_ids[0])
api.video.object.tag.update_value(tag_id_to_operate, "small")
api.video.object.tag.update_frame_range(tag_id_to_operate, [3, 5])
```
### **Delete tag from object**
```python
api.video.object.tag.remove(tag_id_to_operate)
```
## **Managing project tags (TagMeta)**
Everything above adds, edits and removes tags **on** a video or an object. The tag itself — its name, value type, scope and constraints — lives in the project meta as a `TagMeta`. The `refresh_meta` helper at the start of this tutorial creates one by rebuilding the whole project meta, which is the right approach when you are preparing many classes and tags at once.
When you only need to add or edit a tag, there are direct methods that take a `TagMeta` and touch nothing else:
```python
tag_meta = sly.TagMeta(
name="running",
value_type=sly.TagValueType.NONE,
target_type=sly.TagTargetType.FRAME_BASED,
)
created = api.video.tag.create(project_id, tag_meta)
# {'id': 32965996, 'name': 'running'}
```
Several at once, in one request:
```python
created = api.video.tag.create_bulk(project_id, [
sly.TagMeta("standing", sly.TagValueType.NONE, target_type=sly.TagTargetType.FRAME_BASED),
sly.TagMeta("sitting", sly.TagValueType.NONE, target_type=sly.TagTargetType.FRAME_BASED),
])
```
To edit an existing tag, pass its ID. This is a partial update — only the arguments you pass are changed:
```python
api.video.tag.update_meta(
created["id"],
project_id=project_id,
applicable_to=sly.TagApplicableTo.OBJECTS_ONLY,
applicable_classes=["person"],
)
```
{% hint style="info" %}
`project_id` is needed because the endpoint requires the tag's name and colour in every request; passing it lets the SDK read the current values for you. You can also pass `name` and `color` yourself instead.
{% endhint %}
`applicable_classes` takes class **names**, exactly as `TagMeta.applicable_classes` does — the SDK resolves them to the IDs the API expects. An empty list removes the restriction. A name that the project does not have raises a `ValueError` before anything is sent.
These methods are available for every entity type: `api.video.tag`, `api.image.tag`, `api.volume.tag`, `api.pointcloud.tag`.
## **Frame range length limits**
A frame-based tag can carry a minimum and a maximum length, in frames, measured on the finished tag. Use them when a tag is only meaningful over a certain span — a "running" segment shorter than five frames is more likely a mislabel than a real event. The limits apply to videos and point cloud episodes.
```python
tag_meta = sly.TagMeta(
name="running",
value_type=sly.TagValueType.NONE,
target_type=sly.TagTargetType.FRAME_BASED,
frame_range_min_length=5,
frame_range_max_length=30,
)
api.video.tag.create(project_id, tag_meta)
```
A labeler finishing a "running" tag shorter than 5 frames or longer than 30 now gets rejected by the platform.
Three things are worth knowing about how the limits behave:
* **Length is inclusive.** Frames 10 to 12 are a length of 3, not 2.
* **`0` means "no limit".** There is no separate on/off switch — a limit is active only while its value is above zero, so `0` (or `None`) disables it. That is also how you remove a limit later.
* **Only finished tags are checked.** A tag being drawn is not validated until it is completed, so a labeler can pass through invalid lengths on the way.
Reading the limits back from the project meta:
```python
project_meta = sly.ProjectMeta.from_json(api.project.get_meta(project_id))
tag_meta = project_meta.get_tag_meta("running")
tag_meta.frame_range_min_length # 5
tag_meta.frame_range_max_length # 30
tag_meta.frame_range_length_limits # (5, 30)
tag_meta.has_frame_range_length_limits # True
```
You can also check a range yourself before sending it, using the same inclusive arithmetic the platform applies:
```python
tag_meta.is_valid_frame_range(10, 12) # False, that is 3 frames
tag_meta.is_valid_frame_range(10, 19) # True, that is 10 frames
tag_meta.is_valid_frame_range_length(40) # False, above the maximum
```
### **Changing the limits**
On an existing tag, by ID. Pass `0` to drop a limit and leave an argument out to keep it as it is:
```python
# tighten both
api.video.tag.update_meta(tag_id, project_id=project_id,
frame_range_min_length=3, frame_range_max_length=12)
# drop the upper limit, keep the lower one
api.video.tag.update_meta(tag_id, project_id=project_id, frame_range_max_length=0)
```
Or through the project meta, which is convenient when you are already editing it. Note that `with_frame_range_length_limits` replaces **both** limits, so calling it with no arguments clears them:
```python
tag_meta = project_meta.get_tag_meta("running").with_frame_range_length_limits(4, 8)
project_meta = project_meta.delete_tag_meta("running").add_tag_meta(tag_meta)
api.project.update_meta(project_id, project_meta)
```
{% hint style="warning" %}
A minimum above a maximum would make the tag impossible to apply, so it is rejected. `TagMeta` raises a `ValueError` as soon as you construct it, before any request is sent:
```python
sly.TagMeta("bad", sly.TagValueType.NONE,
frame_range_min_length=30, frame_range_max_length=5)
# ValueError: frame range min_length = 30 must be less than or equal to max_length = 5
```
The check runs against the merged result, so raising the minimum above the stored maximum through `update_meta` is refused as well.
{% endhint %}
# Spatial labels on videos
How to create bounding boxes, masks on video frames in Python
## Introduction
In this tutorial, you will learn how to programmatically create classes, objects and figures for video frames and upload them to Supervisely platform.
Supervisely supports different types of shapes / geometries for video annotation:
* bounding box (rectangle)
* mask (also known as bitmap)
* polygon - will be covered in other tutorials
* polyline - will be covered in other tutorials
* point - will be covered in other tutorials
* keypoints (also known as graph, skeleton, landmarks) - will be covered in other tutorials
Learn more [about Supervisely Annotation JSON format here](https://github.com/supervisely/developer-portal/tree/main/getting-started/python-sdk-tutorials/videos/broken-reference/README.md).
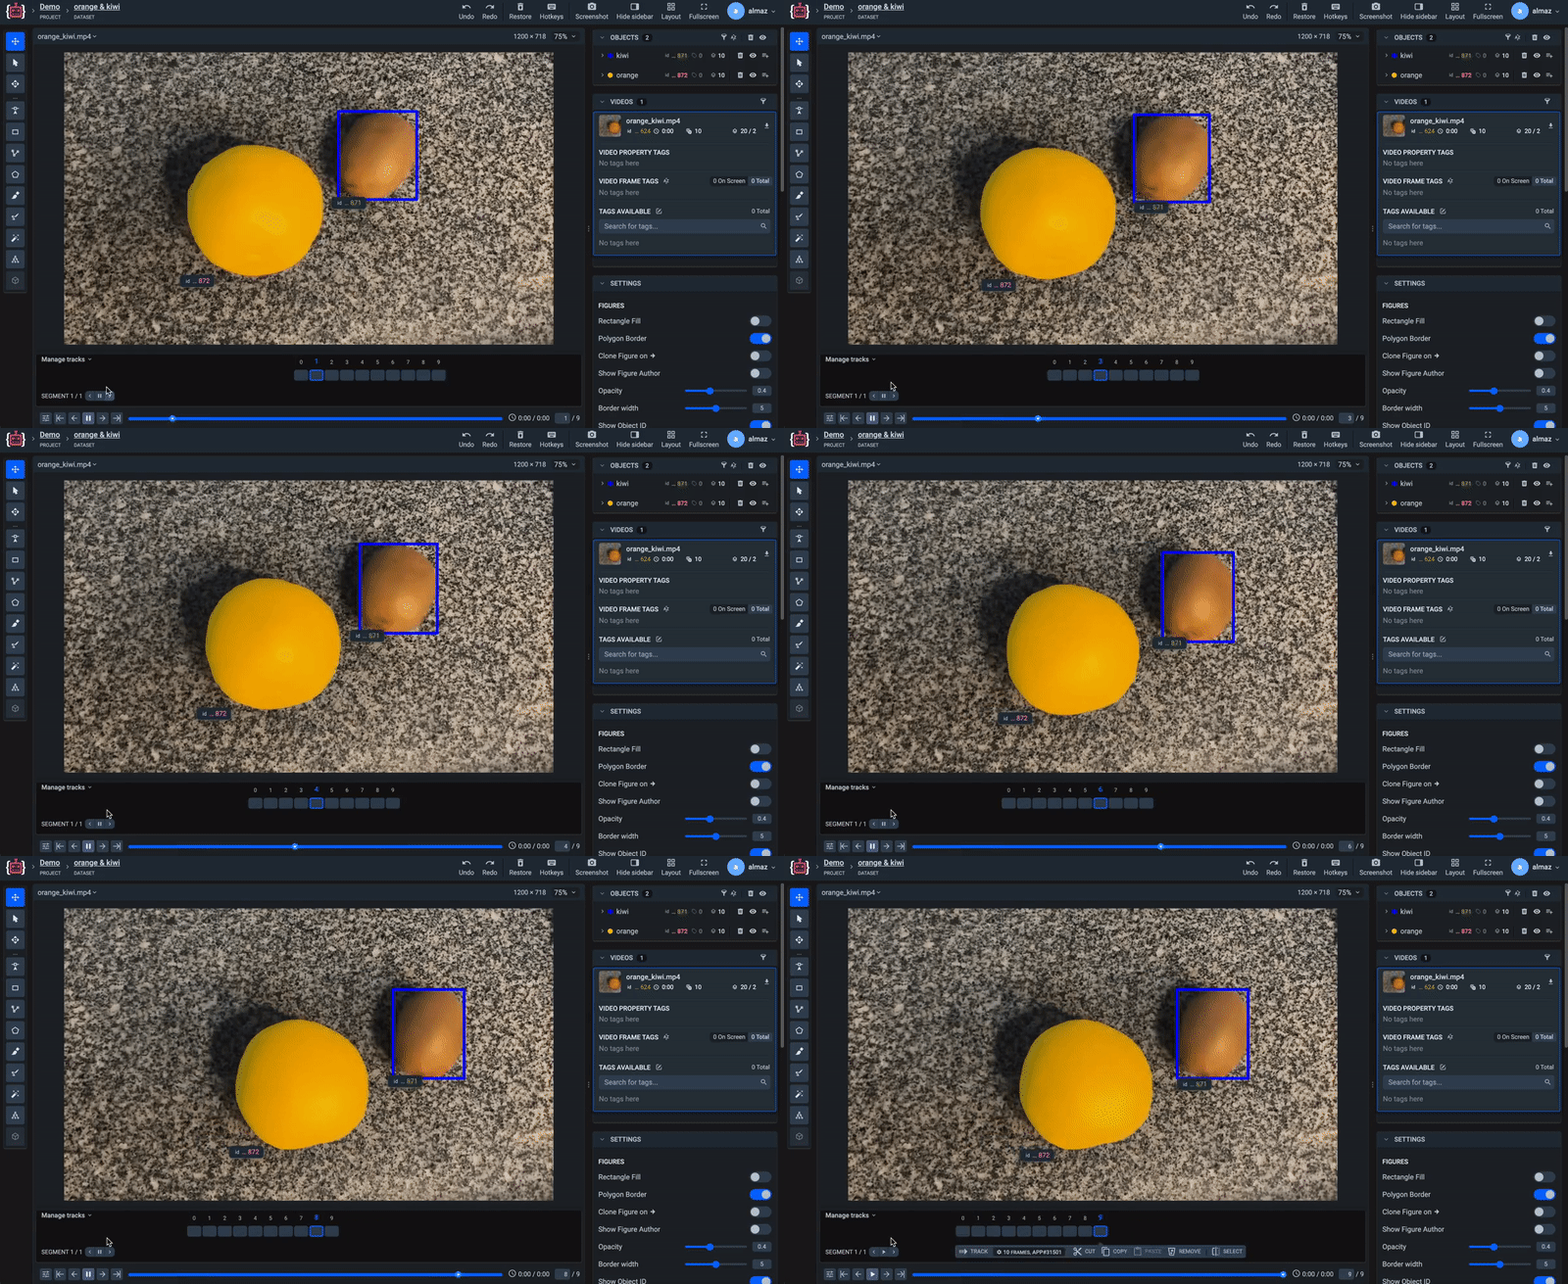
{% hint style="info" %}
Everything you need to reproduce [this tutorial is on GitHub](https://github.com/supervisely-ecosystem/video-figures): source code, Visual Studio Code configuration, and a shell script for creating virtual env.
{% endhint %}
## How to debug this tutorial
**Step 1.** Prepare `~/supervisely.env` file with credentials. [Learn more here.](https://developer.supervisely.com/getting-started/python-sdk-tutorials/videos/pages/2TS0DqIIblacweum1NCW#use-.env-file-recommended)
**Step 2.** Clone [repository](https://github.com/supervisely-ecosystem/video-figures) with source code and demo data and create [Virtual Environment](https://docs.python.org/3/library/venv.html).
```bash
git clone https://github.com/supervisely-ecosystem/video-figures
cd video-figures
./create_venv.sh
```
**Step 3.** Open repository directory in Visual Studio Code.
```bash
code -r .
```
**Step 4.** change ✅ workspace ID ✅ in `local.env` file by copying the ID from the context menu of the workspace. A new project with annotated videos will be created in the workspace you define:
```python
WORKSPACE_ID=507 # ⬅️ change value
```

**Step 5.** Start debugging `src/main.py`

## Python Code
### Import libraries
```python
import os
from os.path import join
from dotenv import load_dotenv
import supervisely as sly
```
### Init API client
Init api for communicating with Supervisely Instance. First, we load environment variables with credentials and workspace ID:
```python
load_dotenv("local.env")
load_dotenv(os.path.expanduser("~/supervisely.env"))
api = sly.Api()
```
With next lines we will check the you did everything right - API client initialized with correct credentials and you defined the correct workspace ID in `local.env`.
```python
workspace_id = sly.env.workspace_id()
workspace = api.workspace.get_info_by_id(workspace_id)
if workspace is None:
print("you should put correct workspaceId value to local.env")
raise ValueError(f"Workspace with id={workspace_id} not found")
```
### Create project
Create empty project with name **"Demo"** with one dataset **"orange & kiwi"** in your workspace on server. If the project with the same name exists in your dataset, it will be automatically renamed (Demo\_001, Demo\_002, etc ...) to avoid name collisions.
```python
project = api.project.create(
workspace.id,
name="Demo",
type=sly.ProjectType.VIDEOS,
change_name_if_conflict=True,
)
dataset = api.dataset.create(project.id, name="orange & kiwi")
print(f"Project has been sucessfully created, id={project.id}")
```
### Upload video to the dataset on server
```python
video_path = "data/orange_kiwi.mp4"
video_name = sly.fs.get_file_name_with_ext(video_path)
video_info = api.video.upload_path(dataset.id, video_name, video_path)
print(f"Video has been sucessfully uploaded, id={video_info.id}")
```
### Create annotation classes and update project meta
Color will be automatically generated if the class was created without `color` argument.
```python
kiwi_obj_cls = sly.ObjClass("kiwi", sly.Rectangle, color=[0, 0, 255])
orange_obj_cls = sly.ObjClass("orange", sly.Bitmap, color=[255, 255, 0])
```
The next step is to create ProjectMeta - a collection of annotation classes and tags that will be available for labeling in the project.
```python
project_meta = sly.ProjectMeta(obj_classes=[kiwi_obj_cls, orange_obj_cls])
```
And finally, we need to set up classes in our project on server:
```python
api.project.update_meta(project.id, project_meta.to_json())
```
### Prepare source data
```python
masks_dir = "data/masks"
# prepare rectangle points for 10 demo frames
points = [
[136, 632, 350, 817],
[139, 655, 355, 842],
[145, 672, 361, 864],
[158, 700, 366, 885],
[153, 700, 367, 885],
[156, 724, 375, 914],
[164, 745, 385, 926],
[177, 770, 396, 944],
[189, 793, 410, 966],
[199, 806, 417, 980],
]
```
### Create video objects
```python
orange = sly.VideoObject(orange_obj_cls)
kiwi = sly.VideoObject(kiwi_obj_cls)
```
### Create masks, rectangles, frames and figures
We are going to create ten masks from the following black and white images:

{% hint style="info" %}
Mask has to be the same size as the video
{% endhint %}
Supervisely SDK allows creating masks from NumPy arrays with the following values:
* `0` - nothing, `1` - pixels of target mask
* `0` - nothing, `255` - pixels of target mask
* `False` - nothing, `True` - pixels of target mask
```python
frames = []
for mask in os.listdir(masks_dir):
fr_index = int(sly.fs.get_file_name(mask).split("_")[-1])
mask_path = join(masks_dir, mask)
# orange will be labeled with a masks.
# supports masks with values (0, 1) or (0, 255) or (False, True)
bitmap = sly.Bitmap.from_path(mask_path)
# kiwi will be labeled with a bounding box.
bbox = sly.Rectangle(*points[fr_index])
mask_figure = sly.VideoFigure(orange, bitmap, fr_index)
bbox_figure = sly.VideoFigure(kiwi, bbox, fr_index)
frame = sly.Frame(fr_index, figures=[mask_figure, bbox_figure])
frames.append(frame)
```
### Create `VideoObjectCollection` and `FrameCollection`
```python
objects = sly.VideoObjectCollection([kiwi, orange])
frames = sly.FrameCollection(frames)
```
### Get video file info
```python
frame_size, vlength = sly.video.get_image_size_and_frames_count(video_path)
```
### Create `VideoAnnotation`
[Learn more](https://github.com/supervisely/developer-portal/tree/main/getting-started/python-sdk-tutorials/videos/broken-reference/README.md) about VideoAnnotation JSON format.
```python
video_ann = sly.VideoAnnotation(
img_size=frame_size,
frames_count=vlength,
objects=objects,
frames=frames,
)
```
### Upload annotation to the video on server
```python
api.video.annotation.append(video_info.id, video_ann)
print(f"Annotation has been sucessfully uploaded to the video {video_name}")
```
### Download video annotation from server
```python
# download JSON annotation from server
video_ann_json = api.video.annotation.download(video_info.id)
# convert to Python objects
key_id_map = sly.KeyIdMap()
video_ann = sly.VideoAnnotation.from_json(video_ann_json, project_meta, key_id_map)
```
> Note: `key_id_map` is required to convert annotation downloaded from server from JSON format to Python objects.
Learn more how to [download video](/getting-started/python-sdk-tutorials/videos/video#download-video) from Supervisely to local directory by id.
In the [GitHub repository for this tutorial](https://github.com/supervisely-ecosystem/video-figures), you will find the [full python script](https://github.com/supervisely-ecosystem/video-figures/blob/master/src/main.py).
## Recap
In this tutorial we learned how to
* quickly configure python development for Supervisely
* how to create a project and dataset with classes of different shapes
* how to initialize rectangles, masks for video frames
* how to construct Supervisely annotation and upload it with an videos to server
# Stream video frames to directory
Decode video frames directly from a raw stream using PyAV — bypasses server-side metadata requirements.
{% hint style="info" %}
Supervisely SDK version ≥ **v6.73.578**
{% endhint %}
## Introduction
Use `stream_video_frames_to_dir` to decode frames directly from the raw video stream using **PyAV** without requiring server-side metadata.
The standard `api.video.frame.download_path` requires video metadata (frame count, timestamps) to be pre-calculated on the server. If that metadata has not been computed yet, the call will fail. `stream_video_frames_to_dir` bypasses this limitation by opening the raw video stream directly with **PyAV** and demuxing it locally.
{% hint style="warning" %}
Requires the `video-av` extra:
```bash
pip install 'supervisely[video-av]'
```
{% endhint %}
{% hint style="info" %}
Performance depends on the video and the requested frame range. Use this function when server-side metadata is unavailable, not as a general-purpose speed optimization.
{% endhint %}
## How to debug this tutorial
**Step 1.** Prepare `~/supervisely.env` file with credentials. [Learn more here.](/getting-started/basics-of-authentication)
**Step 2.** Set the required environment variables in `local.env`:
```
SERVER_ADDRESS=https://app.supervisely.com # ⬅️ change value
API_TOKEN=your-token-here # ⬅️ change value
VIDEO_ID=12345 # ⬅️ change value
```
**Step 3.** Run the script below.
### Import libraries
```python
import os
from dotenv import load_dotenv
import supervisely as sly
from supervisely.video.sampling import stream_video_frames_to_dir
```
### Init API client
```python
if sly.is_development():
load_dotenv("local.env")
load_dotenv(os.path.expanduser("~/supervisely.env"))
api = sly.Api.from_env()
```
## Save frames to directory
{% tabs %}
{% tab title="Frame range (PNG)" %}
Download frames 0–9 (first 10 frames) and save as PNG files:
```python
video_id = int(os.environ["VIDEO_ID"])
output_dir = "/tmp/frames"
paths = stream_video_frames_to_dir(
api=api,
video_id=video_id,
output_dir=output_dir,
start=0,
end=9,
)
print(f"Saved {len(paths)} frames:")
for p in paths:
print(p)
```
**Output:**
```
Saved 10 frames:
/tmp/frames/frame_000000.png
/tmp/frames/frame_000001.png
...
/tmp/frames/frame_000009.png
```
Files are named `frame_.`. The output directory is created automatically if it does not exist.
{% endtab %}
{% tab title="All frames" %}
Omit `start` and `end` to process the entire video:
```python
paths = stream_video_frames_to_dir(
api=api,
video_id=video_id,
output_dir="/tmp/all_frames",
)
print(f"Total frames saved: {len(paths)}")
```
{% endtab %}
{% tab title="JPEG output" %}
Pass `ext="jpg"` to change the output format:
```python
paths = stream_video_frames_to_dir(
api=api,
video_id=video_id,
output_dir="/tmp/frames_jpg",
start=0,
end=49,
ext="jpg",
)
```
{% endtab %}
{% endtabs %}
## Progress bar
Pass a `progress_cb` callable — it is called with `1` after each frame is saved:
```python
with sly.tqdm_sly(total=50, message="Streaming frames") as pbar:
paths = stream_video_frames_to_dir(
api=api,
video_id=video_id,
output_dir="/tmp/frames",
start=0,
end=49,
progress_cb=pbar.update,
)
```
## Decoding progress
Pass `show_decoding_progress=True` to display low-level tqdm progress bars for the demuxing phase (building the PTS map) and, for B-frame videos, the full-decode phase. Both bars count packets and are independent of `progress_cb`:
```python
paths = stream_video_frames_to_dir(
api=api,
video_id=video_id,
output_dir="/tmp/frames",
start=0,
end=49,
show_decoding_progress=True,
)
```
## Tuning parallelism and memory
Two parameters control the internal pipeline:
* `max_write_workers` (default `4`) — number of threads writing frames to disk in parallel. Increase on fast NVMe storage.
* `queue_maxsize` (default `32`) — size of the decode prefetch buffer in frames. Peak RAM ≈ `(queue_maxsize + max_write_workers + 1) × frame_bytes`. Reduce if you hit OOM errors.
```python
paths = stream_video_frames_to_dir(
api=api,
video_id=video_id,
output_dir="/tmp/frames",
max_write_workers=8, # more disk parallelism
queue_maxsize=16, # smaller decode buffer
)
```
## Async version
{% tabs %}
{% tab title="Save to directory" %}
Use `async_stream_video_frames_to_dir` inside an `async` function:
```python
import asyncio
from supervisely.video.sampling import async_stream_video_frames_to_dir
async def main():
paths = await async_stream_video_frames_to_dir(
api=api,
video_id=video_id,
output_dir="/tmp/frames_async",
start=0,
end=9,
)
print(f"Saved {len(paths)} frames")
asyncio.run(main())
```
{% endtab %}
{% tab title="Frame-by-frame generator" %}
For fine-grained control — process each frame as it arrives — use `async_stream_video_frames`:
```python
import asyncio
from supervisely.video.sampling import async_stream_video_frames
async def process_frames():
async for frame_idx, img in async_stream_video_frames(
api=api,
video_id=video_id,
start=0,
end=9,
):
print(f"Got frame {frame_idx}, shape: {img.shape}")
# img is an RGB NumPy array (H, W, 3)
asyncio.run(process_frames())
```
{% endtab %}
{% endtabs %}
## Function reference
stream_video_frames_to_dir
```python
stream_video_frames_to_dir(
api,
video_id,
output_dir,
start=None, # first frame index (inclusive, 0-based); default: 0
end=None, # last frame index (inclusive, 0-based); default: last frame
ext="png", # image extension: "png", "jpg", etc.
progress_cb=None, # callable(1) called after each saved frame
image_writer=None, # custom writer fn(path, np_array); default: sly.image.write
max_write_workers=4, # parallel write threads; increase on fast storage
queue_maxsize=32, # decode prefetch buffer in frames; peak RAM ≈ (queue_maxsize + max_write_workers + 1) × frame_bytes
show_decoding_progress=False, # show tqdm bars for demux / B-frame decode phases
)
```
Returns a `List[str]` of absolute paths to saved frame files.
async_stream_video_frames_to_dir
Same signature as `stream_video_frames_to_dir` (including `max_write_workers`, `queue_maxsize`, and `show_decoding_progress`), but `async`. Returns `List[str]`.
async_stream_video_frames
```python
async_stream_video_frames(
api,
video_id,
start=None, # first frame index (inclusive, 0-based); default: 0
end=None, # last frame index (inclusive, 0-based); default: last frame
queue_maxsize=32, # decode prefetch buffer in frames; peak RAM ≈ (queue_maxsize + 1) × frame_bytes
show_decoding_progress=False, # show tqdm bars for demux / B-frame decode phases
)
```
Async generator. Yields `(frame_index: int, image: np.ndarray)` tuples. Image is in **RGB** format.
# Point Clouds
# Point Clouds (LiDAR)
## Introduction
In this tutorial we will focus on working with Point Clouds and Point Cloud Episodes using Supervisely SDK.
You will learn how to:
1. [Upload point clouds and photo context to Supervisely](#Upload-point-clouds-and-photo-context-to-Supervisely)
2. [Get information about Point Clouds and image contexts](#Get-information-about-Point-Clouds-and-related-context-Images)
3. [Download point clouds and image contexts to local directory](#Download-point-clouds-and-context-images-from-Supervisely)
4. [Working with Point Cloud Episodes](#Working-with-Point-Cloud-Episodes)
📗 Everything you need to reproduce [this tutorial is on GitHub](https://github.com/supervisely-ecosystem/tutorial-pointclouds): source code and demo data.
## How to debug this tutorial
**Step 1.** Prepare `~/supervisely.env` file with credentials. [Learn more here.](/getting-started/basics-of-authentication)
**Step 2.** Clone [repository](https://github.com/supervisely-ecosystem/tutorial-pointclouds) with source code and demo data and create [Virtual Environment](https://docs.python.org/3/library/venv.html).
```
git clone https://github.com/supervisely-ecosystem/tutorial-pointclouds.git
cd tutorial-pointclouds
./create_venv.sh
```
**Step 3.** Open repository directory in Visual Studio Code.
```
code -r .
```
**Step 4.** Change workspace ID in `local.env` file by copying the ID from the context menu of the workspace.
```
WORKSPACE_ID=654 # ⬅️ change value
```
**Step 5.** Start debugging `src/main.py`.
### Import libraries
```python
import os
import json
from pathlib import Path
from dotenv import load_dotenv
import supervisely as sly
```
### Init API client
First, we load environment variables with credentials and init API for communicating with Supervisely Instance.
```python
if sly.is_development():
load_dotenv("local.env")
load_dotenv(os.path.expanduser("~/supervisely.env"))
api = sly.Api()
```
### Get variables from environment
In this tutorial, you will need an workspace ID that you can get from environment variables. [Learn more here](/getting-started/environment-variables#workspace_id)
```python
workspace_id = sly.env.workspace_id()
```
## Create new project and dataset
Create new project.
**Source code:**
```python
project = api.project.create(
workspace_id,
name="Point Clouds Tutorial",
type=sly.ProjectType.POINT_CLOUDS,
change_name_if_conflict=True,
)
print(f"Project ID: {project.id}")
```
**Output:**
```python
# Project ID: 16197
```
Create new dataset.
**Source code:**
```python
dataset = api.dataset.create(project.id, name="dataset_1")
print(f"Dataset ID: {dataset.id}")
```
**Output:**
```python
# Dataset ID: 54539
```
## Upload point clouds and photo context to Supervisely
### Upload single point cloud.
**Source code:**
```python
pcd_file = "src/input/pcd/000000.pcd"
pcd_info = api.pointcloud.upload_path(dataset.id, name="pcd_0.pcd", path=pcd_file)
print(f'Point cloud "{pcd_info.name}" uploaded to Supervisely with ID:{pcd_info.id}')
```
**Output:**
```python
# Point cloud "pcd_0.pcd" uploaded to Supervisely platform with ID:17539453
```
**Now you can explore and label it in** [**Supervisely labeling tool**](https://ecosystem.supervisely.com/annotation_tools/pointcloud-labeling-tool):
### Upload related context image to Supervisely.
#### Extrinsic and intrinsic matrices
If you have a photo context taken with a LIDAR image, you can attach the photo to the point cloud. To do that, we need two additional matrices. They are used for matching 3D coordinates in the point cloud to the 2D coordinates in the photo context:
**Parameters meaning**
* **fx, fy** are the focal lengths expressed in pixel units
* **cx, cy** is a principal point that is usually at the image center
* **rij** and **ti** from the `extrinsicMatrix` are the rotation and translation parameters
The dot product of the matrices and XYZ coordinate in 3D space gives us the coordinate of a point *(x=u, y=v)* in the photo context:
#### Uploading context photo to the Supervisely.
For attaching a photo, it is needed to provide the matrices in a `meta` **dict** with the `deviceId` and `sensorsData` fields. The matrices must be included in the `meta` dict as **flattened** lists.
**Example of a meta dict:**
```python
# src/input/cam_info/000000.json
{
"deviceId": "CAM_2",
"sensorsData": {
"extrinsicMatrix": [
0.007533745,
-0.9999714,
-0.000616602,
-0.004069766,
0.01480249,
0.0007280733,
-0.9998902,
-0.07631618,
0.9998621,
0.00752379,
0.01480755,
-0.2717806,
],
"intrinsicMatrix": [721.5377, 0, 609.5593, 0, 721.5377, 172.854, 0, 0, 1],
}
}
```
#### A full code for uploading and attaching the context image
**Source code:**
```python
# input files:
img_file = "src/input/img/000000.png"
cam_info_file = "src/input/cam_info/000000.json"
# 0. Read cam_info with matrices (a meta dict).
with open(cam_info_file, "r") as f:
cam_info = json.load(f)
# 1. Upload an image to the Supervisely. It generates us a hash for image
img_hash = api.pointcloud.upload_related_image(img_file)
# 2. Create img_info needed for matching the image to the point cloud by its ID
img_info = {"entityId": pcd_info.id, "name": "img_0.png", "hash": img_hash, "meta": cam_info}
# 3. Run the API command to attach the image
api.pointcloud.add_related_images([img_info])
print("Context image has been uploaded.")
```
**Output:**
```python
# Context image has been uploaded.
```
More about the format of a photo context: [Supervisely annotation JSON format](https://github.com/supervisely/developer-portal/tree/main/getting-started/python-sdk-tutorials/point-clouds/broken-reference/README.md)
More about calibration and matrix transformations: [OpenCV 3D Camera Calibration Tutorial](https://docs.opencv.org/2.4/modules/calib3d/doc/camera_calibration_and_3d_reconstruction.html).
### Upload list of point clouds and context images.
✅ Supervisely API allows uploading multiple point clouds in a single request. The code sample below sends fewer requests and it leads to a significant speed-up of our original code.
**Source code:**
```python
# Upload a batch of point clouds and related images
paths = ["src/input/pcd/000001.pcd", "src/input/pcd/000002.pcd"]
img_paths = ["src/input/img/000001.png", "src/input/img/000002.png"]
cam_paths = ["src/input/cam_info/000001.json", "src/input/cam_info/000002.json"]
pcd_infos = api.pointcloud.upload_paths(dataset.id, names=["pcd_1.pcd", "pcd_2.pcd"], paths=paths)
img_hashes = api.pointcloud.upload_related_images(img_paths)
img_infos = []
for i, cam_info_file in enumerate(cam_paths):
# reading cam_info
with open(cam_info_file, "r") as f:
cam_info = json.load(f)
img_info = {
"entityId": pcd_infos[i].id,
"name": f"img_{i}.png",
"hash": img_hashes[i],
"meta": cam_info,
}
img_infos.append(img_info)
result = api.pointcloud.add_related_images(img_infos)
print("Batch uploading has finished:", result)
```
**Output:**
```python
# Batch uploading has finished: {'success': True}
```
## Get information about Point Clouds and related context Images
### Get info by name
Get information about point cloud from Supervisely by name.
**Source code:**
```python
pcd_info = api.pointcloud.get_info_by_name(dataset.id, name="pcd_0.pcd")
print(pcd_info)
```
**Output:**
```python
PointcloudInfo(
id=17553684,
frame=None,
description="",
name="pcd_0.pcd",
team_id=440,
workspace_id=662,
project_id=16108,
dataset_id=54365,
link=None,
hash="rxl9ioCcNobe1z7q1dA6idsebCM77G0wlrZd1Be28ng=",
path_original="/h5un6l2bnaz1vj8a9qgms4-public/point_clouds/f/x/kC/5JwCwSNouz7u3sNVDWOIURf44HRAridOKsf3lDGjo9bEHcj22gCejQIULbZHblG9Ns6GWD4Vmc3I0KdBagpmZKovKikN50Ij7utyw5aUaCTtM10sLiX4BVqPRssx.pcd",
cloud_mime="image/pcd",
figures_count=0,
objects_count=0,
tags=[],
meta={},
created_at="2023-01-08T07:15:50.332Z",
updated_at="2023-01-08T07:15:50.332Z",
)
```
### Get info by ID
You can also get information about image from Supervisely by id.
**Source code:**
```python
pcd_info = api.pointcloud.get_info_by_id(pcd_info.id)
print("Point cloud name:", pcd_info.name)
```
**Output:**
```python
# Point cloud name: pcd_0.pcd
```
### Get information about context images
Get information about related context images. For example it can be a photo from front/back cameras of a vehicle.
**Source code:**
```python
img_infos = api.pointcloud.get_list_related_images(pcd_info.id)
img_info = img_infos[0]
print(img_info)
```
**Output:**
```python
{'pathOriginal': '/h5un6l2bnaz1vj8a9qgms4-public/images/original/S/j/hJ/PwhtY7x4zRQ5jvNETPgFMtjJ9bDOMkjJelovMYLJJL2wxsGS9dvSjQC428ORi2qIFYg4u1gbiN7DsRIfO3JVBEt0xRgNc0vm3n2DTv8UiV9HXoaCp0Fy4IoObKMg.png',
'id': 473302,
'entityId': 17557533,
'createdAt': '2023-01-09T08:50:33.225Z',
'updatedAt': '2023-01-09T08:50:33.225Z',
'meta': {'deviceId': 'cam_2'},
'fileMeta': {'mime': 'image/png',
'size': 893783,
'width': 1224,
'height': 370},
'hash': 'vxA+emfDNUkFP9P6oitMB5Q0rMlnskmV2jvcf47OjGU=',
'link': None,
'preview': '/previews/q/ext:jpeg/resize:fill:50:0:0/q:50/plain/h5un6l2bnaz1vj8a9qgms4-public/images/original/S/j/hJ/PwhtY7x4zRQ5jvNETPgFMtjJ9bDOMkjJelovMYLJJL2wxsGS9dvSjQC428ORi2qIFYg4u1gbiN7DsRIfO3JVBEt0xRgNc0vm3n2DTv8UiV9HXoaCp0Fy4IoObKMg.png',
'fullStorageUrl': 'https://dev.supervisely.com/h5un6l2bnaz1vj8a9qgms4-public/images/original/S/j/hJ/PwhtY7x4zRQ5jvNETPgFMtjJ9bDOMkjJelovMYLJJL2wxsGS9dvSjQC428ORi2qIFYg4u1gbiN7DsRIfO3JVBEt0xRgNc0vm3n2DTv8UiV9HXoaCp0Fy4IoObKMg.png',
'name': 'img0.png'}
```
### Get photocontext's 2D figure list
You can get list of 2D figure on a pointcloud photo context:
**Source code:**
```python
related_images_list = api.pointcloud_episode.get_list_related_images(pointcloud_id)
for image in related_images_list:
rimg_id = image['id']
rimg_figures = api.image.figure.download(dataset_id=dataset_id, image_ids=[rimg_id])
for figure_id, figure_info in rimg_figures.items():
print(f"Image ID: {figure_id}, Figure Info: {figure_info}")
```
**Output:**
```python
Image ID: 1018554, Figure Info: [FigureInfo(id=8120872, class_id=None, updated_at='2025-06-16T14:57:06.250Z', created_at='2025-06-16T14:56:51.786Z', entity_id=1018554, object_id=225408, project_id=1553, dataset_id=10812, frame_index=None, geometry_type='bitmap', geometry={'bitmap': {'data': 'eNpNWHk8lPv3N49nNGN9zAgVeTCWKMvtezP2B5...', 'origin': [135, 175]}}, geometry_meta={'bbox': [175, 135, 374, 782]}, tags=[], meta={}, area='71589', priority=1)]
```
### Get list of all point clouds in the dataset
You can list all point clouds in the dataset.
**Source code:**
```python
pcd_infos = api.pointcloud.get_list(dataset.id)
print(f"Dataset contains {len(pcd_infos)} point clouds")
```
**Output:**
```python
# Dataset contains 3 point clouds
```
## Download point clouds and context images from Supervisely
### Download a point cloud
Download point cloud from Supervisely to local directory by id.
**Source code:**
```python
save_path = "src/output/pcd_0.pcd"
api.pointcloud.download_path(pcd_info.id, save_path)
print(f"Point cloud has been successfully downloaded to '{save_path}'")
```
**Output:**
```python
# Point cloud has been successfully downloaded to 'src/output/pcd_0.pcd'
```
### Download a related context image
Download a related context image from Supervisely to local directory by image id.
**Source code:**
```python
save_path = "src/output/img_0.png"
img_info = api.pointcloud.get_list_related_images(pcd_info.id)[0]
api.pointcloud.download_related_image(img_info["id"], save_path)
print(f"Context image has been successfully downloaded to '{save_path}'")
```
**Output:**
```python
# Context image has been successfully downloaded to 'src/output/img_0.png'
```
## Working with Point Cloud Episodes
Working with Point Cloud Episodes is similar, except the following:
1. There is `api.pointcloud_episode` for working with episodes.
2. Create new projects with type `sly.ProjectType.POINT_CLOUD_EPISODES`.
3. Put the frame index in meta while uploading a pcd: `meta = {"frame": idx}`.
**Note:** in Supervisely each episode is treated as a dataset. Therefore, create a separate dataset every time you want to add a new episode.
### Create new project and dataset
Create new project.
**Source code:**
```python
project = api.project.create(
workspace_id,
name="Point Cloud Episodes Tutorial",
type=sly.ProjectType.POINT_CLOUD_EPISODES,
change_name_if_conflict=True,
)
print(f"Project ID: {project.id}")
```
**Output:**
```python
# Project ID: 16197
```
Create new dataset.
**Source code:**
```python
dataset = api.dataset.create(project.id, "dataset_1")
print(f"Dataset ID: {dataset.id}")
```
**Output:**
```python
# Dataset ID: 54539
```
### Upload one point cloud to Supervisely.
**Source code:**
```python
meta = {"frame": 0} # "frame" is a required field for Episodes
pcd_info = api.pointcloud_episode.upload_path(dataset.id, "pcd_0.pcd", "src/input/pcd/000000.pcd", meta=meta)
print(f'Point cloud "{pcd_info.name}" (frame={meta["frame"]}) uploaded to Supervisely')
```
**Output:**
```python
# Point cloud "pcd_0.pcd" (frame=0) uploaded to Supervisely
```
### Upload entire point clouds episode to Supervisely platform.
**Source code:**
```python
def read_cam_info(cam_info_file):
with open(cam_info_file, "r") as f:
cam_info = json.load(f)
return cam_info
# 1. get paths
input_path = "src/input"
pcd_files = list(Path(f"{input_path}/pcd").glob("*.pcd"))
img_files = list(Path(f"{input_path}/img").glob("*.png"))
cam_info_files = Path(f"{input_path}/cam_info").glob("*.json")
# 2. get names and metas
pcd_metas = [{"frame": i} for i in range(len(pcd_files))]
img_metas = [read_cam_info(cam_info_file) for cam_info_file in cam_info_files]
pcd_names = list(map(os.path.basename, pcd_files))
img_names = list(map(os.path.basename, img_files))
# 3. upload
pcd_infos = api.pointcloud_episode.upload_paths(dataset.id, pcd_names, pcd_files, metas=pcd_metas)
img_hashes = api.pointcloud.upload_related_images(img_files)
img_infos = [
{"entityId": pcd_infos[i].id, "name": img_names[i], "hash": img_hashes[i], "meta": img_metas[i]}
for i in range(len(img_hashes))
]
api.pointcloud.add_related_images(img_infos)
print("Point Clouds Episode has been uploaded to Supervisely")
```
**Output:**
```python
# Point Clouds Episode has been uploaded to Supervisely
```
**Now you can explore and label it in** [**Supervisely labeling tool for Episodes**](https://ecosystem.supervisely.com/annotation_tools/pointcloud-episodes-labeling-tool):
# Point Cloud Episodes and object tags
How to create and add tags, update and remove tags from Point Cloud Episode annotation objects and frames
## **Introduction**
In this tutorial, you will learn how to create new tags and assign them, update its values or remove tags for selected annotation objects or frames (with these objects) in Point Cloud Episodes using the Supervisely SDK.
Supervisely supports different types of tags:
* NONE
* ANY\_NUMBER
* ANY\_STRING
* ONEOF\_STRING
And could be applied to:
* ALL
* IMAGES\_ONLY - PCD in our case
* OBJECTS\_ONLY
You can find all the information about those types in the [Tags in Annotations](https://developer.supervisely.com/api-references/supervisely-annotation-json-format/tags) section and [SDK](https://supervisely.readthedocs.io/en/latest/sdk/supervisely.annotation.tag_meta.TagMeta.html) documentation.
You can learn more about working with Point Cloud Episodes (PCE) using [Supervisely SDK](https://developer.supervisely.com/getting-started/python-sdk-tutorials/point-clouds-and-episodes) and what [Annotations for PCE](https://developer.supervisely.com/api-references/supervisely-annotation-json-format/point-cloud-episodes) are.
{% hint style="info" %}
Everything you need to reproduce [this tutorial is on GitHub](https://github.com/supervisely-ecosystem/add-tag-to-pcd-ep-objects): source code, Visual Studio Code configuration, and a shell script for creating virtual env.
{% endhint %}
## **How to debug this tutorial**
**Step 1.** Prepare `~/supervisely.env` file with credentials. [Learn more here.](https://developer.supervisely.com/getting-started/python-sdk-tutorials/point-clouds/pages/2TS0DqIIblacweum1NCW#use-.env-file-recommended)
**Step 2.** Clone [repository](https://github.com/supervisely-ecosystem/how-to-work-with-pce-object-tags) with source code and create [Virtual Environment](https://docs.python.org/3/library/venv.html).
```bash
git clone https://github.com/supervisely-ecosystem/how-to-work-with-pce-object-tags
cd how-to-work-with-pce-object-tags
./create_venv.sh
```
**Step 3.** Open repository directory in Visual Studio Code.
```bash
code -r .
```
**Step 4.** Get, for example, [Demo KITTI pointcloud episodes annotated](https://app.supervisely.com/ecosystem/projects/demo-kitti-3d-episodes-annotated) project from Ecosystem.
There you see project classes after Demo initialization
Project tags metadata after Demo initialization. This data is empty.
Visualization in Labeling Tool before we add tags
**Step 5.** Change Workspace ID in `local.env` file by copying the ID from the context menu of the workspace. Do the same for Project ID and Dataset ID .
```python
WORKSPACE_ID=82841 # ⬅️ change value
PROJECT_ID=239385 # ⬅️ change value
DATASET_ID=774629 # ⬅️ change value
```
**Step 6.** Start debugging `src/main.py`
## **Python Code**
### **Import libraries**
```python
import os
import supervisely as sly
from dotenv import load_dotenv
```
### **Init API client**
Init `api` for communicating with Supervisely Instance. First, we load environment variables with credentials, Project and Dataset IDs:
```python
load_dotenv("local.env")
load_dotenv(os.path.expanduser("~/supervisely.env"))
api = sly.Api.from_env()
```
With next lines we will get values from `local.env`.
```python
project_id = sly.env.project_id()
dataset_id = sly.env.dataset_id()
```
By using these IDs, we can retrieve the project metadata and annotations, and define the values needed for the following operations.
```python
project_meta_json = api.project.get_meta(project_id)
project_meta = sly.ProjectMeta.from_json(data=project_meta_json)
key_id_map = sly.KeyIdMap()
pcd_ep_ann_json = api.pointcloud_episode.annotation.download(dataset_id)
```
### **Create new tag metadata**
To create a new tag, you need to first define a tag metadata. This includes specifying the tag name, type, the objects to which it can be added, and the possible values. This base information will be used to create the actual tags.
```python
tag_name = "Car"
tag_values = ["car_1", "car_2"]
if not project_meta.tag_metas.has_key(tag_name):
new_tag_meta = sly.TagMeta(
tag_name,
sly.TagValueType.ONEOF_STRING,
applicable_to=sly.TagApplicableTo.OBJECTS_ONLY,
possible_values=tag_values,
)
```
Then recreate the source project metadata with new tag metadata.
```python
new_tags_collection = project_meta.tag_metas.add(new_tag_meta)
new_project_meta = sly.ProjectMeta(
tag_metas=new_tags_collection, obj_classes=project_meta.obj_classes
)
api.project.update_meta(project_id, new_project_meta)
```
New tag metas added
Right after updating the metadata, we need to obtain added metadata on the previous step to get the IDs in the next steps.
```python
new_prject_meta_json = api.project.get_meta(project_id)
new_project_meta = sly.ProjectMeta.from_json(data=new_prject_meta_json)
new_tag_meta = new_project_meta.tag_metas.get(new_tag_meta.name)
```
### **Or use existing tag metadata**
If a tag with the `tag_name` already exists in the metadata, we could just use it if it fits our requirements.
```python
else:
new_tag_meta = project_meta.tag_metas.get(tag_name)
if sorted(new_tag_meta.possible_values) != sorted(tag_values):
sly.logger.warning(
f"Tag [{new_tag_meta.name}] already exists, but with another values: {new_tag_meta.possible_values}"
)
```
In case this tag doesn't meet our requirements, it would be better to create a new one with a different name. On the other hand, we could update the tag values.
### **Create new tag with value and add to objects**
When you pass information from tag metadata using its ID to the object, a new tag is created and appended.
If you want to add a tag with value, you can define the `value` argument with possible values.
If you want to add a tag to frames, you can define the `frame_range` argument.
```python
project_objects = pcd_ep_ann_json.get("objects")
tag_frames = [0, 26]
created_tag_ids = {}
for object in project_objects:
if object["classTitle"] == "Car":
tag_id = api.pointcloud_episode.object.tag.add(
new_tag_meta.sly_id, object["id"], value="car_1", frame_range=tag_frames
)
created_tag_ids[object["id"]] = tag_id
```
`created_tag_ids` uses to store IDs for the following operations.
Visualization in Labeling Tool with new tags
You could more precisely define `tag_frames` in your dataset using the following example:
replace line number 46 of source code with this:
```python
project_frames = pcd_ep_ann_json.get("frames")
```
insert on line number 51 of source code this:
```python
frame_range = []
for frame in project_frames:
for figure in frame["figures"]:
if figure["objectId"] == object["id"]:
frame_range.append(frame["index"])
frame_range = frame_range[0:1] + frame_range[-1:]
```
You will most likely need to modify this example to more accurately define the objects. It is only provided to make it faster and easier to understand where and with what information to interact.
### **Update tag value**
Also, if you need to correct tag values, you can easily do so as follows:
```python
tag_id_to_operate = created_tag_ids.get(project_objects[0]["id"])
api.pointcloud_episode.object.tag.update(tag_id_to_operate, "car_2")
```
In our example, we took the first annotated object and the tag assigned to it in the previous step.
You can use a different approach to obtain information about objects, their tags, and the values of those tags according to your goal.
### **Delete tag**
To remove a tag, all you need is its ID.
```python
api.pointcloud_episode.object.tag.remove(tag_id_to_operate)
```
Please note that you are only deleting the tag from the object. To remove a tag from the project (`TagMeta`), you need to use other SDK methods.
# 3D point cloud object segmentation based on sensor fusion and 2D mask guidance
How to create 3D segmentation masks in point clouds with 2D mask guidance and camera calibration data
### Introduction
Nowadays there are hundreds of machine learning models which can perform instance segmentation on 2D images, even without fine-tuning. However, when it comes to segmentation of 3D point clouds, the choice of models becomes significantly narrower and most of them require finetuning in order to work properly on custom data. Since instance segmentation on 2D images is relatively easily accesible nowadays, the tranfer of segmentation masks from 2D to 3D space could significantly speed up 3D point cloud labeling for instance segmentation task.
In this tutorial we will learn how to create segmentation masks for 3D point cloud using segmentation masks on 2D photo context image and camera calibration data. We wil take point cloud, photo context image and camera calibration parameters from [KITTI](https://www.cvlibs.net/datasets/kitti/) dataset as an example, but this approach can be generalized to any data. Supervisely's [3D Point Cloud labeling tool](https://ecosystem.supervisely.com/annotation_tools/pointcloud-labeling-tool) and [Image labeling tool](https://ecosystem.supervisely.com/annotation_tools/image-labeling-tool-v2) will be used for working with point cloud and photo context image respectively.
The main steps of this tutorial are the following:
* prepare input data: a 3D point cloud, a reference image labeled with segmentation masks, KITTI's sensor calibration files
* project LiDAR 3D points on 2D reference image
* get LiDAR point projections located inside masks on photo context image
* create segmentation masks for 3D point cloud
Everything you need to reproduce this toturial is on [GitHub](https://github.com/supervisely-ecosystem/3d_pcd_segmentation_via_sensor_fusion): source code, Dockerfile, demo data.
### Input data overview: 3D point cloud, photo context image with 2D masks, sensor calibration parameters
As mentioned above, input data will be taken from KITTI dataset. You can import point clouds from KITTI dataset to your Supervisely account using [Import KITTI 3D](https://ecosystem.supervisely.com/apps/import-kitti-3d) app. We will take one point cloud for example:

In KITTI dataset, every point cloud has 4 reference images: 2 from grayscale cameras (left / right) and 2 from color cameras (left / right). We will take image from left color camera as an example and label it with 2D segmentation masks:

Now let's check sensor calibration parameters. KITTI dataset provides several sensor calibration files:
* calib\_cam\_to\_cam.txt - contains matrices for camera-to-camera calibration
* calib\_velo\_to\_cam.txt - contains matrices for velodyne-to-camera registration
File for camera-to-camera calibration contains the following data (source - [KITTI README](https://github.com/yanii/kitti-pcl/blob/master/KITTI_README.TXT)):
* S\_xx: 1x2 size of image xx before rectification
* K\_xx: 3x3 calibration matrix of camera xx before rectification
* D\_xx: 1x5 distortion vector of camera xx before rectification
* R\_xx: 3x3 rotation matrix of camera xx (extrinsic)
* T\_xx: 3x1 translation vector of camera xx (extrinsic)
* S\_rect\_xx: 1x2 size of image xx after rectification
* R\_rect\_xx: 3x3 rectifying rotation to make image planes co-planar
* P\_rect\_xx: 3x4 projection matrix after rectification
For our task, we will need only P\_rect\_xx, R\_rect\_xx, R\_xx and T\_xx matrices.
File for velodyne-to-camera registration contains the following data:
* R: 3x3 rotation matrix
* T: 3x1 translation vector
This data serves as a representation of the velodyne coordinate frame in camera coordinates. We will need rotation matrix and translation vector in order to transform point in velodyne coordinates into the camera coordinate system.
### Environment preparation and libraries import
For running the code provided in this tutorial, you will need some Python modules: `supervisely`, `open3d` and `plotly`. You can use [this Dockerfile](https://github.com/supervisely-ecosystem/3d_pcd_segmentation_via_sensor_fusion/blob/master/.devcontainer/Dockerfile) for convenience:
```docker
FROM supervisely/base-py-sdk:6.73.45
RUN pip3 install open3d==0.13.0
RUN pip3 install executing==1.1.1
RUN pip3 install plotly==5.18.0
RUN pip3 install kaleido==0.2.1
RUN pip3 install jsonschema==4.20.0
```
We will also use `functions.py` file to import visualization functions, you can find this file [here](https://github.com/supervisely-ecosystem/3d_pcd_segmentation_via_sensor_fusion/blob/master/src/functions.py).
Import necessary libraries, load [Supervisely account credentials](https://developer.supervisely.com/getting-started/basics-of-authentication) and set image display parameters:
```python
import supervisely as sly
from dotenv import load_dotenv
from PIL import Image
import os
import matplotlib.pyplot as plt
import open3d as o3d
from functions import *
from supervisely.project.project_type import ProjectType
from supervisely.geometry.pointcloud import Pointcloud
from supervisely.pointcloud_annotation.pointcloud_tag_collection import (
PointcloudTagCollection,
)
from supervisely.pointcloud_annotation.pointcloud_object_collection import (
PointcloudObjectCollection,
)
# load credentials
load_dotenv("../supervisely.env")
api = sly.Api()
# set image display parameters
%matplotlib inline
plt.rcParams["figure.figsize"] = (20, 10)
```
### Download photo context and visualize mask annotations
Let's download photo context image and its annotations from Supervisely platform to local storage and visualize the result. We will use Supervisely Python SDK for this purpose, you can find more tutorials on how to use Supervisely Python SDK [here](https://developer.supervisely.com/getting-started/python-sdk-tutorials).
```python
# define project id and photo context image id
photo_context_project_id = 43714
photo_context_image_id = 32382786
# download photo context image
photo_context_image_np = api.image.download_np(photo_context_image_id)
masked_photo_context_image_np = photo_context_image_np.copy()
# download photo context image annotation
project_meta_json = api.project.get_meta(photo_context_project_id)
project_meta = sly.ProjectMeta.from_json(project_meta_json)
ann_json = api.annotation.download(photo_context_image_id).annotation
ann = sly.Annotation.from_json(ann_json, project_meta)
# draw annotation on photo context image
ann.draw_pretty(masked_photo_context_image_np, thickness=1)
# create output directory
save_dir = "../tutorial_data/"
if not os.path.exists(save_dir):
os.mkdir(save_dir)
# save result
masked_photo_context_path = os.path.join(save_dir, "masked_photo_context.png")
masked_photo_context_image = Image.fromarray(masked_photo_context_image_np)
masked_photo_context_image.save(masked_photo_context_path)
# display result
plt.axis("off")
plt.imshow(masked_photo_context_image);
```

### Download input point cloud
Next step - download input point cloud to local storage:
```python
# define point cloud id and download it to local storage
pcd_id = 32384623
local_pcd_path = os.path.join(save_dir, "lidar_data.pcd")
api.pointcloud.download_path(pcd_id, local_pcd_path)
# display point cloud on interactive plot
visualize_pcd(local_pcd_path)
```
{% embed url="" %}
### Get sensor calibration parameters
The KITTI [paper](https://www.cvlibs.net/publications/Geiger2013IJRR.pdf) describes the transformation from LiDAR to camera *i* as follows, where each transformation matrix has been converted to it's homogeneous representation. The difference here is that we have changed the notation and added the transformation to the desired camera reference.
$$
\tilde{y} = P^{\text{cam}*i}*{\text{rect}\_i} R^{\text{rect}*i}*{\text{ref}\_i} T^{\text{ref}*i}*{\text{ref}\_0} T^{\text{ref}*0}*{\text{velo}} \tilde{x},
\qquad \text{where } \tilde{x} = \[x, y, z, 1]^T
$$
$$
\tilde{y} = (\tilde{u}, \tilde{v}, z, 1)
$$
For convenience we will denote the transformation from LiDAR to camera *i* like Isaac Berrios [proposed](https://github.com/itberrios/CV_tracking/blob/main/kitti_tracker/1_kitti_object_detection_lidar.ipynb) in his sensor fusion tutorial:
$$
T^{\text{cam}*i}*{\text{velo}} = P^{\text{cam}*i}*{\text{rect}\_i} R^{\text{rect}*i}*{\text{ref}\_i} T^{\text{ref}*i}*{\text{ref}\_0} T^{\text{ref}*0}*{\text{velo}}
$$
Where:
* LiDAR to camera reference → transforms a 3D point relative to the LiDAR to a 3D point relative to the Camera.
$$
T^{\text{ref}}\_{\text{velo}}
$$
* Rigid body transformation from camera 0 to camera *i*.
$$
T^{\text{ref}*i}*{\text{ref}\_0}
$$
* Camera *i* to rectified camera *i* reference.
$$
R^{\text{rect}*i}*{\text{ref}\_i}
$$
* Rectified camera *i* to 2D camera *i* *(u, v, z)* coordinate space.
$$
P^{\text{cam}*i}*{\text{rect}\_i}
$$
* 3D LiDAR space to 2D camera *i* *(u, v, z)* coordinate space.
$$
T^{\text{cam}*i}*{\text{velo}}
$$
Where *(u, v, z)* are the final camera coordinates after the rectification and projection transforms. In order to transform from homogeneous image coordinates *y* to true *(u, v, z)* image coordinates y, we will need to normalize by the depth and drop the 1:
$$y = \left( \frac{\tilde{u}}{z}, \frac{\tilde{v}}{z}, z \right)$$
```python
# define target camera number
camera_number = 2
# read calib_cam_to_cam.txt
calib_cam_to_cam_file = open("../tutorial_data/calib_cam_to_cam.txt")
calib_cam_to_cam_dict = {}
for line in calib_cam_to_cam_file.readlines():
key, value = line.split(": ")
calib_cam_to_cam_dict[key] = value.strip()
calib_cam_to_cam_file.close()
# read calib_velo_to_cam.txt
calib_velo_to_cam_file = open("../tutorial_data/calib_velo_to_cam.txt")
calib_velo_to_cam_dict = {}
for line in calib_velo_to_cam_file.readlines():
key, value = line.split(": ")
calib_velo_to_cam_dict[key] = value.strip()
calib_velo_to_cam_file.close()
# get projection matrices
P_rect = calib_cam_to_cam_dict[f"P_rect_0{camera_number}"]
P_rect = np.array([float(x) for x in P_rect.split(" ")]).reshape(
(3, 4)
)
# get rectified rotation matrices
R_rect = calib_cam_to_cam_dict[f"R_rect_0{camera_number}"]
R_rect = np.array([float(x) for x in R_rect.split(" ")]).reshape(
(3, 3)
)
# add (0, 0, 0) translation and convert to homogeneous coordinates
R_rect = np.insert(R_rect, 3, values=[0, 0, 0], axis=0)
R_rect = np.insert(R_rect, 3, values=[0, 0, 0, 1], axis=1)
# get rotation matrix from reference camera to target camera
R = calib_cam_to_cam_dict[f"R_0{camera_number}"]
R = np.array([float(x) for x in R.split(" ")]).reshape((3, 3))
# get translation vector from reference camera to target camera
t = calib_cam_to_cam_dict[f"T_0{camera_number}"]
t = np.array([float(x) for x in t.split(" ")]).reshape((3, 1))
# get reference camera to target camera rigid body transformation in homogeneous coordinates
T_ref_to_target = np.insert(np.hstack((R, t)), 3, values=[0, 0, 0, 1], axis=0)
# get lidar to camera reference transformation
R_velo = np.array([float(x) for x in calib_velo_to_cam_dict["R"].split(" ")]).reshape((3, 3))
t_velo = np.array([float(x) for x in calib_velo_to_cam_dict["T"].split(" ")])[:, None]
T_velo_ref0 = np.vstack((np.hstack((R_velo, t_velo)), np.array([0, 0, 0, 1])))
```
### Project LiDAR 3D points on 2D photo context image
Now when we got all necessary transformation matrices, we can obtain matrix to transform 3D LiDAR points to 2D camera coordinates.
```python
# transform from velo (LiDAR) to target camera
T_velo_to_cam = P_rect @ R_rect @ T_ref_to_target @ T_velo_ref0
# get lidar points
pcd = o3d.io.read_point_cloud(local_pcd_path, format="pcd")
pcd_points = np.asarray(pcd.points)
xyzw = np.insert(pcd_points, 3, 1, axis=1).T
# get 3D points projections on photo context image
projections = T_velo_to_cam @ xyzw
projections[:2] /= projections[2, :]
# draw point projections on image and display result
save_path = os.path.join(save_dir, "projections.png")
draw_projections_on_image(projections.copy(), photo_context_image_np.copy(), save_path)
plt.axis("off")
plt.imshow(Image.open(save_path));
```

### Get LiDAR point projections located inside masks on photo context image
Next step after we got LiDAR point projections - find projections which are located inside masks on photo context image (in our case we need to find find point projections which lie on two cars in front of ego vehicle).
```python
# download photo context image annotation
project_meta_json = api.project.get_meta(photo_context_project_id)
project_meta = sly.ProjectMeta.from_json(project_meta_json)
ann_json = api.annotation.download(photo_context_image_id).annotation
ann = sly.Annotation.from_json(ann_json, project_meta)
# get binary masks
labels = ann.labels
bitmap = np.zeros(photo_context_image_np.shape, dtype=np.uint8)
for label in labels:
geometry = label.geometry
geometry.draw(bitmap=bitmap, color=[1, 1, 1])
bitmap = bitmap[:, :, :2] # to 2d
# get indexes of projections which are located inside masks
u, v, z = projections
inside_masks = []
img_h, img_w, _ = photo_context_image_np.shape
for idx in range(len(pcd.points)):
point = np.array([int(u[idx]), int(v[idx])])
if (point[0] <= 0 or point[0] >= img_w) or (point[1] <= 0 or point[1] >= img_h):
continue
else:
if np.all(bitmap[point[1], point[0]] == 1):
inside_masks.append(idx)
print(f"{len(inside_masks)} point projections are located inside masks")
# display point projections located inside masks
masked_projections_save_path = os.path.join(save_dir, "masked_projections.png")
draw_projections_on_image(
projections.copy(),
photo_context_image_np.copy(),
masked_projections_save_path,
preprocess=False,
indexes=inside_masks,
)
plt.axis("off")
plt.imshow(Image.open(masked_projections_save_path));
```

### Create 3D point cloud segmentation masks
Since 3D points and their projections have the same indexing, we can apply indexes of projections located inside masks on photo context image to original LiDAR points and get masked part of point cloud.
```python
visualize_3d_masks(local_pcd_path, inside_masks)
```
{% embed url="" %}
As you can see, not only points of target objects (cars) were segmented - there are also points in front and behind target objects, whose projections are located on target objects on 2D image. Such scenario was quite predictable since in 3D space points can have similar x and y coordinates, but different z coordinates - their projections will be almost the same, but in 3D space these points can be located in completely different parts of point cloud.
In order to handle such corner case, we will have to apply some postprocessing to masked LiDAR points in order to filer points which do not belong to our target objects.
When it comes to postprocessing 2D to 3D segmentation transfer results, in most cases points which belong to target objects (in our case cars) will be in majority and other points (in our case points of surrounding environment, which we don't want to segment) will be in minority. Additionally, we can state that points of target objects and points of surrounding environment are most likely to be distant from each other.
What can we do with this information? We can apply clustering algorithm to masked part of our point cloud and find N biggest clusters (where N equals number of target objects / segmentation masks, in our case - 2) - since "target" points and "noise" points are likely to be distant from each other and "target" points are likely to have higher density than other points, there is a high probability that points of target objects will belong to biggest clusters. Let's apply DBScan clustering algorithm and test this hypothesis:
```python
# cluster masked part of point cloud
pcd = o3d.io.read_point_cloud(local_pcd_path, format="pcd")
masked_pcd = pcd.select_by_index(inside_masks)
cluster_labels = np.array(masked_pcd.cluster_dbscan(eps=1.5, min_points=100))
clusters, counts = np.unique(cluster_labels, return_counts=True)
# we recommend to set number of clusters equal to number of segmentation masks on photo context image
n_biggest_clusters = len(ann.labels)
biggest_clusters = clusters[np.argsort(counts)][-n_biggest_clusters:]
biggest_cluster_indexes = []
for idx, label in enumerate(cluster_labels):
if label in biggest_clusters:
biggest_cluster_indexes.append(idx)
inside_masks_processed = [inside_masks[idx] for idx in biggest_cluster_indexes]
print(f"{len(inside_masks) - len(inside_masks_processed)} points were filtered using DBScan clustering")
# display point filtering results
visualize_3d_masks(local_pcd_path, inside_masks_processed)
```
{% embed url="" %}
As you can see, for our case, DBScan perfectly filtered points which do not belong to target objects.
### Upload created 3D segmentation mask to Supervisely platform
Now, when we have indexes of target object's points in 3D space, we can create 3D point cloud segmentattion annotation and upload it to Supervisely platform. We will create new point cloud project and upload to it input point cloud, masked photo context image and 3D segmentation mask.
```python
# create output project
pcd_project = api.project.create(
657,
"Segmented point cloud",
change_name_if_conflict=True,
type=ProjectType.POINT_CLOUDS,
)
pcd_dataset = api.dataset.create(pcd_project.id, "ds_0", change_name_if_conflict=True)
# upload point cloud to output project
pcd_info = api.pointcloud.upload_path(pcd_dataset.id, name="scene.pcd", path=local_pcd_path)
# upload related image to output project
related_image_hash = api.pointcloud.upload_related_image(masked_photo_context_path)
# create dict with camera info
extrinsic_matrix = T_velo_ref0[:3, :4]
extrinsic_matrix = extrinsic_matrix.flatten().tolist()
intrinsic_matrix = calib_cam_to_cam_dict["P_rect_00"]
intrinsic_matrix = np.array(intrinsic_matrix.split(" "), dtype=np.float32).reshape(3, 4)
intrinsic_matrix = intrinsic_matrix[:3, :3].flatten().tolist()
cam_info = {
"deviceId": "cam_0",
"sensorsData": {
"extrinsicMatrix": extrinsic_matrix,
"intrinsicMatrix": intrinsic_matrix,
},
}
# create dict with image info
related_image_info = {
"entityId": pcd_info.id,
"name": "img_0.png",
"hash": related_image_hash,
"meta": cam_info,
}
# upload related image info
api.pointcloud.add_related_images([related_image_info])
# upload point cloud segmentation mask to the platform
pcd_project_meta = sly.ProjectMeta.from_json(api.project.get_meta(pcd_project.id))
if not pcd_project_meta.get_obj_class("mask"):
pcd_project_meta = pcd_project_meta.add_obj_class(sly.ObjClass("mask", Pointcloud))
api.project.update_meta(pcd_project.id, pcd_project_meta.to_json())
ann_info = api.pointcloud.annotation.download(pcd_id)
pcd_objects = []
pcd_figures = []
geometry = Pointcloud(inside_masks_processed)
pcd_object = sly.PointcloudObject(pcd_project_meta.get_obj_class("mask"))
pcd_figure = sly.PointcloudFigure(pcd_object, geometry)
pcd_objects.append(pcd_object)
pcd_figures.append(pcd_figure)
pcd_objects = PointcloudObjectCollection(pcd_objects)
result_ann = sly.PointcloudAnnotation(
pcd_objects, pcd_figures, PointcloudTagCollection([])
)
api.pointcloud.annotation.append(pcd_info.id, result_ann)
```
{% embed url="" %}
### Data export
Now, when point cloud has been uploaded to Supervisely platform, you can easily export labeled data in any suitable format using corresponding apps: [Export pointclouds project in Supervisely format](https://ecosystem.supervisely.com/apps/export-pointclouds-project-in-supervisely-format), [Export to KITTI 3D](https://ecosystem.supervisely.com/apps/export-to-kitti-3d), [Export Point Clouds to ROS Bag](https://ecosystem.supervisely.com/apps/export-to-ros-bag).
### Conclusion
In this tutorial, we used 2D mask guidance, sensor calibration matrices and DBScan clustering algorithm in order to transfer 2D segmentation mask to 3D space. This approach can be useful when there is a need in fast 3D point clouds labeling for instance segmentation tasks. For example, we can apply YOLO11 model for instance segmentation to each photo context image in KITTI dataset and transfer 2D masks to 3D space using sensor calibration data - it will allow to create a huge labeled dataset for 3D instance segmentation without having to manually draw segmentation masks in every point cloud. Alternative ways of 3D point clouds labeling will be covered in future tutorials.
### Acknowledgement
This tutorial is based on [great work](https://github.com/itberrios/CV_tracking/tree/main) by Isaac Berrios.
# 3D segmentation masks projection on 2D photo context image
How to transfer segmentation masks from 3D point cloud to 2D photo context image
### Introduction
Previously we have made a [tutorial](https://developer.supervisely.com/getting-started/python-sdk-tutorials/point-clouds/point-cloud-segmentation-with-2d-mask-guidance) on how to transfer segmentation masks from 2D photo context image to 3D point cloud. This time we will do the opposite - transfer segmentation masks from 3D point cloud to 2D photo context image.
In this tutorial, we will show an example of transfering segmention masks from 3D point cloud to 2D photo context image. Segmented image will be uploaded to Supervisely Platform - after that it is possible to export image segmentation masks in any popular format. We wil take point cloud, photo context image and camera calibration parameters from [KITTI](https://www.cvlibs.net/datasets/kitti/) dataset as an example, but this approach can be generalized to any data. Supervisely's [3D Point Cloud labeling tool](https://ecosystem.supervisely.com/annotation_tools/pointcloud-labeling-tool) and [Image labeling tool](https://ecosystem.supervisely.com/annotation_tools/image-labeling-tool-v2) will be used for working with point cloud and photo context image respectively.
The main steps of this tutorial are the following:
* prepare input data: a 3D point cloud with segmentation mask, a photo context image, KITTI's sensor calibration files
* project LiDAR 3D points on photo context image, get projections of masked points
* build convex hull based on projections of masked points to create 2D segmentation mask on photo context image
Everything you need to reproduce this toturial is on [GitHub](https://github.com/supervisely-ecosystem/3d-mask-projection): source code, Dockerfile, demo data.
### Input data overview: 3D point cloud with segmentation mask, photo context image, camera calibration parameters
Firstly, we will need 3D point cloud with segmentation mask:

Secondly, we will need 2D photo context image related to this point cloud:

Finally, we will need camera calibration parameters to project LiDAR 3D points on 2D photo context image. KITTI dataset provides several sensor calibration files:
* calib\_cam\_to\_cam.txt - contains matrices for camera-to-camera calibration
* calib\_velo\_to\_cam.txt - contains matrices for velodyne-to-camera registration
File for camera-to-camera calibration contains the following data (source - [KITTI README](https://github.com/yanii/kitti-pcl/blob/master/KITTI_README.TXT)):
* S\_xx: 1x2 size of image xx before rectification
* K\_xx: 3x3 calibration matrix of camera xx before rectification
* D\_xx: 1x5 distortion vector of camera xx before rectification
* R\_xx: 3x3 rotation matrix of camera xx (extrinsic)
* T\_xx: 3x1 translation vector of camera xx (extrinsic)
* S\_rect\_xx: 1x2 size of image xx after rectification
* R\_rect\_xx: 3x3 rectifying rotation to make image planes co-planar
* P\_rect\_xx: 3x4 projection matrix after rectification
For our task, we will need only P\_rect\_xx, R\_rect\_xx, R\_xx and T\_xx matrices.
File for velodyne-to-camera registration contains the following data:
* R: 3x3 rotation matrix
* T: 3x1 translation vector
This data serves as a representation of the velodyne coordinate frame in camera coordinates. We will need rotation matrix and translation vector in order to transform point in velodyne coordinates into the camera coordinate system.
### Environment preparation and libraries import
For running the code provided in this tutorial, you will need some Python modules: `supervisely`, `open3d` and `alphashape`. You can use [this Dockerfile](https://github.com/supervisely-ecosystem/3d-mask-projection/blob/master/.devcontainer/Dockerfile) for convenience:
```docker
FROM supervisely/base-py-sdk:6.73.45
RUN pip3 install open3d==0.13.0
RUN pip3 install executing==1.1.1
RUN pip3 install jsonschema==4.20.0
RUN pip3 install alphashape==1.3.1
RUN pip3 install python-json-logger==2.0.2
```
Import necessary libraries, load [Supervisely account credentials](https://developer.supervisely.com/getting-started/basics-of-authentication) and set image display parameters:
```python
# import necessary libraries
import supervisely as sly
from dotenv import load_dotenv
from PIL import Image
import os
import matplotlib.pyplot as plt
import open3d as o3d
import json
import numpy as np
import cv2
import alphashape
from matplotlib import cm
# load credentials
load_dotenv("../supervisely.env")
api = sly.Api()
# define input parameters
pcd_id = 316219 # your pcd id
photo_context_image_path = "../tutorial_data/photo_context.png"
cam_to_cam_file_path = "../tutorial_data/calib_cam_to_cam.txt"
velo_to_cam_file_path = "../tutorial_data/calib_velo_to_cam.txt"
# set image display parameters
%matplotlib inline
plt.rcParams["figure.figsize"] = (20, 10)
```
### Download input point cloud and its annotation
Download input point cloud and get indexes of masked points:
```python
# download input point cloud to local storage
save_dir = "../tutorial_data/"
local_pcd_path = os.path.join(save_dir, "lidar_data.pcd")
api.pointcloud.download_path(pcd_id, local_pcd_path)
# download point cloud mask created with pen tool
ann_info = api.pointcloud.annotation.download(pcd_id)
mask_indexes = ann_info["figures"][0]["geometry"]["indices"]
```
## Get sensor calibration parameters
We already [covered](https://developer.supervisely.com/getting-started/python-sdk-tutorials/point-clouds/point-cloud-segmentation-with-2d-mask-guidance#get-sensor-calibration-parameters) the topic of sensor calibration parameters in our previous tutorial, but we will also duplicate it here for convenience.
The KITTI [paper](https://www.cvlibs.net/publications/Geiger2013IJRR.pdf) describes the transformation from LiDAR to camera $i$ as follows, where each transformation matrix has been converted to it's homogeneous representation. The difference here is that we have changed the notation and added the transformation to the desired camera reference.
$$
\tilde{y} = P^{\text{cam}*i}*{\text{rect}\_i} R^{\text{rect}*i}*{\text{ref}\_i} T^{\text{ref}*i}*{\text{ref}\_0} T^{\text{ref}*0}*{\text{velo}} \tilde{x},
\qquad \text{where } \tilde{x} = \[x, y, z, 1]^T
$$
$$
\tilde{y} = (\tilde{u}, \tilde{v}, z, 1)
$$
For convenience we will denote the transformation from LiDAR to camera *i* like Isaac Berrios [proposed](https://github.com/itberrios/CV_tracking/blob/main/kitti_tracker/1_kitti_object_detection_lidar.ipynb) in his sensor fusion tutorial:
$$
T^{\text{cam}*i}*{\text{velo}} = P^{\text{cam}*i}*{\text{rect}\_i} R^{\text{rect}*i}*{\text{ref}\_i} T^{\text{ref}*i}*{\text{ref}\_0} T^{\text{ref}*0}*{\text{velo}}
$$
Where:
* LiDAR to camera reference → transforms a 3D point relative to the LiDAR to a 3D point relative to the Camera.
$$
T^{\text{ref}}\_{\text{velo}}
$$
* Rigid body transformation from camera 0 to camera *i*.
$$
T^{\text{ref}*i}*{\text{ref}\_0}
$$
* Camera *i* to rectified camera *i* reference.
$$
R^{\text{rect}*i}*{\text{ref}\_i}
$$
* Rectified camera *i* to 2D camera *i* *(u, v, z)* coordinate space.
$$
P^{\text{cam}*i}*{\text{rect}\_i}
$$
* 3D LiDAR space to 2D camera *i* *(u, v, z)* coordinate space.
$$
T^{\text{cam}*i}*{\text{velo}}
$$
Where *(u, v, z)* are the final camera coordinates after the rectification and projection transforms. In order to transform from homogeneous image coordinates *y* to true *(u, v, z)* image coordinates y, we will need to normalize by the depth and drop the 1:
$$y = \left( \frac{\tilde{u}}{z}, \frac{\tilde{v}}{z}, z \right)$$
```python
# define target camera number
camera_number = 2
# read calib_cam_to_cam.txt
calib_cam_to_cam_file = open(cam_to_cam_file_path)
calib_cam_to_cam_dict = {}
for line in calib_cam_to_cam_file.readlines():
key, value = line.split(": ")
calib_cam_to_cam_dict[key] = value.strip()
calib_cam_to_cam_file.close()
# read calib_velo_to_cam.txt
calib_velo_to_cam_file = open(velo_to_cam_file_path)
calib_velo_to_cam_dict = {}
for line in calib_velo_to_cam_file.readlines():
key, value = line.split(": ")
calib_velo_to_cam_dict[key] = value.strip()
calib_velo_to_cam_file.close()
# get projection matrices
P_rect = calib_cam_to_cam_dict[f"P_rect_0{camera_number}"]
P_rect = np.array([float(x) for x in P_rect.split(" ")]).reshape(
(3, 4)
)
# get rectified rotation matrices
R_rect = calib_cam_to_cam_dict[f"R_rect_0{camera_number}"]
R_rect = np.array([float(x) for x in R_rect.split(" ")]).reshape(
(3, 3)
)
# add (0, 0, 0) translation and convert to homogeneous coordinates
R_rect = np.insert(R_rect, 3, values=[0, 0, 0], axis=0)
R_rect = np.insert(R_rect, 3, values=[0, 0, 0, 1], axis=1)
# get rotation matrix from reference camera to target camera
R = calib_cam_to_cam_dict[f"R_0{camera_number}"]
R = np.array([float(x) for x in R.split(" ")]).reshape((3, 3))
# get translation vector from reference camera to target camera
t = calib_cam_to_cam_dict[f"T_0{camera_number}"]
t = np.array([float(x) for x in t.split(" ")]).reshape((3, 1))
# get reference camera to target camera rigid body transformation in homogeneous coordinates
T_ref_to_target = np.insert(np.hstack((R, t)), 3, values=[0, 0, 0, 1], axis=0)
# get lidar to camera reference transformation
R_velo = np.array([float(x) for x in calib_velo_to_cam_dict["R"].split(" ")]).reshape((3, 3))
t_velo = np.array([float(x) for x in calib_velo_to_cam_dict["T"].split(" ")])[:, None]
T_velo_ref0 = np.vstack((np.hstack((R_velo, t_velo)), np.array([0, 0, 0, 1])))
```
### Project LiDAR 3D points on 2D photo context image
Next step - project LiDAR 3D points on photo context image and get projections of points which belong to segmented area in point cloud (mask projections).
```python
# transform from velo (LiDAR) to target camera
T_velo_to_cam = P_rect @ R_rect @ T_ref_to_target @ T_velo_ref0
# get lidar points
pcd = o3d.io.read_point_cloud(local_pcd_path, format="pcd")
pcd_points = np.asarray(pcd.points)
xyzw = np.insert(pcd_points, 3, 1, axis=1).T
# get 3D points projections on photo context image
projections = T_velo_to_cam @ xyzw
projections[:2] /= projections[2, :]
def draw_projections_on_image(velo_uvz, image, save_path, preprocess=True, indexes=None):
"""Draw LiDAR point projectiins on the image"""
if preprocess:
# remove negative points
velo_uvz = np.delete(velo_uvz, np.where(velo_uvz[2, :] < 0)[0], axis=1)
# remove outliers
u, v, z = velo_uvz
img_h, img_w, _ = image.shape
u_out = np.logical_or(u < 0, u > img_w)
v_out = np.logical_or(v < 0, v > img_h)
outliers = np.logical_or(u_out, v_out)
velo_uvz = np.delete(velo_uvz, np.where(outliers), axis=1)
# create color map
u, v, z = velo_uvz
rainbow_r = cm.get_cmap("rainbow_r", lut=100)
color_map = lambda z: [255 * val for val in rainbow_r(int(z.round()))[:3]]
# draw LiDAR point cloud on blank image
for i in range(len(u)):
if indexes and i in indexes:
cv2.circle(image, (int(u[i]), int(v[i])), 1, color_map(z[i]), -1)
if indexes:
for i in indexes:
cv2.circle(image, (int(u[i]), int(v[i])), 1, color_map(z[i]), -1)
else:
for i in range(len(u)):
cv2.circle(image, (int(u[i]), int(v[i])), 1, color_map(z[i]), -1)
# save result
image = Image.fromarray(image)
image.save(save_path)
# get projections of masked points
mask_projections = projections.T[mask_indexes].T
# read photo context image
photo_context_image = sly.image.read(photo_context_image_path)
# draw point projections on image and display result
save_path = os.path.join(save_dir, "projections.png")
draw_projections_on_image(mask_projections.copy(), photo_context_image.copy(), save_path)
plt.axis("off")
plt.imshow(Image.open(save_path));
```

### Build 2D segmentation mask from 3D point projections
In order to create segmentation mask from 3D point projections, we are going to build a convex hull - the smallest convex set that encloses all the points, forming a convex polygon. We found alphashape implementation of convex hull to be the most effective, but it is also possible to use cv2 and scipy convex hull implementations.
```python
# build convex hull
convex_hull = alphashape.alphashape(mask_projections.T[:, :2], alpha=0.01) # alpha parameter needs to be tuned
if convex_hull.type == "Polygon":
vertices = np.array(list(zip(*convex_hull.exterior.coords.xy)))
elif convex_hull.type == "MultiPolygon":
vertices = []
for geom in convex_hull.geoms:
vertices.extend(list(zip(*geom.exterior.coords.xy)))
vertices = np.array(vertices)
# create segmentation mask based on convex hull
bitmap = np.zeros(photo_context_image.shape[:2], np.uint8)
bitmap = cv2.drawContours(bitmap, [vertices.astype(int)], -1, 1, cv2.FILLED)
mask = bitmap == 1
# generate supervisely annotation and visualize result
sly_mask = sly.Bitmap(mask)
obj_class = sly.ObjClass("car", sly.Bitmap)
label = sly.Label(sly_mask, obj_class)
img_height, img_width = photo_context_image.shape[:2]
sly_ann = sly.Annotation(img_size=[img_height, img_width], labels=[label])
viz_img = photo_context_image.copy()
sly_ann.draw_pretty(viz_img, thickness=1, color=[255, 0, 0])
plt.axis("off")
plt.imshow(Image.fromarray(viz_img));
```

### Upload image and its mask annotation to Supervisely platform
Final step - upload result to Supervisely platform - it will create opportunities for convenient export of segmention masks and other data operations.
You will need team and workspace IDs.
Here is how to get your team ID:


Here is how to get your workspace ID:


```python
# define team and workspace IDs
team_id = 4
workspace_id = 23
# create output images project
project = api.project.create(workspace_id, "Photo context with masks", change_name_if_conflict=True)
dataset = api.dataset.create(project.id, "ds_0", change_name_if_conflict=True)
# upload image to the platform
image_info = api.image.upload_path(
dataset.id,
name="photo_context.jpg",
path=photo_context_image_path,
)
# add previously created plant object class to project meta
project_meta = sly.ProjectMeta(obj_classes=[obj_class])
api.project.update_meta(project.id, project_meta.to_json())
# upload mask annotation to the platform
api.annotation.upload_ann(image_info.id, sly_ann)
```
Result:

### Data export
Now, when image has been uploaded to Supervisely platform, you can easily export image mask annotations in any suitable format using corresponding apps: [Export as masks](https://ecosystem.supervisely.com/apps/export-as-masks), [Export to COCO mask](https://ecosystem.supervisely.com/apps/export-to-coco-mask), [Export to Pascal VOC](https://ecosystem.supervisely.com/apps/export-to-pascal-voc), [Export to Cityscapes](https://ecosystem.supervisely.com/apps/export-to-cityscapes), [Export to YOLOv8 format](https://ecosystem.supervisely.com/apps/export-to-yolov8).
### Conclusion
In this tutorial, we used 3D mask guidance, sensor calibration matrices and convex hull algorithm in order to project 3D segmentation mask on 2D photo context image. This approach can be useful when there is a need in labeling both 3D point clouds and corresponding photo context images - instead of manually labeling both point clouds and images, you can label only point clouds and transfer 3D mask annotations to images.
### Acknowledgement
This tutorial is based on [great work](https://github.com/itberrios/CV_tracking/tree/main) by Isaac Berrios.
# Volumes
# Volumes (DICOM)
## Introduction
In this tutorial we will focus on working with volumes using Supervisely SDK.
You will learn how to:
1. [upload volume (NRRD) from local directory to Supervisely dataset](#upload-nrrd-format-volume)
2. [upload volume to Supervisely as NumPy matrix](#upload-volume-as-numpy-array)
3. [upload DICOM series from local directory](#upload-dicom-series-from-local-directory)
4. [upload list of volumes from local directory to Supervisely](#upload-list-of-volumes-from-local-directory)
5. [get list of volume infos](#get-list-of-volumes-infos-from-current-dataset)
6. [get single volume info by id](#get-single-volume-info-by-id)
7. [get single volume info by name](#get-single-volume-info-by-name)
8. [download volume from Supervisely to local directory](#download-volume-from-supervisely-to-local-directory)
9. [read NRRD files from local directory](#read-nrrd-file-from-local-directory)
10. [get volume slices from local directory](#get-slices-from-volume)
11. [download slice as NumPy from Supervisely by ID](#download-slice-from-supervisely)
12. [save slice as NRRD or JPG file](#save-slice-to-local-directory)
📗 Everything you need to reproduce [this tutorial is on GitHub](https://github.com/supervisely-ecosystem/tutorial-volume): source code and demo data.
## How to debug this tutorial
**Step 1.** Prepare `~/supervisely.env` file with credentials. [Learn more here.](/getting-started/basics-of-authentication)
**Step 2.** Clone [repository](https://github.com/supervisely-ecosystem/tutorial-volume) with source code and demo data and create [Virtual Environment](https://docs.python.org/3/library/venv.html).
```
git clone https://github.com/supervisely-ecosystem/tutorial-volume.git
cd tutorial-volume
./create_venv.sh
```
**Step 3.** Open repository directory in Visual Studio Code.
```
code -r .
```
**Step 4.** Change workspace ID in `local.env` file by copying the ID from the context menu of the workspace.
```
WORKSPACE_ID=654 # ⬅️ change value
```
**Step 5.** Download sample [volumes](https://github.com/supervisely-ecosystem/tutorial-volume/releases/download/v0.0.1/upload.tar.gz)
**Step 6.** Place downloaded files in the project structure as shown below:
```
tutorial-volume
├── .vscode
├── src
│ ├── upload
│ │ ├── MRHead_dicom <-- sample dicom files
│ │ │ ├── 000000.dcm
│ │ │ ├── 000001.dcm
│ │ │ └── ...
│ │ └── nrrd
│ │ ├── CTACardio.nrrd <-- sample NRRD
│ │ ├── CTChest.nrrd <-- sample NRRD
│ │ └── MRHead.nrrd <-- sample NRRD
│ └── main.py
├── .gitignore
├── create_venv.sh
├── local.env
├── README.md
└── requirements.txt
```
**Step 7.** Start debugging `src/main.py`.
### Import libraries
```python
import os
from dotenv import load_dotenv
from pprint import pprint
import supervisely as sly
```
### Init API client
First, we load environment variables with credentials and init API for communicating with Supervisely Instance.
```python
if sly.is_development():
load_dotenv("local.env")
load_dotenv(os.path.expanduser("~/supervisely.env"))
api = sly.Api()
```
### Get variables from environment
In this tutorial, you will need an workspace ID that you can get from environment variables. [Learn more here](/getting-started/environment-variables#workspace_id)
```python
workspace_id = sly.env.workspace_id()
```
### Create new project and dataset
Create new project with **`ProjectType.VOLUMES`** type.
**Source code:**
```python
project = api.project.create(
workspace_id,
"Volume tutorial",
ProjectType.VOLUMES,
change_name_if_conflict=True,
)
print(f"Project ID: {project.id}")
```
**Output:**
```python
# Project ID: 16342
```
Create new dataset.
**Source code:**
```python
dataset = api.dataset.create(project.id, "dataset_1")
print(f"Dataset ID: {dataset.id}")
```
**Output:**
```python
# Dataset ID: 54698
```
## Upload volumes from local directory to Supervisely
### Upload NRRD format volume
**Source code:**
```python
local_path = "src/upload/nrrd/MRHead.nrrd"
nrrd_info = api.volume.upload_nrrd_serie_path(
dataset.id,
"MRHead.nrrd",
local_path,
)
print(f'"{nrrd_info.name}" volume uploaded to Supervisely with ID:{nrrd_info.id}')
```
**Output:**
```python
# "NRRD_1.nrrd" volume uploaded to Supervisely with ID:18562981
```
### Upload volume as NumPy array
**Source code:**
```python
np_volume, meta = sly.volume.read_nrrd_serie_volume_np(local_path)
nrrd_info_np = api.volume.upload_np(
dataset.id,
"MRHead_np.nrrd",
np_volume,
meta,
)
print(f"Volume uploaded as NumPy array to Supervisely with ID:{nrrd_info_np.id}")
```
**Output:**
```python
# Volume uploaded as NumPy array to Supervisely with ID:18562982
```
### Upload DICOM series from local directory
Inspect you local directory and collect all dicom series.
**Source code:**
```python
dicom_dir_name = "src/upload/MRHead_dicom/"
series_infos = sly.volume.inspect_dicom_series(root_dir=dicom_dir_name)
```
Upload DICOM series from local directory to Supervisely platform.
**Source code:**
```python
for serie_id, files in series_infos.items():
item_path = files[0]
name = f"{sly.fs.get_file_name(path=item_path)}.nrrd"
dicom_info = api.volume.upload_dicom_serie_paths(
dataset_id=dataset.id,
name=name,
paths=files,
anonymize=True,
)
print(f"DICOM volume has been uploaded to Supervisely with ID: {dicom_info.id}")
```
> Set **`anonymize=True`** if you want to anonymize DICOM series and hide **`PatientID`** and **`PatientName`** fields.
**Output:**
```python
# DICOM volume has been uploaded to Supervisely with ID: 18630608
```
### Upload list of volumes from local directory
**Source code:**
```python
local_dir_name = "src/upload/nrrd/"
all_nrrd_names = os.listdir(local_dir_name)
names = [f"1_{name}" for name in all_nrrd_names]
paths = [os.path.join(local_dir_name, name) for name in all_nrrd_names]
volume_infos = api.volume.upload_nrrd_series_paths(dataset.id, names, paths)
print(f"All volumes has been uploaded with IDs: {[x.id for x in volume_infos]}")
```
**Output:**
```python
# All volumes has been uploaded with IDs: [18630605, 18630606, 18630607]
```
**Now you can explore and label it in** [**Supervisely labeling tool**](https://dev.supervisely.com/ecosystem/annotation_tools/dicom-labeling-tool):
## Get volume info from Supervisely
### Get list of volumes infos from current dataset
**Source code:**
```python
volume_infos = api.volume.get_list(dataset.id)
volumes_ids = [x.id for x in volume_infos]
print(f"List of volumes`s IDs: {volumes_ids}")
```
**Output:**
```python
# List of volumes`s IDs: [18562986, 18562987, 18562988, 18562989, 18562990]
```
### Get single volume info by id
**Source code:**
```python
volume_id = volume_infos[0].id
volume_info_by_id = api.volume.get_info_by_id(id=volume_id)
print(f"Volume name:", volume_info_by_id.name)
```
**Output:**
```python
# Volume name: NRRD_1.nrrd
```
### Get single volume info by name
**Source code:**
```python
volume_info_by_name = api.volume.get_info_by_name(dataset.id, name="MRHead.nrrd")
print(f"Volume name:", volume_info_by_name.name)
```
**Output:**
```python
# Volume name: NRRD_1.nrrd
```
## Download volume from Supervisely to local directory
**Source code:**
```python
volume_id = volume_infos[0].id
volume_info = api.volume.get_info_by_id(id=volume_id)
download_dir_name = "src/download/"
path = os.path.join(download_dir_name, volume_info.name)
if os.path.exists(path):
os.remove(path)
api.volume.download_path(volume_info.id, path)
if os.path.exists(path):
print(f"Volume (ID {volume_info.id}) successfully downloaded.")
```
**Output:**
```python
# Volume (ID 18630603) successfully downloaded.
```
## Get volume slices from local directory
### Read NRRD file from local directory
Read NRRD file from local directory and get meta and volume (as NumPy array).
**Source code:**
```python
# read NRRD file from local directory
nrrd_path = os.path.join(download_dir_name, "MRHead.nrrd")
volume_np, meta = sly.volume.read_nrrd_serie_volume_np(nrrd_path)
pprint(meta)
```
**Output:**
```python
# {
# 'ACS': 'RAS',
# 'channelsCount': 1,
# 'dimensionsIJK': {'x': 130, 'y': 256, 'z': 256},
# 'directions': (1.0, 0.0, 0.0, 0.0, 1.0, 0.0, 0.0, 0.0, 1.0),
# 'intensity': {'max': 279.0, 'min': 0.0},
# 'origin': (-86.64489746093749, -121.07139587402344, -138.21430206298828),
# 'rescaleIntercept': 0,
# 'rescaleSlope': 1,
# 'spacing': (1.2999954223632812, 1.0, 1.0),
# 'windowCenter': 139.5,
# 'windowWidth': 279.0
# }
```
### Get slices from volume
Get slices from current volume. In this example we will get sagittal slices.
**Source code:**
```python
slices = {}
dimension = volume_np.shape[0] # change index: 0 - sagittal, 1 - coronal, 2 - axial
for batch in sly.batched(list(range(dimension))):
for i in batch:
if i >= dimension:
continue
pixel_data = volume_np[i, :, :] # sagittal
# pixel_data = volume_np[:, i, :] # coronal
# pixel_data = volume_np[:, :, i] # axial
slices[i] = pixel_data
print(f"{len(slices.keys())} slices has been received from current volume.")
```
**Output:**
```python
# 130 slices has been received from current volume.
```
## Download slice from Supervisely
Download slice as NumPy from Supervisely by ID
**Source code:**
```python
slice_index = 60
image_np = api.volume.download_slice_np(
volume_id=volume_id,
slice_index=slice_index,
plane=sly.Plane.SAGITTAL,
)
print(f"Image downloaded as NumPy array. Image shape: {image_np.shape}")
```
**Output:**
```python
# Image downloaded as NumPy array. Image shape: (256, 256, 3)
```
## Save slice to local directory
✅ There is a built-in function **`supervisely.image.write`** which reads file extension from path and saves image (slice) with the desired format in local directory.
Example:
```python
import supervisely as sly
sly.image.write("folder/slice.nrrd", image_np) # save as NRRD
sly.image.write("folder/slice.jpg", image_np) # save as JPG
```
#### Save slice as NRRD
Recommended way to save slice as NRRD file to preserve image quality (pixel depth)
**Source code:**
```python
# save slice as NRRD file
save_dir = "src/download/"
nrrd_slice_path = os.path.join(save_dir, 'slice.nrrd')
sly.image.write(nrrd_slice_path, image_np)
```
### Save slice as JPG
**Source code:**
```python
# save slice as jpg
save_dir = "src/download/"
image_slice_path = os.path.join(save_dir, 'slice.jpg')
sly.image.write(jpg_slice_path, image_np)
```
#### Note:
In case you save slice using `nrrd` library, it is [recommended](https://pynrrd.readthedocs.io/en/stable/background/index-ordering.html) to use `C-order` indexing.
```python
save_dir = "src/download/"
slice_path = os.path.join(save_dir, 'slice.nrrd')
nrrd.write(slice_path, image_np, index_order='C')
```
# Spatial labels on volumes
How to create Mask3D annotations on volumes in Python
## Introduction
In this tutorial, you will learn how to programmatically create 3D annotations for volumes and upload them to Supervisely platform.
Supervisely supports different types of shapes/geometries for volume annotation, and now we will consider the primary type - **Mask3D**.
You can explore other types as well, like Mask (also known as Bitmap), Bounding Box (Rectangle), and Polygon. However, you'll find more information about them in other articles.
Learn more about [Supervisely Annotation in JSON format](https://developer.supervisely.com/api-references/supervisely-annotation-json-format/volumes-annotation) for volumes.
Read about our enterprise-grade DICOM labeling toolbox in blog post [Best DICOM & NIfTI annotation tools for Medical Imaging AI](https://supervisely.com/blog/dicom-labeling-toolbox/) to be informed about all the advantages of our platform.

{% hint style="info" %}
Everything you need to reproduce [this tutorial is on GitHub](https://github.com/supervisely-ecosystem/dicom-spatial-figures): source code, Visual Studio Code configuration, and a shell script for creating virtual env.
{% endhint %}
### Prepare data for annotations
{% hint style="warning" %}
**Important: Spatial Alignment for NIfTI Masks**
When uploading 3D masks from NIfTI files, it's crucial to ensure proper spatial alignment with the volume. Without this alignment, annotations may not be correctly positioned relative to the volume data, which can cause issues when using the masks outside of Supervisely's labeling tools.
{% endhint %}
**Why this matters:**
* Supervisely automatically converts volumes to the RAS coordinate system during upload
* If masks are uploaded without spatial alignment information, they won't be transformed accordingly
* While Supervisely's labeling tools may display them correctly, the underlying data won't match the volume's coordinate space
* This misalignment can cause problems when exporting or using annotations in external tools During your work, you can create 3D annotation shapes, and here are a few ways you can do that:
1. **NRRD files**
The easiest way to create **Mask3D** annotation in Supervisely is to use NRRD file with 3D figure that corresponds to the dimensions of the Volume.
You can find an example NRRD file at [data/mask/lung.nrrd](https://github.com/supervisely-ecosystem/dicom-spatial-figures/tree/master/data/mask) in the GitHub repository for this tutorial.
2. **NumPy Arrays**
Another simple way to create **Mask3D** annotation is to use NumPy arrays, where values of 1 represent the object and values of 0 represent empty space.
On the right side, you can see a volume with a pink cuboid. Let's represent this volume as an NumPy array.
```python
figure_array = np.zeros((3, 4, 2))
```
To draw a pink cuboid on it, you need to assign a value of 1 to the necessary cells. In the code below, each cell is indicated by three axes \[`axis_0`, `axis_1`, `axis_2`].
```python
figure_array[0, 1, 0] = 1
figure_array[0, 2, 0] = 1
figure_array[1, 1, 0] = 1
figure_array[1, 2, 0] = 1
```
In the Python code example section, we will create a NumPy array that represents a foreign body in the lung as a sphere.
3. **Images**
You can also use flat mask annotations, such as black and white pictures, to create **Mask3D** from them. You just need to know which plane and slice it refers to.
You can find an example image file at [data/mask/body.png](https://github.com/supervisely-ecosystem/dicom-spatial-figures/tree/master/data/mask) in the GitHub repository for this tutorial.
If your flat annotation doesn't correspond to the dimensions of the plane, you also need to know its `PointLocation`. This will help to properly apply the mask to the image. This point indicates where the top-left corner of the mask is located, or in other words, the coordinates of the mask's initial position on the canvas or image.
```python
plane = 'axial'
slice_index = 69
point_location = [36, 91]
```
## Python code example
### Import libraries and init API client
```python
import os
import numpy as np
import cv2
from dotenv import load_dotenv
import supervisely as sly
# To init API for communicating with Supervisely Instance.
# It needs to load environment variables with credentials and workspace ID
if sly.is_development():
load_dotenv("local.env")
load_dotenv(os.path.expanduser("~/supervisely.env"))
api = sly.Api()
# Check that you did everything right - the API client initialized with the correct credentials and you defined the correct workspace ID in `local.env`file
workspace_id = sly.env.workspace_id()
workspace = api.workspace.get_info_by_id(workspace_id)
if workspace is None:
sly.logger.warning("You should put correct WORKSPACE_ID value to local.env")
raise ValueError(f"Workspace with id={workspace_id} not found")
```
### Create project and upload volumes
Create an empty project with the name **"Volumes Demo"** with one dataset **"CTChest"** in your workspace on the server. If a project with the same name exists in your workspace, it will be automatically renamed (Volumes Demo\_001, Volumes Demo\_002, etc.) to avoid name collisions.
```python
# create empty project and dataset on server
project_info = api.project.create(
workspace.id,
name="Volumes Demo",
type=sly.ProjectType.VOLUMES,
change_name_if_conflict=True,
)
dataset_info = api.dataset.create(project_info.id, name="CTChest")
sly.logger.info(
f"Project with id={project_info.id} and dataset with id={dataset_info.id} have been successfully created"
)
# upload NRRD volume as ndarray into dataset
volume_info = api.volume.upload_nrrd_serie_path(
dataset_info.id,
name="CTChest.nrrd",
path="data/CTChest_nrrd/CTChest.nrrd",
)
```
### Create annotations and upload into the volume
```python
# create annotation classes
lung_class = sly.ObjClass("lung", sly.Mask3D, color=[111, 107, 151])
body_class = sly.ObjClass("body", sly.Mask3D, color=[209, 192, 129])
tumor_class = sly.ObjClass("tumor", sly.Mask3D, color=[255, 153, 204])
# update project meta with new classes
api.project.append_classes(project_info.id, [lung_class, tumor_class, body_class])
################################ 1 NRRD file ######################################
mask3d_path = "data/mask/lung.nrrd"
# create 3D Mask annotation for 'lung' using NRRD file with 3D object
lung_mask = sly.Mask3D.create_from_file(mask3d_path)
lung = sly.VolumeObject(lung_class, mask_3d=lung_mask)
############################### 2 NumPy array #####################################
# create 3D Mask annotation for 'tumor' using NumPy array
tumor_mask = sly.Mask3D(generate_tumor_array())
tumor = sly.VolumeObject(tumor_class, mask_3d=tumor_mask)
################################## 3 Image ########################################
image_path = "data/mask/body.png"
# create 3D Mask annotation for 'body' using image file
mask = cv2.imread(image_path, cv2.IMREAD_GRAYSCALE)
# create an empty mask with the same dimensions as the volume
body_mask = sly.Mask3D(np.zeros(volume_info.file_meta["sizes"], np.bool_))
# fill this mask with the an image mask for the desired plane.
# to avoid errors, use constants: Plane.AXIAL, Plane.CORONAL, Plane.SAGITTAL
body_mask.add_mask_2d(mask, plane_name=sly.Plane.AXIAL, slice_index=69, origin=[36, 91])
body = sly.VolumeObject(body_class, mask_3d=body_mask)
# create volume annotation object
volume_ann = sly.VolumeAnnotation(
volume_info.meta,
objects=[lung, tumor, body],
spatial_figures=[lung.figure, tumor.figure, body.figure],
)
# upload VolumeAnnotation
api.volume.annotation.append(volume_info.id, volume_ann)
sly.logger.info(
f"Annotation has been sucessfully uploaded to the volume {volume_info.name} in dataset with ID={volume_info.dataset_id}"
)
```
**Auxiliary function for generating tumor NumPy array:**
```python
def generate_tumor_array():
"""
Generate a NumPy array representing the tumor as a sphere
"""
width, height, depth = (512, 512, 139) # volume shape
center = np.array([128, 242, 69]) # sphere center in the volume
radius = 25
x, y, z = np.ogrid[:width, :height, :depth]
# Calculate the squared distances from each point to the center
squared_distances = (x - center[0]) ** 2 + (y - center[1]) ** 2 + (z - center[2]) ** 2
# Create a boolean mask by checking if squared distances are less than or equal to the square of the radius
tumor_array = squared_distances <= radius**2
tumor_array = tumor_array.astype(np.uint8)
return tumor_array
```
### Download existing annotations, manipulate the geometry & upload the result
```python
volume_id = os.getenv("VOLUME_ID")
project_id = sly.env.project_id()
project_meta = sly.ProjectMeta.from_json(api.project.get_meta(project_id))
key_id_map = sly.KeyIdMap()
# * Download the annotation
ann_json = api.volume.annotation.download(volume_id)
ann = sly.VolumeAnnotation.from_json(ann_json, project_meta, key_id_map)
# load spatial geometries
for figure in ann.spatial_figures:
api.volume.figure.load_sf_geometry(figure, key_id_map)
# * Manipulate the geometry
new_sfs = []
for figure in ann.spatial_figures:
# In this example, we will invert the mask of each spatial figure,
# but you can perform any manipulation you need.
inverted_mask_array = np.invert(figure.geometry.data)
# create a new object with the inverted mask
new_geometry: sly.Mask3D = figure.geometry.clone()
new_geometry.data = inverted_mask_array
# add the new figure to the list of spatial figures
new_figure = sly.VolumeFigure.clone(figure, geometry=new_geometry)
new_sfs.append(new_figure)
# clone the annotation with the new spatial figures
new_ann = sly.VolumeAnnotation.clone(ann, spatial_figures=new_sfs)
# * Upload the new annotation
api.volume.annotation.append(volume_id, new_ann, key_id_map)
```
### Convert Mask3D geometries into meshes
Spatial figures can be easily converted into meshes:
```python
ann_json = api.volume.annotation.download(volume_id)
ann = sly.VolumeAnnotation.from_json(ann_json, project_meta, key_id_map)
for figure in ann.spatial_figures:
# load the spatial geometry first, if not already loaded
api.volume.figure.load_sf_geometry(figure, key_id_map)
# Option 1: python Trimesh object
mesh = sly.volume.volume.convert_3d_geometry_to_mesh(figure.geometry)
# Option 2: export to STL/OBJ file
out_path = figure.geometry.sly_id + ".stl" # or ".obj"
# two latter arguments are optional and passed to the convert_3d_geometry_to_mesh function
sly.volume.volume.export_3d_as_mesh(
figure.geometry, out_path, apply_decimation=True, decimation_fraction=0.4
)
```
In the [GitHub repository for this tutorial](https://github.com/supervisely-ecosystem/dicom-spatial-figures), you will find the [full Python script](https://github.com/supervisely-ecosystem/dicom-spatial-figures/blob/master/src/main.py).
## Best practices for NIfTI mask upload
**Recommended approaches** (choose based on your situation):
**Option 1: Attach volume header when you already have mask data**
Use this when you already have the mask as a NumPy array (e.g., converted from NIfTI or other format) and need to align it with your volume:
```python
import nrrd
import supervisely as sly
# Read the header from your reference volume
header = nrrd.read_header("path/to/your/volume.nrrd")
# Create Mask3D geometry with the volume header
mask_np = ... # your mask data as NumPy array
geometry = sly.Mask3D(mask_np, volume_header=header)
```
**Option 2: Convert NIfTI mask to RAS coordinates and use mask's own header**
Use this to convert a NIfTI mask to RAS coordinate system. The function returns the mask data and its header in RAS coordinates. This works when mask dimensions match your volume dimensions:
```python
import supervisely as sly
# Convert NIfTI mask to RAS coordinate system (NRRD format)
# Returns both the converted mask data and header with RAS transformation information
mask_np, header = sly.volume.volume.convert_3d_nifti_to_nrrd("path/to/mask.nii")
# Create Mask3D using the converted mask data and its own header
geometry = sly.Mask3D(mask_np, volume_header=header)
```
Following these practices ensures your annotations maintain correct spatial alignment across all tools and workflows.
## How to debug this tutorial
**Step 1.** Prepare `~/supervisely.env` file with credentials. [Learn more here.](https://github.com/supervisely/developer-portal/tree/main/getting-started/python-sdk-tutorials/basics-of-authentication.md#use-.env-file-recommended)
**Step 2.** Clone the [repository](https://github.com/supervisely-ecosystem/dicom-spatial-figures) with source code and demo data and create a [Virtual Environment](https://docs.python.org/3/library/venv.html).
```bash
git clone https://github.com/supervisely-ecosystem/dicom-spatial-figures
cd dicom-spatial-figures
./create_venv.sh
```
**Step 3.** Open the repository directory in Visual Studio Code.
```bash
code -r .
```
**Step 4.** Change ✅ workspace ID ✅ in `local.env` file by copying the ID from the context menu of the workspace. A new project with annotated videos will be created in the workspace you define:
```python
WORKSPACE_ID=696 # ⬅️ change value
```
**Step 5.** Start debugging `src/main.py`

## To sum up
In this tutorial, we learned:
* What are the types of annotations for Volumes
* How to create a project and dataset, upload volume
* How to create 3D annotations and upload into volume
* How to configure Python development for Supervisely
* How to download and manipulate spatial geometries
# Common
# Iterate over a project
In this article, we will learn how to iterate through a project with annotated data in python. It is one of the most frequent operations in Superviely Apps and python automation scripts.
## Dataset Types
In Supervisely, datasets can be organized in two ways: flat or nested. Understanding these structures can help you with efficient data organization and management.
### Flat Dataset Structure
A flat dataset is the simplest form of organization where all images and their annotations are stored in a single level. This structure is good for simple projects with straightforward organization.
You can add this dataset to your team via Supervisely Ecosystem - ⬇️[Lemons (Annotated)](https://ecosystem.supervisely.com/projects/lemons-annotated)
**Example structure:**
```
📦 Lemons (Annotated) ← The project
┣ 📂 ds1 ← The dataset
┃ ┣ 📂 ann ← Folder for annotations
┃ ┃ ┣ 📜 IMG_0748.jpeg.json ← Annotation for image 0748
┃ ┃ ┣ 📜 IMG_1836.jpeg.json ← Annotation for image 1836
┃ ┃ ┣ 📜 IMG_2084.jpeg.json
┃ ┃ ┣ 📜 IMG_3861.jpeg.json
┃ ┃ ┣ 📜 IMG_4451.jpeg.json
┃ ┃ ┗ 📜 IMG_8144.jpeg.json
┃ ┣ 📂 img ← Folder for images
┃ ┃ ┣ 🖼️ IMG_0748.jpeg ← Image 0748
┃ ┃ ┣ 🖼️ IMG_1836.jpeg ← Image 1836
┃ ┃ ┣ 🖼️ IMG_2084.jpeg
┃ ┃ ┣ 🖼️ IMG_3861.jpeg
┃ ┃ ┣ 🖼️ IMG_4451.jpeg
┃ ┃ ┗ 🖼️ IMG_8144.jpeg
┣ 📜 meta.json ← Project metadata
┗ 📜 README.md ← Optional readme file
```
### Nested Dataset Structure
A nested dataset structure is a bit more advanced. It lets you create datasets inside other datasets, forming a hierarchy—like tree for your data. Nested datasets are good for complex projects requiring hierarchical organization or when you need to group related data together.
You can add this dataset to your team via Supervisely Ecosystem - ⬇️[Fruits (Annotated)](https://ecosystem.supervisely.com/apps/fruits-nested-annotated)
{% hint style="info" %}
**Important Note about Nested Datasets:**
When working with nested datasets, keep in mind:
* Parent datasets (like "Temperate" or "Tropical") can be empty or non-empty themselves, but contain images inside nested datasets
* To get all parent dataset images including nested ones, you'll need to iterate through each nested dataset
{% endhint %}
**Example structure:**
* The main datasets ("Temperate" and "Tropical") don't hold images or annotations directly in ann and img folders.
* Instead, they have a datasets folder containing nested datasets (like "Apple", "Banana", etc.), and those hold the images and annotations.
* The main datasets can also contain images, but we removed them for this example
```
📦 Fruits (Annotated) ← The project
┣ 📂 Temperate ← Main dataset #1
┃ ┣ 📂 ann ← Empty (no annotations here)
┃ ┣ 📂 img ← Empty (no images here)
┃ ┣ 📂 datasets ← Where the nested datasets live
┃ ┃ ┣ 📂 Apple ← Nested dataset for apples
┃ ┃ ┃ ┣ 📂 ann
┃ ┃ ┃ ┃ ┣ 📜 apple_1.jpg.json
┃ ┃ ┃ ┃ ┣ 📜 apple_2.jpg.json
┃ ┃ ┃ ┃ ┗ 📜 apple_3.jpg.json
┃ ┃ ┃ ┗ 📂 img
┃ ┃ ┃ ┃ ┣ 🖼️ apple_1.jpg
┃ ┃ ┃ ┃ ┣ 🖼️ apple_2.jpg
┃ ┃ ┃ ┃ ┗ 🖼️ apple_3.jpg
┃ ┃ ┗ 📂 Pear ← Nested dataset for pears
┃ ┃ ┃ ┣ 📂 ann
┃ ┃ ┃ ┃ ┣ 📜 pear_1.jpg.json
┃ ┃ ┃ ┃ ┣ 📜 pear_2.jpg.json
┃ ┃ ┃ ┃ ┗ 📜 pear_3.jpg.json
┃ ┃ ┃ ┗ 📂 img
┃ ┃ ┃ ┃ ┣ 🖼️ pear_1.jpg
┃ ┃ ┃ ┃ ┣ 🖼️ pear_2.jpg
┃ ┃ ┃ ┃ ┗ 🖼️ pear_3.jpg
┣ 📂 Tropical ← Main dataset #2
┃ ┣ 📂 ann ← Empty (no annotations here)
┃ ┣ 📂 img ← Empty (no images here)
┃ ┣ 📂 datasets ← Where the nested datasets live
┃ ┃ ┣ 📂 Banana ← Nested dataset for bananas
┃ ┃ ┃ ┣ 📂 ann
┃ ┃ ┃ ┃ ┣ 📜 banana_1.jpg.json
┃ ┃ ┃ ┃ ┣ 📜 banana_2.jpg.json
┃ ┃ ┃ ┃ ┗ 📜 banana_3.jpg.json
┃ ┃ ┃ ┗ 📂 img
┃ ┃ ┃ ┃ ┣ 🖼️ banana_1.jpg
┃ ┃ ┃ ┃ ┣ 🖼️ banana_2.jpg
┃ ┃ ┃ ┃ ┗ 🖼️ banana_3.jpg
┃ ┃ ┣ 📂 Lemon ← Nested dataset for lemons
┃ ┃ ┃ ┣ 📂 ann
┃ ┃ ┃ ┃ ┣ 📜 lemon_1.jpg.json
┃ ┃ ┃ ┃ ┣ 📜 lemon_2.jpg.json
┃ ┃ ┃ ┃ ┗ 📜 lemon_3.jpg.json
┃ ┃ ┃ ┗ 📂 img
┃ ┃ ┃ ┃ ┣ 🖼️ lemon_1.jpg
┃ ┃ ┃ ┃ ┣ 🖼️ lemon_2.jpg
┃ ┃ ┃ ┃ ┗ 🖼️ lemon_3.jpg
┃ ┃ ┗ 📂 Mango ← Nested dataset for mangoes
┃ ┃ ┃ ┣ 📂 ann
┃ ┃ ┃ ┃ ┣ 📜 mango_1.jpg.json
┃ ┃ ┃ ┃ ┣ 📜 mango_2.jpg.json
┃ ┃ ┃ ┃ ┗ 📜 mango_3.jpg.json
┃ ┃ ┃ ┗ 📂 img
┃ ┃ ┃ ┃ ┣ 🖼️ mango_1.jpg
┃ ┃ ┃ ┃ ┣ 🖼️ mango_2.jpg
┃ ┃ ┃ ┃ ┗ 🖼️ mango_3.jpg
┣ 📜 meta.json ← Project metadata
┗ 📜 README.md ← Optional readme file
```
## Step-by-Step Guide
{% hint style="info" %}
Everything you need to reproduce [this tutorial is on GitHub](https://github.com/supervisely-ecosystem/iterate-over-project): source code, Visual Studio code configuration, and a shell script for creating venv.
{% endhint %}
In this guide we will go through the following steps:
\*\*\*\* [**Step 1.**](#1-demo-project) Get a demo project with labeled [lemons and kiwis](https://github.com/supervisely/developer-portal/tree/main/getting-started/python-sdk-tutorials/common/\(https:/ecosystem.supervisely.com/projects/lemons-annotated\)/README.md) or [fruits project](https://ecosystem.supervisely.com/apps/fruits-nested-annotated) with nested datasets.
\*\*\*\* [**Step 2.**](#2-env-files) Prepare `.env` files with credentials and ID of a demo project.
\*\*\*\* [**Step 3.**](#3-python-script) Run [python script](https://github.com/supervisely-ecosystem/iterate-over-project/blob/master/main.py).
\*\*\*\* [**Step 4.**](#4-optimizations) Show possible optimizations.
### 1. Demo project
If you don't have any projects yet, go to the ecosystem and add the demo project 🍋 **`Lemons (Annotated)`** or 🍍 **`Fruits Nested (Annotated)`** to your current workspace.

### 2. `.env` files
Create a file at `~/supervisely.env` with the credentials for your Supervisely account. Learn more about environment variables [here](/getting-started/environment-variables). The content should look like this:
```python
# your API credentials, learn more here: https://developer.supervisely.com/getting-started/basics-of-authentication
SERVER_ADDRESS="https://app.supervisely.com" # ⬅️ change it if use Enterprise Edition
API_TOKEN="4r47N.....blablabla......xaTatb" # ⬅️ change it
```
Create the second file `local.env` and place it in the same directory with the `main.py`. This file will contain values we are going to use in the python script.
```python
# change the Project ID to your value
PROJECT_ID=12208 # ⬅️ change it
```
### 3. Python script
{% hint style="info" %}
This script illustrates only the basics. If your project is huge and has **hundreds of thousands of images** then it is not so efficient to download annotations one by one. It is better to use batch (bulk) methods to reduce the number of API requests and significantly speed up your code. Learn more in [the optimizations section](#optimizations) below.
{% endhint %}
To start debugging you need to
1. Clone the [repo](https://github.com/supervisely-ecosystem/iterate-over-project)
2. Create [venv](https://docs.python.org/3/library/venv.html) by running the script [`create_venv.sh`](https://github.com/supervisely-ecosystem/iterate-over-project/blob/master/create_venv.sh)
3. Change value in [local.env](https://github.com/supervisely-ecosystem/iterate-over-project/blob/master/local.env)
4. Check that you have `~/supervisely.env` file with correct values
#### Source code
```python
import os
import supervisely as sly
from dotenv import load_dotenv
if sly.is_development():
load_dotenv("local.env")
load_dotenv(os.path.expanduser("~/supervisely.env"))
api = sly.Api.from_env()
project_id = sly.env.project_id()
project = api.project.get_info_by_id(project_id)
if project is None:
raise KeyError(f"Project with ID {project_id} not found in your account")
print(f"Project info: {project.name} (id={project.id})")
# get project meta - collection of annotation classes and tags
meta_json = api.project.get_meta(project.id)
project_meta = sly.ProjectMeta.from_json(meta_json)
print(project_meta)
# Set recursive to True if you want to include nested datasets
datasets = api.dataset.get_list(project.id, recursive=True)
print(f"There are {len(datasets)} datasets in project")
for dataset in datasets:
print(f"Dataset {dataset.name} has {dataset.items_count} images")
images = api.image.get_list(dataset.id)
for image in images:
ann_json = api.annotation.download_json(image.id)
ann = sly.Annotation.from_json(ann_json, project_meta)
print(f"There are {len(ann.labels)} objects on image {image.name}")
```
If you are working with nested datasets and want to get full path to the dataset, you can use `api.dataset.tree` method instead of `api.dataset.get_list`. It returns a generator that yields tuples `(parents, dataset)` where `parents` is a list of parent dataset names and `dataset` is a dataset object.
Your `for` loop will look like this:
```python
for parents, dataset in api.dataset.tree(project_id):
print(f"Dataset path: {'/'.join(parents + [dataset.name])}")
print(f"Dataset {dataset.name} has {dataset.items_count} images")
images = api.image.get_list(dataset.id)
for image in images:
ann_json = api.annotation.download_json(image.id)
ann = sly.Annotation.from_json(ann_json, project_meta)
print(f"There are {len(ann.labels)} objects on image {image.name}")
# >>> Dataset path: Temperate
# >>> Dataset Temperate has 0 images
# >>>
# >>> Dataset path: Temperate/Apple
# >>> Dataset Apple has 3 images
# >>> There are 1 objects on image apple_2.jpg
# >>> There are 1 objects on image apple_1.jpg
# >>> There are 1 objects on image apple_3.jpg
# >>>
# >>> Dataset path: Temperate/Pear
# >>> Dataset Pear has 3 images
# >>> There are 1 objects on image pear_3.jpg
# >>> There are 1 objects on image pear_1.jpg
# >>> There are 1 objects on image pear_2.jpg
# >>> ...
```
#### Output
The script above produces the following output for Lemons (Annotated) project:
```
Project info: Lemons (Annotated) (id=12208)
ProjectMeta:
Object Classes
+-------+--------+----------------+--------+
| Name | Shape | Color | Hotkey |
+-------+--------+----------------+--------+
| kiwi | Bitmap | [255, 0, 0] | |
| lemon | Bitmap | [81, 198, 170] | |
+-------+--------+----------------+--------+
Tags
+------+------------+-----------------+--------+---------------+--------------------+
| Name | Value type | Possible values | Hotkey | Applicable to | Applicable classes |
+------+------------+-----------------+--------+---------------+--------------------+
+------+------------+-----------------+--------+---------------+--------------------+
There are 1 datasets in project
Dataset ds1 has 6 images
There are 3 objects on image IMG_1836.jpeg
There are 4 objects on image IMG_8144.jpeg
There are 4 objects on image IMG_3861.jpeg
There are 3 objects on image IMG_0748.jpeg
There are 5 objects on image IMG_4451.jpeg
There are 7 objects on image IMG_2084.jpeg
```
The script above produces the following output for Fruits Nested (Annotated) project:
```
Project info: Fruits Nested (Annotated) (id=1317)
ProjectMeta:
Object Classes
+-----------+-----------+----------------+--------+
| Name | Shape | Color | Hotkey |
+-----------+-----------+----------------+--------+
| Lemon | Rectangle | [144, 19, 254] | |
| Apple | Rectangle | [208, 2, 27] | |
| Pineapple | Rectangle | [248, 231, 28] | |
| Pear | Rectangle | [126, 211, 33] | |
| Orange | Rectangle | [80, 227, 194] | |
| Banana | Rectangle | [139, 87, 42] | |
| Mango | Rectangle | [74, 144, 226] | |
+-----------+-----------+----------------+--------+
Tags
+-----------+------------+-----------------+--------+---------------+--------------------+-------------+
| Name | Value type | Possible values | Hotkey | Applicable to | Applicable classes | Target type |
+-----------+------------+-----------------+--------+---------------+--------------------+-------------+
| Apple | none | None | | all | [] | all |
| Banana | none | None | | all | [] | all |
| Lemon | none | None | | all | [] | all |
| Mango | none | None | | all | [] | all |
| Orange | none | None | | all | [] | all |
| Pear | none | None | | all | [] | all |
| Pineapple | none | None | | all | [] | all |
+-----------+------------+-----------------+--------+---------------+--------------------+-------------+
There are 9 datasets in project
Dataset Temperate has 0 images
Dataset Apple has 3 images
There are 1 objects on image apple_2.jpg
There are 1 objects on image apple_1.jpg
There are 1 objects on image apple_3.jpg
Dataset Pear has 3 images
There are 1 objects on image pear_3.jpg
There are 1 objects on image pear_1.jpg
There are 1 objects on image pear_2.jpg
Dataset Tropical has 0 images
Dataset Banana has 3 images
There are 1 objects on image banana_1.jpg
There are 1 objects on image banana_2.jpg
There are 3 objects on image banana_3.jpg
Dataset Mango has 4 images
There are 1 objects on image mango_3.jpg
There are 1 objects on image mango_1.jpg
There are 1 objects on image mango_4.jpg
There are 1 objects on image mango_2.jpg
Dataset Pineapple has 3 images
There are 1 objects on image pineapple_3.jpg
There are 1 objects on image pineapple_2.jpg
There are 1 objects on image pineapple_1.jpg
Dataset Lemon has 3 images
There are 1 objects on image lemon_1.jpg
There are 1 objects on image lemon_3.jpg
There are 1 objects on image lemon_2.jpg
Dataset Orange has 3 images
There are 1 objects on image orange_2.jpg
There are 1 objects on image orange_1.jpg
There are 1 objects on image orange_3.jpg
```
### 4. Optimizations
The bottleneck of this script is in these lines (27-28):
```python
for image in images:
ann_json = api.annotation.download_json(image.id)
```
If you have **1M** images in your project, your code will send 🟡 **1M** requests to download annotations. It is inefficient due to Round Trip Time (RTT) and a large number of similar tiny requests to a Supervisely database.
It can be optimized by using the batch API method:
```python
api.annotation.download_json_batch(dataset.id, image_ids)
```
Supervisely API allows downloading annotations for multiple images in a single request. The code sample below sends ✅ **50x fewer** requests and it leads to a significant speed-up of our original code:
```python
for batch in sly.batched(images):
image_ids = [image.id for image in batch]
annotations = api.annotation.download_json_batch(dataset.id, image_ids)
for image, ann_json in zip(batch, annotations):
ann = sly.Annotation.from_json(ann_json, project_meta)
print(f"There are {len(ann.labels)} objects on image {image.name}")
```
The optimized version of the original script is in [`main_optimized.py`](https://github.com/supervisely-ecosystem/iterate-over-project/blob/master/main_optimized.py).
# Iterate over a local project
In this article, we will learn how to iterate through a project in [Supervisely format](https://developer.supervisely.com/api-references/supervisely-annotation-json-format), which is stored locally on your machine. It is one of the most frequent operations in Superviely Apps and python automation scripts. You will see how easy it is to get all the necessary information from the project, as well as how quickly you can visualize the contents of the project even without internet access.
{% hint style="info" %}
Everything you need to reproduce [this tutorial is on GitHub](https://github.com/supervisely-ecosystem/iterate-over-local-project): source code, Visual Studio code configuration, and a shell script for creating venv.
{% endhint %}
In this guide we will go through the following steps:
\*\*\*\* [**Step 1.**](#1.-demo-project) Get a [demo project](https://ecosystem.supervisely.com/projects/lemons-annotated) with labeled lemons and kiwis.
\*\*\*\* [**Step 2.**](#2.-download-project-in-supervisely-format) Download the demo project to your local machine in Supervisely format using [Export to Supervisely format](https://ecosystem.supervisely.com/apps/export-to-supervisely-format) app in Supervisely Ecosystem.
\*\*\*\* [**Step 3.**](#3.-python-script) Run [python script](https://github.com/supervisely-ecosystem/iterate-over-local-project/blob/master/main.py).
### 1. Demo project
If you don't have any projects in Supervisely format on your local machine, go to the ecosystem and add the demo project 🍋 **`Lemons annotated`** to your current workspace.

### 2. Download project in Supervisely format
Go to the ecosystem and launch the app [Export to Supervisely format](https://ecosystem.supervisely.com/apps/export-to-supervisely-format). Select the demo project, you created in the previous step (or use any existing project in Supervisely), and download the result archive to your local machine.


Extract the archive to any folder and check that it has the following structure:
```
. 📦 (project root)
├── 📂 ds1 (dataset name)
│ ├── 📂 ann
│ │ ├── 📜 IMG_0748.jpeg.json
│ │ ├── 📜 IMG_1836.jpeg.json
│ │ ├── 📜 IMG_2084.jpeg.json
│ │ ├── 📜 IMG_3861.jpeg.json
│ │ ├── 📜 IMG_4451.jpeg.json
│ │ └── 📜 IMG_8144.jpeg.json
│ └── 📂 img
│ ├── 🖼️ IMG_0748.jpeg
│ ├── 🖼️ IMG_1836.jpeg
│ ├── 🖼️ IMG_2084.jpeg
│ ├── 🖼️ IMG_3861.jpeg
│ ├── 🖼️ IMG_4451.jpeg
│ └── 🖼️ IMG_8144.jpeg
└── 📜 meta.json
```
The project root directory contains the `meta.json` file with the project meta information and directories for each dataset. Each dataset directory contains two subdirectories: `img` with images and `ann` with annotations in Supervisely format.
### 3. Python script
To start debugging you need to:
1. Clone the [repo](https://github.com/supervisely-ecosystem/iterate-over-local-project)
2. Create [venv](https://docs.python.org/3/library/venv.html) by running the script [`create_venv.sh`](https://github.com/supervisely-ecosystem/iterate-over-local-project/blob/master/create_venv.sh)
3. Set the correct path to the downloaded and extracted project on your local machine in the script [`main.py`](https://github.com/supervisely-ecosystem/iterate-over-local-project/blob/master/main.py)
#### Source code:
```python
import os
import json
import supervisely as sly
from tqdm import tqdm
input = "./lemons-fs"
output = "./results"
os.makedirs(output, exist_ok=True)
# Creating Supervisely project from local directory.
project = sly.Project(input, sly.OpenMode.READ)
print("Opened project: ", project.name)
print("Number of images in project:", project.total_items)
# Showing annotations tags and classes.
print(project.meta)
# Iterating over classes in project, showing their names, geometry types and colors.
for obj_class in project.meta.obj_classes:
print(
f"Class '{obj_class.name}': geometry='{obj_class.geometry_type}', color='{obj_class.color}'",
)
# Iterating over tags in project, showing their names and colors.
for tag in project.meta.tag_metas:
print(f"Tag '{tag.name}': color='{tag.color}'")
print("Number of datasets (aka folders) in project:", len(project.datasets))
progress = tqdm(project.datasets, desc="Processing datasets")
for dataset in project.datasets:
# Iterating over images in dataset, using the paths to the images and annotations.
for item_name, image_path, ann_path in dataset.items():
print(f"Item '{item_name}': image='{image_path}', ann='{ann_path}'")
ann_json = json.load(open(ann_path))
ann = sly.Annotation.from_json(ann_json, project.meta)
img = sly.image.read(image_path) # rgb - order
for label in ann.labels:
# Drawing each label on the image.
label.draw(img)
res_image_path = os.path.join(output, item_name)
sly.image.write(res_image_path, img)
# Or alternatively draw annotation (all labels at once) preview with
# ann.draw_pretty(img, output_path=res_image_path)
progress.update(1)
```
#### Output
The script above produces the following output:
```
Opened project: lemons-fs
Number of images in project: 6
ProjectMeta:
Object Classes
+-------+--------+----------------+--------+
| Name | Shape | Color | Hotkey |
+-------+--------+----------------+--------+
| kiwi | Bitmap | [255, 0, 0] | |
| lemon | Bitmap | [81, 198, 170] | |
+-------+--------+----------------+--------+
Tags
+----------+------------+-----------------+--------+---------------+--------------------+
| Name | Value type | Possible values | Hotkey | Applicable to | Applicable classes |
+----------+------------+-----------------+--------+---------------+--------------------+
+----------+------------+-----------------+--------+---------------+--------------------+
Class 'kiwi': geometry='', color='[255, 0, 0]'
Class 'lemon': geometry='', color='[81, 198, 170]'
Number of datasets (aka folders) in project: 1
Item 'IMG_4451.jpeg': image='./lemons-fs/ds1/img/IMG_4451.jpeg', ann='./lemons-fs/ds1/ann/IMG_4451.jpeg.json'
Item 'IMG_0748.jpeg': image='./lemons-fs/ds1/img/IMG_0748.jpeg', ann='./lemons-fs/ds1/ann/IMG_0748.jpeg.json'
Item 'IMG_1836.jpeg': image='./lemons-fs/ds1/img/IMG_1836.jpeg', ann='./lemons-fs/ds1/ann/IMG_1836.jpeg.json'
Item 'IMG_3861.jpeg': image='./lemons-fs/ds1/img/IMG_3861.jpeg', ann='./lemons-fs/ds1/ann/IMG_3861.jpeg.json'
Item 'IMG_2084.jpeg': image='./lemons-fs/ds1/img/IMG_2084.jpeg', ann='./lemons-fs/ds1/ann/IMG_2084.jpeg.json'
Item 'IMG_8144.jpeg': image='./lemons-fs/ds1/img/IMG_8144.jpeg', ann='./lemons-fs/ds1/ann/IMG_8144.jpeg.json'
```
As a result of running the script there also will be created a directory `results`, which will contain the images with drawn annotations.

# Progress Bar tqdm
## Introduction
In this tutorial we will show you how to use [tqdm](https://github.com/tqdm/tqdm) [](https://github.com/tqdm/tqdm) module inside methods of Supervisely SDK in a seamless manner.
{% hint style="info" %}
🔥 With this update, any sly.Progress object can be easily replaced with tqdm, allowing you to seamlessly integrate your progress tracking with the powerful features of tqdm. Say goodbye to headaches!
{% endhint %}
📗 Everything you need to reproduce [this tutorial is on GitHub](https://github.com/supervisely-ecosystem/tutorial-tqdm): source code.
## How to debug this tutorial
**Step 1.** Prepare `~/supervisely.env` file with credentials. [Learn more here.](/getting-started/basics-of-authentication)
**Step 2.** Clone [repository](https://github.com/supervisely-ecosystem/tutorial-tqdm) with source code and demo data and create [Virtual Environment](https://docs.python.org/3/library/venv.html).
```
git clone https://github.com/supervisely-ecosystem/tutorial-tqdm.git
cd tutorial-tqdm
./create_venv.sh
```
**Step 3.** Open repository directory in Visual Studio Code.
```
code .
```
**Step 4.** Change project ID in `local.env` file by copying the ID from the context menu of the workspace.
```
PROJECT_ID=17732 # ⬅️ change value
TEAM=449 # ⬅️ change value
```
**Step 5.** Start debugging `src/main.py`.
### Import libraries
```python
import os
import time
from dotenv import load_dotenv
import supervisely as sly
from tqdm import tqdm
```
### Init API client
First, we load environment variables with credentials and init API for communicating with Supervisely Instance.
```python
if sly.is_development():
load_dotenv("local.env")
load_dotenv(os.path.expanduser("~/supervisely.env"))
api = sly.Api()
```
### Get variables from environment
In this tutorial, you will need an workspace ID that you can get from environment variables. [Learn more here](/getting-started/environment-variables#workspace_id)
```python
project_id = sly.env.project_id()
team_id = sly.env.team_id()
```
## Use tqdm for tracking progress
### Example 1. Use tqdm in the loop.
**Source code:**
```python
batch_size = 10
data = range(100)
with tqdm(total=len(data)) as pbar:
for batch in sly.batched(data, batch_size):
for item in batch:
time.sleep(0.1)
pbar.update(batch_size)
```
**Output:**

{% hint style="info" %}
When running locally, the fancy-looking tqdm progress bar will be displayed in the console, while in production, JSON-looking lines with relevant information will be logged and fancy-looking progress bar will be shown in Workspace Tasks.
{% endhint %}

### Example 2. Download image project and upload it into Team files using tqdm progress bar.
**Source code:**
Download your project with previously initiialized `project_id`
```python
n_count = api.project.get_info_by_id(project_id).items_count
p = tqdm(desc="Downloading", total=n_count)
sly.download(api, project_id, 'your/local/dir/', progress_cb=p)
```
**Output:**

Then, you can upload downloaded directory to Team files:
**Source code:**
```python
p = tqdm(
desc="Uploading",
total=sly.fs.get_directory_size('your/local/dir/'),
unit="B",
unit_scale=True,
)
api.file.upload_directory(
team_id,
'your/local/dir/',
'/your/teamfiles/dir/',
progress_size_cb=p,
)
```
**Output:**

### Example 3 (advanced). Use native sly.Progress functions for downloading.
Let's reproduce previous example with Supervisely's native Progress bar.
**Source code:**
```python
n_count = api.project.get_info_by_id(project_id).items_count
p = sly.Progress("Downloading", n_count)
sly.download(api, project_id, 'your/local/dir/', progress_cb=p)
```
**Output:**

You will get files in progress.
Then, you can upload downloaded directory to Team files:
**Source code:**
```python
p = sly.Progress(
"Uploading",
sly.fs.get_directory_size('your/local/dir/'),
is_size=True,
)
api.file.upload_directory(
team_id,
'your/local/dir/',
'/your/teamfiles/dir/',
progress_size_cb=p,
)
```
**Output:**

{% hint style="info" %}
You can swap equivalent arguments from `sly.Progress` while initializing `tqdm`. For example, the `desc` argument can be replaced with `message`, and `total` can be replaced with `total_cnt`. Additionally, both `unit="B"` and `unit_scale=True` can be replaced with `is_size=True`.
{% endhint %}
# Cloning projects for development
## Introduction
When developing apps or scripts, you may start worrying about deleting or modifying data by mistake in active projects. But there's no need to worry, Supervisely has very simple ways to clone your projects and ensure that your data is safe. This tutorial can be helpful in the following cases:
1. You're developing an app or script that modifies data in the project, while you want to keep the original data safe.
2. You need to work with the real data, not some dummy data, but it's important to keep the original data safe.
{% hint style="info" %}
In Supervisely, data from the database is deleted by special mechanisms by the administrator, if something is accidentally deleted, it can be restored by contacting technical support. So there's no need to worry if something is accidentally deleted or modified in the project. But still, it's better to keep your data safe, while working with it. We also recommend setting up a schedule for backing up your data, so that you can always restore it if necessary.
{% endhint %}
In this tutorial, we'll show you how to clone (or save a backup of) your projects in Supervisely.
And there are several ways you can achieve this:\
[**Option 1.**](#option-1-clone-the-project-in-ui) Clone the project in UI.\
[**Option 2.**](#option-2-export-the-project-in-ui) Export the project in UI.\
[**Option 3.**](#option-3-save-the-project-with-python-sdk) Save the project with Python SDK.\
[**Option 4.**](#option-4-clone-the-project-with-python-sdk) Clone the project with Python SDK.\\
{% hint style="info" %}
Everything you need to reproduce [this tutorial is on GitHub](https://github.com/supervisely-ecosystem/backing-up-data): source code and additional app files.
{% endhint %}
## Using UI
UI ways are usually fast and easy, but only if we're talking about one or two projects and don't need some post-processing or automation. So, if it's your case, you can use the following ways to clone your projects, otherwise, check the Options 3 and 4.
### Option 1. Clone the project in UI
**Use cases:** when you need to clone a project once or twice.\
**Pros:** fast and easy.\
**Cons:** not suitable for automation or for cloning many projects.\\
So it's the easiest and fastest way to clone a project in Supervisely, if you need to do it once or twice. You can do it just in two clicks:
1. Open the list of projects in your workspace.
2. Find the project you want to clone and click on the three dots on the right side of the project name.
3. Click `Clone` in the dropdown menu.
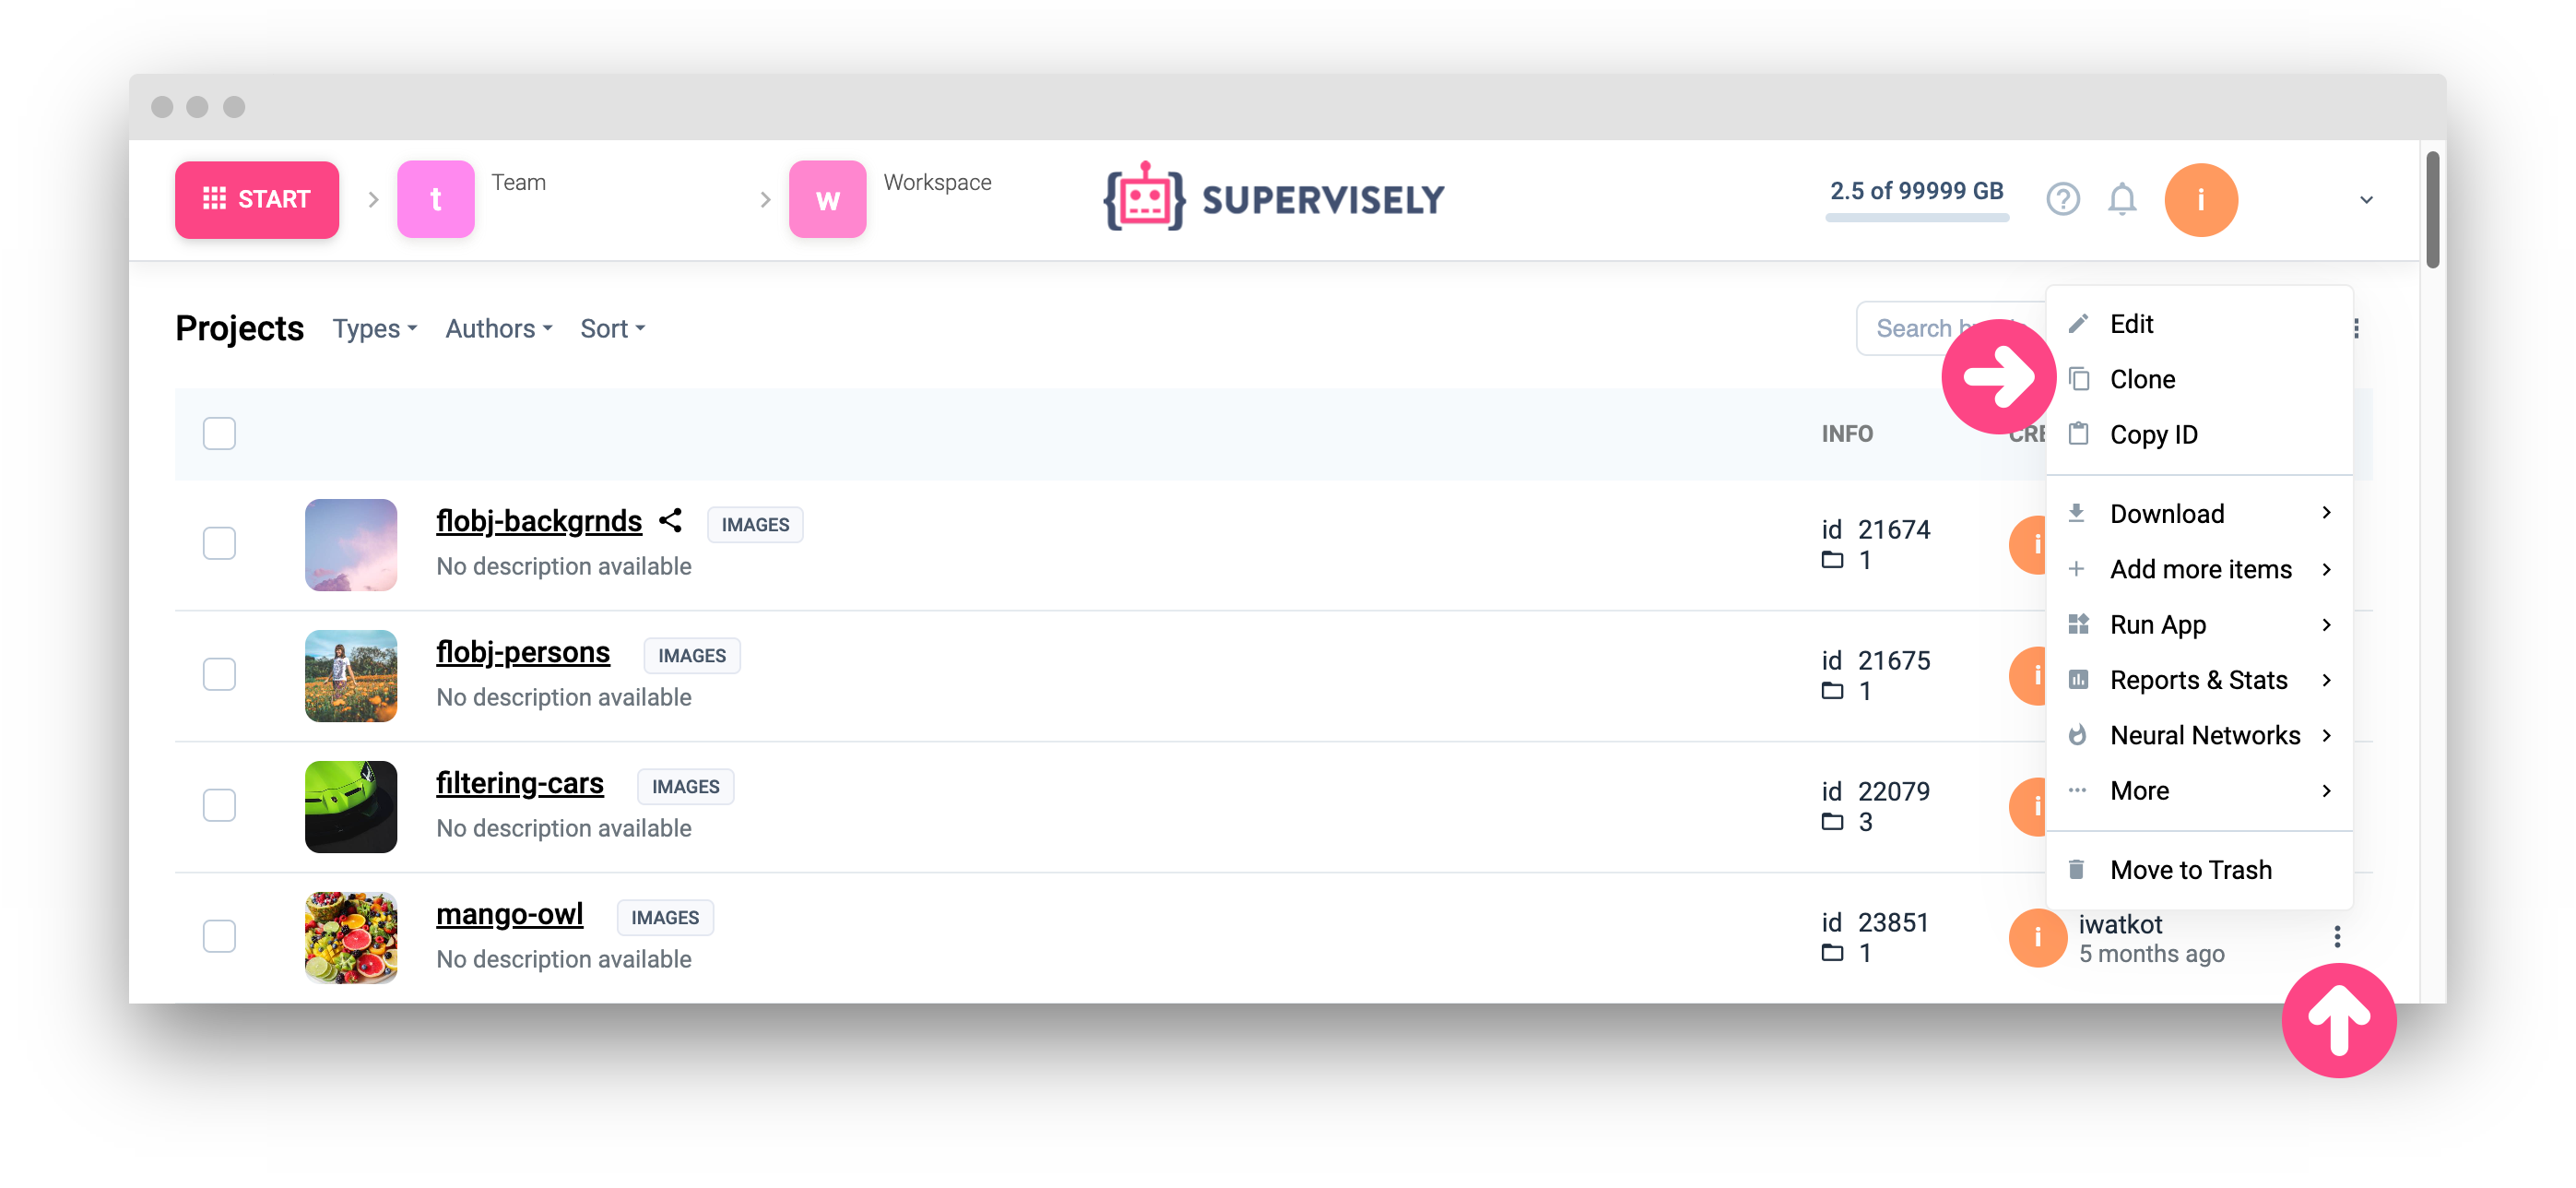
And that's it! You'll find `Clone` application on the `Workspace tasks` page. When the application is finished, you'll see the cloned project in the list of projects in your workspace. But, of course, if you need to clone many projects, it's not the best way to do it. In this case, you can use the Supervisely Python SDK.
### Option 2. Export the project in UI
**Use cases:** you want to have a backup of your project and store it somewhere outside Supervisely.\
**Pros:** fast, easy and can be used as a snapshot of your project.\
**Cons:** not suitable for automation or for cloning many projects, not convenient for further work with the project.\\
It's not a way to clone a project, so it might be a little bit off-topic. But still, we want to mention it, because it's a very simple way to save a backup of your project. You can export your project in the Supervisely format and store it somewhere outside Supervisely. You can do it in the UI:
1. Open the list of projects in your workspace.
2. Find the project you want to clone and click on the three dots on the right side of the project name.
3. Find `Download` section in the dropdown menu and select `Export to Supervisely format`.
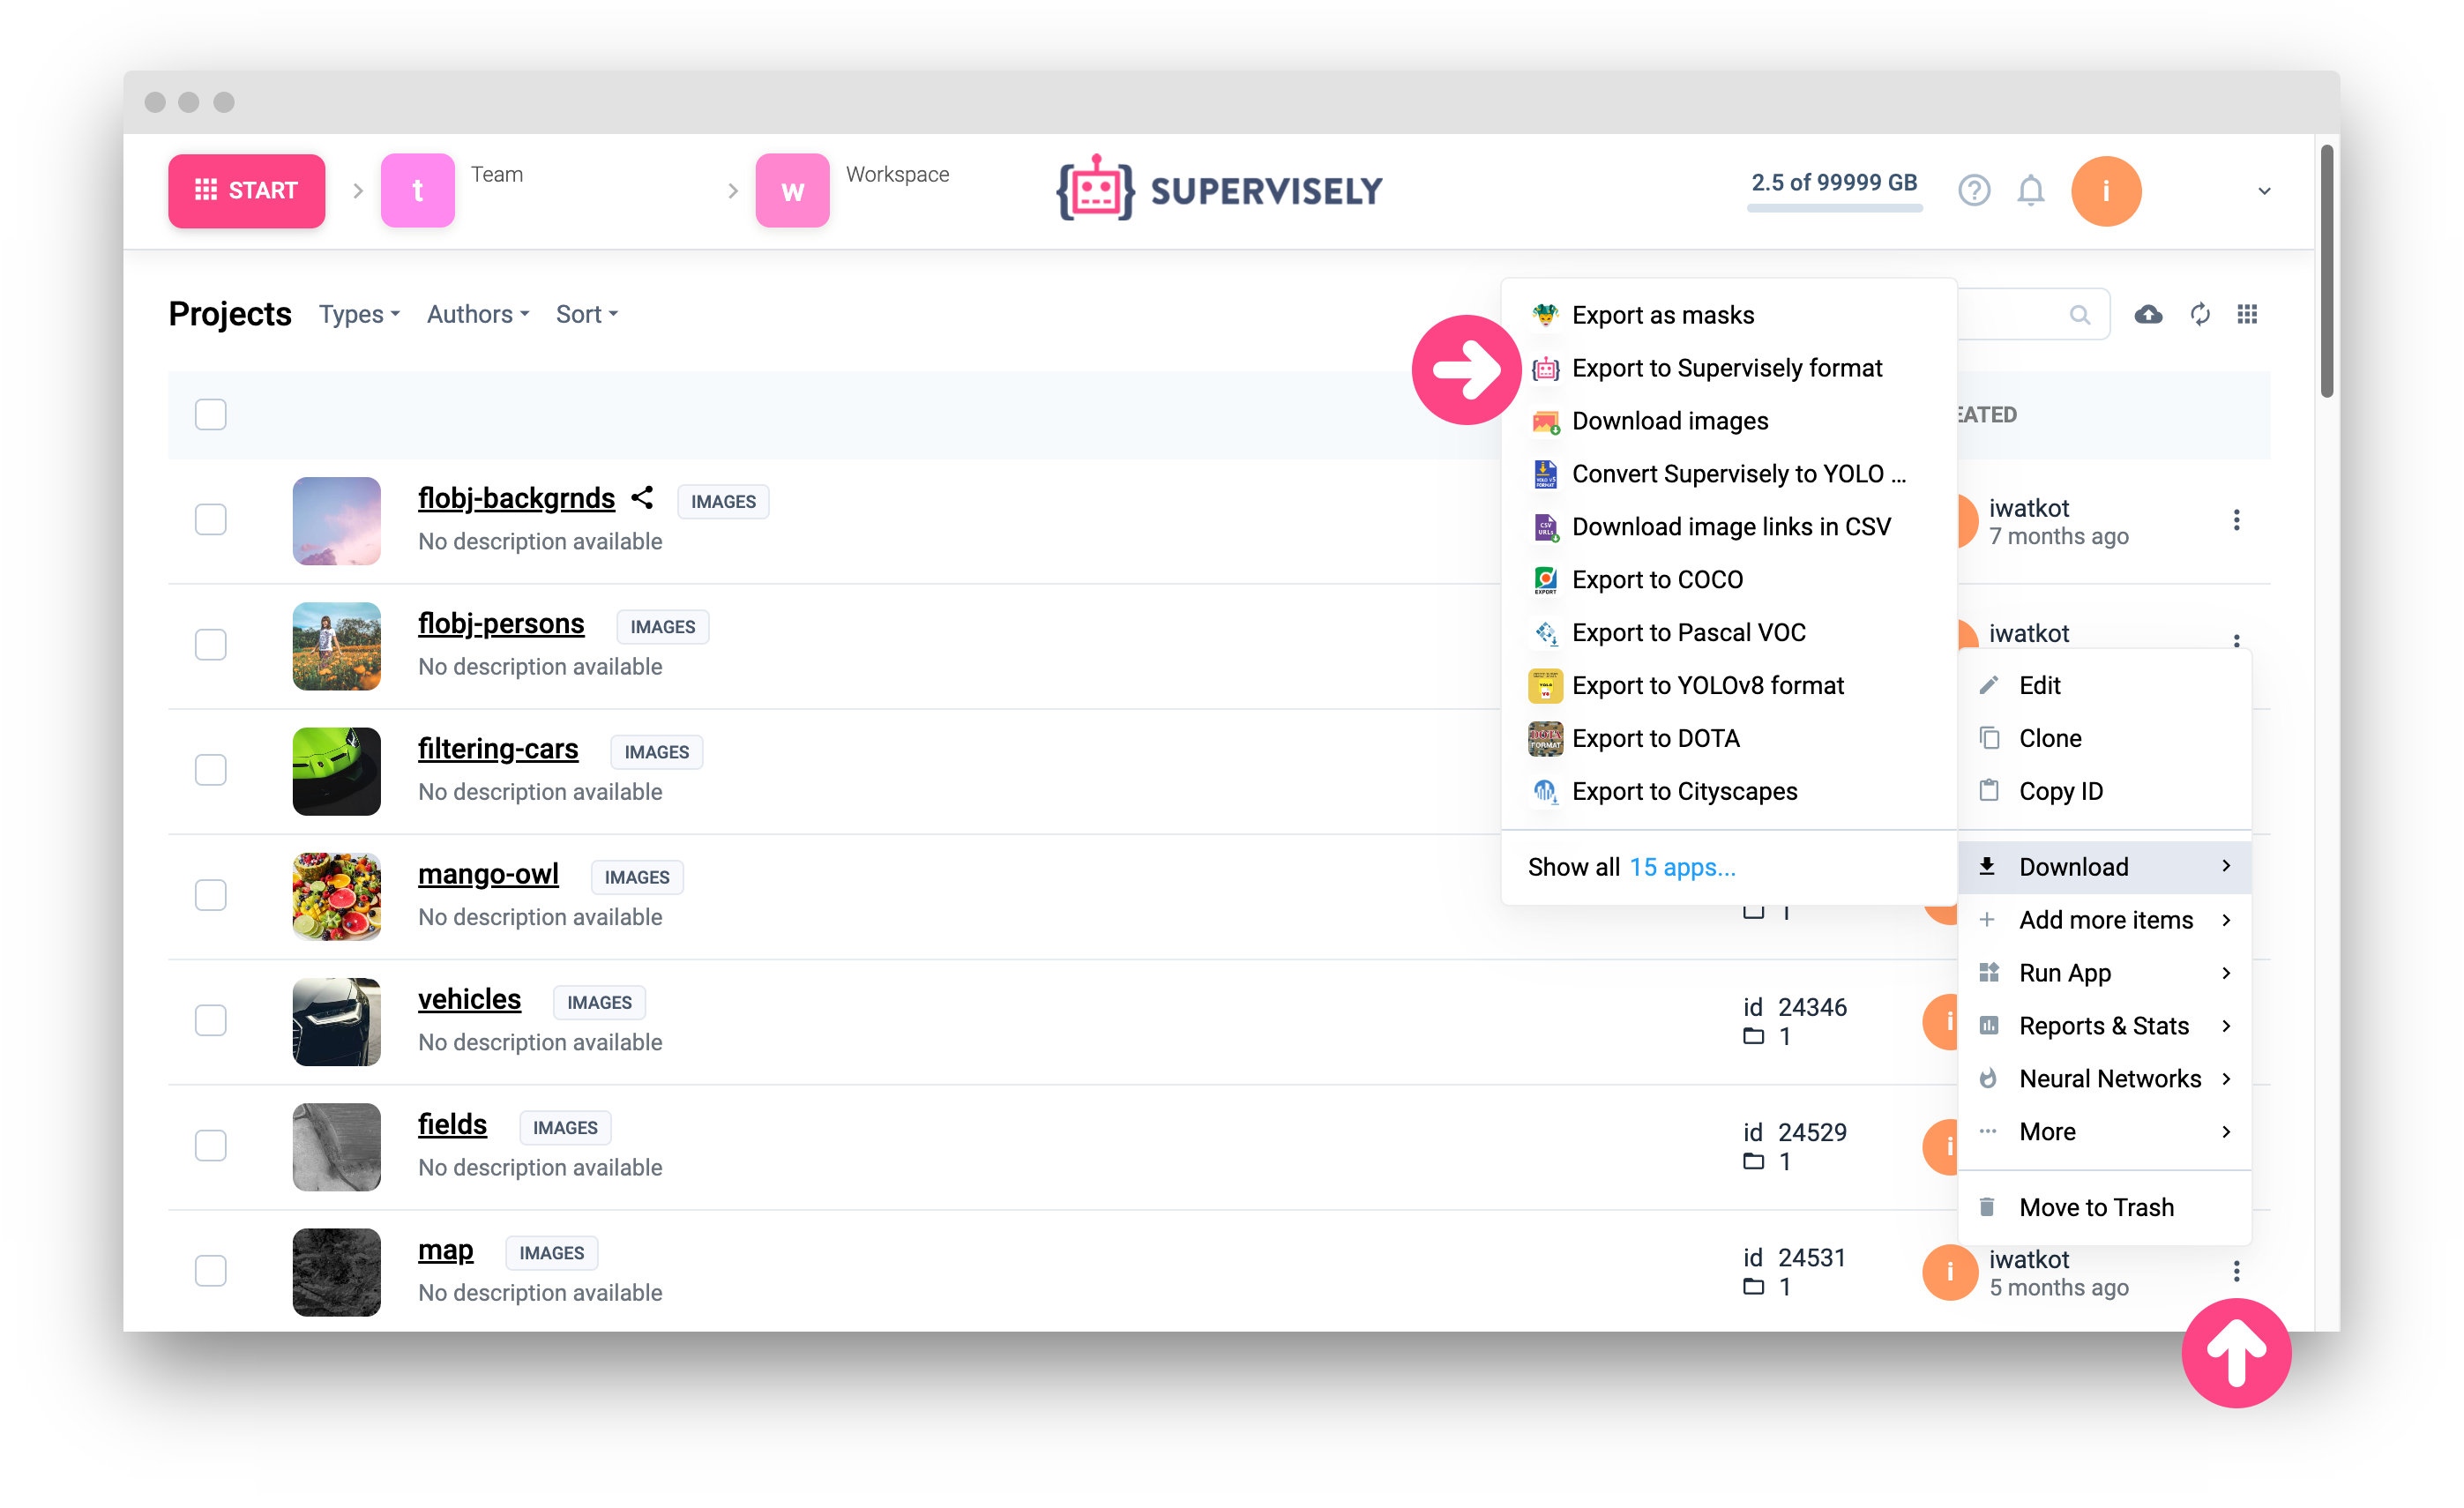
You'll find `Export to Supervisely format` application on the `Workspace tasks` page. When the application is finished, you'll be able to download the archive with your project. You can store it somewhere outside Supervisely and use it as a snapshot of your project. It's important to mention, that you can use `Import Images in Supervisely format` later to import the project back to Supervisely, but we believe that it's not the best way to save a data, when you need a project copy for further work.
## Using Supervisely Python SDK
Supervisely Python SDK is a powerful tool, which can solve almost any problem in Supervisely. It's a great way to clone your projects, if you need to do it more than once or twice. You can use it for automation and for cloning many projects.
{% hint style="info" %}
Supervisely instance version >= 6.8.54 Supervisely SDK version >= 6.72.200
In the tutorial, Supervisely Python SDK version is not directly defined in the requirements.txt. But when developing your app, we recommend defining the SDK version in the requirements.txt and the config.json file.
{% endhint %}
But first, we need to import the required packages and modules and read .env files with your credentials:
```python
import os
import supervisely as sly
from dotenv import load_dotenv
if sly.is_development():
load_dotenv(os.path.expanduser("~/supervisely.env"))
load_dotenv("local.env")
```
Now we'll retrieve your credentials from .env files and initialize the API access point:
```python
# Read environment variables and create an API client.
team_id = sly.env.team_id()
workspace_id = sly.env.workspace_id()
api: sly.Api = sly.Api.from_env()
# Read project ID from the environment variables.
project_id = sly.env.project_id()
```
So now, we're ready to use Python SDK for backing up or cloning your projects.
### Option 3. Save the project with Python SDK
**Use cases:** you need to save a backup of many projects or you want to automate the process.\
**Pros:** can be used for automation and for cloning many projects.\
**Cons:** can be inconvenient for further work with the project, since the copies are not stored in Supervisely.\\
So it's not the way to clone a project too, but it's a fast and secure way to save a backup of your project. It can be used for automation and for backing up many projects. It's easy to do with Supervisely Python SDK:
```python
save_dir = "my_saved_data"
sly.Project.download(
api, project_id, save_dir, save_image_info=True, save_image_meta=True
)
# Now the project is saved locally. We can archive it and then save in another place.
archive_path = f"{project_id}_archive.zip"
sly.fs.archive_directory(save_dir, archive_path)
```
In this example, we've downloaded the project and archived it. This backup can be stored somewhere outside Supervisely and used as a snapshot of your project. Later you can easily import it back to Supervisely with `Import Images in Supervisely format` application or with Supervisely Python SDK using `sly.Project.upload` method.
### Option 4. Clone the project with Python SDK
**Use cases:** you need to clone many projects or you want to automate the process.\
**Pros:** can be used for automation and for cloning many projects.\
**Cons:** none.\\
Now we can talk about the most effective way, when you need to keep your data safe, while working with it, and it can be fully automated, when working with many projects. It's easy to do with Supervisely Python SDK:
```python
task_id = api.project.clone(project_id, workspace_id, "my_cloned_project")
# Wait until the task is finished.
api.task.wait(task_id, api.task.Status.FINISHED)
# Now the project is cloned and we can retrieve its ID.
task_info = api.task.get_info_by_id(task_id)
dst_project_id = task_info["meta"]["output"]["project"]["id"]
```
So in this example, we've cloned the project and retrieved the ID of the cloned project. Now you can work with the cloned project and be sure that the original data is safe.
## Summary
In this tutorial, we've shown you how to clone or save a backup of your projects in Supervisely. We've shown you how to do it in the UI and with Supervisely Python SDK. We've also shown you how to save a backup of your project and how to clone it. We hope that this tutorial was helpful for you and now you can clone your projects and keep your data safe.
# Command Line Interface (CLI)
# Enterprise CLI Tool
Use Command Line Interface for managing the new CLI and its daemon. Automate the initialization and upgrading processes effortlessly.
{% hint style="warning" %}
#### Beta. Release coming soon.
{% endhint %}
## Introduction
This documentation guides you through the usage of the new Enterprise CLI tool, designed to manage your Supervisely instance. CLI consists of two parts: the CLI itself and the daemon. The CLI is a command-line tool that you can use to manage the daemon. The daemon is a system service that runs on your machine and performs the necessary actions on your instance.
{% hint style="info" %}
The CLI commands provided here are subject to updates. If you have specific functionalities you'd like to see or suggestions for improvements, feel free to reach out to the development team.
{% endhint %}
### Downloading and Installation
This operation is very simple, you just need to execute the command
```bash
sudo curl -fsSL https://config.enterprise.supervisely.com/cli -o /usr/local/bin/supervisely && sudo chmod +x /usr/local/bin/supervisely
```
### Prerequisites
First, make sure you don't have the Supervisely SDK installed globally. In the other case, there may be a conflict in the namespace.
```bash
pip show supervisely
WARNING: Package(s) not found: supervisely
```
☝️ Remember that it is always better to work in a virtual environment in which the SDK is installed. Therefore, it is recommended to remove Supervisely SDK from the global environment and install it in the virtual environment.
Then check that you have the latest version of the CLI package installed.
```bash
supervisely version
Supervisely CLI 2.0.57 is up to date
# If you have an older version installed, you will see the following
Supervisely CLI 2.0.54
Version 2.0.57 is out! Upgrade now for the latest features.
Run 'supervisely self-update' in your terminal.
```
If you decided to update to the latest version run the following command.
```bash
supervisely self-update
Superviselyd updated to 2.0.24
Downloading latest CLI version: 100%|████████████████| 231M/231M [00:00<00:00, 770MB/s]
Supervisely CLI updated to 2.0.57
```
Now you're ready to use the CLI. Refer to the following sections for specific commands.
## CLI Functionality
1. [**Instance administration 🔧**](/getting-started/command-line-interface/cli-tool/instance-administration)
2. [**Workflow automation 💻**](/getting-started/command-line-interface/cli-tool/workflow-automation)
# Instance administration
## Instance Administration with CLI
{% hint style="warning" %}
#### Beta. Release coming soon.
{% endhint %}
## Usage
The instance you want to manage is defined by the `workdir`. Workdir - is a directory where all the data necessary for running the instance is stored. By default, it is `/opt/supervisely/`. This also means that you can run several instances on the same machine by using different workdirs.
When you run a CLI command, the CLI tries to find the workdir in the following order. You can also provide a workdir explicitly using the `-w`/`--workdir` option:
1. current directory
2. default directory `/opt/supervisely/`
3. parents of current directory
{% hint style="info" %}
directory considered as workdir if it contains `.supervisely/config.json` file
{% endhint %}
The daemon uses a configuration files to store instance settings. The configuration files are located at `.supervisely` subdirectory in the workdir and are created automatically when you run the `init` command. What those files are:
1. `config.json` - instance settings
2. `vars.yml` - variables for instance
3. `docker-compose.yml` - docker-compose configuration for instance
## Commands
### Init
To set up the instance, use the "init" command. This command installs daemon as a system service, creates a configuration file for the instance and upgrades the instance if needed.
```bash
supervisely [OPTIONS] init
```
command options:
* `-l` / `--license` - path to license file or license string. Is not necessary if config file already contains license.
* `-w` / `--workdir` - path to workdir. See # Usage.
* `--show-daemon-logs` - add this flag to include daemon logs in the output. Useful for debugging.
* `--log-file` - path to log file. If not specified, logs will be written to stdout.
### Set license
To set new license, use the "set-license" command.
```bash
supervisely set-license [OPTIONS] [license string or path to license file]
```
command options:
* `-w` / `--workdir` - path to workdir. See # Usage.
### Update
To update configuration file, use the "update" command. This fetches a new configuration from the web and updates the configuration file.
```bash
supervisely [OPTIONS] update
```
command options:
* `-w` / `--workdir` - path to workdir. See # Usage.
### Backup
To create a backup of configuration and data for the instance, use the "backup" command. This command creates a backup archive and stores it in the workdir.
```bash
supervisely [OPTIONS] backup
```
command options:
* `-w` / `--workdir` - path to workdir. See # Usage.
### Upgrade
Upgrade your instance by using the "upgrade" command. This command fetches a new configuration from the web, downloads the latest Docker images required to run the instance, and restarts the instance.
```bash
supervisely [OPTIONS] upgrade
```
command options:
* `-w` / `--workdir` - path to workdir. See # Usage.
* `--skip-backup` - add this flag to skip backup creation before upgrade.
### Login
To log in to Docker registry, use the "login" command. Credentials are stored in the config.
```bash
supervisely [OPTIONS] login
```
command options:
* `-w` / `--workdir` - path to workdir. See # Usage.
### Uninstall
To uninstall the instance, use the "uninstall" command. This command stops the instance containers and deletes data.
```bash
supervisely [OPTIONS] uninstall
```
command options:
* `-w` / `--workdir` - path to workdir. See # Usage.
### SQL
To run SQL query on the instance database, use the "sql" command. This command runs the query and prints the result.
```bash
supervisely [OPTIONS] sql [query]
```
command options:
* `-w` / `--workdir` - path to workdir. See # Usage.
# Workflow automation
## Workflow Automation with CLI
{% hint style="warning" %}
#### Beta. Release coming soon.
{% endhint %}
This section of the documentation will help you understand how to use CLI tool to effectively communicate with instance. The commands in this module will allow you to manage projects, upload files, etc.
## Commands
### General Information
If there are no credentials in the environment variables or no `supervisely.env` file, then the login command will be initiated whenever the any command in this section is initialized. The entered data will only be used to execute the current command. To avoid entering this data each time, use the `login` command first.
{% hint style="info" %}
To correctly pass arguments for options in commands that can take several values you need to do follow:
1. Use `|` as separator for arguments
2. Using double quotes (recommend)
```bash
supervisely command --opt "first agr | second arg"
```
3. Escaping special characters
```bash
supervisely command --opt first\ arg\ \|\ second\ arg
```
where the escape character `\` must be placed in front of what is being escaped
{% endhint %}
### Log in
Authorize on a Supervisely instance to access the API to execute commands. Overwrite existing `.env` file and override environment variables. A backup file will be created for the `.env` file. Backup files will be stored for the last 5 authorizations.
```bash
supervisely instance login [OPTIONS]
```
#### Command options:
* `-s` / `--server-address` - Server address.
* `-l` / `--login` - User login.
* `-p` / `--password` - User password.
#### Usage examples
**1. Full interactive mode from scratch**
```bash
supervisely instance login
Select Instance type: (Use arrow keys)
Community Edition
» Enterprise Edition
Enter server address here >> thiscompany.supervisely.com # this step will be skipped for selection "Community Edition"
Enter login here >> user_1
Enter password here >> ************
User with login user_1 successfully authenticated on https://thiscompany.supervisely.com
```
**2. Check authorization**
In case you have already been authorized and have valid data, information about which user on which server is authorized will be shown.
```bash
supervisely instance login
User with login user_1 successfully authenticated on https://thiscompany.supervisely.com
```
**3. Overwrite data / one-command authorization**
If you want to change users and keep that authorization, or just want to authorize non-interactively, then use all options at once.
```bash
supervisely instance login -s https://thiscompany.supervisely.com -l user_1 -p password
User with login user_1 successfully authenticated on https://thiscompany.supervisely.com
```
### Upload entity files
Upload entity files from a specified directory into a new or existing project or dataset.
```bash
supervisely instance $entity_type upload [OPTIONS]
```
`$entity_type` - command group name
#### Possible entity types:
* `images`
* `videos`
* `volumes`
* `point-clouds`
* `point-cloud-episodes`
#### Command options:
* `-p` / `--paths` - Path to the local directories with files. `required`, `multiple`
* `-tid` / `--team-id` - Team ID.
* `-wid` / `--workspace-id` - Workspace ID.
* `-pid` / `--project-id` - ID of an existing project.
* `-did` / `--dataset-id` - ID of an existing dataset.
* `-pn` / `--project-name` - Name of the project to be created.
* `-dn` / `--dataset-name` - Name of the dataset to be created.
* `-ep` / `--existing-project` - This option is only used in interactive mode, where you choose which of the available projects to upload files to. It is not possible to use with '--project-id', because by using '--project-id' you are already indicating that you are going to upload data into a specific existing project.
* `-ed` / `--existing-dataset` - This option is only used in interactive mode, where you choose which of the available datasets to upload files to. It is not possible to use with '--dataset-id', because by using '--dataset-id' you are already indicating that you are going to upload data into a specific existing dataset.
#### Usage examples
**1. Upload via Interactive mode**
```bash
supervisely instance $entity_type upload -p /path/to/dir
```
The team and workspace selection wizard will be initialized. Use the up and down arrow keys on the keyboard to make a selection, and the Enter key to confirm the selection.
```bash
Select Team: (Use arrow keys)
team_name_1
» team_name_2
team_name_3
```
The next steps will prompt you to enter the name of the project and the dataset. It is necessary to enter the name of the project, in turn it is not necessary to enter the name of the dataset, in this case the name of the dataset will be the name of the first directory listed.
```bash
Creating new project. Please enter poject name here >> Project_1
Creating new dataset. Please press Enter to use the first dir name or write dataset name here >> Dataset_1
```
After the files are successfully uploaded, information with a link to the project will be displayed.
```bash
Uploading images to project Project_1: 100%|████████| 6/6 [00:00<00:00, 6.76it/s]
===============================================
To access uploaded files, please follow this link:
https://app.supervisely.com/projects/1111/datasets
===============================================
```
**2. Upload via Semi-predefined mode**
You can specify any of the IDs to skip some wizard steps.
For example, if you specify only the workspace ID, you will go straight to the step of entering the project name.
```bash
supervisely instance $entity_type upload -p /path/to/dir -wid 100
User with login user_1 successfully authenticated on https://app.supervisely.com
Creating new project. Please enter poject name here >> Project_1
Creating new dataset. Please press Enter to use the first dir name or write dataset name here >> Dataset_1
...
```
If you specify a workspace ID and a dataset name, you will only go through the step of entering the project name.
```bash
supervisely instance $entity_type upload -p /path/to/dir -wid 100 -dn Dataset_1
User with login user_1 successfully authenticated on https://app.supervisely.com
Creating new project. Please enter poject name here >> Project_1
...
```
In case you upload something into an existing project and want to select the project interactively - you need to specify option `-ep`
```bash
supervisely instance $entity_type upload -p /path/to/dir -wid 100 -ep -dn Dataset_1
User with login user_1 successfully authenticated on https://app.supervisely.com
Select Project: (Use arrow keys)
» Project_1
Project_2
Project_3
...
```
And if you add the `-pn` parameter to the command above, then the results will be filtered and only projects with the `-pn` argument matches in name will be displayed.
```bash
supervisely instance $entity_type upload -p /path/to/dir -wid 100 -ep -pn Proj -dn Dataset_1
User with login user_1 successfully authenticated on https://app.supervisely.com
There were found 3 projects with similar names.
Select Project: (Use arrow keys)
» Projector
Project_1
test_Project_one
...
```
In the above example, if no matches are found, you will see a list of all existing projects in the current workspace.
**3. Upload via One-command mode**
If you are going to automate some processes with scripts that will use CLI tool, it is possible to set all parameters for successful uploading.
In this case, be sure to initiate the login command before calling commands that communicate with the instance.
```bash
supervisely instance $entity_type upload -p /path/to/dir_1 -wid 100 -pn Project_4 -dn Dataset_1
# here you can write a code to extract project ID from stdout
supervisely instance $entity_type upload -p /path/to/dir_2 -pid 1111 -dn Dataset_2
...
```
### Upload projects in Supervisely format
Upload projects from a specified directory to instance. Project must have Supervisely format.
```bash
supervisely instance $entity_type upload-project [OPTIONS]
```
`$entity_type` - command group name
#### Command options:
* `-p` / `--paths` - Paths to the local directory or .tar archive with project in Supervisely format. To upload multiple projects, specify multiple paths, e.g. '-p "path/to/project1 | /path/to/project2"'. `required`, `multiple`
* `-n` / `--project-names` - Names of the projects to be created. To upload multiple projects, specify multiple names, e.g. '-n "project1 | project2"'.
* `-tid` / `--team-id` - Team ID.
* `-wid` / `--workspace-id` - Workspace ID.
#### Usage examples
**1. Upload via Interactive mode**
```bash
supervisely instance $entity_type upload-project -p /path/to/dir/Project_1
```
The team and workspace selection wizard will be initialized. Use the up and down arrow keys on the keyboard to make a selection, and the Enter key to confirm the selection.
```bash
Select Team: team_name_2
Select Workspace: (Use arrow keys)
workspace_1
» workspace_2
```
If you do not specify project names, then they will automatically be named with their folder names.
After the project is successfully uploaded, information with a link to the project will be displayed.
```bash
Start uploading project: Project_1
Uploading images to 'ds1': 100%|████████| 8/8 [00:00<00:00, 29.58it/s]
===============================================
To access uploaded project, please follow this link:
https://app.supervisely.com/projects/1111/datasets
===============================================
```
**2. Upload via One-command mode**
In this case, be sure to initiate the login command before calling commands that communicate with the instance.
```bash
supervisely instance $entity_type upload-project -p "/path/to/dir/Project_1 | /path/to/tar/Project_2.tar" -n "Cars | Bikes" -wid 100
...
```
### Download projects in Supervisely format
Download projects from instance to specified local directory.
```bash
supervisely instance $entity_type download-project [OPTIONS]
```
`$entity_type` - command group name
#### Command options:
* `-p` / `--save-path` - Path to the local directory where the project(s) will be saved. `required`
* `-pid` / `--project-ids` - ID of the project(s) to be downloaded. If not specified, you will be able to choose one within wizard. `multiple`
* `-did` / `--dataset-ids` - ID of the dataset(s) to be downloaded according to the project(s). If not specified, all datasets will be downloaded. `multiple`
* `-a` / `--archived` - If specified, the project(s) will be downloaded and saved in .tar archive(s).
#### Usage examples
**1. Download via Interactive mode**
```bash
supervisely instance $entity_type download-project -p /path/to/dir
```
The team, workspace, and project selection wizard will be initialized. Use the up and down arrow keys on the keyboard to make a selection, and the Enter key to confirm the selection.
```bash
Select Project: (Use arrow keys)
Project_1
» Project_2
```
Selected project with all datasets will be downloaded. Someday we'll add multiple dataset selection via wizard.
After the project is successfully downloaded, information with path to this project will be displayed.
```bash
Downloading projects: 100%|██████████| 1/1 [00:03<00:00, 3.79s/it]
=====================================================
Downloaded project Project_2 is available at:
/path/to/dir/Project_2
=====================================================
```
In case you want to download project and store it as `.tar` archive, you need to add option `-a` to your call
**2. Download via One-command mode**
In this case, be sure to initiate the login command before calling commands that communicate with the instance.
```bash
supervisely instance $entity_type download-project -p /path/to/dir -pid "1111 | 1112" -did " 11, 12, 13 | all"
...
```
If you do not need to download the whole project, you can designate the datasets of this project to be downloaded by separating them with a comma `,`. In this case, if you are downloading multiple projects, you need to designate datasets for each of them with a common separator `|`. To download all datasets for a project in such a complex download, specify `None` or `all` for it.
☝️ Note that the sequence of projects and datasets for them must be consistent across the separator.
```bash
Downloading projects: 100%|███████████████| 2/2 [00:05<00:00, 2.95s/it]
=====================================================
Downloaded project Project_1 is available at:
/home/ganpoweird/Work/test_assets/download/Project_1.tar
=====================================================
Downloaded project Project_2 is available at:
/home/ganpoweird/Work/test_assets/download/Project_1.tar
=====================================================
```
# Supervisely SDK CLI
Use Command Line Interface for easy and convenient usage of supervisely functional right inside your console locally and with shell scripts on instance!
## Introduction
In this tutorial, you will discover how to simplify certain basic functions of Supervisely by automating them with easy-to-use Command Line Interface (CLI) commands.
{% hint style="info" %}
The list of commands currently available is not the final list and new commands may be added in the future. If you find that a certain functionality you need is not currently available, you can contact the developers and request that it be added.
{% endhint %}
## Prerequisites
To use CLI you first need to install latest Supervisely package on your preferred Linux system:
```bash
pip3 install --upgrade supervisely
```
After that, you will be able to use CLI. Learn more about SDK installation [here](https://github.com/supervisely/developer-portal/tree/main/getting-started/getting-started/installation.md)
## Interact with Projects using CLI
### Download a Project
```bash
supervisely project download -id -d
```
In the following **required** arguments, replace:
* `` with the ID of the Supervisely project you want to download. Prefixes: `-id`, `--id`
* `` with the local directory where you want to save the project data. Prefixes: `-d`, `--dst`
### Get project name
```bash
supervisely project get-name -id
```
Replace: `` with the ID of the Supervisely project you want to get name. Prefixes: `-id`, `--id`
To export project name right in environmental variable, use the following trick in your shell script:
```shell
PROJECT_NAME=$(supervisely project get-name -id $PROJECT_ID)
```
### Upload a Project
```bash
supervisely project upload -s -id -n
```
In the following **required** arguments, replace:
* `` with the local directory where your project is stored. Prefixes: `-s`, `--src`
* `` with the ID of the target Supervisely workspace. Prefixes: `-id`, `--id`
In the following **optional** arguments, replace:
* `` with the name of the project. By default, it takes the name of the source directory. Prefixes: `-n`, `--name`
## Interact with Team files using CLI
### Download directory from Team files
```bash
supervisely teamfiles download -id -s -d -f "" -i
```
In the following **required** arguments, replace:
* `` with the ID of the actual team. Prefixes: `-id`, `--id`
* `` with the local directory where the files are located. Prefixes: `-s`, `--src`
* `` with the remote directory in Team files where you want to upload the files. Prefixes: `-d`, `--dst`
In the following **optional** arguments, replace:
* `""` with the regular expression (f.e. `".jpg$"`) which will filter files in directory. Then, only filtered files will be downloaded. Prefixes: `-f`, `--filter`
* Add the `-i` flag to ignore and skip if source directory not exists.
### Upload directory to Team files
```bash
supervisely teamfiles upload -id -s -d
```
In the following **required** arguments, replace:
* `` with the ID of the actual team. Prefixes: `-id`, `--id`
* `` with the local directory where the files are located. Prefixes: `-s`, `--src`
* `` with the remote directory in Team files where you want to upload the files. Prefixes: `-d`, `--dst`
Note: to set link to Team files directory at workspace tasks interface, use [following command](#set-link-to-a-team-files-directory)
### Remove directory from Team files
```bash
supervisely teamfiles remove-directory -id -p
```
In the following **required** arguments, replace:
* `` with the ID of the team. Prefixes: `-id`, `--id`
* `` with the path to the folder in Team files. Prefixes: `-p`, `--path`
### Remove file from Team files
```bash
supervisely teamfiles remove-file -id -p
```
In the following **required** arguments, replace:
* `` with the ID of the team. Prefixes: `-id`, `--id`
* `` with the path to the file in Team files. Prefixes: `-p`, `--path`
## Interact with Workspace tasks using CLI
### Set link to a Team files directory
```bash
supervisely task set-output-dir -d
```
Replace `` with the path to the output directory. Prefixes: `-d`, `--dir`
## Release your Private Apps using CLI
See the full [tutorial](https://github.com/supervisely/developer-portal/tree/main/getting-started/app-development/basics/add-private-app.md) on how to add Private Apps using CLI.
Here, we will describe components of following command which releases a private app:
```bash
supervisely release -p -a --release-version --release-description -s -y
```
In the following **optional** arguments, replace:
* `` with the path to the directory containing the application. By default, it's a current working directory. Prefixes: `-p`, `--path`
* `` with the path to the sub-app relative to the application directory. By default, it's a current working directory. Prefixes: `-a`, `--sub-app`
* `` with the version number in the format "vX.X.X". By default, there will be a small increment "0.0.1". Prefix: `--release-version`
* `` with the release description (max length is 64 symbols). You will be asked to enter description. Prefix: `--release-description`
* `` with the slug for internal use. A term "slug" stands for a short label or ID that is used to identify a specific item or resource (ann app in our case). Prefixes: `-s`, `--slug`
* Add the `-y` flag to auto-confirm the release.
## Advanced
To install your own modification or specific version of Supervisely, follow these steps:
### **Create file `requirements.txt`**
Create file `requirements.txt` with necessary dependency:
```
supervisely== # specific version
# path/to/sdk/supervisely # alternative (only local debug)
# git+https://github.com//.git@ # alternative
```
### **Make shell script `create_venv.sh`**
Make shell script `create_venv.sh` with instructions on virtual environment installation.
create_venv.sh
```shell
#!/bin/bash
# learn more in documentation
# Official python docs: https://docs.python.org/3/library/venv.html
# Superviely developer portal: https://developer.supervisely.com/getting-started/installation#venv
if [ -d ".venv" ]; then
echo "VENV already exists, will be removed"
rm -rf .venv
fi
echo "VENV will be created" && \
python3 -m venv .venv && \
source .venv/bin/activate && \
echo "Install requirements..." && \
pip3 install -r requirements.txt && \
echo "Requirements have been successfully installed" && \
echo "Testing imports, please wait a minute ..." && \
python -c "import supervisely as sly" && \
echo "Success!" && \
deactivate
```
### **Activate virtual environment**
Run script and choose directory with virtual environment. Then, activate your environment (you will see `(.venv)` appeared in your console):
```bash
cd your/directory/with/script/
./create_venv.sh
source .venv/bin/activate
```
{% hint style="info" %}
To use CLI on instance (for example, in your personal shell script), you need to include `requirements.txt` with Supervisely in your Private App repository
{% endhint %}
# Connect your computer
Supervisely Agent is a tiny docker container that allows you to connect your computational resources (cloud server or PC) to the platform. You can run any task from web interface (for example Neural Network training/inference/deploy). Running tasks with GPU will enhance performance and efficiency for your computer vision and deep learning projects.
After you run Agent on your computer, Agent will automatically connect your server to Supervisely platform. You will see this information on the "Team Cluster" page.
{% hint style="info" %}
Only you and your team members have access to your agents. So only tasks that you explicitly started yourself run on them. We will never use your nodes for our own benefit or the benefit of other users.
{% endhint %}

## Instructions for different operating systems:
* [Linux](/getting-started/connect-your-computer/gpu-agent-linux-installation)
* [Windows WSL](/getting-started/connect-your-computer/gpu-agent-wsl-installation)
# Linux
Everything you need to know about deploying Supervisely agent on Linux based operating systems
### Deploy Supervisely agent on Linux
Supervisely agent can work both with and without GPU support. If you don't have a GPU, you can deploy the agent on any machine with Linux OS and you can skip the GPU installation steps. This tutorial explains how to deploy the Supervisely agent on Linux OS.
### Table of Contents
* [Prerequisites](#prerequisites)
* [How to install](#how-to-install)
* [Step 1. Install Docker](#step-1-install-docker)
* [Step 2. Install CUDA Toolkit](#step-2-install-cuda-toolkit)
* [Step 3. Install NVIDIA Driver](#step-3-install-nvidia-driver)
* [Step 4. Install NVIDIA Container Toolkit](#step-4-install-nvidia-container-toolkit)
* [Step 5. Deploy Supervisely Agent](#step-5-deploy-supervisely-agent)
* [Troubleshooting](#troubleshooting)
### Prerequisites
* Linux OS (Kernel 3.10 or higher)
* [Docker](https://docs.docker.com/engine/install/ubuntu/) (Version 19.3 or higher)
* [CUDA Toolkit](https://developer.nvidia.com/cuda-downloads) (Version 9.0 or higher)
* [NVIDIA Driver](https://developer.nvidia.com/cuda-downloads) (Version 452.39 or higher)
* [NVIDIA Container Toolkit](https://docs.nvidia.com/datacenter/cloud-native/container-toolkit/latest/install-guide.html)
#### How to install
#### Step 1. Install Docker
First, set up the Docker apt repository:
```bash
# Add Docker's official GPG key:
sudo apt-get update
sudo apt-get install ca-certificates curl
sudo install -m 0755 -d /etc/apt/keyrings
sudo curl -fsSL https://download.docker.com/linux/ubuntu/gpg -o /etc/apt/keyrings/docker.asc
sudo chmod a+r /etc/apt/keyrings/docker.asc
# Add the repository to Apt sources:
echo \
"deb [arch=$(dpkg --print-architecture) signed-by=/etc/apt/keyrings/docker.asc] https://download.docker.com/linux/ubuntu \
$(. /etc/os-release && echo "$VERSION_CODENAME") stable" | \
sudo tee /etc/apt/sources.list.d/docker.list > /dev/null
sudo apt-get update
```
Then install the Docker packages:
```bash
sudo apt-get install docker-ce docker-ce-cli containerd.io docker-buildx-plugin docker-compose-plugin
```
Finally, verify that the Docker Engine installation is successful by running the hello-world image:
```bash
sudo docker run hello-world
```
Check out the official [Docker documentation](https://docs.docker.com/engine/install/ubuntu/) for more information.
#### Step 2. Install CUDA Toolkit
Install the CUDA Toolkit using the following commands:
```bash
wget https://developer.download.nvidia.com/compute/cuda/repos/ubuntu2204/x86_64/cuda-ubuntu2204.pin
sudo mv cuda-ubuntu2204.pin /etc/apt/preferences.d/cuda-repository-pin-600
wget https://developer.download.nvidia.com/compute/cuda/12.4.1/local_installers/cuda-repo-ubuntu2204-12-4-local_12.4.1-550.54.15-1_amd64.deb
sudo dpkg -i cuda-repo-ubuntu2204-12-4-local_12.4.1-550.54.15-1_amd64.deb
sudo cp /var/cuda-repo-ubuntu2204-12-4-local/cuda-*-keyring.gpg /usr/share/keyrings/
sudo apt-get update
sudo apt-get -y install cuda-toolkit-12-4
```
Check out the official [CUDA Toolkit documentation](https://developer.nvidia.com/cuda-downloads) for more information and the latest version.
### Step 3. Install NVIDIA Driver
Install the NVIDIA driver using the following commands:
```bash
sudo apt-get install -y cuda-drivers-550
```
To verify the installation, run the following command:
```bash
nvidia-smi
```
It's recommended to restart your system after installing the NVIDIA driver with the following command:
```bash
sudo reboot
```
The output should display the NVIDIA driver version, CUDA version, and GPU information.

If you can see this information, the installation was successful. Otherwise, please check the [Troubleshooting](#troubleshooting) section.
Check out the official [NVIDIA Driver documentation](https://developer.nvidia.com/cuda-downloads) for more information and the latest version.
### Step 4. Install NVIDIA Container Toolkit
The NVIDIA drivers must be also available in the Docker containers so the agent can utilize the GPU. To do this, install the NVIDIA Container Toolkit using the following commands:
```bash
curl -fsSL https://nvidia.github.io/libnvidia-container/gpgkey | sudo gpg --dearmor -o /usr/share/keyrings/nvidia-container-toolkit-keyring.gpg \
&& curl -s -L https://nvidia.github.io/libnvidia-container/stable/deb/nvidia-container-toolkit.list | \
sed 's#deb https://#deb [signed-by=/usr/share/keyrings/nvidia-container-toolkit-keyring.gpg] https://#g' | \
sudo tee /etc/apt/sources.list.d/nvidia-container-toolkit.list
sudo apt-get update
sudo apt-get install -y nvidia-container-toolkit
```
Now, configure the Docker daemon to use the NVIDIA runtime:
```bash
sudo nvidia-ctk runtime configure --runtime=docker
```
Finally, restart the Docker daemon:
```bash
sudo systemctl restart docker
```
Now, we'll need to ensure that the NVIDIA Container Toolkit is installed and working correctly and that the NVIDIA runtime is available inside the Docker containers. To do this, run the following command:
```bash
sudo docker run --rm --runtime=nvidia --gpus all nvidia/cuda:12.4.1-base-ubuntu22.04 nvidia-smi
```
The output should display the NVIDIA driver version, CUDA version, and GPU information.

If you can't see this information, please check the [Troubleshooting](#troubleshooting) section.
### Step 5. Deploy Supervisely Agent
Now it's time to deploy the Supervisely agent.
Open Supervisely instance, go to the Cluster page and press the `Add` button. Select the `Supervisely agent` option.

Copy the command and run it in the terminal on the machine where you want to deploy the agent.

That's it! Now your agent is deployed and running.
#### TroubleShooting
If the `nvidia-smi` command does not display the GPU information from OS or the Docker container, the NVIDIA drivers were not successfully installed. In this case, you can try to uninstall the NVIDIA drivers and CUDA Toolkit:
```bash
sudo apt-get purge nvidia*
sudo apt-get purge cuda*
sudo apt-get autoremove
sudo apt-get autoclean
```
After that restart your system, and try to install the components again.
# Windows WSL
Everything you need to know about deploying Supervisely agent on Windows WSL

## Deploy Supervisely agent with GPU on Windows WSL
This tutorial explains how to deploy the Supervisely agent with GPU support on Windows Subsystem for Linux (WSL). Whether you prefer following a video tutorial or a text-based guide, we've got you covered. In this guide, we'll walk you through the process step by step.
If you're a visual learner and prefer to watch along, check out our comprehensive video guide on deploying the Supervisely agent with GPU on Windows WSL. This guide will take you through each step visually, making it easier to follow along and set up the environment correctly.
**Machine Specs used in video guide:**
* **Operating System:** Microsoft Windows 10 Enterprise (10.0.19045 Build 19045)
* **GPU:** NVIDIA GeForce RTX 4090
* **GPU Driver Version:** 536.67
* **UBUNTU:** 22.04.2 LTS
* **Docker Desktop Version:** 4.20.1 (110738)
{% embed url="" %}
Video guide
{% endembed %}
If you prefer written instructions and a more detailed breakdown, here's how you can deploy the Supervisely agent with GPU on Windows WSL:
**Machine Specs used in text guide:**
* **Operating System:** Microsoft Windows 11 Pro (10.0.22621 Build 22621)
* **GPU:** NVIDIA GeForce RTX 3080 Ti (Laptop)
* **GPU Driver Version:** 536.67
* **UBUNTU:** 22.04.2 LTS
* **Docker Desktop Version:** 4.1.1 (69879)
## Table of Contents
* [Prerequisites](#prerequisites)
* [How to install](#how-to-install)
* [Step 1. Turn on WSL](#step-1.-turn-on-wsl)
* [Step 2. Install Windows Terminal](#step-2.-install-windows-terminal)
* [Step 3. Install Ubuntu](#step-3.-install-ubuntu)
* [Step 4. Install NVIDIA GPU Driver](#step-4.-install-nvidia-gpu-driver)
* [Step 5. Docker Desktop](#step-5.-docker-desktop)
* [Step 6. Install NVIDIA Container Toolkit](#step-6.-install-nvidia-container-toolkit)
* [Step 7. Deploy Supervisely Agent](#step-7.-deploy-supervisely-agent)
### Prerequisites
* Windows 10 Home, Pro or Enterprise (64-bit edition). Version 1903 or higher, with Build 18362 or higher.
or
* Windows 11 Home, Pro or Enterprise (64-bit edition).
and
* [Windows Terminal](https://www.microsoft.com/store/productid/9N0DX20HK701) installed.
* [Ubuntu 22.04.2](https://www.microsoft.com/store/productid/9PN20MSR04DW?ocid=pdpshare) installed.
* [WSL 2](https://docs.microsoft.com/en-us/windows/wsl/install-win10) installed and running.
* [NVIDIA GPU Driver](https://www.nvidia.com/Download/index.aspx?lang=en-us) installed.
* [Docker Desktop](https://www.docker.com/products/docker-desktop) installed and running.
### How to install
### Step 1. Turn on WSL
Use windows search to find "Turn Windows features on or off" and open it.

Scroll down and locate "Windows Subsystem for Linux", check the box and **restart your computer**. If the box is already checked proceed to the next step.

### Step 2. Install Windows Terminal
Open Microsoft Store and find **Windows Terminal** and press **Get**.

### Step 3. Install Ubuntu
Open Microsoft Store and find **Ubuntu 22.04.2** and press **Get**.

### Step 4. Install NVIDIA GPU Driver
Go to [NVIDIA](https://www.nvidia.com/Download/index.aspx?lang=en-us) site and download the latest driver for your GPU.
Fill the form and press **Search**.

Press **Download** button and install the driver.

### Step 5. Docker Desktop
Download [Docker Desktop](https://www.docker.com/products/docker-desktop) and install it.
If you have problems running Docker Desktop, check out the possible problems when running Docker Desktop just below.
Possible problems when running Docker Desktop
#### Docker Desktop -WSL Kernel version too low
Open Windows Terminal and run the following command:
```bash
wsl --update
```
#### Docker Desktop Windows Hypervision is not present
Restart you computer and go to BIOS settings and enable Virtualization.
#### Docker Desktop Resources - You don't have any WSL 2 distros installed
In this case you need to update your WSL distro to version 2.
Open Windows Terminal and run the following commands:
1. Get name of your WSL distro
```bash
wsl -l -v
```
Output:
```
NAME STATE VERSION
* Ubuntu-22.04 Running 1
docker-desktop-data Running 2
docker-desktop Running 2
```
2. Update your WSL distribution to version 2
```bash
wsl --set-version Ubuntu-22.04 2
```
Output:
```
Conversion in progress, this may take a few minutes.
The operation completed successfully.
```
3. Set default WSL version to 2
```bash
wsl --set-default-version 2
```
Output:
```
The operation completed successfully.
```
Open Docker Desktop and go to **Settings -> Resources -> WSL integration**. Check "Enable integration with my default WSL distro" and "Ubuntu 22.04" and press **Apply & Restart** as shown below.

Open Docker Desktop and go to **Settings -> Docker engine** and add runtime to the docker config file as shown below and press Apply & Restart:
```json
{
"default-runtime": "nvidia",
"runtimes": {
"nvidia": {
"path": "/usr/bin/nvidia-container-runtime",
"runtimeArgs": []
}
}
}
```
Or you can copy and paste merged config file from here:
```json
{
"builder": {
"gc": {
"defaultKeepStorage": "20GB",
"enabled": true
}
},
"experimental": false,
"features": {
"buildkit": true
},
"runtimes": {
"nvidia": {
"path": "/usr/bin/nvidia-container-runtime",
"runtimeArgs": []
}
}
}
```

### Step 6. Install NVIDIA Container Toolkit
Open Ubuntu terminal via Windows terminal

Install [NVIDIA Container Toolkit](https://docs.nvidia.com/datacenter/cloud-native/container-toolkit/latest/install-guide.html#step-1-install-nvidia-container-toolkit) repository for your distribution by running the following command:
```bash
distribution=$(. /etc/os-release;echo $ID$VERSION_ID) \
&& curl -fsSL https://nvidia.github.io/libnvidia-container/gpgkey | sudo gpg --dearmor -o /usr/share/keyrings/nvidia-container-toolkit-keyring.gpg \
&& curl -s -L https://nvidia.github.io/libnvidia-container/$distribution/libnvidia-container.list | \
sed 's#deb https://#deb [signed-by=/usr/share/keyrings/nvidia-container-toolkit-keyring.gpg] https://#g' | \
sudo tee /etc/apt/sources.list.d/nvidia-container-toolkit.list
```
Update the APT repository cache and install the `nvidia-container-toolkit` package:
```bash
sudo apt-get update
sudo apt-get install -y nvidia-container-toolkit
sudo nvidia-ctk runtime configure --runtime=docker
```
**Restart Docker Desktop.**
Enter the following command to verify that the installation was successful:
```bash
sudo docker run --rm --runtime=nvidia --gpus all nvidia/cuda:12.2.0-runtime-ubuntu22.04 nvidia-smi
```
{% hint style="warning" %}
If you have problems running this container, try upgrading [CUDA Toolkit](https://developer.nvidia.com/cuda-downloads) to latest version.
{% endhint %}
After docker image is pulled, you will see nvidia-smi output.

### Step 7. Deploy Supervisely Agent
Deploy Supervisely Agent with GPU support on Windows WSL.
Open Supervisely instance and go to the **Start -> Team Cluster** page and press "**Add**" button

Select "Supervisely agent".

Copy instructions `bash` command in the modal window. System will automatically recognize and add available GPU to the agent.
Agent Instructions
Copy the instructions command and run it in the Ubuntu terminal.

After the agent docker image is pulled you will see this message in the terminal. It means that agent is successfully deployed.

Go to the Team Cluster page and open your agent, check that agent is running. That's it! Now you can run GPU tasks on your Windows machine.

# Troubleshooting
Some of the problems you could run into when using the agent, along with solutions
## Failed to initialize NVML: Unknown Error
This error applies to any utilities/libraries that use NVML: `pytorch`, `nvidia-smi`, `pynvml` etc. It frequently shows up unexpectedly and prevents applications from using the GPU until it is fixed.
### Quick solution
If the error only appears inside the container, you can quickly fix it by restarting it. If the error also appears on the host after running `nvidia-smi` you can fix it by using the `reboot` command on the host.
### Proper solution
1. If the error has not yet appeared, you can check if your system is affected by this problem.
* run agent docker on the host PC;
* run `sudo systemctl daemon-reload` on the host;
* execute `nvidia-smi` into the agent container and catch `NVML initialization error`
2. Set the parameter `"exec-opts": ["native.cgroupdriver=cgroupfs"]` in the `/etc/docker/daemon.json` file.
```bash
~$ cat /etc/docker/daemon.json
```
```json
{
"default-runtime": "nvidia",
"runtimes": {
"nvidia": {
"args": [],
"path": "nvidia-container-runtime"
}
},
"exec-opts": ["native.cgroupdriver=cgroupfs"]
}
```
3. Restart Docker with `sudo systemctl restart docker`
You can also try other [official NVIDIA fixes](https://github.com/lurk-lab/gh-actions-runner/pull/9) to solve this problem for a specific docker container or plunge into this problem by reading [this discussion](https://github.com/NVIDIA/nvidia-docker/issues/1671) or [this official description](https://github.com/NVIDIA/nvidia-docker/issues/1730).
## CUDA Out Of Memory Error
This error could appear in any training apps.
### Solution
1. Check the amount of free GPU memory by running `nvidia-smi` command in your machine terminal - it will give you an understanding of how much GPU memory is it necessary to free in order to train your machine learning model
2. Stop unnecessary app sessions in Supervisely: *START button → App Sessions → stop all unnecessary app sessions by clicking on Stop button in front of every undesired app session*
3. Stop unnecessary processes in your machine terminal by running `sudo kill `
4. Select a lighter machine learning model (check "Memory" column in a model table - there is information about how much GPU memory will this model require to train).

If this information is not provided, use a simple rule: the higher the model in the table, the lighter it is.

5. Reduce batch size or model input resolution
| | |
| -------------------------------------------------------------------------------------------------------------------------------------------- | -------------------------------------------------------------------------------------------------------------------------------------------- |
| MMsegmentation image resolution/batch size | MMdetection v3 image resolution/batch size |
#### Additional: stop a process via docker.
1. run `docker ps` - it will return a big table with all docker containers running on this machine
2. run `docker stop `
## Can't start the docker container. Trying to use another runtime.
This message indicates that there was a problem using the Nvidia runtime, most likely the Nvidia driver failed after an automatic kernel update - by default, this feature is enabled on Ubuntu. However, it often fails because the driver cannot be unloaded while it is in use.
### Solution
#### Fast solution
The simplest way to fix this problem is to `reboot` the machine. After the reboot, the Nvidia driver will be reloaded and the problem will be fixed.\
But, if you don't want to reboot the machine, use the second solution.
#### Without rebooting
In case you receive: `nvidia version mismatch` after executing `nvidia-smi` command:
```bash
~$ nvidia-smi
Failed to initialize NVML: Driver/library version mismatch
```
You can fix it without rebooting or reinstalling the driver using these commands:
```bash
kill -9 $(lsof /dev/nvidia* | awk '{print $2}')
sleep 5
modprobe --remove nvidia_uvm nvidia_drm nvidia_modeset nvidia drm_kms_helper drm
modprobe nvidia_uvm nvidia_drm nvidia_modeset nvidia drm_kms_helper drm
```
The first command will kill all processes that use the Nvidia driver, and the last two will unload and reload the driver.\
You might need to redeploy your agent on the machine after running this command.
### Additional: disable automatic kernel updates.
You can also run this command to disable automatic kernel updates:
```bash
sudo apt remove unattended-upgrades
```
If the commands above don't work for you (some process is auto restarting preventing the driver from properly unload), you can simply reboot the machine.
# Basics
# Create app from any py-script
## Introduction
The main point: ✅ **any python script can be easily transformed into Supervisely App** ✅. And in this tutorial, you will learn how to do it. It will show you how to add the necessary files and structure to create the app from a python script, and how to add it to the Supervisely platform.
We will write a simple Python program that prints user login to console (stdout) in ASCII art (also known as "computer text art").
We will go through the following steps:
[**Step 1.**](#step-1.-python-script) Prepare a tiny python script.
[**Step 2.**](#step-2.-from-script-to-supervisely-app) How to transform this script into Supervisely App
[**Step 3.** ](#step-3.-how-to-add-your-private-app)How to add custom private app into Supervisely Platform.
[**Step 4.**](#step-4.-run-your-app-in-supervisely) How to run it in Supervisely.
{% hint style="info" %}
Everything you need to reproduce [this tutorial is on GitHub](https://github.com/supervisely-ecosystem/hello-world-app): source code and additional app files.
{% endhint %}
## Step 1. Python script
The python program that takes user login from ENV variable and prints it to console (STDOUT) as ASCII art using [ART python package](https://github.com/sepandhaghighi/art) [](https://github.com/sepandhaghighi/art).
```python
import os
from dotenv import load_dotenv
from art import tprint
# load ENV variables for debug
# has no effect in production
if sly.is_development():
load_dotenv("local.env")
def main():
name = sly.env.user_login()
print("Hello World! This app is run by the user:")
tprint(name)
if __name__ == "__main__":
main()
```
Here is an example of the output of this tiny python program:
```
Hello World! This app is run by the user:
_ __ ___ __ _ __ __
| '_ ` _ \ / _` |\ \/ /
| | | | | || (_| | > <
|_| |_| |_| \__,_|/_/\_\
```
## Step 2. From script to Supervisely App
### Repository structure
Supervisely App is just a git repository on Github or Gitlab. For this particular app the files structure should be the following:
```
.
├── README.md
├── config.json
├── requirements.txt
└── src
└── main.py
```
Let's explain every file:
* `README.md` \[optional] - contains an explanation of what this app does and how to use it. You can provide here all information that can be useful for the end-user (screenshots, gifs, videos, demos, examples).
* `requirements.txt` \[optional] - here you can specify all Python modules (pip packages) that are needed for your python program. This is a common convention in Python development. In our example we use two additional packages: [`art`](https://pypi.org/project/art/) [](https://github.com/sepandhaghighi/art)to do cool prints to console and [`black`](https://pypi.org/project/black/)  for automatic code formatting.
# supervisely SDK
supervisely

# used to print cool text to stdout
art==5.7

# my favorite code formatter
black==22.6.0
* `config.json` - This file will contain all your app metadata information, like name, description, poster URL, icon URL, app tags for Ecosystem, docker image, and so on. This file will be explained in detail in the next guides.
* `src/main.py` our python program.
The two files below are in the repo but they are used **ONLY** for debug purposes and are provided for your convenience.
```
.
├── create_venv.sh
└── local.env
```
### App configuration
App configuration is stored in `config.json` file. A detailed explanation of all possible fields in app configuration will be covered in other tutorials. Let's check the config for our small app:
```json
{
"slug": "supervisely-ecosystem/hello-world-app",
"main_script": "src/main.py",
"headless": true,
"name": "Hello World!",
"description": "Demonstrates how to turn your python script into Supervisely App",
"docker_image": "supervisely/development:6.73.205",
"categories": ["development"],
"icon": "https://user-images.githubusercontent.com/12828725/182186256-5ee663ad-25c7-4a62-9af1-fbfdca715b57.png",
"poster": "https://user-images.githubusercontent.com/12828725/182181033-d0d1a690-8388-472e-8862-e0cacbd4f082.png",
"instance_version": "6.11.19"
}
```
Let's go through the fields:
* `main_script` - relative path to the main script (entry point) in a git repository
* `"headless": true` means that app has no User Interface
* `name`, `description` and `poster` define how the app will look in the Supervisely Ecosystem

* `icon`, `categories` - categories help to navigate in the Supervisely Ecosystem and it is a user-friendly way to explore apps

## Step 3. How to add your private app
There are two following ways to add an application
{% hint style="info" %}
More details about adding apps can be found in [the documentation](/app-development/basics/add-private-app).
{% endhint %}
### Add app from git repository
Supervisely supports both private and public apps.
🔒 **Private apps** are those that are available only on private Supervisely Instances (Enterprise Edition).
🌎 **Public apps** are available on all private Supervisely Instances and in Community Edition. The guidelines for adding public apps will be covered in other tutorials.
Since Supervisely app is just a git repository, we support public and private repos from the most popular hosting platforms in the world - **GitHub** and **GitLab**. You just need to generate and provide access token to your repo. Learn more in [the documentation](https://docs.supervisely.com/enterprise-edition/advanced-tuning/private-apps).
Go to `Ecosystem` -> `Private Apps` -> `Add private app`.

### Add app directly to the supervisely instance via supervisely-cli
Install supervisely SDK via following command:
```
pip install -U supervisely
```
Create .env file `~/supervisely.env` with the following content:
```python
SERVER_ADDRESS="https://"
API_TOKEN="4r47N...xaTatb"
```
Go root folder of your app folder and run:
```
supervisely release
```
## Step 4. Run your app in Supervisely
There are multiple ways how application can be integrated into Supervisely Platform. App can be run from context menu of project / dataset / labeling job / user / and so on ... Or app can be run right from labeling interface. All possible running options will be covered in next tutorials.
For simplicity, we will run our app from the Ecosystem page.

# Configuration file
Configuration that connects Python application with Supervisely
# config.json
Configuration file properties
## Introduction
The app config (**config.json**) is used for configuring how a project loads in Supervisely. All data is stored in app configuration as key-values, where keys are the string type and values must be in valid JSON format for Supervisely to process it correctly. Otherwise, app might fail. Configuration file must be located at the root of your project, next to the `.env` file.
**Here is a bare-minimum example:**
```json
{
"name": "Hello World!",
"version": "2.0.0",
"entrypoint": "python -m uvicorn src.main:app --host 0.0.0.0 --port 8000"
}
```
## Properties
The Supervisely app config configures many things such as app name, category, icon, poster, docker image and so on. A complete list of available properties with example values is described below. Don't worry, you don't need all of them.
### `name`
**Required property**
Name of the app

```json
"name": "Hello World"
```
### `description`
App description in Ecosystem

```json
"description": "Working demo, use it as a template for your custom apps
```
### `type`
Specifies type of the Ecosystem entity. Default value is `"app"`\\
Types
**Available types:**
* [Apps](https://ecosystem.supervise.ly/apps) - `"app"`
* [Projects](https://ecosystem.supervise.ly/projects) - `"project"`
* [Collections](https://ecosystem.supervise.ly/collections) - `"collection"`
```json
"type": "app"
```
### `categories`
List of categories that app are associated with in Ecosystem. App can have as many categories as you like.
YOLOv5 app categories
```json
"categories": [
"neural network",
"images",
"videos",
"object detection",
"detection & tracking",
"train"
]
```
**List of main categories:**
* `"import"` - [Import](https://ecosystem.supervise.ly/import)
* `"export"` - [Export](https://ecosystem.supervise.ly/export)
* `"neural network"`- [Neural networks](https://ecosystem.supervise.ly/neural-network)
* `"labelling"`- [Labeling](https://ecosystem.supervise.ly/labeling)
* `"collaboration"`- [Collaboration](https://ecosystem.supervise.ly/collaboration)
* `"synthetic"`- [Synthetic data](https://ecosystem.supervise.ly/synthetic)
* `"data operations"`- [Data operations](https://ecosystem.supervise.ly/data-operations)
* `"visualization stats"`- [Visualization & stats](https://ecosystem.supervise.ly/visualization-stats)
* `"development"`- [Development](https://ecosystem.supervise.ly/development)
* Any other category that doesn't contain any category name from the above goes to [Other utilities](https://ecosystem.supervise.ly/other)
Main categories
**Category tags combination**
Main categories also contain sub-categories.
If you want your application to appear there you must combine multiple tags. Place order does not matter.
```json
"categories": [
"images",
"annotation transformation",
"data operations"
]
```
**List of sub-categories:**
* `"images"`, `"videos"`, `"dicom"`, `"pointclouds"`
* `"object detection"`, `"semantic segmentation"`, `"instance segmentation"`, `"classification"`, `"interactive segmentation"`, `"metric learning"`
* `"detection & tracking"`, `"segmentation & tracking"`, `"interactive segmentation"`, `"interpolation"`
* `"annotation transformations"`, `"data transformations"`, `"modality transformations"`, `"projects management"`, `"composition & synthesizing"`, `"augmentation"`
* `"train"`, `"serve"`
### `icon`
Link to the application icon. If not specified the first two letters of the app name will be displayed as an icon

```json
"icon": "https://your-icon.png"
```
### `icon_cover`
Stretches the icon to full width. Comparison of `icon cover` true (left) and false (right)
 
```json
"icon_cover": false
```
### `icon_background`
Icon background color in hex color code format
```json
"icon_background": "#FFFFFF"
```
### `poster`
Link to the application poster. If not specified displays `icon` as poster
Comparison of thumbnail with and without spcified poster
```json
"poster": "https://your-poster.png"
```
### `version`
**Required property**
App engine version. If you want to use legacy app engine do not specify version property.
```json
"version": "2.0.0"
```
### `entrypoint`
**Required property**
Instruction for executing app scripts v2.0.0 app engine only, for legacy apps use **`main_script`** property, but **not both**
**`src.main` \*\* is a relative path to main.py which contains app object \*\* `:app`**
```json
"entrypoint": "python -m uvicorn src.main:app --host 0.0.0.0 --port 8000"
```
**Note 1:** if **`app`** object is in a different script file like **`globals.py`**, and **`globals.py`** is imported to **`main.py`** script you can specify it like **`src.main:globals.app`**
**Note 2:** if **`main.py`** file is locarted in a path that could cause a conflict with some `pip` package (ex.: `./supervisely/src/main.py`), use `--app-dir` parameter
```json
"entrypoint": "python -m uvicorn src.main:app --app-dir ./supervisely --host 0.0.0.0 --port 8000"
```
### `port`
Use this property if you want to specify certain port (**v2.0.0 app engine only**)
```json
"port": 8000
```
### `docker_image`
Docker image used to run the app. If not specified uses [`supervisely/base-py-sdk`](https://hub.docker.com/r/supervisely/base-py-sdk) image based on supervisely version in requirements.txt file or uses latest version. List of available supervisely docker images can be found at [Dockerhub](https://hub.docker.com/u/supervisely)
```json
"docker_image": "supervisely/base-py-sdk:6.68.6"
```
### `community_agent`
Applicable only for Community Edition instances. Users of Enterprise Instances can ignore this field. If flag is `False` - then the app can not be run on public agents and has to be run only on user's agents. Default value is `true`.
Practical example: by default users of Community Edition can run apps on the agents (computers) provided by Supervisely team for free. If app, for example, deploys NN inside, Supervisely team can not allow community users to run this app due to the limitation of available GPU resources. That is why some resource-intensive apps have this flag: `"community_agent": false`
```json
"community_agent": false
```
### `min_agent_version`
Minimum agent version to launch app. Current agent version can be found at the **`Team Cluster`** page. List of available agent versions can be found at [Dockerhub](https://hub.docker.com/r/supervisely/agent/tags)
```json
"min_agent_version": "6.7.4"
```
### `need_gpu`
{% hint style="warning" %}
Deprecated
{% endhint %}
If flag is `True` the Docker image will be executed with the `runtime=nvidia`. Selected Docker image must support NVIDIA Container Toolkit.
### `gpu`
Specifies whether a GPU is required to run the application. Selected Docker image must support NVIDIA Container Toolkit if "gpu" is "required" or "preferred".
```json
"gpu": "required"
```
If both flags **`gpu`** and **`need_gpu`** are specified, **`gpu`** flag will be prioritized
**List of available options:**
* `"required"` - can be run only on agents with GPU
* `"preferred"` - сan be run on both GPU and CPU agents (GPU agents prioritized)
* `"no"` (or lack of "gpu" property) - сan be run on both GPU and CPU agents
### `min_instance_version`
Minimum instance version to launch app. Current instance version can be found at the bottom right corner at the Supervisely
If the current instance version is lower than the version specified in the application, the supervisely platform will try to find a compatible instance version

```json
"min_instance_version": "6.5.50"
```
### `instance_version`
Same as [**`min_instance_version`**](/app-development/basics/app-json-config#min_instance_version)**\`\`**
```json
"instance_version": "6.5.50"
```
### `headless`
Specifies if app do not use frontend. Set to false for the apps with GUI. Default value is `false`
```json
"headless": true
```
### `modal_template`
Relative path to modal window template from project root
```json
"modal_template": "src/modal.html"
```
### `modal_template_data`
Initializes default values for data variables in modal window
```json
"modal_template_data": {
"test_1": "modalDataVal 1",
"files": null
}
```
### `modal_template_state`
Initializes default values for state variables in modal window
```json
"modal_template_state": {
"checkbox_1": false,
"checkbox_2": true,
"input": ""
}
```
### `context_menu`
App context menu configuration options. If not specified, app can be launched only from Ecosystem
`context_category` - sub section in context menu
`target` - determines where the application can be launched from
```json
"context_menu": {
    "context_category": "Import",
    "target": ["files_folder", "images_project", "images_dataset", "agent_folder"]
  }
```
{% tabs %}
{% tab title="files\_folder/agent\_folder" %}
{% endtab %}
{% endtabs %}
**List of available context menu targets:**
* `"ecosystem"`
* "team"
* `"workspace"`
* `"labeling_job"`
* `"team_member"`
* `"files_folder"`
* `"files_file"`
* `"agent_folder"`
* `"agent_file"`
* `"images_project"`
* `"images_dataset"`
* `"videos_project"`
* `"videos_dataset"`
* `"volumes_project"`
* `"volumes_dataset"`
* `"point_cloud_project"`
* `"point_cloud_dataset"`
* `"point_cloud_episodes_project"`
* `"point_cloud_episodes_dataset"`
### `session_tags`
List of session tags. Makes app session available in another app session:
e.g [`serve YOLOV5`](https://ecosystem.supervise.ly/apps/yolov5/supervisely/serve) running app session is available in [`Apply NN to Images Project`](https://ecosystem.supervise.ly/apps/nn-image-labeling/project-dataset) app session
```json
"session_tags": [
"sly_video_tracking",
"sly_smart_annotation"
]
```
**List of available session tags:**
* `"sly_video_tracking"`
* `"sly_smart_annotation"`
* `"deployed_nn"`
### `integrated_into`
Integrates app into selected tool.
e.g [smart tool app](https://ecosystem.supervise.ly/apps/ritm-interactive-segmentation/supervisely) can be used in image annotation tool
```json
"integrated_into": ["image_annotation_tool", "video_annotation_tool"]
```
**List of available options:**
* `"panel"`
* `"files"`
* `"standalone"`
* `"image_annotation_tool"`
* `"video_annotation_tool"`
* `"dicom_annotation_tool"`
* `"pointcloud_annotation_tool"`
### `task_location`
Defines where the task will be displayed on app launch. If specified as `"workspace_tasks"`, app will be displayed in both workspace tasks and app session pages
Task Location
```json
"task_location": "workspace_tasks"
```
**Available task locations:**
* `"workspace_tasks"` - suitable for application that directly interacts with data from the workspace (e.g. import/export apps)
* `"application_sessions"` - suitable for the application that is tied to the team and can work in multiple workspaces (e.g. server-like apps)
### `hotkeys`
Specifies hotkeys that can be used in app
```json
"hotkeys": [
{"hotkey": "ctrl+m", "command": "inference"}
]
```
### `restart_policy`
Restarts app when certain condition occurs. **`restart_policy`** can be found in modal window advanced settings when launching app
```json
"restart_policy": "on_error"
```
restart policy location
### `main_script`
{% hint style="warning" %}
Deprecated
{% endhint %}
Relative path to main script from project root. Can not be used with v2.0.0 apps, use **`main_script`** or [**`entrypoint`**](/app-development/basics/app-json-config#entrypoint)**\`\`**
```json
"main_script": "src/main.py"
```
### `gui_template`
{% hint style="warning" %}
Deprecated
{% endhint %}
Relative path to GUI template from project root. Can not be used with v2.0.0 apps.
```json
"gui_template": "src/gui.html"
```
### `license`
Application license
```json
"license": {
"type": "MIT",
"url": ""
}
```
**List of available options:**
* `"type"` - any string
* `"url"` - license url (may be empty for the following license types: GPL-3.0 / AGPL-3.0 / Apache-2.0 / BSD-3-Clause / MIT)
### **`only_for_instance_admins`**
If `true` makes app available only for instance administrators. Default values is `false.`
### **`min_nvidia_driver_version`**
App will be available on agents with nvidia driver version same or higher. Requires `"gpu": "required"`
```json
"min_nvidia_driver_version": "535.54.03"
```
or even
```json
"min_nvidia_driver_version": "535"
```
which is equivalent to all versions higher than `535.0.0`
### **`access_restriction`**
The app will be restricted to run on a specific instance for a specific subscription, and a message will appear in a modal window when attempting to launch app.
#### Example 1
```json
"access_restriction": [{
"instance": "beta_free",
"message": "The app launch is limited to the Free subscription on the Beta instance."
}]
```
*The application is available for launch to everyone except beta\_free.*
#### Example 2
```json
"access_restriction": [
{
"message": "This application is only available in Enterprise Edition",
"instance": "community_pro"
},
{
"message": "This application is only available in Enterprise Edition with Point Clouds module",
"instance": "enterprise",
"license_modules": ["pointClouds"]
}
]
```
*The application is available for launch only on EE instances with the pointCloud module.*
**List of available options:**
* `"instance"` - the name of the instance and/or subscription on which access will be restricted
* `"message"` - the message that appears in the modal window, could contain HTML formatting
* `"license_modules"` - A list of modules in license required to run the application (for EE instances only)
## Configuration examples
Configurations will not vary that much depending on type of the project, whether it's a small headless app or complicated app with UI and a lot of widgets.
**Common app config example:**
```json
{
"name": "App name here",
"type": "app",
"version": "2.0.0",
"categories": ["development"],
"description": "App description here",
"entrypoint": "python -m uvicorn src.main:app --host 0.0.0.0 --port 8000"
"task_location": "workspace_tasks",
"icon": "https://icon.png",
"poster": "https://poster.png"
}
```
We'll consider a few examples of app configs:
1. [**Headless**](/app-development/basics/app-json-config/example-1.-headless)
2. [**App with GUI**](/app-development/basics/app-json-config/example-2.-app-with-gui)
3. [**v1 - Legacy**](/app-development/basics/app-json-config/v1-legacy)
# Example 1. Headless
config.json for headless app explained
## Introduction
We will take [`Hello World`](https://ecosystem.supervisely.com/apps/hello-world-app) app as an example of a simple headless app that can be launched from Ecosystem, it uses minimum properties.
[supervisely-ecosystem/hello-world-app/config.json](https://github.com/supervisely-ecosystem/hello-world-app/blob/master/config.json)
```json
{
"main_script": "src/main.py",
"headless": true,
"name": "Hello World!",
"description": "Demonstrates how to turn your python script into Supervisely App",
"categories": ["development"],
"icon": "https://user-images.githubusercontent.com/12828725/182186256-5ee663ad-25c7-4a62-9af1-fbfdca715b57.png",
"poster": "https://user-images.githubusercontent.com/12828725/182181033-d0d1a690-8388-472e-8862-e0cacbd4f082.png"
}
```
Headless app visual properties
## Properties
### `main_script`
Relative path to the main script of the application from the root of the project
```json
"main_script": "src/main.py"
```
### `headless`
Specifies that app does not have GUI
```json
"headless": true
```
### `name`
Name of the app in Supervisely
```json
"name": "Hello World!"
```
### `description`
Description of the app in Supervisely
```json
"description": "Demonstrates how to turn your python script into Supervisely App"
```
### `categories`
Сategories under which the app will be displayed in Ecosystem
```json
"categories": ["development"]
```
### `icon`
Link to the app icon
```json
"icon": "https://user-images.githubusercontent.com/12828725/182186256-5ee663ad-25c7-4a62-9af1-fbfdca715b57.png"
```
### `poster`
Link to the app poster
```json
"poster": "https://user-images.githubusercontent.com/12828725/182181033-d0d1a690-8388-472e-8862-e0cacbd4f082.png"
```
# Example 2. App with GUI
config.json for app with GUI explained
## Introduction
Configuration for apps with graphical user interface are pretty much the same like any other Supervisely apps. In this section we'll look into [`Interactive objects distribution`](https://github.com/supervisely-ecosystem/interactive-objects-distribution) app. Application calculates interactive heatmap chart for every class with objects distribution.
[supervisely-ecosystem/interactive-objects-distribution/config.json](https://github.com/supervisely-ecosystem/interactive-objects-distribution/blob/master/config.json)
```json
{
"type": "app",
"version": "2.0.0",
"name": "Interactive objects distribution",
"description": "Explore images with certain number of objects of specific class",
"categories": [
"images",
"visualization",
"exploration",
"statistics",
"visualization stats"
],
"icon": "https://user-images.githubusercontent.com/12828725/183916661-224ff8cb-a3d1-4b82-a629-def8c6de1db5.png",
"poster": "https://user-images.githubusercontent.com/106374579/187223426-ec7e0fae-8ba9-48fd-b71f-8680cc0f1b49.png",
"entrypoint": "python -m uvicorn src.main:app --host 0.0.0.0 --port 8000",
"port": 8000,
"context_menu": {
"target": ["images_project"],
"context_root": "Report"
},
"min_instance_version": "6.5.22"
}
```
App properties
## Properties
### **`type`**
Type of the Ecosystem entity
```json
"type": "app"
```
### **`version`**
App engine version
```json
"version": "2.0.0"
```
### **`name`**
Name of the app
```json
"name": "Interactive objects distribution"
```
### **`description`**
App description in Ecosystem
```json
"description": "Explore images with certain number of objects of specific class"
```
### **`categories`**
List of categories that app are associated with in Ecosystem
App categories
```json
"categories": [
"images",
"visualization",
"exploration",
"statistics",
"visualization stats"
]
```
### **`icon`**
Link to the application icon
```json
"icon": "https://user-images.githubusercontent.com/12828725/183916661-224ff8cb-a3d1-4b82-a629-def8c6de1db5.png"
```
### **`poster`**
Link to the application poster
```json
"poster": "https://user-images.githubusercontent.com/106374579/187223426-ec7e0fae-8ba9-48fd-b71f-8680cc0f1b49.png"
```
### **`entrypoint`**
Instruction for executing app scripts.
**`src.main`** is a relative path to main.py which contains app object **`:app`**
```json
"entrypoint": "python -m uvicorn src.main:app --host 0.0.0.0 --port 8000"
```
### **`port`**
Predefined standard port for the app
```json
"port": 8000
```
### **`context_menu`**
App context menu configuration options. If not specified, app can be launched only from Ecosystem
`context_category` - sub section in context menu
`target` - determines where the application can be launched from
```json
"context_menu": {
"target": ["images_project"],
"context_root": "Report"
}
```
### **`min_instance_version`**
Minimum instance version to launch app. Current instance version can be found at the bottom right corner at the Supervisely

```json
"min_instance_version": "6.5.22"
```
# v1 - Legacy
legacy app examples
This section contains 2 examples of v1 apps.
Examples:
1. [**Modal Window**](/app-development/basics/app-json-config/v1-legacy/example-1.-v1-modal-window)
2. [**App with GUI**](/app-development/basics/app-json-config/v1-legacy/example-2.-v1-app-with-gui)
# Example 1. v1 Modal Window
config.json for v1 app with Modal Window explained
## Introduction
Modal Window is designed to have all app pre-launch configuration options or contain critical information about app in a centralized dialog within one tab. We'll use [`Import Images`](https://ecosystem.supervisely.com/apps/import-images) app as an example in this section. This is a common app that import images without annotations to Supervisely.
[supervisely-ecosystem/import-images/config.json](https://github.com/supervisely-ecosystem/import-images/blob/master/config.json)
```json
{
"name": "Import Images",
"type": "app",
"categories": ["import", "images", "essentials"],
"description": "Drag and drop images to Supervisely, supported formats: .jpg, .jpeg, jpe, .mpo, .bmp, .png, .tiff, .tif, .webp, .nrrd",
"docker_image": "supervisely/base-py-sdk:6.68.1",
"main_script": "src/main.py",
"modal_template": "src/modal.html",
"modal_template_state": {
"normalize_exif": false,
"remove_alpha_channel": false,
"remove_source": true,
"project_name": ""
},
"task_location": "workspace_tasks",
"icon": "https://github.com/supervisely-ecosystem/import-images/releases/download/v1.0.0/icon.png",
"icon_cover": true,
"icon_background": "#FFFFFF",
"min_agent_version": "6.7.4",
"min_instance_version": "6.5.46",
"headless": true,
"context_menu": {
"context_category": "Import",
"target": ["files_folder", "images_project", "images_dataset", "agent_folder"]
},
"poster": "https://github.com/supervisely-ecosystem/import-images/releases/download/v1.0.0/poster.png"
}
```
Modal window properties
## Properties
### `name`
Name of the app in Supervisely
```json
"name": "Import Images"
```
### `type`
Entity type in Supervisely Ecosystem
```json
"type": "app"
```
### `categories`
Сategories under which the app will be displayed in Ecosystem
```json
"categories": ["import", "images", "essentials"]
```
### `description`
Description of the app in Supervisely
```json
"description": "Drag and drop images to Supervisely, supported formats: .jpg, .jpeg, jpe, .mpo, .bmp, .png, .tiff, .tif, .webp, .nrrd"
```
### `docker_image`
Docker image used to launch the app with all pre-installed requirements
```json
"docker_image": "supervisely/base-py-sdk:6.68.1"
```
### `main_script`
Relative path to the main script of the application from the root of the project
```json
"main_script": "src/main.py"
```
### `modal_template`
Relative path to the modal window template from the root of the project
```json
"modal_template": "src/modal.html"
```
### `modal_template_state`
Controls default values for modal window variables.
modal template state
```json
"modal_template_state": {
"normalize_exif": false,
"remove_alpha_channel": false,
"remove_source": true,
"project_name": ""
}
```
### `task_location`
Specifies where to display task
workspace task
```json
"task_location": "workspace_tasks"
```
### `icon`
Link to the app icon
```json
"icon": "https://github.com/supervisely-ecosystem/import-images/releases/download/v1.0.0/icon.png"
```
### `icon_cover`
Stretches the icon to full width.
Comparison of `icon cover` true (left) and false (right)
 
```json
"icon_cover": true
```
### `icon_background`
Background of app icon in hex color code
```json
"icon_background": "#FFFFFF"
```
### `min_agent_version`
Minimum required agent version to launch the app. Agent version can be found at **`Team Cluster`** page
Agent version
```json
"min_agent_version": "6.7.4"
```
### `min_instance_version`
Minimum required instance version to launch the app. Current instance version can be found at the bottom right corner of the Supervisely page.

```json
"min_instance_version": "6.5.46"
```
### `headless`
Specifies that app does not have GUI
# Example 2. v1 app with GUI
config.json for v1 app with GUI explained
## Introduction
In this section we'll explain app config for [`Convert Class Shape`](https://ecosystem.supervisely.com/apps/convert-class-shape) app. This app converts labeled objects from one geometry to another and creates a new project from original with converted class shapes.
[supervisely-ecosystem/convert-class-shape/config.json](https://github.com/supervisely-ecosystem/convert-class-shape/blob/master/config.json)
```json
{
"name": "Convert Class Shape",
"type": "app",
"categories": [
"images",
"annotation transformation",
"data operations"
],
"description": "Converts shapes of classes (e.g. polygon to bitmap) and all corresponding objects",
"docker_image": "supervisely/base-py-sdk:6.35.0",
"instance_version": "6.4.57",
"main_script": "src/convert_class_shape.py",
"gui_template": "src/gui.html",
"modal_template": "src/modal.html",
"task_location": "workspace_tasks",
"isolate": true,
"icon": "https://i.imgur.com/TxR0dfX.png",
"icon_background": "#FFFFFF",
"context_menu": {
"target": [
"images_project"
],
"context_category": "Transform"
},
"poster": "https://user-images.githubusercontent.com/106374579/186599439-6b6848e6-48cb-4fdc-912e-1a4493c79f41.png"
}
```
## Properties
### **`name`**
Name of the app in Supervisely
```json
"name": "Convert Class Shape"
```
### **`type`**
Entity type in Supervisely Ecosystem
```json
"type": "app"
```
### **`categories`**
Сategories under which the app will be displayed in Ecosystem
```json
"categories": [
"images",
"annotation transformation",
"data operations"
]
```
### **`description`**
Description of the app in Supervisely
```json
"description": "Converts shapes of classes (e.g. polygon to bitmap) and all corresponding objects"
```
### **`docker_image`**
Docker image used to launch the app with all pre-installed requirements
```json
"docker_image": "supervisely/base-py-sdk:6.4.57"
```
### **`instance_version`**
Minimum instance version to launch app. Same as **`min_instance_version`.** Current instance version can be found at the bottom right corner of the Supervisely page.

```json
"instance_version": "6.4.57"
```
### **`main_script`**
Relative path to the main script of the application from the root of the project
"main_script": "src/convert_class_shape.py"
### **`gui_template`**
Relative path to the GUI template from the root of the project
```json
"gui_template": "src/gui.html"
```
### **`modal_template`**
Relative path to the modal window template from the root of the project. GUI apps can use modal window functionality too. In case of this app modal window only contain text information hence **`modal_template_state`** is not needed
```json
"modal_template": "src/modal.html"
```
### **`task_location`**
Specifies where to display task
workspace task
```json
"task_location": "workspace_tasks"
```
### `isolate`
Runs app in isolated container
```json
"isolate": true
```
### **`icon`**
Link to the app icon
```json
"icon": "https://i.imgur.com/TxR0dfX.png"
```
### **`icon_background`**
Background of app icon in hex color code
```json
"icon_background": "#FFFFFF"
```
### **`context_menu`**
App context menu configuration
```json
"context_menu": {
"target": ["images_project"],
"context_category": "Transform"
}
```
### **`poster`**
Link to app poster
```json
"poster": "https://github.com/supervisely-ecosystem/import-images/releases/download/v1.0.0/poster.png"
```
# Add private app
## Introduction
Supervisely supports both private and public apps.
🔒 **Private apps** are those that are available only on your private Supervisely Instance (Enterprise Edition) in your account.
🌎 **Public apps** are available on all private Supervisely Instances and in Community Edition. The guidelines for adding public apps will be covered in other tutorials.
This tutorial covers the case of adding a custom private app to your private instance. It means that this app will be available only for your account and only on your private Supervisely instance.
Apps, developed by the Supervisely team, are open-sourced and are available on all Supervisely instances (Community Edition and all private customer's instances with Enterprise Edition license). The case of publishing an app to the global public Supervisely Ecosystem will be covered in another tutorial.
## Version releases and Branch releases
There are two types of releases: `version` and `branch`. The `version` release is made from the `main` or `master` branch. With each `version` release, a release tag is added to the last commit. This tag is used to identify the release version and is important for the app versioning. If during the release process, the tag is not created, the release will be rejected. With version releases, you can specify the release version and description. The `branch` releases are for testing and debugging and are made from any other branch except `main` or `master`. With branch releases, you can't specify the release version and description. The release version will be the branch name.
## Multi-app repositories
In Supervisely you can have a single git repository with multiple applications. It is advised to have connected applications with a common codebase in the same repository. By default `supervisely release` command will release the application from the root directory of the repository. If you have multiple applications in the repository, you can specify the path to the application directory with the `-a` flag. The application directory is a directory with a `config.json` file. Such applications are called `subapps`. For example, if you have a repository with two applications in the `train` and `serve` directories, you can release the `train` application with the following command:
```bash
supervisely release -a train
```
{% hint style="info" %}
When making a release the tag is added to the last commit. And since all of the applications are in the same repository, it is impossible to differentiate the release tags of different applications. Therefore, it is advised to do a release for each subapp with every new version.
{% endhint %}
## How to share the private app with Team members
After the private app is released it will be available for the user who released the app. The app can be shared with the team members without the need to share it with the whole instance. To do it, you need to run the app once while being a member of the team. After that, the app will appear on the `App sessions` page and will become available by URL for any team member.
## Option 1. \[👍 Recommended] CLI - Run command in terminal.
### Step 0. Install Supervisely SDK
Run command in terminal to install Supervisely SDK
```bash
pip install supervisely
```
### Create a .env file `~/supervisely.env` with the following content (learn more [here](/getting-started/basics-of-authentication):
```python
SERVER_ADDRESS=""
API_TOKEN="4r47N...xaTatb"
```
### Development in a team
For team development, you need to add `APP_RELEASE_TOKEN` variable to your `~/supervisely.env` file. This token will be used to authenticate your app during the release process. If `APP_RELEASE_TOKEN` is present in your `~/supervisely.env` file, then the app will be owned by the user associated with the token and any user will be able to do a release if he has the token. Otherwise, the app will be owned by the user who released the app and releases from other users will be rejected.
### How to get `APP_RELEASE_TOKEN`
1. Create a new user on your instance. This user will be used for releasing apps. You can name it `dev` or `dev-team` or whatever you want.
 
2. Login as this user and copy API token.
 
3. Use this token as `APP_RELEASE_TOKEN` in your `~/supervisely.env` file.
```python
SERVER_ADDRESS=""
API_TOKEN="4r47N...xaTatb"
APP_RELEASE_TOKEN="xaTatb...4r47N"
```
### How to pass ownership of an app to another user
If you released an app without `APP_RELEASE_TOKEN` and now want to continue development in a team you can pass the ownership to the user created in previous steps. To do this you need to go to the private app page, navigate to the bottom left part and click `Change owner` button. Then input login of the user. You will be still able to see this app in your private apps. But to make new releases you will need to use `APP_RELEASE_TOKEN` of the new owner.

### Step 1. Prepare a directory with app sources.
You are a developer and you implemented an app. App sources are on your local computer in some directory. Go to this folder. For example, the folder structure will look like this:
```
.
├── README.md
├── config.json
├── requirements.txt
└── src
└── main.py
```
### Step 2. Release
Execute the following command in the terminal to release an app. By default, this command will pack and release files in the current folder.
```
supervisely release
```
You will be asked for a release description and in case of releasing from main/master branch for release version. After that, you will see a summary message and confirmation request. If releasing from main/master branch new tag will be created and pushed to remote (You may be asked for git authentication). Then if there are no errors you will see the "App release successfully!" message.


You can provide release version and release description by providing `--release-version` and `--release-description` options to the CLI
Your app will appear in the section `🔒 private` apps\` in Ecosystem.

Thus you can quickly do releases of your app. All releases will be available on the application page. Just select the release in the modal window in the `advanced` section before running the app. The latest release is selected by default.

{% hint style="info" %} You can store several applications in one repository. To release an application from such repository, go to root folder of the repository, then run `supervisely release` with `-a` flag and specify the relative path to folder with application configuration file
```
cd ~/code/yolov5
supervisely release -a apps/train
```
## Option 2. Connect your git account (Github or Gitlab).
Since Supervisely app is just a git repository, we support public and private repos from the most popular hosting platforms in the world - **GitHub** and **GitLab**. You just need to generate and provide the access token to your repo.
### Step 1. Generate new personal token
#### GitHub
To access private GitHub repositories, you will need to generate a personal token. Please note, that this token will provide your Supervisely instance a read access to all repositories, available for this GitHub account — you may want to create a dedicated GutHub account for a single Supervisely App repository.
Open GitHub → Settings → Developer settings → [Personal access tokens](https://github.com/settings/tokens) and click Generate new token.
Select "repo" access scope and click "Generate token" button. Save generated token — you will need it later.

#### GitLab
To access private GitLab repositories, you will need to generate a personal token. Please note, that this token will provide your Supervisely instance a read access to all repositories, available for this GitLab account — you may want to create a dedicated GutLab account for a single Supervisely App repository.
Open GilLab → Settings → [Access Tokens](https://docs.gitlab.com/ee/user/profile/personal_access_tokens.html#create-a-personal-access-token)
Select with "read\_api", "read\_repository" scopes enabled and click "Create personal access token" button. Save generated token — you will need it later.
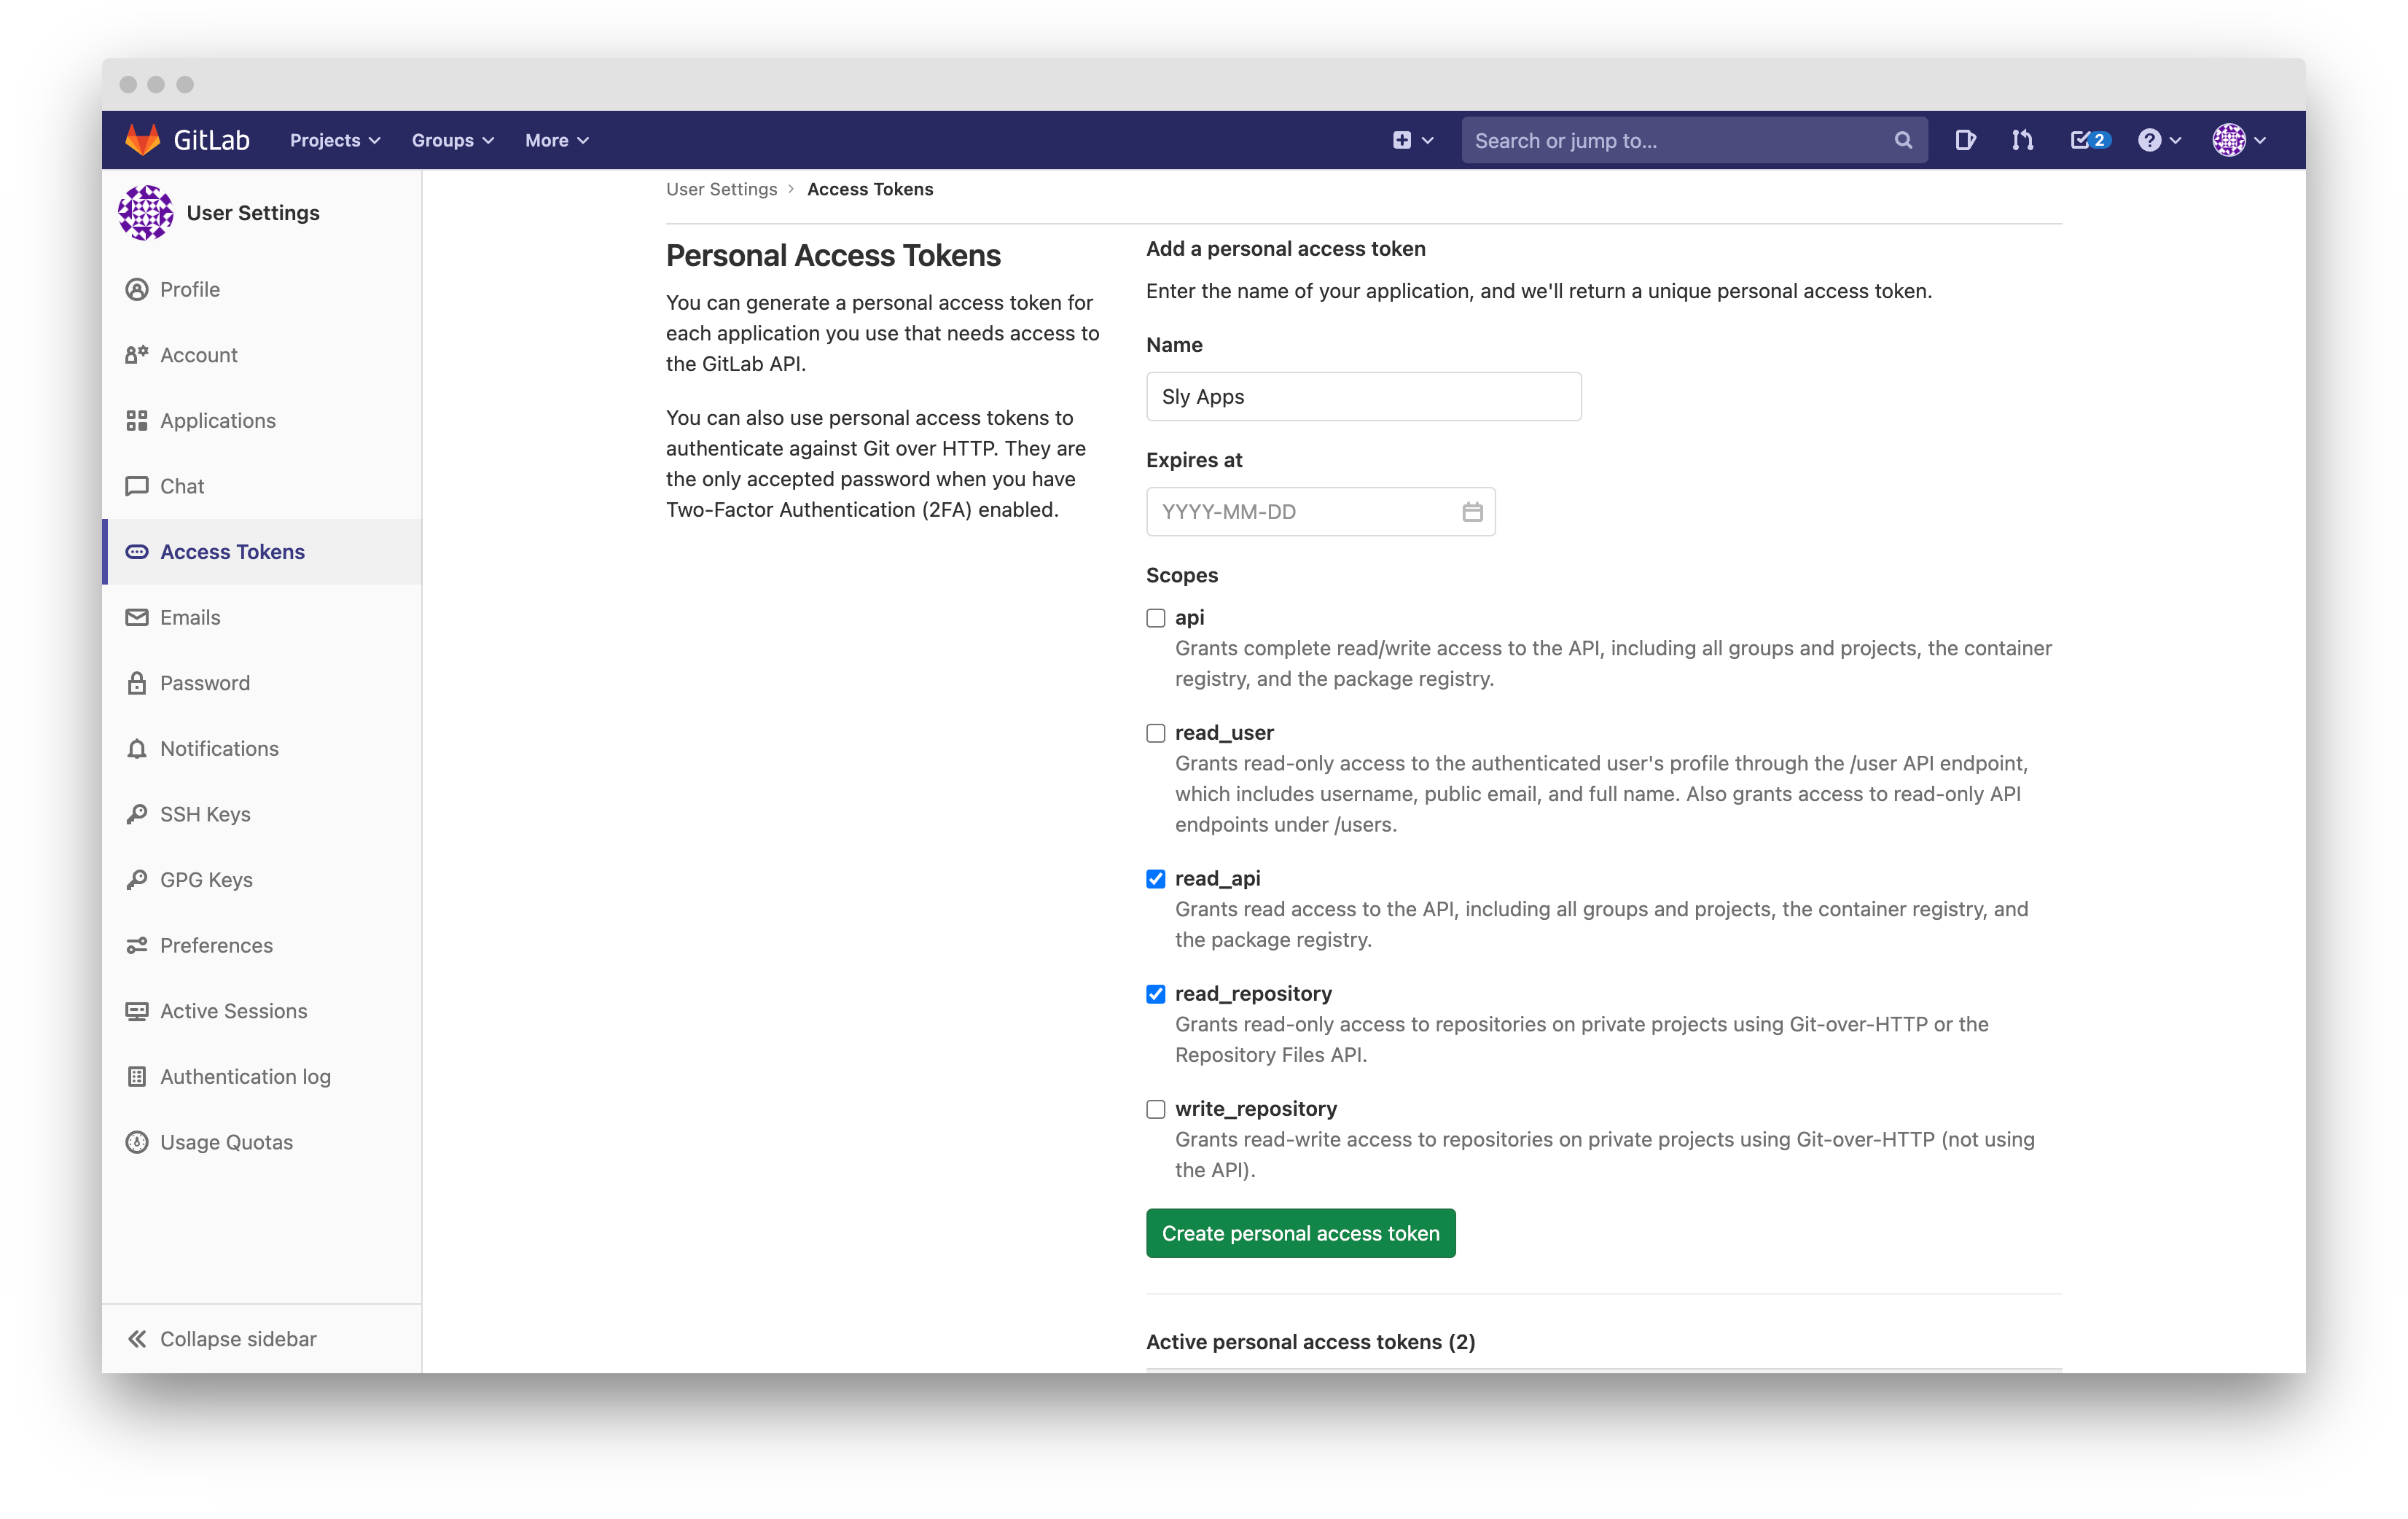
### Step 2. Create repository
#### GitHub
Let's create a new GitHub repository that we will use to deploy a new Supervisely application. Create a [new private GitHub repository](https://github.com/new): do not forget to choose "Private" visibility option.

#### GitLab
Let's create a new GitLab repository that we will use to deploy a new Supervisely application. Create a new project.

{% hint style="info" %}
You can create a public repository alright — you will still need a personal token and further steps are gonna be the same.
{% endhint %}
### Step 3. Make it a Supervisely App repository
In this tutorial we will use [While(true) app](https://github.com/supervisely-ecosystem/while-true-script) code-base as a starting point — it's a bare minimum sample application that, basically, just runs an infinite loop.
We will download its source code, extract it, create a new repository and initialize it:
```
wget -O while-true-app.zip https://github.com/supervisely-ecosystem/while-true-script/archive/refs/heads/master.zip
unzip while-true-app.zip
cd while-true-script-master/
git init
git add .
git commit -m "first commit"
git branch -M main
git remote add origin https://github.com/supervisely/my-first-private-app.git # Your actual repository name here...
git push -u origin main
```
You will find a few files in your new application:
* `config.json` describes your app name, type, etc.
* `requirements.txt` list python packages you will need
* `README.md` in markdown format
* `src/main.py` your entry-point python file
Let's leave it as is for now
### Step 4. Add Application to Supervisely
Go to Ecosystem page → Private apps → Click "Add private app"
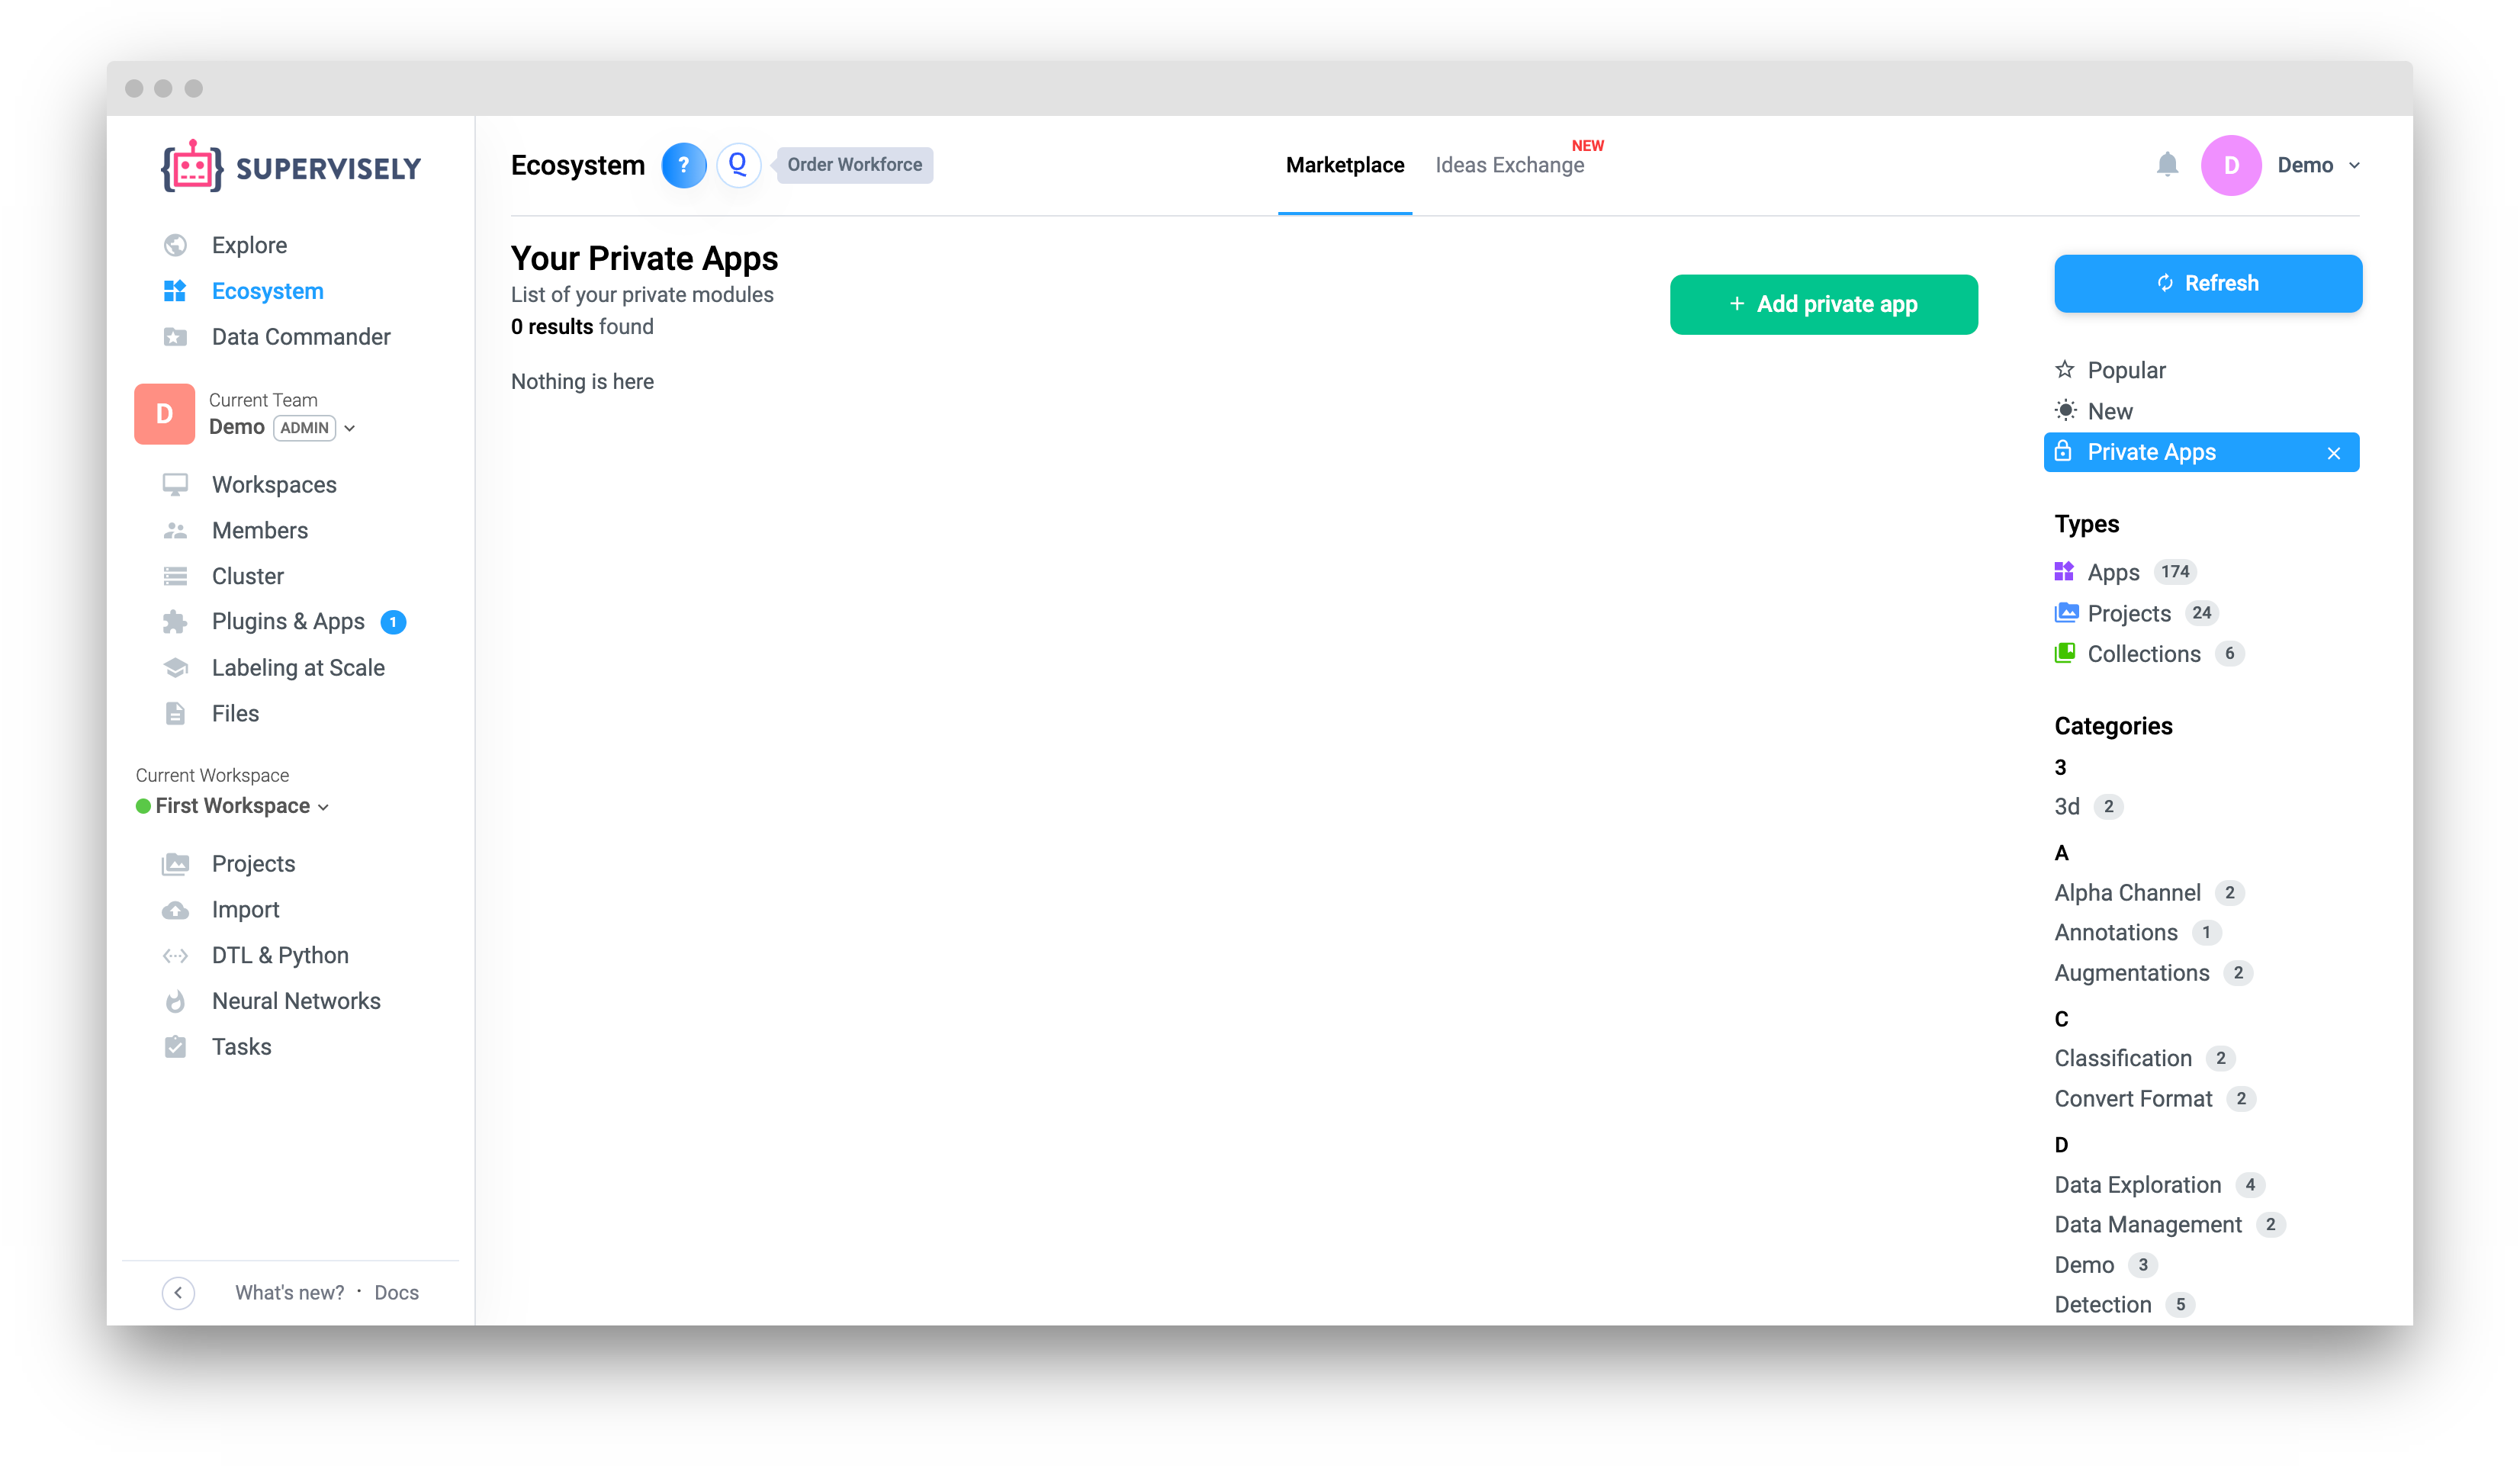

### Step 5. Check your first application
Now, open the Ecosystem page in the left menu and choose "Private Apps" in the right menu. You should see here your new application after a minute. Add it to your team and try it out!
Next time you push a new update to your repository, do not forget to open the application in Ecosystem and click "Refresh" button to update it.
## Option 3. Create a release on GitHub
{% hint style="info" %}
Only for Supervisely Team.
{% endhint %}
### Step 1. Create a repository
Create an app repository on GitHub in a [Supervisely-ecosystem organization](https://github.com/supervisely-ecosystem). \*[How to create an app](/app-development/basics/from-script-to-supervisely-app)
### Step 2. Add GitHub workflow
Add a GitHub workflow files from [this repository](https://github.com/supervisely-ecosystem/workflows):
1. For version releases (see step 3.1): [.github/workflows/release.yml](https://github.com/supervisely-ecosystem/workflows/blob/master/.github/workflows/release.yml)
2. For branch releases (see step 3.2): [.github/workflows/release\_branch.yml](https://github.com/supervisely-ecosystem/workflows/blob/master/.github/workflows/release_branch.yml)
```yaml
name: Release
run-name: Release version "${{ github.event.release.tag_name }}"
on:
release:
types: [published]
branches:
- main
- master
jobs:
Supervisely-Release:
***
with:
***
SUBAPP_PATHS: "__ROOT_APP__, subapp" <-- Change this variable
```
In each of these files, you should change the following variable: `SUBAPP_PATHS` - Paths to directories with applications within the repository (directory where the `config.json` file is located). If the application is located in a root directory, then you should specify `__ROOT_APP__` instead of the path. Paths should be separated by commas.
In the example above, releases are configured for two applications in the repository: the one which is located in `root` directory and the one which is located in the `subapp` directory. Example for the repository with two applications, located in `train` and `serve` directories: `SUBAPP_PATHS: "train, serve"`.
### Step 3. Create a release
#### 3.1 Version release
The workflow we created in the previous step will be triggered when you publish a release in the repository.
To create a release, go to the repository page on GitHub and click on the `Releases` tab. Then click on the `Create a new release` or `Draft a new release` button. Choose a tag version in semver format (v1.0.0) and a release title. Then click on the `Publish release` button.
{% hint style="warning" %}
Do not change the Target of the release. It should always be `main` or `master`.
{% endhint %}


#### 3.2 Branch release
The workflow we created in the previous step will be triggered when you push a branch (except "main" or "master") in the repository.
{% hint style="info" %}
You can disable branch release by adding the branch name to `branches-ignore` list in the `.github/workflows/release_branch.yml` workflow file. See below
{% endhint %}
```yaml
name: Release branch
run-name: Release "${{ github.ref_name }}" branch
on:
push:
branches-ignore:
- main
- master
- branch-to-ignore <-- Add branch name here
jobs:
Supervisely-Release:
```
#### After the release is published the workflow will be triggered and you can see the release progress in the `Actions` tab. If the workflow is successful, the app will appear in the ecosystem.

# Add public app
## Introduction
Supervisely supports both private and public apps.
🔒 **Private apps** are those that are available only on your private Supervisely Instance (Enterprise Edition) in your account. The guidelines for adding public apps is [this tutorial](/app-development/basics/add-private-app).
🌎 **Public apps** are available on all private Supervisely Instances and in Community Edition.
This tutorial covers the case of adding a public app. It means that this app is open-sourced and is available on all Supervisely instances (Community Edition and all private customer's instances with Enterprise Edition license).
{% hint style="info" %}
Only for Supervisely Team.
{% endhint %}
## Version releases and Branch releases
There are two types of releases: `version` and `branch`. The `version` release is made from the `main` or `master` branch. With each `version` release, a release tag is added to the last commit. This tag is used to identify the release version and is important for the app versioning. If during the release process, the tag is not created, the release will be rejected. With version releases, you can specify the release version and description. The `branch` releases are for testing and debugging and are made from any other branch except `main` or `master`. With branch releases, you can't specify the release version and description. The release version will be the branch name.
## Multi-app repositories
In Supervisely you can have a single git repository with multiple applications. It is advised to have connected applications with a common codebase in the same repository. By default `supervisely release` command will release the application from the root directory of the repository. If you have multiple applications in the repository, you can specify the path to the application directory with the `-a` flag. The application directory is a directory with a `config.json` file. Such applications are called `subapps`. For example, if you have a repository with two applications in the `train` and `serve` directories, you can release the `train` application with the following command:
```bash
supervisely release -a train
```
{% hint style="info" %}
When making a release the tag is added to the last commit. And since all of the applications are in the same repository, it is impossible to differentiate the release tags of different applications. Therefore, it is advised to do a release for each subapp with every new version.
{% endhint %}
### Step 1. Create a repository
Create an app repository on GitHub in a [Supervisely-ecosystem organization](https://github.com/supervisely-ecosystem). \*[How to create an app](/app-development/basics/from-script-to-supervisely-app)
### Step 2. Add GitHub workflow
Add a GitHub workflow files from [this repository](https://github.com/supervisely-ecosystem/workflows):
1. To publish the app to the production (see step 3): [.github/workflows/publish.yml](https://github.com/supervisely-ecosystem/workflows/blob/master/.github/workflows/publish.yml)
2. For version releases (see step 4.1): [.github/workflows/release.yml](https://github.com/supervisely-ecosystem/workflows/blob/master/.github/workflows/release.yml)
3. For branch releases (see step 4.2): [.github/workflows/release\_branch.yml](https://github.com/supervisely-ecosystem/workflows/blob/master/.github/workflows/release_branch.yml)
{% hint style="info" %}
Workflow files to release the app as private and as public are the same. If you already have `.github/workflows/release.yml` or `.github/workflows/release_branch.yml` you only need to add `.github/workflows/publish.yml` file.
{% endhint %}
```yaml
name: Release
run-name: Release version "${{ github.event.release.tag_name }}"
on:
release:
types: [published]
branches:
- main
- master
jobs:
Supervisely-Release:
***
with:
***
SUBAPP_PATHS: "__ROOT_APP__, subapp" <-- Change this variable
```
In each of this files, you should change the following variable: `SUBAPP_PATHS` - Paths to directories with applications within the repository (directory where the `config.json` file is located). If the application is located in a root directory, then you should specify `__ROOT_APP__` instead of the path. Paths should be separated by commas.
In the example above, releases are configured for two applications in the repository: the one which is located in `root` directory and the one which is located in the `subapp` directory. Example for the repository with two applications, located in `train` and `serve` directories: `SUBAPP_PATHS: "train, serve"`.
### Step 3. Publish to production
Workflow files to release the app as private and as public are the same. To make your private app public you need to run `Publish to production` workflow.
This workflow will create a public release for all the GitHub releases in the repository. Only releases with valid version names (in semver format) will be published.
To run the workflow you need to go to the `Actions` tab of the repository and select the `Publish app to production` workflow. Then click on the `Run workflow` button. Do not change the Target of the release. It should always be `main` or `master`.

After the app is published to the production you will no longer be able to create releases via CLI tool and you will need to create releases via GitHub interface. How to do it is described below in steps 3.2 and 3.3.
### Step 4. Create a release
#### 4.1 Version release
The workflow we created in the previous step will be triggered when you publish a release in the repository.
To create a release, go to the repository page on GitHub and click on the `Releases` tab. Then click on the `Create a new release` or `Draft a new release` button. Choose a tag version in semver format (v1.0.0) and a release title. Then click on the `Publish release` button.
{% hint style="warning" %}
Do not change the Target of the release. It should always be `main` or `master`.
{% endhint %}


#### 4.2 Branch release
The workflow we created in the previous step will be triggered when you push a branch (except "main" or "master") in the repository.
{% hint style="info" %}
You can disable branch release by adding branch name to `branches-ignore` list in the `.github/workflows/release_branch.yml` workflow file. See below
{% endhint %}
```yaml
name: Release branch
run-name: Release "${{ github.ref_name }}" branch
on:
push:
branches-ignore:
- main
- master
- branch-to-ignore <-- Add branch name here
jobs:
Supervisely-Release:
```
#### After the release is published the workflow will be triggered and you can see the release progress in the `Actions` tab. If the workflow is successful, the app will appear in the ecosystem.

## App development process
### App Development and local tests
The developer creates the application and tests it locally.
### Testing on development instance
When you done with development and local tests, you can test your app on the development instance. To do so you need to create a private app on the development instance and then create a new release. \*[How to add private app](/app-development/basics/add-private-app).
The preferred way is to use CLI tool from the SDK. From the environment where you have installed the SDK, run the following command: `supervisely release` and follow the instructions. Make sure you set the correct server address and API token. After the release is created, you can find the application in the [Private apps tab of the ecosystem](https://dev.supervisely.com/ecosystem/private).
{% hint style="info" %}
For development in a team you need to add `APP_RELEASE_TOKEN` variable to your `~/supervisely.env` file. Ask the administrator for the token.
{% endhint %}
### Releasing the app to the public
When you are ready to publish your app to the public, you need to create a public app. To do so you need to follow the steps described in the [steps 1 to 3](#step-1-create-a-repository) of this tutorial. After the app is published to the public you will no longer be able to create releases via CLI tool.
{% hint style="info" %}
Do not forget to add the app to the [README\_v2](https://github.com/supervisely-ecosystem/repository/blob/master/README_v2.md). It is needed for back-compatibility with older versions of Supervisley instances. To check that the app is released on older instances ask the administrator.
{% endhint %}
### Developing new features
{% hint style="warning" %}
Still in development
{% endhint %}
You may be asking yourself: "How can I develop new features for my app if I can't create releases via CLI tool?". There is a solution for that. Future feature development and testing are done in development branches (any branch other than `main` or `master`).
To activate this mechanism you need to add another workflow file to the repository: You can use [This file](https://github.com/supervisely-ecosystem/workflows/blob/master/.github/workflows/release_dev.yml).
```yaml
name: Supervisely release
run-name: Supervisely ${{ github.repository }} app release
on:
push:
branches-ignore:
- main
- master
jobs:
***
SUBAPP_PATHS: "__ROOT_APP__, subapp"
```
Same as in [step 2](#step-2-add-github-workflow) you need to change the `SUBAPP_PATHS` variable.
This workflow will be triggered on any push to any branch other than `main` or `master`. It will create a release with the name of the branch. For example, if you push to the `dev` branch, the release will be created with the version `dev` and the name `dev branch release`.
{% hint style="info" %}
You can also limit branches on which the workflow will be triggered. To do so you need to replace `branches-ignore` parameter with `branches` parameter to the `on` section of the workflow. For example, if you want to trigger the workflow only on the `test` branch you need to add on: push: branches: - test
{% endhint %}
### Updating the app
When you need to update the app, you need to create a new release. It is described in [step 4](#step-4-updating-the-app) of this tutorial.
## Process for submitting a Public App
Developers can submit their apps for review to Supervisely by following these steps:
### Step 1. Develop and test your app locally
1. Develop your app in a public repository on GitHub.
2. Perform local testing to ensure your app works as expected.
### Step 2. Submit your repository for review
Once your app is ready, email the repository link to , requesting a review for public release. Include the following details:
* Repository URL
* Brief description of your app
* Any special requirements or instructions for testing
### Step 3. Review by Supervisely Team
The Supervisely Team will fork your repository, review your code, and test the app. If the app meets the quality and security standards, the team will publish it as a public app in the Supervisely Ecosystem. If there are issues, you will receive a detailed list of improvements required.
### Step 4: Maintenance and updates
Once the app is published, it will be accessible to all Supervisely users. The app remains maintained by the original developer (through the forked repository), but future changes will be subject to Supervisely's review before release.
{% hint style="info" %}
Supervisely reserves the right to reject apps that do not meet security, quality, or compatibility standards.
{% endhint %}
# App Compatibility
## Introduction
When releasing a public app for Supervisely Ecosystem, you must ensure that your app is compatible with the version of Supervisely instance, which is provided in the [`config.json`](https://developer.supervisely.com/app-development/basics/app-json-config/config.json#instance_version) file. Otherwise, it may lead to an app doesn't work properly.\
ℹ️ If `instance_version` parameter is not specified in the `config.json` file, the release action will be blocked. So this parameter is mandatory.
## Upgrading the Supervisely Python SDK
If you releasing a new version of the Python SDK, which requires some features that are available only in specific versions of Supervisely, for example, you're adding a completely new feature or using new API endpoints, you must update the [`versions.json`](https://github.com/supervisely/supervisely/blob/master/supervisely/versions.json) file in the SDK repo and the table in Documentation [here](https://developer.supervisely.com/getting-started/installation#compatibility-table).\
ℹ️ If you just creating a new release of the app, you don't need to update the compatibility files. They should be updated only when you release a new version of the SDK. So in this case, you can skip this section and jump to the [Creating a new release of the app](#creating-a-new-release-of-the-app) section.
### `versions.json` file
This file is used by release actions to check if the provided version of the SDK is compatible with the Supervisely instance. The file contains a dictionary with the following structure:
```json
{
"6.9.11": "6.72.70",
"6.9.13": "6.73.76",
"6.9.18": "6.73.81",
"6.9.22": "6.73.90",
"6.9.31": "6.73.123",
"6.10.0": "6.73.126"
}
```
Let's take a closer look at the example above. The key is the version of the Supervisely instance, and the value is the minimum version of the SDK that is compatible with the Supervisely instance. Here are some examples:
* instance version `6.9.10` is compatible with all Python SDK versions, `lower than 6.72.70`
* instance version `6.9.12` (which is not present in the file) is compatible with Python SDK versions `higher than 6.72.70` (the previous value in the file) and `lower than 6.73.76` (the next value in the file).
* instance version `6.9.13` is compatible with Python SDK versions `higher or equal to 6.73.76` and `lower than 6.73.81`. Please, pay attention to the `lower or equal` condition, which is different from the previous example.
* instance version `6.10.1` is compatible with all Python SDK versions `higher or equal to 6.73.126`
It may look a bit complicated, but in fact, it becomes very simple when you need to update the file. For example, imagine that you released a new version of the Supervisely Python SDK (e.g. `6.74.0`) and the feature that is required by this release was added in the Supervisely instance version `6.11.0`. So, you simply add this key-value pair to the file and that's it:
```json
{
"6.9.11": "6.72.70",
"6.9.13": "6.73.76",
"6.9.18": "6.73.81",
"6.9.22": "6.73.90",
"6.9.31": "6.73.123",
"6.10.0": "6.73.126"
"6.11.0": "6.74.0"
}
```
Now, you can be sure that any newer release of the SDK will be compatible with the Supervisely instance version `6.11.0` (until new entry won't be added to the file) while older versions will not.\
ℹ️ Please, always add new entries the way, that the file remains sorted by the key in ascending order. It will be much easier for developers to find the required version. In the example above, the new entry should be added to the end of the file.
### Compatibility Table
This works in the same way as the `versions.json` file, but it's used in the Documentation and contains more user-friendly formatting. The table is located [here](https://developer.supervisely.com/getting-started/installation#compatibility-table). It's a simple table with the following structure:
| Instance version | Python SDK version |
| :--------------: | :-------------------: |
| >=6.10.0 | supervisely>=6.73.126 |
| <=6.9.31 | supervisely<=6.73.123 |
| <=6.9.22 | supervisely<=6.73.90 |
| <=6.9.18 | supervisely<=6.73.81 |
| <=6.9.13 | supervisely<=6.73.76 |
| <=6.9.11 | supervisely<=6.72.70 |
As you can see, the order of the instance version is reversed compared to the `versions.json` file. It's done to make it easier for developers to find the required version, so you always see newer versions at the top of the table. And also it contains signs `>=` and `<=` to make it clear which versions are supported. They are used in the same way as in the `versions.json` file.
## Creating a new release of the app
Before creating a new release, please ensure that the compatibility files are up-to-date. After that, for a successful release of the app, the following conditions must be met:
* the repository must not contain any `requirements.txt` files in the directories with the corresponding `config.json` files
* the `config.json` file must contain the `instance_version` parameter
* the `config.json` file must contain the `docker_image` parameter
* the `instance_version` parameter must contain a version that is compatible with the Python SDK version, that is used in the docker image
ℹ️ Those conditions are applied TO ALL apps in the repository, so if at least one app doesn't meet the requirements, the release action will be blocked for the whole repository. If the repo contains multiple apps, you must update it for all of them.
Let's talk about each of these conditions in more detail.
### `requirements.txt` file
It's simple: they're prohibited. The application must use pre-built docker images, which contain all the necessary dependencies. If you need to install additional packages, you can do it in the Dockerfile. If you need to create a release for an app, that contains a `requirements.txt` file, you will need to put everything in the Dockerfile and remove the `requirements.txt` file. If you want to keep some useful list of used requirements for development purposes, you can rename this file to `dev_requirements.txt` and keep it in the repository. Keep in mind, that dependencies from this file won't be installed in the Application session, so it can be used only for development and will not affect the release action.
### `instance_version` and `docker_image` parameters
These parameters are mandatory. The `instance_version` parameter must contain the version of the Supervisely instance, which is required for the app to work properly. The `docker_image` parameter must contain the name of the docker image and its tag, which will be used to run the app. The docker image must contain the Python SDK version, which is compatible with the Supervisely instance version. If any of these parameters are missing, the release action will be blocked.
### `instance_version` and Python SDK version compatibility
This one is the trickiest since there are two different check cases.
#### Case 1: Standard docker images
So, many of the apps in the Supervisely Ecosystem use "default" docker images, which are built automatically on each release of Supervisely Python SDK and all of them contain the Python SDK version in the tag. For example:
```json
{
"docker_image": "supervisely/labeling:6.72.70",
"instance_version": "6.9.12"
}
```
You can find the list of standard docker images [here](https://github.com/supervisely/supervisely/tree/master/docker_images).\
So in this case, the tag of the docker image contains the Python SDK version, which is `6.72.70`. This tag will be used to check the compatibility with the Supervisely instance version. If you run the release action, you will see the following output:
```
INFO: Image name: labeling, Image version: 6.72.70
INFO: Standard docker images: collaboration,data-operations,development,import-export,labeling,synthetic,system,visualization-stats
INFO: Docker image labeling is in the list of standard docker images.
INFO: Assuming that the version of the docker image (6.72.70) is a version of the supervisely Python SDK.
INFO: SDK version to check: 6.72.70
INFO: Version info: {
"6.9.11": "6.72.70",
"6.9.13": "6.73.76",
"6.9.18": "6.73.81",
"6.9.22": "6.73.90",
"6.9.31": "6.73.123",
"6.10.0": "6.73.126"
}
INFO: Minimum SDK version for server v6.9.12 is 6.72.70
INFO: Maximum SDK version for server v6.9.12 is 6.73.76
INFO: Server version 6.9.12 is compatible with SDK version 6.72.70
```
So the docker image was found in the list of standard docker images, the Python SDK version was extracted from the tag, and the compatibility check was successful. The app can be released.
#### Case 2: Custom docker images
If the app is using a custom docker image, which doesn't contain the Python SDK version in the tag, there are two main scenarios:
1. The first one is if we're working with a new docker image, which contains a special label with the Python SDK version.\
When building a new docker image, the build action will automatically retrieve the Python SDK and save it as a label.\
In this case you don't need to do anything, just ensure that the `instance_version` parameter is correct and the release action will be successful.
2. The second scenario is when the app is using an old custom docker image, which doesn't contain the Python SDK version in its labels.\
In this case, you must specify the Supervisely Python SDK version in the release description like this:
```
python_sdk_version: 6.7.10
```
Otherwise, the release action would have no idea which Python SDK version is used in the docker image and the release will be blocked.\
Here's an example of the output if the Python SDK version was not specified in the release description, while the docker image is custom and doesn't contain the Python SDK version in the labels:
```
INFO: Docker image yolo8 is not in the list of standard docker images.
INFO: Will read release description to find the appropriate SDK version.
ERROR: python_sdk_version not found in the release description.
ERROR: When using custom docker images, you must provide the python_sdk_version in the release description, example: python_sdk_version: 6.73.10
```
So, if you see this output, you must add the `python_sdk_version` parameter to the release description and run the release action again. Or you can build a new docker image with the Python SDK version in the labels and run the release action again.
If you are building a Docker image where the SDK will not be used at all, you should disable the SDK version check, since it does not make sense in this case. To do that, you can use the `skip_sdk_version_validation` flag. The easiest way is to specify this flag in the release description.
# Apps with GUI
Supervisely GUI apps tutorial
[**Hello, World!**](/app-development/apps-with-gui/hello-world) - a tutorial that will guide you through the process of creating a simple Python application that uses widgets to provide an interactive user interface.\
[**App in the Image Labeling Tool**](/app-development/apps-with-gui/labeling-tool-app) - developing a custom application, that will work in the Image Labeling Tool and process the labels in real-time.\
[**App in the Video Labeling Tool**](/app-development/apps-with-gui/video-labeling-tool-app) - developing a custom application, that will work in the Video Labeling Tool and validate the video annotation, disabling or enabling buttons for submitting the current video or labeling job. [**In-browser app in the Labeling Tool**](/app-development/apps-with-gui/labeling-tool-web-app) - developing a custom application that will work in the Labeling Tool and process the labels in real-time while working directly with Labeling Tool objects.
# Hello World!
Create simple supervisely app with GUI
## Introduction
In this tutorial you will learn how to create Supervisely apps with GUI on pure python using Supervisely app engine and widgets. We will create a simple "Hello, World!" app that will generate names using `Text` and `Button` widgets.
[`main.py`](https://github.com/supervisely-ecosystem/ui-widgets-demos/blob/master/hello_world/src/main.py) is just 26 lines of code.
## Requirements
Install latest [`supervisely`](https://pypi.org/project/supervisely/) version to have access to all [available widgets](https://ecosystem.supervisely.com/docs/table) and [`names`](https://pypi.org/project/names/) library for names generation
```python
names # requires for names generation
supervisely
```
## How to debug this tutorial
**Step 1.** Prepare `~/supervisely.env` file with credentials. [Learn more here.](/getting-started/basics-of-authentication#how-to-use-in-python)
**Step 2.** Clone [repository](https://github.com/supervisely-ecosystem/ui-widgets-demos) with source code.
```bash
git clone https://github.com/supervisely-ecosystem/ui-widgets-demos
cd ui-widgets-demos
```
**Step 3** Open repository directory in Visual Studio Code.
```bash
code -r .
```
**Step 4** Create [Virtual Environment](https://docs.python.org/3/library/venv.html)
```python
./create_venv.sh
```
**Step 5.** Open the `.vscode/launch.json` file in the project and specify the path to your script in launching configuration arguments.
```python
{
"version": "0.2.0",
"configurations": [
{
"name": "Uvicorn", # ⬅️ Configuration name to select from the dropdown menu in "Run and Debug" section
"type": "python",
"request": "launch",
"module": "uvicorn",
"args": [
"hello_world.src.main:app", # ⬅️ Path to your script
"--host",
"0.0.0.0",
"--port",
"8000",
"--ws",
"websockets",
"--reload"
],
"jinja": true,
"justMyCode": true,
"env": {
"PYTHONPATH": "${workspaceFolder}:${PYTHONPATH}",
"LOG_LEVEL": "DEBUG",
}
}
]
}
```
**Step 6.** Start debugging [`hello_world/src/main.py`](https://github.com/supervisely-ecosystem/ui-widgets-demos/blob/master/hello_world/src/main.py):
* Go to `Run and Debug` section `(Ctrl+Shift+D)`.
* Select configuration name `Uvicorn` that you specified in `launch.json` from configuration dropdown.
* Press green play button or `F5` to start debugging.

## Hello, World! app
### Import libraries
```python
import os
import names # requires
import supervisely as sly
from dotenv import load_dotenv
from supervisely.app.widgets import Button, Card, Container, Text
```
### Init API client
Init API for communicating with Supervisely instance. First, we load environment variables with credentials:
```python
load_dotenv("local.env")
load_dotenv(os.path.expanduser("~/supervisely.env"))
api = sly.Api()
```
### Initialize `Text` and `Button` widgets.
```python
hello_msg = Text(text="Hello, World!", status="text")
start_btn = Button(text="Generate Name", icon="zmdi zmdi-play")
```
### Create app layout
Prepare a layout for app using `Card` widget with the `content` parameter and place 2 widgets that we've just created in the `Container` widget. Place order in the `Container` is also important, we want the "hello text" to be above the name generation button.
```python
layout = Card(
title="Hello, World!",
content=Container([hello_msg, start_btn])
)
```
### Create app using layout
Create an app object with layout parameter.
```python
app = sly.Application(layout=layout)
```
Layout
### Handle button clicks
Use the decorator as shown below to handle button click. When we change `hello_msg.text` value, data will be pushed to web browser via web sockets.
```python
@start_btn.click
def generate_name():
hello_msg.text = f"Hello, {names.get_first_name()}!"
```
Result
# App in the Image Labeling Tool
## Introduction
{% hint style="info" %}
Supervisely instance version >= 6.8.54\
Supervisely SDK version >= 6.72.200\\
In the tutorial, Supervisely Python SDK version is not directly defined in the dev\_requirements.txt and config.json files. But when developing your app, we recommend defining the SDK version in the dev\_requirements.txt and the config.json file.
{% endhint %}
Developing a custom app for the Labeling Tool be useful in the following cases:
1. When you need to combine manual labeling and the algorithmic post-processing of the labels in real-time.
2. When you need to validate created labels for some specific rules in real-time.
In this tutorial, we'll learn how to develop an application that will process masks in real-time while working with the Image Labeling Tool. The processing will be triggered automatically after the mask is created with the Brush tool (after releasing the left mouse button). The demo app will also have settings for enabling / disabling the processing and adjusting the mask processing settings. We will focus on processing the mask in this tutorial, but it's possible to work with different geometries (points, polygons, rectangles, etc.) in the same way.
We will go through the following steps:
[**Step 1.**](#step-1.-preparing-ui-widgets) Prepare UI widgets and the application's layout.\
[**Step 2.**](#step-2.-enabling-advanced-debug-mode) Enable advanced debug mode.\
[**Step 3.**](#step-3.-handling-the-events) Handle the events.\
[**Step 4.**](#step-4.-preparing-config.json-file) Prepare the config.json file.\
[**Step 5.**](#step-5.-using-cache-optional) Use cache (optional).\
[**Step 6.**](#step-6.-processing-the-mask) Process the mask.\
[**Step 7.**](#step-7.-implementing-the-processing-function) Implement the processing function.\
[**Step 8.**](#step-8.-running-the-app-locally) Run the app locally.\
[**Step 9.**](#step-9.-releasing-the-app-and-running-it-in-supervisely) Release the app and run it in Supervisely.\
[**Step 10.**](#step-10.-optimizations-optional) Optimizations (optional).\\
{% hint style="info" %}
Everything you need to reproduce [this tutorial is on GitHub](https://github.com/supervisely-ecosystem/labeling-tool-template): source code and additional app files.
{% endhint %}
## Step 1. Preparing UI widgets
But first, we need to import required packages and modules:
```python
import cv2
import os
import numpy as np
import supervisely as sly
from dotenv import load_dotenv
```
To be able to change the app's settings we need to add UI widgets to the app's layout. So, we'll need two widgets:
* Switch widget for enabling / disabling the processing
* Slider widget for adjusting the mask processing settings
```python
import supervisely.app.development as sly_app_development
from supervisely.app.widgets import Container, Switch, Field, Slider
# Creating widget to turn on/off the processing of labels.
need_processing = Switch(switched=True)
processing_field = Field(
title="Process masks",
description="If turned on, then the mask will be processed after every change on left mouse release after drawing",
content=need_processing,
)
# Creating widget to set the strength of the processing.
dilation_strength = Slider(value=10, min=1, max=50, step=1)
dilation_strength_field = Field(
title="Dilation",
description="Select the strength of the dilation operation",
content=dilation_strength,
)
```
Now, our widgets are ready and we can create the app's layout:
```python
layout = Container(widgets=[processing_field, dilation_strength_field])
app = sly.Application(layout=layout)
```
## Step 2. Enabling advanced debug mode
In this tutorial, we'll be using advanced debug mode. It allows you to run your code locally from VSCode, while the application will be linked to the Labeling Tool and you'll be able to see the results of your actions in the Labeling Tool in real-time.\
Ensure that you have installed the required software from step 3 in [this](https://developer.supervisely.com/app-development/advanced/advanced-debugging#prepare-environment) tutorial. Otherwise, you won't be able to debug it in the Video Labeling Tool.
```python
if sly.is_development():
load_dotenv("local.env")
team_id = sly.env.team_id()
load_dotenv(os.path.expanduser("~/supervisely.env"))
sly_app_development.supervisely_vpn_network(action="up")
sly_app_development.create_debug_task(team_id, port="8000")
```
To use the advanced debug mode, you'll need to prepare two .env files. Learn more about them [here](/app-development/apps-with-gui/labeling-tool-app).
## Step 3. Handling the events
Now, we need to handle the events that will be triggered by the Labeling Tool. In this tutorial, we'll be using only one event, when the left mouse button is released after drawing a mask. So, catching the event will is pretty simple:
```python
@app.event(sly.Event.Brush.DrawLeftMouseReleased)
def brush_left_mouse_released(api: sly.Api, event: sly.Event.Brush.DrawLeftMouseReleased):
sly.logger.info("Left mouse button released after drawing mask with brush")
```
That's it! Our function will receive the API object and the Event object and that's all we need to process the mask. The API object contains credentials for the user, which is currently working in the Labeling Tool and triggered the event. The Event object contains a lot of context information, such as:
```python
team_id: int,
workspace_id: int,
project_id: int,
dataset_id: int,
image_id: int,
label_id: int,
object_class_id: int,
object_class_title: str,
user_id: int,
is_fill: bool,
is_erase: bool,
mask: np.ndarray,
```
So it will be easy to get any required information from the Event object like this:
```python
project_id = event.project_id
dataset_id = event.dataset_id
```
and so on.
## Step 4. Preparing config.json file
Now, when we're ready to start testing our app, we first need to prepare the config.json file, so our app can be launched directly in the Labeling Tool. You can find a lot of information using the config.json file [here](https://developer.supervisely.com/app-development/basics/app-json-config/config.json). In this tutorial, we will pay attention to the specific key in the file:
```json
"integrated_into": ["image_annotation_tool"],
```
So, it will allow us to run the application directly in the Image Labeling Tool.
## Step 5. Using cache (optional)
While working in the Labeling Tool, we are waiting for the results of our actions in real-time. So, we need to process the mask as fast as possible. That's why it's better to use a cache to avoid unnecessary API calls each time the function is triggered (e.g. for the same project meta). In this tutorial, we will use a very simple caching just as a reference. In the real app, you can implement more advanced caching. So, we'll need to cache [Supervisely Project Meta](https://docs.supervisely.com/customization-and-integration/00_ann_format_navi/02_project_classes_and_tags)(list of classes and tags in the project) objects.
```python
project_metas = {}
def get_project_meta(api: sly.Api, project_id: int) -> sly.ProjectMeta:
if project_id not in project_metas:
project_meta = sly.ProjectMeta.from_json(api.project.get_meta(project_id))
project_metas[project_id] = project_meta
else:
project_meta = project_metas[project_id]
return project_meta
```
So, if we already have the image or project meta in the cache, we'll use it. Otherwise, we'll get it from the API and save it to the cache. And it will save us some time when processing the mask.
## Step 6. Processing the mask
And now we're ready to implement the mask processing. But first, let's do some checks to make sure that we need to use the processing of the mask.
```python
@app.event(sly.Event.Brush.DrawLeftMouseReleased)
def brush_left_mouse_released(api: sly.Api, event: sly.Event.Brush.DrawLeftMouseReleased):
sly.logger.info("Left mouse button released after drawing mask with brush")
if not need_processing.is_on():
# Checking if the processing is turned on in the UI.
return
if event.is_erase:
# If the eraser was used, then we don't need to process the label in this tutorial.
return
```
So, if the processing is turned off or the eraser was used, then we don't need to process the mask and we'll just exit the function. And now, let's finally process the mask!
```python
project_meta = get_project_meta(api, event.project_id)
obj_class = project_meta.get_obj_class_by_id(event.object_class_id)
new_mask = process(event.mask)
label = sly.Label(geometry=sly.Bitmap(data=new_mask.astype(bool)), obj_class=obj_class)
api.annotation.update_label(event.label_id, new_label)
```
Let's take a closer look at the process function:
1. We're retrieving the ProjectMeta object from the cache function.
2. We're retrieving the label's object class from the ProjectMeta object.
3. We're processing the mask in the process function.
4. We're creating a new label object with the processed mask and the same object class as the original label.
5. We're uploading the new label to the Supervisely platform.
## Step 7. Implementing the processing function
So, we already have the code for all the application's logic. But we still don't have the code for the processing function. In this tutorial, we'll be using a simple mask transformation just for demonstration purposes. But you can implement any logic you want.
```python
def process(mask: np.ndarray) -> np.ndarray:
dilation = cv2.dilate(mask.astype(np.uint8), None, iterations=dilation_strength.get_value())
return dilation
```
Let's take a closer look at the process function:
1. We're reading the dilation strength from the Slider widget.
2. We're converting the mask to the uint8 type since it cames as a boolean 2D array from the Event object.
3. We're returning a new mask.
## Step 8. Running the app locally
Now, when everything is ready let's run the app and test it in the Labeling Tool. After launching the app from your VSCode you'll need to enter your root password to run the VPN connection. If everything works as it should, you'll see the following message in the terminal:
```bash
INFO: Application startup complete.
```
Now follow the steps below to test the app while running it locally:
1. Open Image Labeling Tool in Supervisely.
2. Select the `Apps` tab.
3. Find the `Develop and Debug` application with a running marker and click `Open`.
4. The app's UI will be opened in the right sidebar.

The application UI including the widgets we created earlier is displayed in the right sidebar. We can turn the processing on and off using the Switch widget and adjust the strength of the processing using the Slider widget. Both events will be visible in the terminal, so it will be easy and convenient to debug the app.
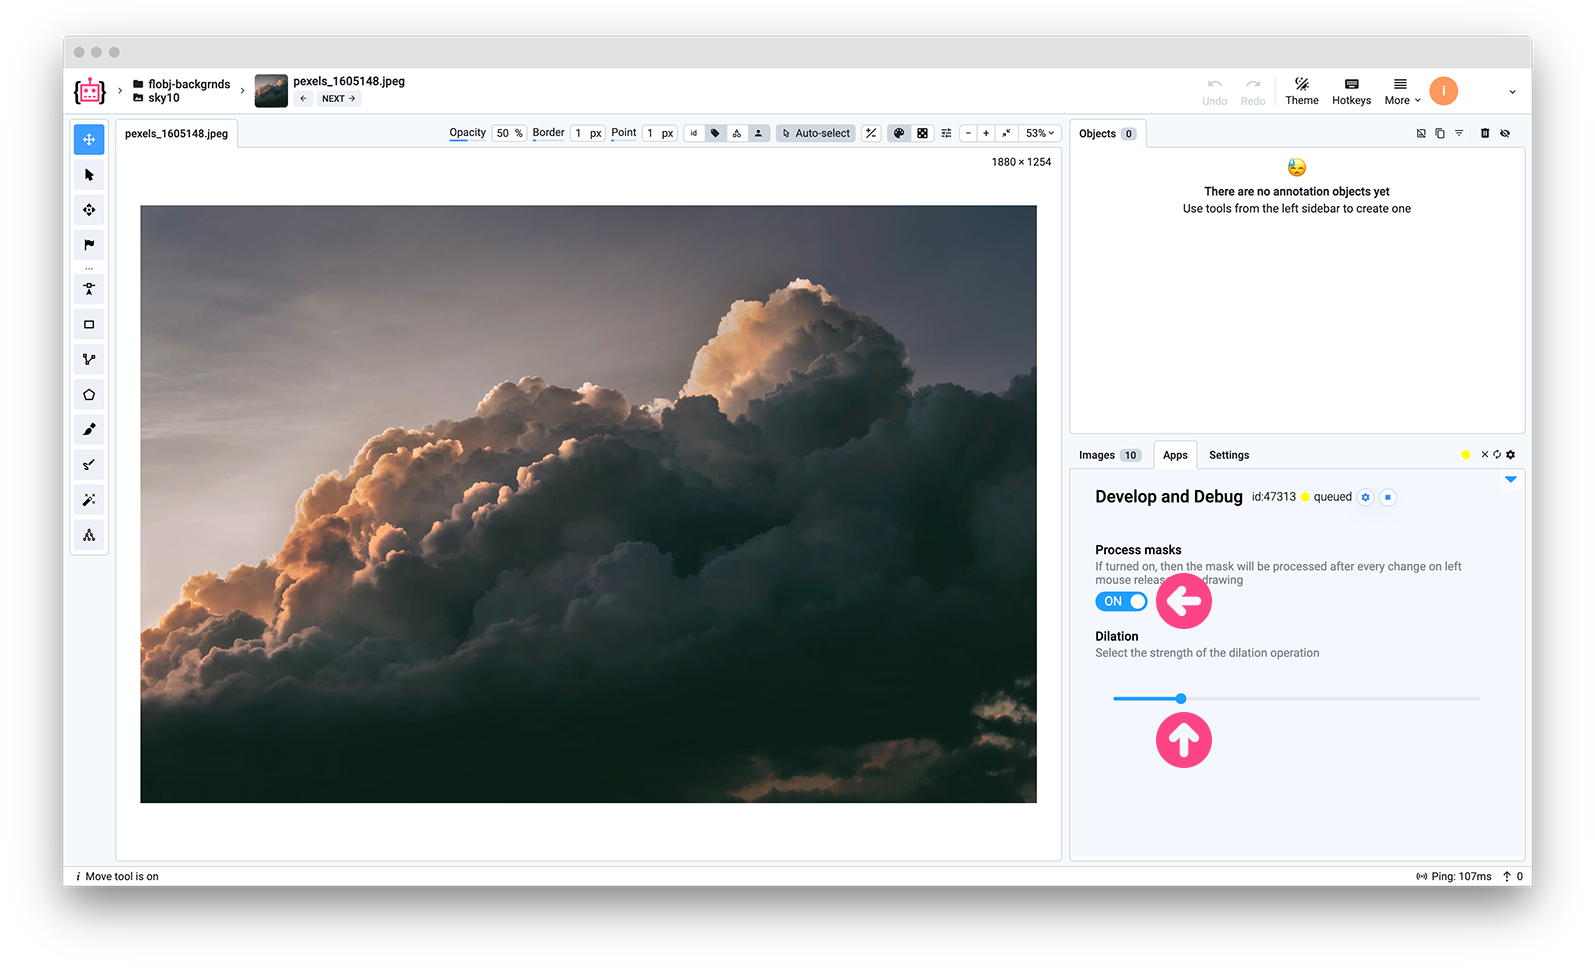
Now we're ready to test our app. Let's try to draw a mask with the Brush tool and release the left mouse button. After that mask will be processed and become a little bit bigger as you will see in the Labeling Tool. Let's also check that our widgets are working properly:
* The Switch widget disables and enables the processing
* The Slider widget changes the strength of the processing
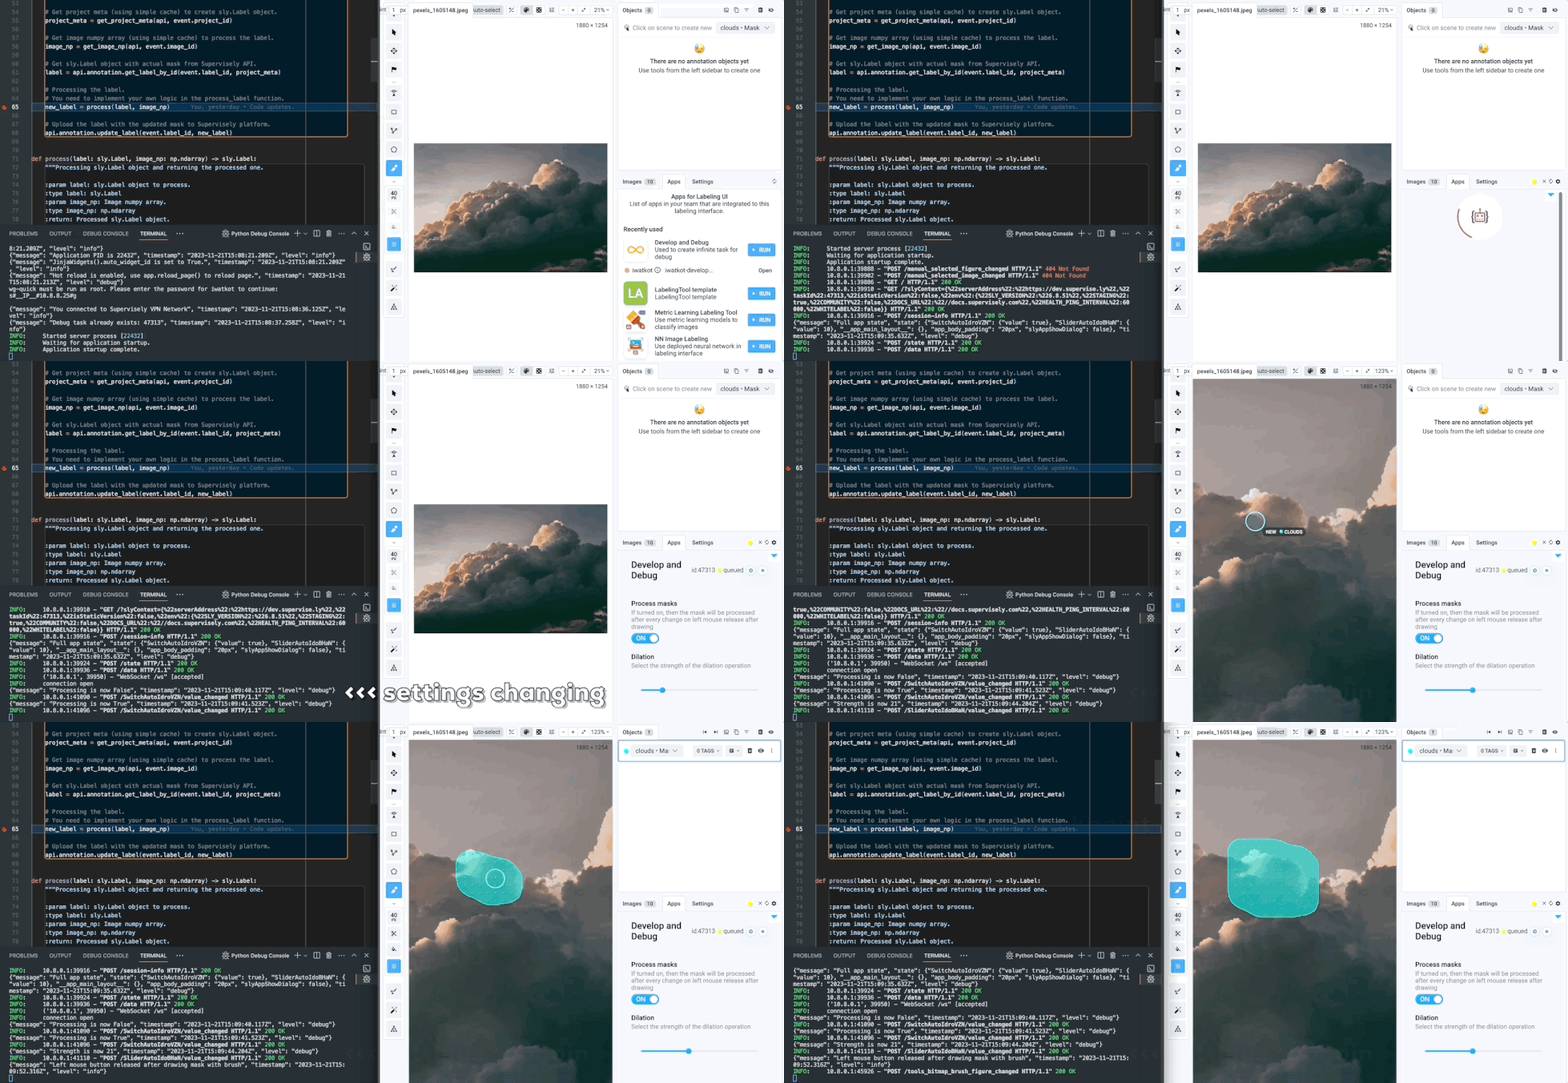
## Step 9. Releasing the app and running it in Supervisely
When we test the application, we can release it and run it in Supervisely. You can find a detailed guide on how to release the app [here](https://developer.supervisely.com/app-development/basics/add-private-app#step-2.-release), but in this tutorial, we'll just use the following command:
```bash
supervisely release
```
After it's done, you can find your app in the Apps section of the platform and run it in the Labeling Tool without running the code locally. The steps are the same as in the previous step, but this time we'll be launching the actual application. In this tutorial the app's name in config.json is `Labeling Tool template`, so we'll find it in the list and click `Run`.
## Step 10. Optimizations (optional)
It's important to mention that the app we developed in this tutorial is not optimized for production use. The main reason is the delays: when the application receives the mask from the event and starts processing it, the user can already draw a new mask. So, the app will be processing the old mask while the user is already working with a new one. And it can lead to unexpected results. In this tutorial, we've implemented a very simple throttling mechanism to avoid this issue. Let's take a closer look at it:
```python
timestamp = None
@app.event(sly.Event.Brush.DrawLeftMouseReleased)
def brush_left_mouse_released(api: sly.Api, event: sly.Event.Brush.DrawLeftMouseReleased):
sly.logger.info("Left mouse button released after drawing mask with brush")
if not need_processing.is_on():
# Checking if the processing is turned on in the UI.
return
if event.is_erase:
# If the eraser was used, then we don't need to process the label in this tutorial.
return
t = datetime.now().timestamp()
global timestamp
timestamp = t
# Here goes the processing code...
if t == timestamp:
api.annotation.update_label(event.label_id, label)
```
So, what's happening here:
1. When the event is triggered, we get the current timestamp at the beginning of the function.
2. We do some processing with our mask.
3. When we're ready to upload the new label to the platform, we're checking if the current timestamp is the same as the one we got at the beginning of the function. If it's not the same, then it means that the user has already drawn a new mask and we don't need to upload the label to the platform.
And this simple solution will do its job in most cases. But it's only implemented for demonstration purposes and it's not optimized for production use since it only handles the cases inside of the application code. That means when the application calls the API to upload the label, there's still a delay before a request reaches the platform and updates the mask in the Labeling Tool. So if you draw new masks fast enough, you can still get outdated results. For those cases, we recommend implementing a more advanced mechanism for handling queues and delays. But it's out of the scope of this tutorial.
## Summary
In this tutorial, we learned how to develop an application for the Image Labeling Tool. We learned how to use UI widgets, how to handle the events and how to process the mask. We also learned how to use advanced debug mode and how to release the app and run it in Supervisely. We hope that this tutorial was helpful for you and you'll be able to use it as a reference for your application.
# App in the Video Labeling Tool
## Introduction
{% hint style="info" %}
Supervisely instance version >= 6.8.58\
Supervisely SDK version >= 6.72.209\\
In the tutorial, Supervisely Python SDK version is not directly defined in the dev\_requirements.txt and config.json files. But when developing your app, we recommend defining the SDK version in the dev\_requirements.txt and the config.json file.
{% endhint %}
Developing a custom app for the Labeling Tool be useful in the following cases:
1. When you need to combine manual labeling and the algorithmic post-processing of the labels in real-time.
2. When you need to validate created labels for some specific rules in real-time.
3. When you need to disable / enable some actions for the labeler (e.g. Submitting the job, etc.) if the created labels do not meet some specific rules.
In this tutorial, we'll learn how to develop an application that will validate the created labels for specified rules by clicking on the `Validate` button. You can implement your logic for the validation of the labels, but here now we'll use the following rules:
1. First, we create a tag on the video for a range of frames.
2. Then, we assign a value to the tag with the name of an object class, where the object with the same class name must be present at least in one frame of the range.
3. When the application is started it will disable the buttons `Confirm` for the video and the `Submit job` for the labeling job.
4. When the `Validate` button is clicked, the application will check the labels for the conditions above and enable the buttons `Confirm` and `Submit job` if the conditions are met, otherwise, the buttons will be disabled.
Our application will show the results of the validation in the table, where each row will contain the following information:
* Status (correct or incorrect).
* Button to jump to the frame range in the video (where an object should be present).
* Object class name.
* Frame range.
The most important thing about this table are buttons in the `Go to Frame` column. When you click on the button, the video will jump to the frame range in the same browser tab. It's a very convenient way to check the labels and the video at the same time.
We will go through the following steps:
[**Step 1.**](#step-1.-implement-ui) Implement UI.\
[**Step 2.**](https://github.com/supervisely/developer-portal/tree/main/app-development/apps-with-gui/video-tool-app.md#step-2.-enabling-integrated-debug-mode) Enable Integrated Debug Mode.\
[**Step 3.**](https://github.com/supervisely/developer-portal/tree/main/app-development/apps-with-gui/video-tool-app.md#step-3.-handling-the-events) Handle the events.\
[**Step 4.**](https://github.com/supervisely/developer-portal/tree/main/app-development/apps-with-gui/video-tool-app.md#step-4.-preparing-the-config.json-file) Prepare the config.json file.\
[**Step 5.**](https://github.com/supervisely/developer-portal/tree/main/app-development/apps-with-gui/video-tool-app.md#step-5.-using-cache-optional) Use cache (optional).\
[**Step 6.**](https://github.com/supervisely/developer-portal/tree/main/app-development/apps-with-gui/video-tool-app.md#step-6.-reading-information-from-the-event) Read information from the event.\
[**Step 7.**](https://github.com/supervisely/developer-portal/tree/main/app-development/apps-with-gui/video-tool-app.md#step-7.-preparing-the-validation-function) Prepare the validation function.\
[**Step 8.**](https://github.com/supervisely/developer-portal/tree/main/app-development/apps-with-gui/video-tool-app.md#step-8.-implementing-the-annotation-validation-function) Implement the annotation validation function.\
[**Step 9.**](https://github.com/supervisely/developer-portal/tree/main/app-development/apps-with-gui/video-tool-app.md#step-9.-running-the-app-locally) Run the app locally.\
[**Step 10.**](https://github.com/supervisely/developer-portal/tree/main/app-development/apps-with-gui/video-tool-app.md#step-10.-releasing-the-private-app-and-running-it-in-supervisely) Release the private app and run it in Supervisely.\\
{% hint style="info" %}
Everything you need to reproduce [this tutorial is on GitHub](https://github.com/supervisely-ecosystem/video-labeling-tool-template): source code and additional app files.
{% endhint %}
## Step 1. Implement UI
But first, we need to import required packages and modules:
```python
import os
from dotenv import load_dotenv
import supervisely as sly
```
To be able to change the app's settings we need to add UI widgets to the app's layout. So, we'll need the following widgets:
* Button to start the validation of the labels.
* Table to display the validation results.
* Checkbox to enable / disable showing all results (including the correct ones).
* Text to show the overall validation result. (optional, just for better UI)
* Field widget to add title and description to the UI section. (optional, just for better UI)
These widgets will be useful for us in this tutorial, but you can use any other widgets you want when developing your app. You can find more information about the UI widgets [here](https://developer.supervisely.com/app-development/widgets).
```python
import supervisely.app.development as sly_app_development
from supervisely.app.widgets import (
Container,
Button,
Field,
Table,
Text,
Checkbox,
)
# Preparing a list of columns for the results table.
columns = [
"Status",
"Go to Frame",
"Object Class",
"Frame Range",
]
# Preparing the status icons, you can change them and use your own.
ok_status = "✅"
error_status = "❌"
# This is the main button that starts the validation.
validate_button = Button("Validate")
validate_field = Field(
title="Validate current video",
description="Press the button to check if the video was annotated correctly",
content=validate_button,
)
# Widget for displaying a result of the check.
validate_text = Text()
validate_text.hide()
# This checkbox allows you to choose which results to show in the table.
# By default, only incorrect results are shown, but you can also show all results.
show_all_checkbox = Checkbox("Show all results")
show_all_field = Field(
title="Which results to show",
description="If checked, will be shown both correct and incorrect results",
content=show_all_checkbox,
)
# This is the table where the results will be displayed.
results_table = Table(columns=columns, fixed_cols=1, sort_direction="desc")
results_table.hide()
```
As you can see, we're using the `hide()` method for the widgets that we don't want to show at the start of the application. Since there are no results yet, we don't need to show the table and the text with the overall result. Later, we'll use the `show()` method to show the widgets when we need them.
Now, our widgets are ready and we can create the app's layout:
```python
# Preparing the layout of the application and creating the application itself.
layout = Container(
widgets=[
check_field,
show_all_field,
check_text,
results_table,
]
)
app = sly.Application(layout=layout)
```
Right now our UI is ready and we can check how it looks just by running the app locally. It's a convenient way to check if everything is ok with the UI before moving to the next steps. The repository with the source code already contains the `.vscode` directory with the `launch.json` file, so you can just run the app from VSCode by hitting `F5` or by clicking `Run and Debug` in the Debug section.
In the screenshot above you can see how the app looks when it's running locally. It's not yet integrated into the Labeling Tool, we'll do it a little bit later and obviously, it would not work, since it's not linked to the Video Labeling Tool, so we just check the UI and make sure that everything is ok with it.
## Step 2. Enabling Integrated Debug Mode
So, after we prepare the UI for our app and run it locally, we can move to the next step and debug the application right in the Video Labeling Tool, while running the code locally from VSCode. It's a very convenient way to debug apps, which will be used in the Labeling Tool and we strongly recommend using it before releasing the app. In this tutorial, we'll be using Integrated Debug Mode. It allows you to run your code locally from VSCode, while the application will be linked to the Labeling Tool and you'll be able to see the results of your actions in the Labeling Tool in real-time.\
Ensure that you have installed the required software from step 3 in [this](https://developer.supervisely.com/app-development/advanced/advanced-debugging#prepare-environment) tutorial. Otherwise, you won't be able to debug it in the Video Labeling Tool.
```python
if sly.is_development():
load_dotenv("local.env")
team_id = sly.env.team_id()
load_dotenv(os.path.expanduser("~/supervisely.env"))
sly_app_development.supervisely_vpn_network(action="up")
sly_app_development.create_debug_task(team_id, port="8000")
```
## Step 3. Handling the events
Now, we need to handle the events that will be triggered by the Labeling Tool. In this tutorial, we'll be using only one event, when the current video has changed. It also will be triggered when the application is launched for the first time. This event is needed for the app, so it will be able to get the current video and its labels.
```python
def video_changed(event_api: sly.Api, event: sly.Event.ManualSelected.VideoChanged):
sly.logger.info("Current video was changed")
```
That's it! Our function will receive the API object and the Event object and that's all we need to process the mask. The API object contains credentials for the user, which is currently working in the Labeling Tool and triggered the event. The Event object contains a lot of context information, such as:
```python
team_id: int,
workspace_id: int,
project_id: int,
dataset_id: int,
figure_id: int,
video_id: int,
frame: int,
tool_class_id: int,
session_id: str,
tool: str,
user_id: int,
job_id: int,
```
So it will be easy to get any required information from the Event object like this:
```python
session_id = event.session_id
dataset_id = event.dataset_id
video_id = event.video_id
project_id = event.project_id
```
and so on.
As you can see, the `event` object contains all the required information, so validation in the tutorial is just one example of what you can do with your application. That means that you can also do some other stuff, for example, process the labels or copy the video to another project, etc. So, your app can do anything you want.
## Step 4. Preparing the config.json file
Now, when we're ready to start testing our app, we first need to prepare the config.json file, so our app can be launched directly in the Video Labeling Tool. You can find a lot of information using the config.json file [here](https://developer.supervisely.com/app-development/basics/app-json-config/config.json). In this tutorial, we will pay attention to the specific key in the file:
```json
"integrated_into": ["video_annotation_tool"],
```
So, it will allow us to run the application directly in the Video Labeling Tool.
## Step 5. Using cache (optional)
To avoid unnecessary requests to the Supervisely API, we can use the cache for [Supervisely Project Meta](https://docs.supervisely.com/customization-and-integration/00_ann_format_navi/02_project_classes_and_tags) (list of classes and tags in the project) objects. In this tutorial, we will use a very simple caching just as a reference. In the real app, you can implement more advanced caching.
```python
# We will store the project meta in a dictionary so that we do not have to download it every time.
project_metas = {}
@app.event(sly.Event.ManualSelected.VideoChanged)
def video_changed(event_api: sly.Api, event: sly.Event.ManualSelected.VideoChanged):
sly.logger.info("Current video was changed")
# some code here...
# Using a simple caching mechanism to avoid downloading the project meta every time.
if event.project_id not in project_metas:
project_meta = sly.ProjectMeta.from_json(api.project.get_meta(event.project_id))
project_metas[event.project_id] = project_meta
```
So, if we already have the project meta in the cache, we don't need to download it again. But if we don't have it, we need to download it and add it to the cache.
## Step 6. Reading information from the event
Now, we need to get the required information from the `event` object and save it in global variables, so we can use it later, when the `Validate` button is clicked.
```python
# Initializing global variables.
api = None
session_id = None
dataset_id = None
video_id = None
```
And now the full code of the `video_changed` function:
```python
@app.event(sly.Event.ManualSelected.VideoChanged)
def video_changed(event_api: sly.Api, event: sly.Event.ManualSelected.VideoChanged):
sly.logger.info("Current video was changed")
global api, session_id, dataset_id, video_id, project_id
# Saving the event parameters to global variables.
api = event_api
session_id = event.session_id
dataset_id = event.dataset_id
video_id = event.video_id
project_id = event.project_id
# Using a simple caching mechanism to avoid downloading the project meta every time.
if event.project_id not in project_metas:
project_meta = sly.ProjectMeta.from_json(api.project.get_meta(event.project_id))
project_metas[event.project_id] = project_meta
api.vid_ann_tool.disable_job_controls(session_id)
```
As you can see in the code above, we're also disabling the buttons `Confirm` for the video and the `Submit job` for the labeling job using the `disable_job_controls` method. We need to do it because we don't want the user to be able to submit the job or confirm the video until the validation is completed. So buttons will be disabled any time the video is changed or when the application is launched for the first time.
## Step 7. Preparing the validation function
Ok, we've got the required information from the event, now we need to prepare the function that will validate the labels. But this function should be called when the `Validate` button is clicked. And we'll use a convenient decorator for this.
```python
# We will store the results in a list of lists, where each list is a row in the table.
table_rows = []
@validate_button.click
def validate_video():
# If the button is pressed, we clear the table and hide it,
# because we will fill the table with new results.
# We also hide the error message from the previous validation
# and will show it again if there are incorrect results.
table_rows.clear()
results_table.hide()
validate_text.hide()
# Retrieving project meta from the cache.
project_meta = project_metas[project_id]
# Downloading the annotation in JSON format and converting it to VideoAnnotation object.
ann_json = api.video.annotation.download(video_id)
ann = sly.VideoAnnotation.from_json(ann_json, project_meta, key_id_map=sly.KeyIdMap())
# Validating the annotation for the current video.
validate_annotation(dataset_id, video_id, ann)
# Filling the table with the results and showing it.
if len(table_rows) > 0:
results_table.read_json({"columns": columns, "data": table_rows})
results_table.show()
# Checking if there are incorrect results.
if any([result[0] == error_status for result in table_rows]):
# If there are incorrect results, we show the error message
# and block the job buttons.
api.vid_ann_tool.disable_job_controls(session_id)
validate_text.text = "The video was not annotated correctly"
validate_text.status = "error"
else:
# If there are no incorrect results, we show the success message
# and unlock the job buttons.
api.vid_ann_tool.enable_job_controls(session_id)
validate_text.text = "The video is annotated correctly"
validate_text.status = "success"
# Showing the validation result.
validate_text.show()
```
Let's take a closer look at the `validate_video` function:
1. We clear the table and hide it because we will fill the table with new results. We also hide the error message from the previous validation and will show it again if there are incorrect results.
2. Then we retrieve the project meta from the cache.
3. Downloading the annotation in JSON format and converting it to the `VideoAnnotation` object.
4. Then we validate the annotation for the current video using the `validate_annotation` function, which is described below.
5. Then we fill the table with the results and show it if there are any results.
6. Then we check if there are incorrect results. If there are, we show the error message and block the job buttons. Otherwise, we show the success message and unlock the job buttons.
7. And finally, we show the validation result.
So now it's time to implement the `validate_annotation` function.
## Step 8. Implementing the annotation validation function
Just to remind you how we will validate the annotation:
1. We check the annotation for the presence of the tags.
2. We read the tag value, which is supposed to be the name of the object class and the frame range.
3. We check if the object with the same class name is present in at least one frame of the range.
After that, we'll need to fill the table with the results. Let's now implement the `validate_annotation` function:
```python
ok_status = "✅"
error_status = "❌"
def validate_annotation(dataset_id: int, video_id: int, ann: sly.VideoAnnotation) -> None:
# Iterating over all tags in the current annotation.
for tag in ann.tags:
# Checking if there's an object with the same ObjClass name
# as value of the current tag in the tag's frame range.
status = ok_status if is_in_range(tag, ann) else error_status
# Preparing an entry for the results table.
result = [
status,
sly.app.widgets.Table.create_button("Open"),
tag.value,
tag.frame_range,
]
# If we're showing all results than we'll add ok results too,
# otherwise we'll add only incorrect results.
if show_all_checkbox.is_checked() or status == error_status:
table_rows.append(result)
def is_in_range(tag: sly.VideoTag, ann: sly.VideoAnnotation) -> bool:
# Retrieving the frame range for the current tag.
range_start, range_end = tag.frame_range
for figure in ann.figures:
if figure.video_object.obj_class.name == tag.value:
if figure.frame_index in range(range_start, range_end + 1):
return True
return False
```
Since we will check the annotation for each tag, we will iterate over all tags in the current annotation and it's better to use another function for this. That's why we've created the `is_in_range()` function. It will check if there's an object with the same ObjClass name as a value of the current tag in the tag's frame range. If there is, it will return `True`, otherwise `False`.
Then we'll use this function in the `validate_annotation()` function. It will iterate over all tags in the current annotation and check them using the `is_in_range()` function. But let's check what the `validate_annotation()` function does in more detail:
1. Iterating over all tags in the current annotation.
2. Calling the `is_in_range()` function to check if there's an object with the same ObjClass name as a value of the current tag in the tag's frame range.
3. Depending on the result of the `is_in_range()` function, we'll set the status of the result to values of the `ok_status` or `error_status` variables.
4. Then we'll prepare an entry for the results table, which is just a list of values for each column in the table.
5. We also check if we need to show all results or only incorrect ones. If we need to show all results, we'll add the result to the table, otherwise, we'll add only incorrect results.
And that's it. Now table rows are saved in the `table_rows` variable and we can fill the table with them. And it will be done in the `validate_video()` function. And our application is ready, let's test it!
## Step 9. Running the app locally
Now, when everything is ready let's run the app and test it in the Labeling Tool. After launching the app from your VSCode you'll need to enter your root password to run the VPN connection. If everything works as it should, you'll see the following message in the terminal:
```bash
INFO: Application startup complete.
```
Now follow the steps below to test the app while running it locally:
1. Open Video Labeling Tool in Supervisely.
2. Select the `Apps` tab.
3. Find the `Develop and Debug` application with a running marker and click `Open`.
4. The app's UI will be opened in the right sidebar.
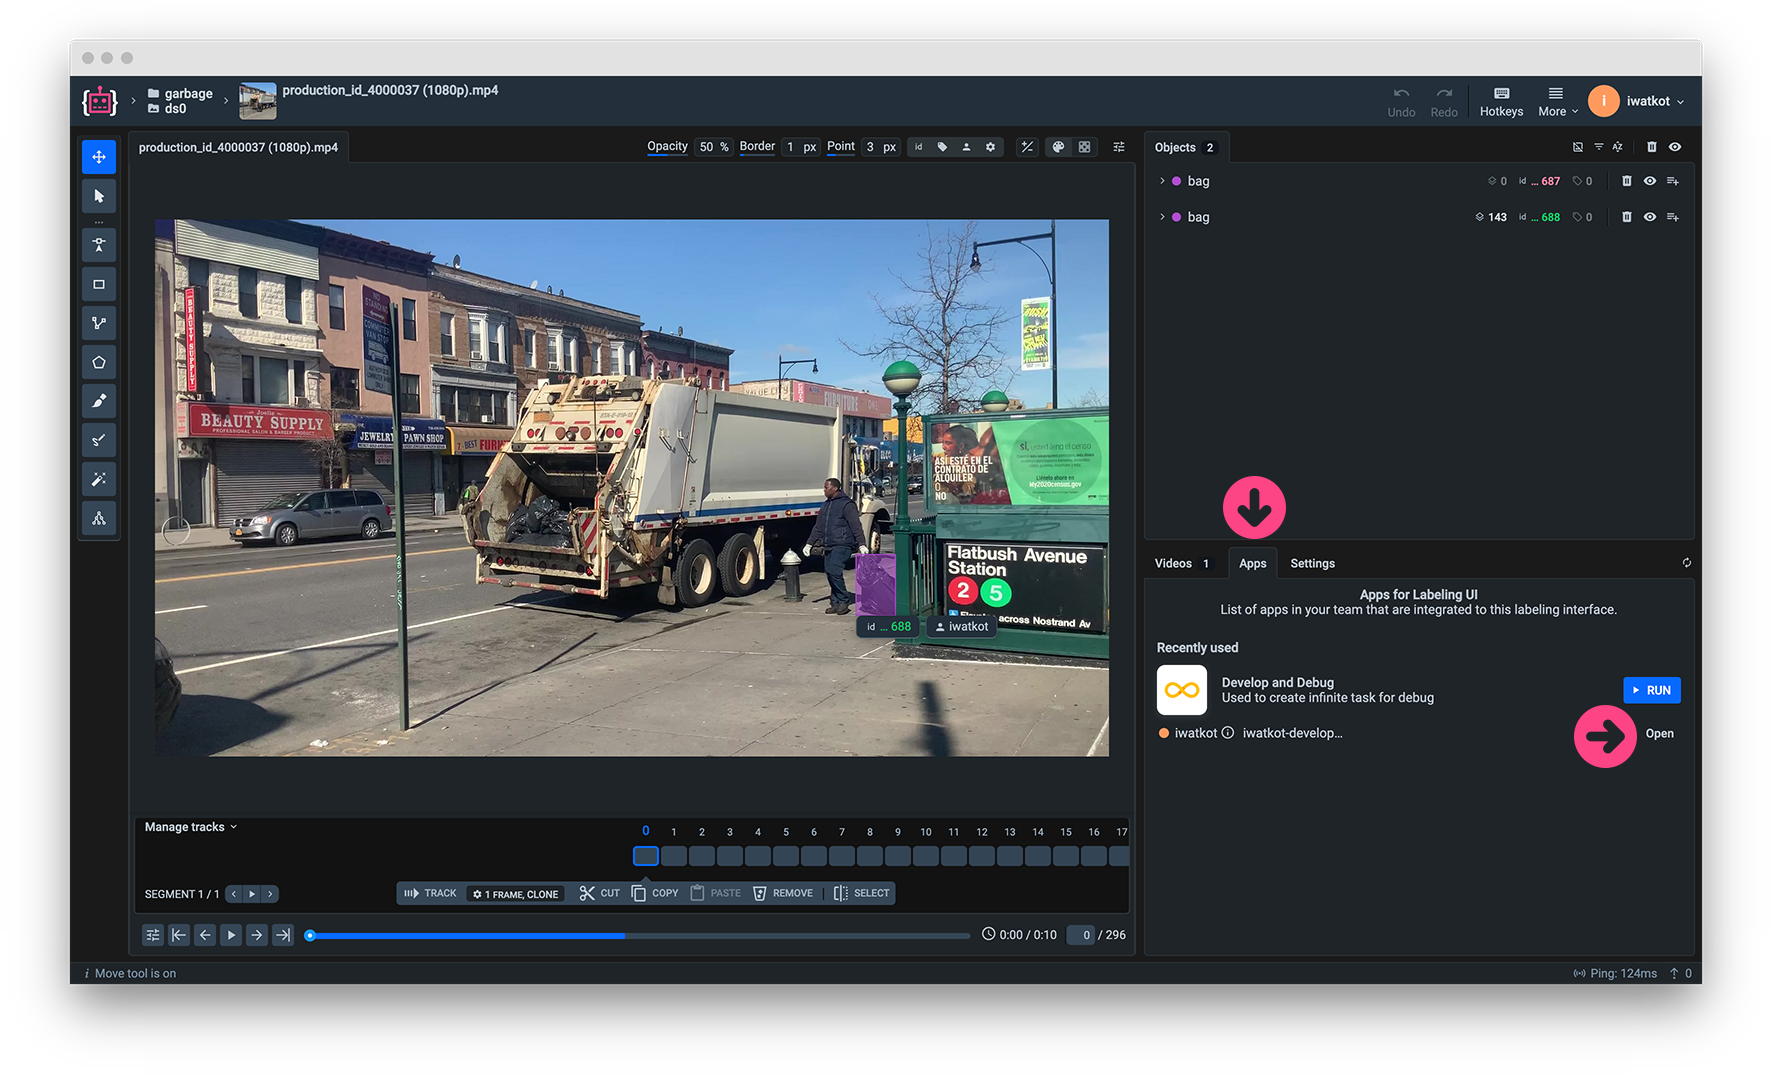
The application UI including the widgets we created earlier is displayed in the right sidebar. The buttons `Confirm` for the video and the `Submit job` for the labeling job are disabled already. Just a reminder: you need to open the actual labeling job to see those buttons, if you will open a video through the `Datasets` tab, you won't see those buttons.
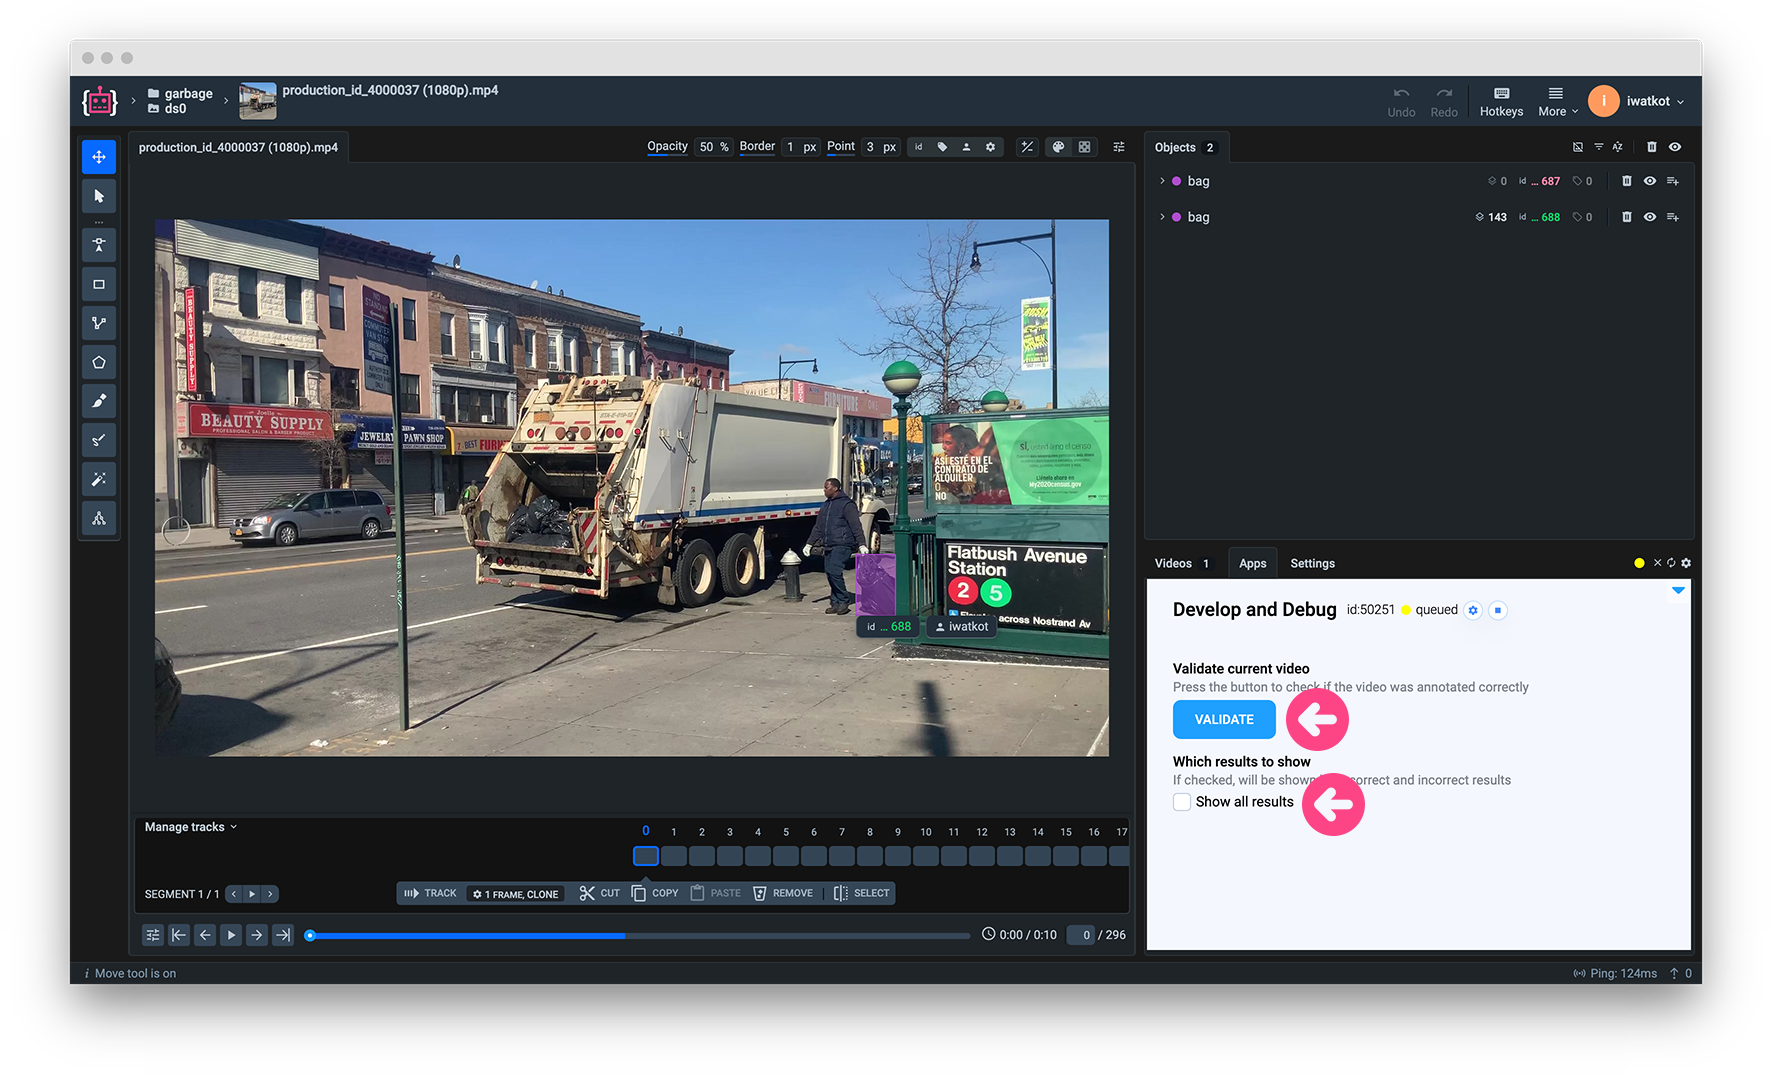
So, now we can start testing the app. But before ensure that you've already created some tags in range of frames for the current video with values that are the same as the object class names. Otherwise, the app will have nothing to validate and the result will always be `The video is annotated correctly`.
Let's also check that our Checkbox widget is working correctly:
1. Check the `Show all results` checkbox.
2. Click the `Validate` button.
3. You should see all the results in the table (both correct and incorrect).
Also, let's try to click on the `Open` button to jump to the exact frame in the video, where the object with the same class name is present. It should work correctly too.

## Step 10. Releasing the private app and running it in Supervisely
When we test the application, we can release it as a 🔒 private app and run it in Supervisely. You can find a detailed guide on how to release the app [here](https://developer.supervisely.com/app-development/basics/add-private-app#step-2.-release), but in this tutorial, we'll just use the following command:
```bash
supervisely release
```
After it's done, you can find your app in the Apps section of the platform and run it in the Labeling Tool without running the code locally. The steps are the same as in the previous step, but this time we'll be launching the actual application. In this tutorial the app's name in config.json is `Video Labeling Tool template`, so we'll find it in the list and click `Run`.
## Summary
In this tutorial, we've learned how to develop a custom app for the Video Labeling Tool. We've learned how to use the UI widgets, how to handle the events, how to read information from the event, how to validate the annotation and show the results in the table. We also learned how to use Integrated Debug Mode and how to release the app and run it in Supervisely. We hope that this tutorial was helpful for you and you'll be able to use it as a reference for your application.
# In-browser app in the Labeling Tool
## Introduction
{% hint style="info" %}
Supervisely instance version >= 6.12.13\
Supervisely SDK version >= 6.73.272
{% endhint %}
Developing a in-browser custom app for the Labeling Tool can be useful in the following cases:
1. When you need to combine manual labeling and the algorithmic post-processing of the labels in real-time.
2. When you need to validate created labels for some specific rules in real-time.
In this tutorial, we'll learn how to develop an application that will process masks in real-time while working with the Image Labeling Tool. The processing will be triggered automatically after the mask is created with the Brush tool (after releasing the left mouse button). The demo app will also have settings for enabling / disabling the processing and adjusting the mask processing settings.
We will go through the following steps:
[**Step 0.**](#step-0.-project-structure) Project structure.\
[**Step 1.**](#step-1.-preparing-ui-widgets) Prepare UI widgets and the application's layout.\
[**Step 2.**](#step-2.-handling-the-events) Handle the events.\
[**Step 3.**](#step-3.-preparing-config.json-file) Prepare the config.json file.\
[**Step 4.**](#step-4.-processing-the-mask) Process the mask.\
[**Step 5.**](#step-5.-implementing-the-processing-function) Implement the processing function.\
[**Step 6.**](#step-6.-debugging-the-app) Debug the app.\
[**Step 7.**](#step-6.-releasing-the-app-and-running-it-in-supervisely) Release the app and run it in Supervisely.\\
{% hint style="info" %}
Everything you need to reproduce [this tutorial is on GitHub](https://github.com/supervisely-ecosystem/client_side_app_template): source code and additional app files. Another example of the app that processes the masks in real-time can be found [here](https://github.com/supervisely-ecosystem/masks-intersections-web-py)
{% endhint %}
## Step 0. Project structure
Supervisely SDK is not used for the application to run, it is only used for debugging and releasing the application. The application will be using the `sly_sdk` module as `supervisely` in the app runtime, so it must be present in the repository for application to work. Any in-browser app for the Labeling Tool should have the following structure:
1. `config.json` - the configuration file that contains the app's settings.
2. the directory that contains the source code of the app. In this tutorial, it will be `src`.
3. `sly_sdk` - module that is required for releasing and running the application. Newest version of the module can be found [here](https://github.com/supervisely-ecosystem/client_side_app_template). This module should not be modified.
4. `requirements.txt` - the file that contains the dependencies of the app.
```plaintext
config.json
src/
main.py
gui.py
sly_sdk/
requirements.txt
```
## Step 1. Preparing UI widgets
To be able to change the app's settings we need to add UI widgets to the app's layout. So, we'll need two widgets:
* Switch widget for enabling / disabling the processing
* Slider widget for adjusting the mask processing settings
{% hint style="info" %}
Only widgets that are present in `sly_sdk.app.widgets` can be used for such applications. But you should import them from `supervisely.app.widgets` in the app's code.
{% endhint %}
{% hint style="info" %}
The `widget_id` argument is required. It should be unique for each widget in the app.
{% endhint %}
```python
# src/gui.py
from supervisely.app.widgets import Container, Slider, Switch, Field
from supervisely.sly_logger import logger
# Creating widget to turn on/off the processing of labels.
need_processing = Switch(switched=True, widget_id="need_processing_widget")
processing_field = Field(
title="Process masks",
description="If turned on, then the mask will be processed after every change on left mouse release after drawing",
content=need_processing,
widget_id="processing_field_widget",
)
# Creating widget to set the strength of the processing.
dilation_strength = Slider(value=10, min=1, max=50, step=1, widget_id="dilation_strength_widget")
dilation_strength_field = Field(
title="Dilation",
description="Select the strength of the dilation operation",
content=dilation_strength,
widget_id="dilation_strength_field_widget",
)
```
Now, our widgets are ready and we can create the app's layout:
```python
layout = Container(widgets=[processing_field, dilation_strength_field], widget_id="layout_widget")
```
## Step 2. Handling the events
Now, we need to handle the events that will be triggered by the Labeling Tool. In this tutorial, we'll be using only one event, when the left mouse button is released after drawing a mask. So, catching the event will is pretty simple:
```python
# src/main.py
from datetime import datetime
import cv2
import numpy as np
from sly_sdk.webpy import WebPyApplication
from sly_sdk.sly_logger import logger
from src.gui import layout, dilation_strength, need_processing
app = WebPyApplication(layout)
@app.event(app.Event.FigureGeometrySaved)
def geometry_updated(event: WebPyApplication.Event.FigureGeometrySaved):
logger.info("Left mouse button released after drawing mask with brush")
```
That's it! Our function will receive the Event object and that's all we need to process the mask. In our case the event will contain a single argument `figure_id`:
```python
figure_id = event.figure_id
```
## Step 3. Preparing config.json file
Now, when we're ready to start testing our app, we first need to prepare the config.json file, so our app can be launched directly in the Labeling Tool. You can find a lot of information using the config.json file [here](https://developer.supervisely.com/app-development/basics/app-json-config/config.json). In this tutorial, we will pay attention to the specific keys in the file:
```json
"type": "client_side_app",
"integrated_into": ["image_annotation_tool"],
"gui_folder_path": "app",
"main_script": "src/main.py",
"src_dir": "src"
```
* `type`: `client_side_app` - it's a key that tells the platform that this app is an in-browser app.
* `integrated_into`: \[`image_annotation_tool`] - it's a key that tells the platform that this app should be integrated into the Image Labeling Tool.
* `gui_folder_path`: `app` - it is a key that tells the platform where the app's layout is located. It can be any non-conflicting path. It will only be used when releasing the application.
* `main_script`: `src/main.py` - it's a key that tells the platform where the main script of the app is located. This fhile should contain the `app` variable of the `WebPyApplication` type.
* `src_dir`: `src` - it's a key that tells the platform where the source code of the app is located. All the modules that you import in the main script should be located in this directory.
So, it will allow us to run the application directly in the Image Labeling Tool.
## Step 4. Processing the mask
And now we're ready to implement the mask processing. But first, let's do some checks to make sure that we need to use the processing of the mask.
```python
# src/main.py
# Creating geometry version dictionary to avoid recursion.
last_geometry_version = {}
@app.event(app.Event.FigureGeometrySaved)
def geometry_updated(event: WebPyApplication.Event.FigureGeometrySaved):
logger.info("Left mouse button released after drawing mask with brush")
if not need_processing.is_on():
# Checking if the processing is turned on in the UI.
return
# Get figure
figure_id = event.figure_id
figure = app.get_figure_by_id(figure_id)
# app.update_figure_geometry will trigger the same event, so we need to avoid infinite recursion.
current_geom_version = figure.geometry_version
last_geom_version = last_geometry_version.get(figure_id, None)
last_geometry_version[figure_id] = current_geom_version + 2
if last_geom_version is not None and last_geom_version >= current_geom_version:
return
```
So, if the processing is turned off or the current geometry version of the figure less or equal to the last version we set, then we don't need to process the mask and we'll just exit the function. And now, let's finally process the mask!
```python
# Get mask from the figure
figure_geometry = figure.geometry
mask = figure_geometry["data"]
# Processing the mask. You need to implement your own logic in the process function.
new_mask = process(mask)
# Update the mask in the figure
app.update_figure_geometry(figure, new_mask)
```
Let's take a closer look at the process function:
1. We're retrieving the geometry from the figure object.
2. We're processing the mask in the process function.
3. We're updating the figure geometry directly in the labeling tool.
## Step 5. Implementing the processing function
So, we already have the code for all the application's logic. But we still don't have the code for the processing function. In this tutorial, we'll be using a simple mask transformation just for demonstration purposes. But you can implement any logic you want.
```python
def process(mask: np.ndarray) -> np.ndarray:
dilation = cv2.dilate(mask.astype(np.uint8), None, iterations=dilation_strength.get_value())
return dilation
```
Let's take a closer look at the process function:
1. We're reading the dilation strength from the Slider widget.
2. We're converting the mask to the uint8 type since it cames as a boolean 2D array from the Event object.
3. We're returning a new mask.
## Step 6. Debugging the app
Since the app is running in the Labeling Tool, we can't use the standard debugging tools. But we developed an approach that allows you to test and debug the application easily.
When you run the app, there is an advanced setting `Client side app server URL`. You can set the URL to the server that will serve the files of the app. We added a `.vscode/launch.json` file to the repository that allows you to run such server which will reload each time you make changes in your src directory. So you can run the server and set the URL in the app settings. After that, each time you make changes and want to test them, you just need to reload the app in the Labeling Tool.
You can find the configuration below:
```json
{
"name": "Advanced Debug in Supervisely platform",
"type": "python",
"request": "launch",
"module": "uvicorn",
"args": [
"sly_sdk.webpy.debug_server:app",
"--host",
"0.0.0.0",
"--port",
"8000",
"--ws",
"websockets",
"--reload",
"--reload-dir",
"src", // config.json[src_dir]
"--reload-exclude",
"app", // config.json[gui_folder_path]
"--reload-exclude",
"app/__webpy_script__.py"
],
"jinja": true,
"justMyCode": false,
"env": {
"PYTHONPATH": "${workspaceFolder}:${PYTHONPATH}",
"LOG_LEVEL": "DEBUG",
"ENV": "development",
}
}
```
## Step 7. Releasing the app and running it in Supervisely
Now we can release it and run it in Supervisely. You can find a detailed guide on how to release the app [here](https://developer.supervisely.com/app-development/basics/add-private-app#step-2.-release), but in this tutorial, we'll just use the following command:
```bash
supervisely release
```
After it's done, you can find your app in the Apps section of the platform and run it in the Labeling Tool. Follow the steps below to run the app in Supervisely:
1. Open Image Labeling Tool in Supervisely.
2. Select the Apps tab.
3. Find the application and click Run.
4. The app's UI will be opened in the right sidebar.
## Summary
In this tutorial, we learned how to develop an in-browser application for the Image Labeling Tool. We learned how to use UI widgets, how to handle the events and how to process the mask. We also learned how to release the app and run it in Supervisely. We hope that this tutorial was helpful for you and you'll be able to use it as a reference for your application.
# Custom import app
# Overview
This tutorial provides guidance on how to create a custom Supervisely import application.
We advise reading our [from script to supervisely app](/app-development/basics/from-script-to-supervisely-app) guide if you are unfamiliar with the [file structure](/app-development/basics/from-script-to-supervisely-app#repository-structure) of a Supervisely app repository because it addresses the majority of the potential questions.
We recommend to use import template for creating custom import applications using class `sly.app.Import` from Supervisely SDK. It is the easiest way to create import app with convenient GUI and designed to speed up and simplify the development of import apps.
* [Learn how to create import app from template](/app-development/create-import-app/create-import-app-from-template)
However, if your use case is not covered by our import template, you can create your own app **from scratch** without the template using basic methods and [widgets](/app-development/widgets) from Supervisely SDK.
* [Learn how to create import app from scratch](/app-development/create-import-app/create-import-app-without-template)
* [Learn how to create import app from scratch with GUI](/app-development/create-import-app/create-import-app-without-template-gui)
## [`sly.app.Import`](https://github.com/supervisely/supervisely/blob/master/supervisely/app/import_template.py) advantages
`sly.app.Import` class will handle boilerplate/routine operations for you:
* ✅ Check that the selected team, workspace, project or dataset exists and that you have access to it
* ⬇️ Download your data from the Supervisely platform to a remote container or local hard drive if you are debugging your app
* 🪄 Automatically detect app context with all required information for creating import app
* ⬆️ Upload result data to new or existing Supervisely project or dataset
* 🧹 Remove source directory from Team Files after successful import
**Simply inherit from `sly.app.Import` and implement the `process` method.**
`sly.app.Import` has a `Context` subclass which contains all required information that you need for importing your data from the Supervisely platform. You can read about `context` in [this section](/app-development/create-import-app/create-import-app-from-template).
```python
class MyImport(sly.app.Import):
def process(self, context: sly.app.Import.Context):
# Implement your import logic here
# Return result project id
# That's it!
```
## Set up an environment for the development
**Follow the steps below:**
**Step 1.** Prepare `~/supervisely.env` file with credentials. [Learn more here.](/getting-started/basics-of-authentication#how-to-use-in-python)
**Step 2.** Fork and clone the repository with source code and create [Virtual Environment](https://docs.python.org/3/library/venv.html).
**for** [**import with template**](/app-development/create-import-app/create-import-app-from-template)**:**
```bash
git clone https://github.com/supervisely-ecosystem/template-import-app
cd template-import-app
./create_venv.sh
```
**for** [**import from scratch**](/app-development/create-import-app/create-import-app-without-template)
```bash
git clone https://github.com/supervisely-ecosystem/import-app-from-scratch
cd import-app-from-scratch
./create_venv.sh
```
**for** [**import from scratch GUI**](/app-development/create-import-app/create-import-app-without-template-gui)
```bash
git clone https://github.com/supervisely-ecosystem/import-app-from-scratch-gui
cd import-app-from-scratch-gui
./create_venv.sh
```
**Step 3.** Open the repository directory in Visual Studio Code.
```bash
code -r .
```
**Step 4.** Select created virtual environment as a Python interpreter.
## How to run it in Supervisely
Submitting an app to the Supervisely Ecosystem isn’t as simple as pushing code to the GitHub repository, but it’s not as complicated as you may think of it either.
Please follow this [link](/app-development/basics/add-private-app) for instructions on adding your app. We have produced a step-by-step guide on how to add your application to the Supervisely Ecosystem.
# From template - simple
A step-by-step tutorial of how to create custom import app using import template from SDK class \`sly.app.Import\`.
## Introduction
In this tutorial, we will create a simple import app that will upload images from a folder, archive or `.txt` file to Supervisely using import app template from SDK.
## Data example
We prepared an app that can import images from: folder, archive or `.txt` file to Supervisely server. We will review each case separately.
**folder and archive structure:**
```
📂my_folder 🗃️ my_archive.zip
┣ 🖼️cat_1.jpg ┣ 🖼️cat_1.jpg
┣ 🖼️cat_2.jpg ┣ 🖼️cat_2.jpg
┗ 🖼️cat_3.jpg ┗ 🖼️cat_3.jpg
```
**.txt file:**
```
https://github.com/supervisely-ecosystem/demo-data-for-import-template/releases/download/images/pexels-couleur-2317904.jpg
https://github.com/supervisely-ecosystem/demo-data-for-import-template/releases/download/images/pexels-kammeran-gonzalezkeola-7925859.jpg
https://github.com/supervisely-ecosystem/demo-data-for-import-template/releases/download/images/pexels-stijn-dijkstra-7177188.jpg
https://github.com/supervisely-ecosystem/demo-data-for-import-template/releases/download/images/pexels-taryn-elliott-3889728.jpg
https://github.com/supervisely-ecosystem/demo-data-for-import-template/releases/download/images/pexels-taryn-elliott-9565787.jpg
```
You can find the above demo folder in the data directory of the template-import-app repo - [here](https://github.com/supervisely-ecosystem/template-import-app/blob/master/data/)
## Tutorial content
* [**Step 1.** How to debug import app](#step-1.-how-to-debug-import-app)
* [**Step 2.** Illustrative example of practical use case](#step-2.-illustrative-example-of-practical-use-case)
* [**Step 3.** How to write an import script](#step-3.-how-to-write-an-import-script)
* [**Step 4.** Advanced debug](#step-4.-advanced-debug)
* [**`sly.app.Import`** reference](#sly.app.import-reference)
Everything you need to reproduce [this tutorial is on GitHub](https://github.com/supervisely-ecosystem/template-import-app): [main.py](https://github.com/supervisely-ecosystem/template-import-app/blob/master/src/main.py).
Before we begin, please clone the project and set up the working environment - [here is a link with a description of the steps](/#set-up-an-environment-for-development).
## Step 1. How to debug import app
Open `local.env` files and set up environment variables by inserting your values here for debugging.
Put data that you want to import to the folder specified in `SLY_APP_DATA_DIR`. This tutorial comes with demo data that you can use for debugging. You can find it in the `data` directory of the template-import-app repo - see [**Data example**](#data-example) section.
For this example, we will use the following environment variables:
**local.env:**
```python
TEAM_ID=8 # ⬅️ change it to your team ID
WORKSPACE_ID=349 # ⬅️ change it to your workspace ID
SLY_APP_DATA_DIR="input/" # ⬅️ path to directory for local debugging
# Optional. Specify following variables if you want to import data to existing:
# PROJECT_ID=20811 # ⬅️ put your value here
# DATASET_ID=64686 # ⬅️ put your value here | requires PROJECT_ID
```
Learn more about environment variables in our [guide](https://developer.supervisely.com/getting-started/environment-variables)
For advanced debugging with GUI see [**Step 3**](#step-3-advanced-debug)
## Step 2. Illustrative example of practical use case
This illustrative example showcasing a simple use case, by leveraging its out-of-the-box graphical user interface (GUI), developers can focus on implementing their own data processing code without having to worry about the underlying infrastructure. The GUI is organized into four sequential steps, each step is designed to guide users through all the necessary options and configurations for import.
In this example we will use local debug mode, and upload files from the local data folder to Supervisely server.
**Step 1. Select Data**
You can specify data folder in `local.env` file. By default it is set to `input/` folder in the root of the project. Place data that you want to import inside this folder.
```python
SLY_APP_DATA_DIR="input/"
```
**Step 2. Settings**
In local debug mode checkbox to remove source files after import has no effect, so it is disabled and unchecked. In production mode, if you check this box, the source data will be deleted from Supervisely server after import.
In this step you can add your custom settings using [Supervisely widgets](/app-development/widgets). We will not be adding any custom settings in this example. You can learn more about how to add custom settings in [**sly.app.Import reference**](#slyappimport-reference) section.
**Step 3. Destination Project**
In this step you can select destination project, by default **`New Project`** tab is selected. In this tab you can select destination: Team, Workspace, and enter new project's name. If you want to import data to existing project or existing dataset, you can select corresponding tab in GUI.
**Step 4. Output**
This step contains **Start Import** button and information about the selections you made in previous steps:
1. Path to source data that will be imported
2. Destination where data will be imported
3. State of the checkbox to remove source data after import
If your import implementation code is correct, data has been successfully imported and there are no errors, you will see project thumbnail with the link to the project on Supervisely server.
## Step 3. How to write an import script
Find source code for this example [here](https://github.com/supervisely-ecosystem/template-import-app/blob/master/src/main.py)
**Step 1. Import libraries**
```python
import os
import shutil
from pathlib import Path
import requests
import supervisely as sly
from dotenv import load_dotenv
```
**Step 2. Load environment variables**
Load ENV variables for debug, has no effect in production
```python
if sly.is_production():
load_dotenv("advanced.env")
else:
load_dotenv("local.env")
load_dotenv(os.path.expanduser("~/supervisely.env"))
```
**Step 3. Create class MyImport that inherits from `sly.app.Import` with process method**
```python
class MyImport(sly.app.Import):
def process(self, context: sly.app.Import.Context):
...
```
**Step 4. Reimplement process method**
1. Create api object to communicate with Supervisely Server
2. Get or create project and dataset
3. Process import data (see step 5)
4. Upload images to dataset (see step 6)
5. Return result project id
```python
class MyImport(sly.app.Import):
def process(self, context: sly.app.Import.Context):
# create api object to communicate with Supervisely Server
api = sly.Api.from_env()
# get or create project
project_id = context.project_id
if project_id is None:
project = api.project.create(
workspace_id=context.workspace_id,
name=context.project_name or "My Project",
change_name_if_conflict=True,
)
project_id = project.id
# get or create dataset
dataset_id = context.dataset_id
if dataset_id is None:
dataset = api.dataset.create(
project_id=project_id, name="ds0", change_name_if_conflict=True
)
dataset_id = dataset.id
# process images and upload them by paths
images_names, images_paths = process_data(context)
upload_images(api, dataset_id, images_names, images_paths, context.progress)
# clean local data dir after successful import
sly.fs.remove_dir(context.path)
return project_id
```
**Step 5. Write function to process data**
In this app example function `process_data` can process 3 types of data:
* folder - `process_folder` function
* archive - `process_archive` function
* `.txt` file with links to images - `process_text_file` function
For local debugging, put data that you want to import to the folder specified in `SLY_APP_DATA_DIR` in `local.env` file. For advanced debugging, selected data is downloaded automatically to the folder specified in `SLY_APP_DATA_DIR` in `advanced.env` file.
Data processing logic is up to you. You can implement any logic that you need to process your data. Please see [`main.py`](https://github.com/supervisely-ecosystem/template-import-app/blob/master/src/main.py) file for implementation details
```python
def process_data(context):
path = os.path.join(context.path, os.listdir(context.path)[0])
if os.path.isdir(path):
images_names, images_paths = process_folder(path)
elif sly.fs.get_file_ext(path) == ".txt":
images_names, images_paths = process_text_file(path, context.progress)
else:
images_names, images_paths = process_archive(path)
return images_names, images_paths
```
**Step 6. Write function to upload images to dataset**
```python
def upload_images(api, dataset_id, images_names, images_paths, progress):
# process images and upload them by paths
with progress(total=len(images_paths)) as pbar:
for img_name, img_path in zip(images_names, images_paths):
try:
# upload image into dataset on Supervisely server
info = api.image.upload_path(dataset_id=dataset_id, name=img_name, path=img_path)
sly.logger.trace(f"Image has been uploaded: id={info.id}, name={info.name}")
except Exception as e:
sly.logger.warn("Skip image", extra={"name": img_name, "reason": repr(e)})
finally:
pbar.update(1)
```
**Step 7. Create app object and execute run() method**
```python
app = MyImport()
app.run()
```
## Step 4. Advanced debug
Advanced debug is for final app testing. In this case, import app will download data from Supervisely server and upload images to new project. You can use this mode to test your app before [publishing it to the Ecosystem](https://developer.supervisely.com/getting-started/cli#release-your-private-apps-using-cli).
Upload [demo data](https://github.com/supervisely-ecosystem/template-import-app/blob/master/data/) provided in the repository to Supervisely Team Files in order to use it in the app or use your own data.
To switch between local and advanced debug modes, select corresponding debug configuration in **`Run & Debug`** menu in VS Code
**advanced.env:**
```python
TEAM_ID=8 # ⬅️ change it to your team ID
WORKSPACE_ID=349 # ⬅️ change it to your workspace ID
SLY_APP_DATA_DIR="input/" # ⬅️ path to directory for local debugging
# Optional. Specify one of the following variables if you want to simulate import from:
# FOLDER="/data/my_folder" # ⬅️ path to directory with data
# FILE="/data/my_archive.zip" # ⬅️ path to archive with data
# FILE="/data/my_file.txt" # ⬅️ path to text file with links to images
# or one of the following variables if you want to import data to existing:
# PROJECT_ID=20811 # ⬅️ put your value here
# DATASET_ID=64686 # ⬅️ put your value here | requires PROJECT_ID
```
Please note that the path you specify in the `SLY_APP_DATA_DIR` variable will be used for storing import data, it means that data that you select or drag & drop in GUI will be automatically downloaded to this folder.
For example:
* path on your local computer could be `/Users/admin/projects/template-import-app/input/`
* path in the current project folder on your local computer could be `input/`
Also note that all paths in Supervisely server are absolute and start from '/' symbol, so you need to specify the full path to the folder, for example `/data/my_folder/`
> Don't forget to add this path to `.gitignore` to exclude it from the list of files tracked by Git.

## `sly.app.Import` reference
Import template has GUI out of the box and allows you skip boilerplate/routine operations. The only thing you need to do is to code your logic in the `process` method. Import template is customizable and allows you to tail import app to your needs.
You can customize `sly.app.Import` class by passing arguments to the constructor:
**allowed\_project\_types**
Pass list of project types that you want to allow for import. By default, all project types are allowed. If you pass None, all project types will be allowed in project selector.
Available project types: `["images", "videos", "volumes", "pointclouds", "pointcloud_episodes"]`
```python
app = MyImport(allowed_project_types=[sly.ProjectType.Volumes])
```
**allowed\_destination\_options**
Pass list of destination options that you want to allow for import. By default, all destination options are allowed. If you pass None, all destination options will be allowed.
Allowed destinations: `["new_project", "existing_project", "existing_dataset"]`
```python
app = MyImport(allowed_destination_options=["New Project"])
```
```python
app = MyImport(allowed_destination_options=["New Project", "Existing Project"])
```
**allowed\_data\_type**
Pass list of data types that you want to allow for import. By default, all data types are allowed. If you pass None, all data types will be allowed.
Allowed data types: `["folder", "file"]`
```python
app = MyImport(allowed_data_type="folder")
```
**`sly.app.Import` class has 2 methods:**
* `process(self, context)`
* `add_custom_settings(self)`
**method process(self, context)**
Main method where you implement your import logic, process and upload data to Supervisely server. This method must return project ID
```python
def process(self, context: sly.app.Import.Context):
# get or create project
project_id = context.project_id
if project_id is None:
project = api.project.create(
workspace_id=context.workspace_id,
name=context.project_name or "My Project",
change_name_if_conflict=True,
)
project_id = project.id
# implement your import logic here
return project_id
```
`context` is passed as an argument to the `process` method and the `context` object will be created automatically when you execute import script. `context` contains all the necessary information about the import process.
You can get the following information from the context:
* `Team ID` - ID of the destination Team
* `Workspace ID` - ID of the destination Workspace
* `Project ID` - ID of an existing project to which data will be imported. None if you import data to a new project
* `Dataset ID` - ID of an existing dataset to which data will be imported. None if you import data to a new dataset
* `Path` - Path to your data on the local machine.
* `Project name` - name of the project provided in the GUI if import data to new project
* `Progress` - `tqdm` progress that you can use in your app to update progress bar
* `Is on agent` - Shows if your data is located on the agent or not
```python
class MyImport(sly.app.Import):
def process(self, context: sly.app.Import.Context):
print(context)
# implement your import logic here
```
Output:
```
Team ID: 8
Workspace ID: 349
Project ID: 8534
Dataset ID: 22852
Path: /data/my_file.txt
Project name: ""
Is on agent: False
```
**method add\_custom\_settings(self)**
You can add custom settings to the import template using the `add_custom_settings(self)` method. This method should return any [Widget](/app-development/widgets). If you want to add multiple widgets, you can return a widget [`Container`](/app-development/widgets/layouts-and-containers/container).
```python
class MyImport(sly.app.Import):
def add_custom_settings(self):
# create widget
self.ann_checkbox = sly.app.widgets.Checkbox("Upload annotations", True)
# return widget with custom settings
return self.ann_checkbox
def process(self, context: sly.app.Import.Context):
...
# get widget state in process method
with_annotations = self.ann_checkbox.is_checked()
...
```
# From scratch - simple
A step-by-step tutorial of how to create custom import Supervisely app from scratch.
## Introduction
In this tutorial, we will create a simple import app that will import images from selected folder to Supervisely server. This application is headless (no GUI) and is designed to demonstrate the basic principles of creating minimalistic import applications.
## Data example
```
📂my_folder
┣ 🖼️cat_1.jpg
┣ 🖼️cat_2.jpg
┗ 🖼️cat_3.jpg
```
You can find the above demo files in the data directory of the template-import-app repo - [here](https://github.com/supervisely-ecosystem/import-app-from-scratch/blob/master/data/)
## Tutorial content
* [**Step 1.** How to debug import app](#step-1.-how-to-debug-import-app)
* [**Step 2.** How to write import script](#step-2.-how-to-write-import-script)
* [**Step3.** Advanced debug](#step-3.-advanced-debug)
Everything you need to reproduce [this tutorial is on GitHub](https://github.com/supervisely-ecosystem/import-app-from-scratch): [main.py](https://github.com/supervisely-ecosystem/import-app-from-scratch/blob/master/src/main.py).
Before we begin, please clone the project and set up the working environment - [here is a link with a description of the steps](/app-development/create-import-app/overview#set-up-an-environment-for-the-development).
## Step 1. How to debug import app
Open `local.env` and set up environment variables by inserting your values here for debugging. Learn more about environment variables in our [guide](/getting-started/environment-variables)
**local.env:**
```python
TEAM_ID=8 # ⬅️ change it to your team ID
WORKSPACE_ID=349 # ⬅️ change it to your workspace ID
FOLDER="data/my_folder/" # ⬅️ path to folder on local machine
```
## Step 2. How to write import script
Find source code for this example - [main.py](https://github.com/supervisely-ecosystem/import-app-from-scratch/blob/master/src/main.py)
**Step 1. Import libraries**
```python
import os
import supervisely as sly
from dotenv import load_dotenv
from tqdm import tqdm
```
**Step 2. Load environment variables**
Load ENV variables for debug, has no effect in production.
```python
IS_PRODUCTION = sly.is_production()
if IS_PRODUCTION is True:
load_dotenv("advanced.env")
STORAGE_DIR = sly.app.get_data_dir()
else:
load_dotenv("local.env")
load_dotenv(os.path.expanduser("~/supervisely.env"))
# Get ENV variables
TEAM_ID = sly.env.team_id()
WORKSPACE_ID = sly.env.workspace_id()
PATH_TO_FOLDER = sly.env.folder()
```
**Step 3. Initialize API object**
Create API object to communicate with Supervisely Server and initialize application. Loads from `supervisely.env` file
```python
# Create api object to communicate with Supervisely Server
api = sly.Api.from_env()
# Initialize application
app = sly.Application()
```
**Step 4. Create new project and dataset on Supervisely server**
```python
project = api.project.create(WORKSPACE_ID, "My Project", change_name_if_conflict=True)
dataset = api.dataset.create(project.id, "ds0", change_name_if_conflict=True)
```
**Step 5. Download data from Supervisely server**
Check if app was launched in production mode and download data from Supervisely server
```python
# Download folder from Supervisely server
if IS_PRODUCTION is True:
api.file.download_directory(TEAM_ID, PATH_TO_FOLDER, STORAGE_DIR)
# Set path to folder with images
PATH_TO_FOLDER = STORAGE_DIR
```
**Step 6. List files in directory**
Get list of files in directory and create list of images names and paths
```python
images_names = []
images_paths = []
for file in os.listdir(PATH_TO_FOLDER):
file_path = os.path.join(PATH_TO_FOLDER, file)
images_names.append(file)
images_paths.append(file_path)
```
**Step 7. Upload images to new project**
```python
# Process folder with images and upload them to Supervisely server
with tqdm(total=len(images_paths)) as pbar:
for img_name, img_path in zip(images_names, images_paths):
try:
# Upload image into dataset on Supervisely server
info = api.image.upload_path(dataset_id=dataset.id, name=img_name, path=img_path)
sly.logger.trace(f"Image has been uploaded: id={info.id}, name={info.name}")
except Exception as e:
sly.logger.warn("Skip image", extra={"name": img_name, "reason": repr(e)})
finally:
# Update progress bar
pbar.update(1)
# Log info about result project
sly.logger.info(f"Result project: id={project.id}, name={project.name}")
```
**Output of the app in development mode:**
```
{"message": "Application is running on localhost in development mode", "timestamp": "2023-06-09T17:06:12.671Z", "level": "info"}
{"message": "Application PID is 11269", "timestamp": "2023-06-09T17:06:12.671Z", "level": "info"}
Processing: 100%|██████████████████████████████████████████████████████████████████████████| 3/3 [00:01<00:00, 2.02it/s]
{"message": "Result project: id=22962, name=My Project_004", "timestamp": "2023-06-09T17:06:16.139Z", "level": "info"}
```
## Step 3. Advanced debug
Advanced debug is for final app testing. In this case, import app will download data from Supervisely server. You can use this mode to test your app before [publishing it to the Ecosystem](/app-development/basics/add-private-app).
To switch between local and advanced debug modes, select corresponding debug configuration in **`Run & Debug`** menu in VS Code
Open `advanced.env` and set up [environment variables](/getting-started/environment-variables) by inserting your values here for debugging.
**advanced.env:**
```python
TEAM_ID=8 # ⬅️ change it to your team ID
WORKSPACE_ID=349 # ⬅️ change it to your workspace ID
FOLDER="/data/my_folder/" # ⬅️ path to folder on Supervisely server
SLY_APP_DATA_DIR="input/" # ⬅️ path to directory for local debugging
```
Please note that the path you specify in the `SLY_APP_DATA_DIR` variable will be used for storing import data.
For example:
* path on your local computer could be `/Users/admin/projects/import-app-from-scratch/input/`
* path in the current project folder on your local computer could be `input/`
Also note that all paths on Supervisely server are absolute and start from '/' symbol, so you need to specify the full path to the folder, for example `/data/my_folder/`
> Don't forget to add this path to `.gitignore` to exclude it from the list of files tracked by Git.
**Output of the app in production mode:**
```
{"message": "Application is running on Supervisely Platform in production mode", "timestamp": "2023-06-09T16:12:40.673Z", "level": "info"}
{"message": "Application PID is 10646", "timestamp": "2023-06-09T16:12:40.673Z", "level": "info"}
{"message": "progress", "event_type": "EventType.PROGRESS", "subtask": "Processing", "current": 0, "total": 3, "timestamp": "2023-06-09T16:12:42.911Z", "level": "info"}
...
{"message": "progress", "event_type": "EventType.PROGRESS", "subtask": "Processing", "current": 3, "total": 3, "timestamp": "2023-06-09T16:12:44.355Z", "level": "info"}
```
# From scratch GUI - advanced
A step-by-step tutorial of how to create custom import Supervisely app from scratch with GUI.
## Introduction
In this tutorial, we will create a simple import app that will import images from selected folder to Supervisely server. This application has GUI and is designed to demonstrate the basic principles of creating import applications with interface.
## Data example
```
📂my_folder
┣ 🖼️cat_1.jpg
┣ 🖼️cat_2.jpg
┗ 🖼️cat_3.jpg
```
You can find the above demo files in the data directory of the template-import-app repo - [here](https://github.com/supervisely-ecosystem/import-app-from-scratch-gui/blob/master/data/)
## Tutorial content
* [**Step 1.** How to debug import app](#step-1.-how-to-debug-import-app)
* [**Step 2.** How to write import script](#step-2.-how-to-write-import-script)
* [**Step 3.** Advanced debug](#step-3.-advanced-debug)
Everything you need to reproduce [this tutorial is on GitHub:](https://github.com/supervisely-ecosystem/import-app-from-scratch-gui) [main.py](https://github.com/supervisely-ecosystem/import-app-from-scratch-gui/blob/master/src/main.py).
Before we begin, please clone the project and set up the working environment - [here is a link with a description of the steps](/app-development/create-import-app/overview#set-up-an-environment-for-the-development).
## Step 1. How to debug import app
Open `local.env` and set up environment variables by inserting your values here for debugging. Learn more about environment variables in our [guide](/getting-started/environment-variables)
**local.env:**
```python
TEAM_ID=8 # ⬅️ change it to your team ID
WORKSPACE_ID=349 # ⬅️ change it to your workspace ID
FOLDER="data/my_folder" # ⬅️ path to folder on local machine
```
## Step 2. How to write import script
Find source code for this example - [main.py](https://github.com/supervisely-ecosystem/import-app-from-scratch-gui/blob/master/src/main.py)
**Step 1. Import libraries**
```python
import os
import supervisely as sly
from dotenv import load_dotenv
# to show error message to user with dialog window
from supervisely.app import DialogWindowError
# widgets that we will use in GUI
from supervisely.app.widgets import (
Button,
Card,
Checkbox,
Container,
Input,
ProjectThumbnail,
SelectWorkspace,
SlyTqdm,
TeamFilesSelector,
Text,
)
```
**Step 2. Load environment variables**
Load ENV variables for debug, has no effect in production.
```python
IS_PRODUCTION = sly.is_production()
if IS_PRODUCTION is True:
load_dotenv("advanced.env")
STORAGE_DIR = sly.app.get_data_dir()
else:
load_dotenv("local.env")
load_dotenv(os.path.expanduser("~/supervisely.env"))
# Get ENV variables
TEAM_ID = sly.env.team_id()
WORKSPACE_ID = sly.env.workspace_id()
PATH_TO_FOLDER = sly.env.folder(raise_not_found=False)
```
**Step 3. Initialize API object**
Create API object to communicate with Supervisely Server. Loads from `supervisely.env` file
```python
api = sly.Api.from_env()
```
**Step 4. Make GUI with widgets**
We will build GUI for our import app using [Supervisely widgets](https://developer.supervisely.com/app-development/widgets).
We will breakdown our GUI into 4 steps:
1. File selector to select folder with data.
2. Import settings.
3. Destination project settings.
4. Output card with button to start import and info about result project.
Let's take a closer look at each step:
1. Create FileSelector widget to select folder with data and place it into Card widget with validation.
2. Create Checkbox widget to select if we want to remove source files after successful import and place it into Card widget.
3. Create workspace selector and input widget to enter project name. Combine those widgets into Container widget and place it into Card widget. Using workspace selector we can select team and workspace where we want to create project in which data will be imported.
4. Create Button widget to start import process.
5. Create output text to show warnings and info messages.
6. Create progress widget to show progress of import process.
7. Create ProjectThumbnail to show result project with link to it.
8. Combine all button, output text, progress and project thumbnail .
9. Create layout by combining all created cards into one container.
10. Initialize app object with layout as an argument.
```python
# Create GUI
# Step 1: Import Data
if IS_PRODUCTION is True:
tf_selector = TeamFilesSelector(
team_id=TEAM_ID, multiple_selection=False, max_height=300, selection_file_type="folder"
)
data_card = Card(
title="Select Data",
description="Check folder in File Browser to import it",
content=tf_selector,
)
else:
data_text = Text()
if PATH_TO_FOLDER is None:
data_text.set("Please, specify path to folder with data in local.env file.", "error")
else:
if os.path.isdir(PATH_TO_FOLDER):
data_text.set(f"Folder with data: '{PATH_TO_FOLDER}'", "success")
else:
data_text.set(f"Folder with data: '{PATH_TO_FOLDER}' not found", "error")
data_card = Card(
title="Local Data", description="App was launched in development mode.", content=data_text
)
# Step 2: Settings
remove_source_files = Checkbox("Remove source files after successful import", checked=True)
settings_card = Card(
title="Settings", description="Select import settings", content=remove_source_files
)
# Step 3: Create Project
ws_selector = SelectWorkspace(default_id=WORKSPACE_ID, team_id=TEAM_ID)
output_project_name = Input(value="My Project")
project_creator = Container(widgets=[ws_selector, output_project_name])
project_card = Card(
title="Create Project",
description="Select destination team, workspace and enter project name",
content=project_creator,
)
# Step 4: Output
start_import_btn = Button(text="Start Import")
output_project_thumbnail = ProjectThumbnail()
output_project_thumbnail.hide()
output_text = Text()
output_text.hide()
output_progress = SlyTqdm()
output_progress.hide()
output_container = Container(
widgets=[output_project_thumbnail, output_text, output_progress, start_import_btn]
)
output_card = Card(
title="Output", description="Press button to start import", content=output_container
)
# create app object
layout = Container(widgets=[data_card, settings_card, project_card, output_card])
app = sly.Application(layout=layout)
```
**Step 5. Add button click handler to start import process**
In this step we will create button click handler. We will get state of all widgets and import data to new project.
```python
@start_import_btn.click
def start_import():
try:
data_card.lock()
settings_card.lock()
project_card.lock()
output_text.hide()
project_name = output_project_name.get_value()
if project_name is None or project_name == "":
output_text.set(text="Please, enter project name", status="error")
output_text.show()
return
# download folder from Supervisely Team Files to local storage if debugging in production mode
PATH_TO_FOLDER = tf_selector.get_selected_paths()
if len(PATH_TO_FOLDER) > 0:
PATH_TO_FOLDER = PATH_TO_FOLDER[0]
# specify local path to download
local_data_path = os.path.join(
STORAGE_DIR, os.path.basename(PATH_TO_FOLDER).lstrip("/")
)
# download file from Supervisely Team Files to local storage
api.file.download_directory(
team_id=TEAM_ID, remote_path=PATH_TO_FOLDER, local_save_path=local_data_path
)
else:
output_text.set(
text="Please, specify path to folder in Supervisely Team Files", status="error"
)
output_text.show()
return
project = api.project.create(WORKSPACE_ID, project_name, change_name_if_conflict=True)
dataset = api.dataset.create(project.id, "ds0", change_name_if_conflict=True)
output_progress.show()
images_names = []
images_paths = []
for file in os.listdir(local_data_path):
file_path = os.path.join(local_data_path, file)
images_names.append(file)
images_paths.append(file_path)
with output_progress(total=len(images_paths)) as pbar:
for img_name, img_path in zip(images_names, images_paths):
try:
# upload image into dataset on Supervisely server
info = api.image.upload_path(dataset_id=dataset.id, name=img_name, path=img_path)
sly.logger.trace(f"Image has been uploaded: id={info.id}, name={info.name}")
except Exception as e:
sly.logger.warn("Skip image", extra={"name": img_name, "reason": repr(e)})
finally:
# update progress bar
pbar.update(1)
# remove source files from Supervisely Team Files if checked
if remove_source_files.is_checked():
api.file.remove_dir(TEAM_ID, PATH_TO_FOLDER)
# hide progress bar after import
output_progress.hide()
# update project info for thumbnail preview
project = api.project.get_info_by_id(project.id)
output_project_thumbnail.set(info=project)
output_project_thumbnail.show()
output_text.set(text="Import is finished", status="success")
output_text.show()
start_import_btn.disable()
sly.logger.info(f"Result project: id={project.id}, name={project.name}")
except Exception as e:
data_card.unlock()
settings_card.unlock()
project_card.unlock()
raise DialogWindowError(title="Import error", description=f"Error: {e}")
```
**App screenshot**
## Step 3. Advanced debug
Advanced debug is for final app testing. In this case, import app will download selected folder with data from Supervisely server. You can use this mode to test your app before [publishing it to the Ecosystem](https://developer.supervisely.com/getting-started/cli#release-your-private-apps-using-cli).
To switch between local and advanced debug modes, select corresponding debug configuration in **`Run & Debug`** menu in VS Code
Open `advanced.env` and set up [environment variables](/getting-started/environment-variables) by inserting your values here for debugging.
**advanced.env:**
```python
TEAM_ID=8 # ⬅️ change it to your team ID
WORKSPACE_ID=349 # ⬅️ change it to your workspace ID
SLY_APP_DATA_DIR="input/" # ⬅️ path to directory where selected data will be downloaded
```
Please note that the path you specify in the `SLY_APP_DATA_DIR` variable will be used for storing import data.
For example:
* path on your local computer could be `/Users/admin/projects/import-app-from-scratch-gui/input/`
* path in the current project folder on your local computer could be `input/`
Also note that all paths on Supervisely server are absolute and start from '/' symbol, so you need to specify the full path to the folder, for example `/data/my_folder/`
> Don't forget to add this path to `.gitignore` to exclude it from the list of files tracked by Git.

# Finding directories with specific markers
A tutorial on how to find directories with specific markers (filename) and check them for some conditions using \`sly.fs.dirs\_with\_marker()\` function.
## Introduction
First of all, let's talk about the use cases of this function. When working with import apps, there are often cases where we need a specific structure for input data to ensure the application functions correctly. Frequently, it's necessary to identify a specific file marker that serves as a reference point for determining the rest of the structure. However, user-provided data can have varying structures. For instance, the target directory might not be in the root directory but nested within several other directories, or the data may contain not just one but multiple suitable directories.\
For example, we're trying to find a directory with a `config.json` file in it. The directory structure might look like this:
```
📂 input_dir
┣ 📂 nested_dir_1
┃ ┣ 📂 nested_dir_2
┃ ┃ ┣ 📂 nested_dir_3
┃ ┃ ┃ ┣ 📄 config.json
┃ ┃ ┃ ┗ 📄 data.csv
┣ 📂 nested_dir_4
┃ ┣ 📄 config.json
┃ ┗ 📄 data.csv
```
So, in this case, we need to find two directories: `nested_dir_3` and `nested_dir_4`. It's not a problem to find them, but why implement the same logic every time? It's much easier to use a function that will do it for us everywhere we need it.\
And it's just a part of the problem, we're trying to solve here. Same as finding directories, we usually need to check them for some conditions. Because the file we've found maybe incorrect and a user may just forget to delete it, or the directory may not contain other needed files. If we try to work with the data from this directory, we may have an error or, much worse, incorrect results. Of course, we can write the function that will check the directory for us, and pass the directories to it one by one. Well, while using `sly.fs.dirs_with_marker()` we still need to have this function, if we need to check the directory for some conditions, but we can make this process more convenient and the code more readable and clear.\\
## Function signature
```python
sly.fs.dirs_with_marker(
input_path: str,
markers: Union[str, List[str]],
check_function: Optional[Callable] = None,
ignore_case: Optional[bool] = False,
) -> Generator[str, None, None]:
```
## Parameters
| Parameters | Type | Description |
| :--------------: | :---------------------: | :--------------------------------------------------------------------: |
| `input_path` | `str` | Path to the directory from which the search will be performed. |
| `markers` | `Union[str, List[str]]` | Filename or list of filenames, which will be searched. |
| `check_function` | `Optional[Callable]` | Function that will be used to check the directory for some conditions. |
| `ignore_case` | `Optional[bool]` | If `True`, the search will be case-insensitive. Default is `False`. |
## Data Example
We prepared a short Python script, that will unpack an archive (as an example of input data from a user) and find directories with `config.json` files in them. Then it will check if they're valid. Conditions for checking are the following:
* The directory must contain `config.json` file.
* The `config.json` file must have a key `valid`, and its value must be `true`.
* The directory must contain two other subdirectories: `images` and `anns`.
Example archive structure:
```
📦extracted
┗ 📂input_dir
┃ ┣ 📂subdir01
┃ ┃ ┣ 📂subdir11
┃ ┃ ┃ ┣ 📂anns
┃ ┃ ┃ ┣ 📂images
┃ ┃ ┃ ┗ 📄config.json
┃ ┃ ┗ 📂subdir12
┃ ┃ ┃ ┣ 📂anns
┃ ┃ ┃ ┣ 📂images
┃ ┃ ┃ ┗ 📄config.json
┃ ┗ 📂subdir02
```
So, we have two directories with `config.json` files in them, but only one of them is valid.\\
You can find the above demo archive in the data directory of the dirs-with-marker repo - [here](https://github.com/supervisely-ecosystem/dirs-with-marker/blob/master/data)
## Tutorial content
* [Step 1. How to extract the archive and remove junk files](#step-1.-how-to-extract-the-archive-and-remove-junk-files)
* [Step 2. How to find directories with markers](#step-2.-how-to-find-directories-with-markers)
* [Step 3. How to check directories for specific conditions](#step-3.-how-to-check-directories-for-specific-conditions)
* [Example of the final code](#example-of-the-final-code)
Everything you need to reproduce [this tutorial is on GitHub](https://github.com/supervisely-ecosystem/dirs-with-marker): [main.py](https://github.com/supervisely-ecosystem/dirs-with-marker/blob/master/src/main.py).
## Step 1. How to extract the archive and remove junk files
It's not a rare case, when the archive from a user contains some unnecessary files. For example, the archive may contain a `__MACOSX` directory or `.DS_Store` files, which are created by macOS. If we don't handle them, we may have an error while working with the data, so in most cases, it's much easier to delete them.\\
To extract the archive, we'll use the `sly.fs.unpack_archive()` function:
```python
import os
import json
import supervisely as sly
DATA_DIR = "data"
ARCHIVE_PATH = os.path.join(DATA_DIR, "input_archive.zip")
EXCTRACT_PATH = os.path.join(DATA_DIR, "extracted")
sly.fs.unpack_archive(ARCHIVE_PATH, EXCTRACT_PATH, remove_junk=True)
```
ℹ️ If the archive was already extracted and you want to remove junk files from it, you can use the `sly.fs.remove_junk_from_dir()` function:
```python
sly.fs.remove_junk_from_dir(EXCTRACT_PATH)
```
Now we have a directory without junk files, and we can start searching for directories with markers.
## Step 2. How to find directories with markers
As we already have a directory without junk files, we need to specify the markers we want to find. In our case, it's `config.json` file. We can pass it as a string or as a list of strings if we need to find multiple markers.\
\
ℹ️ If you're passing a list of markers it's important to mention, that they will be searched with the `OR`, not `AND` condition. It means that if you pass a list of markers, the function will return all directories that contain at least one of the markers. If you need a condition when the directory contains several specific markers, you can implement this check in the `check_function` parameter, we will talk about it in next section.\
\
Now we can use the `sly.fs.dirs_with_marker()` function to iterate over all directories with markers:
```python
MARKERS = "config.json"
for directory in sly.fs.dirs_with_marker(EXCTRACT_PATH, MARKERS, ignore_case=True):
print(f"The directory with the marker '{MARKERS}' is found: '{directory}'")
```
Ok, we've found the directories, but how can we check them for some conditions? Let's talk about it in the next section.
## Step 3. How to check directories for specific conditions
As we've already mentioned, we can pass a function to the `check_function` parameter, which will be used to check the directory for specific conditions. This function must return `True` if the directory is valid and `False` otherwise. So, our conditions for checking were: `config.json` file must have a key `valid`, and its value must be `true`, and the directory must contain two subdirectories: `images` and `anns`. Let's implement this check:
```python
def check_function(directory: str) -> bool:
config = json.load(open(os.path.join(directory, MARKERS)))
images_dir = os.path.join(directory, "images")
anns_dir = os.path.join(directory, "anns")
return config.get("valid") is True and os.path.isdir(images_dir) and os.path.isdir(anns_dir)
```
Just as a reminder, the `check_function` must return the `bool` value.\\
## Example of the final code
So, we've implemented the check function, and now we can use it in the `sly.fs.dirs_with_marker()` function. Here's the full code:
```python
import os
import json
import supervisely as sly
DATA_DIR = "data"
ARCHIVE_PATH = os.path.join(DATA_DIR, "input_archive.zip")
EXCTRACT_PATH = os.path.join(DATA_DIR, "extracted")
# 1. Extracting the archive and removing junk files.
sly.fs.unpack_archive(ARCHIVE_PATH, EXCTRACT_PATH, remove_junk=True)
# 2. Specifying the marker we want to find.
MARKERS = "config.json"
# 3. Iterating over directories with markers without checking them.
for directory in sly.fs.dirs_with_marker(EXCTRACT_PATH, MARKERS, ignore_case=True):
print(f"The directory with the marker '{MARKERS}' is found: '{directory}'")
# 4. Defining the check function.
def check_function(directory: str) -> bool:
config = json.load(open(os.path.join(directory, MARKERS)))
images_dir = os.path.join(directory, "images")
anns_dir = os.path.join(directory, "anns")
return config.get("valid") is True and os.path.isdir(images_dir) and os.path.isdir(anns_dir)
# 5. Iterating over directories with directories which contains markers and passed the check.
for checked_directory in sly.fs.dirs_with_marker(
EXCTRACT_PATH, MARKERS, check_function=check_function, ignore_case=True
):
print(f"The directory '{checked_directory}' is valid.")
```
**Let's have a look on what we've got here:**
1. We've extracted the archive and removed junk files.
2. We've specified the marker we want to find.
3. We've iterated over directories with markers without checking them. In our test case it will print two directories, while the correct is only one.
4. We've defined the check function that will be used to check the directory meet our requirements.
5. We've iterated over directories that passed all checks. In our test case it will print only one directory, which is correct.
And now we can easily work with the data from the directory (or directories) we've found, knowing that it's valid.
## Summary
In this tutorial, we've learned how to find directories with specific markers and check them for some conditions using `sly.fs.dirs_with_marker()` function. We've also learned how to extract the archive and clean it of junk files using `sly.fs.unpack_archive()` or `sly.fs.remove_junk_from_dir()` functions.\
We hope this tutorial was helpful for you and it will save you some time in the future, while working with import apps.\\
# Custom export app
# Overview
## Introduction
There are many different applications in the Supervisely ecosystem for exporting data to various popular formats. However, companies often need to implement custom data export in their specific format to meet their particular requirements.
In the upcoming tutorial series, you will learn **2 ways to create a custom export app** for exporting data from the Supervisely platform.
### Option 1. Use our SDK export template class `sly.app.Export` (simple)
👍 This way is more convenient and can handle most of the routine tasks and cover most required use cases. All you need to do is create your own class (inherit from `sly.app.Export`), and override the `process` method. Method `process` should return the path to the result data (folder or archive).
[✅ Learn step-by-step tutorial here](/app-development/create-export-app/create-export-app-from-template).
[💻 Source code](https://github.com/supervisely-ecosystem/template-export-app/tree/master).
### Option 2. Create an app from scratch (advanced)
It is more recommended way to use SDK export template class (`sly.app.Export`) to create custom export app. However, if your use case is not covered by our export template, you can create your own app without the template. We will also learn this way in the upcoming tutorial series.
[✅ Learn step-by-step tutorial here](/app-development/create-export-app/create-export-app-without-template).
[💻 Source code](https://github.com/supervisely-ecosystem/export-custom-format/tree/master).
### More details about sly.app.Export. [See source code](https://github.com/supervisely/supervisely/blob/master/supervisely/app/export_template.py)
`sly.app.Export` class will handle export routines for you:
* it will check that selected project or dataset exist and that you have access to work with it,
* it will upload your result data to Team Files and clean temporary folder, containing result archive in remote container or local hard drive if you are debugging your app.
* Your application must return string, containing path to result archive or folder. If you return path to folder - this folder will be automatically archived.
`sly.app.Export` has a `Context` subclass which contains all required information that you need for exporting your data from Supervisely platform:
* `Team ID` - shows team id where exporting project or dataset is located
* `Workspace ID` - shows workspace id where exporting project or dataset is located
* `Project ID` - id of exporting project
* `Dataset ID` - id of exporting dataset (detected only if the export is performed from dataset context menu)
`context` variable is passed as an argument to `process` method of class `MyExport` and `context` object will be created automatically when you execute export script.
```python
class MyExport(sly.app.Export):
def process(self, context: sly.app.Export.Context):
print(context)
```
Output:
```
Team ID: 435
Workspace ID: 680
Project ID: 15623
Dataset ID: 53491
```
## Set up an environment for development
> The following pages of the guide about creating a custom export app will refer to this section, which describes the preparation of the working environment.
We advise reading our [from script to supervisely app](/app-development/basics/from-script-to-supervisely-app) guide if you are unfamiliar with the [file structure](/app-development/basics/from-script-to-supervisely-app#repository-structure) of a Supervisely app repository because it addresses the majority of the potential questions.
**For both options, you need to prepare a development environment. Follow the steps below:**
**Step 1.** Prepare `~/supervisely.env` file with credentials. [Learn more here.](/getting-started/basics-of-authentication#how-to-use-in-python)
**Step 2.** Fork and clone repository with source code and create [Virtual Environment](https://docs.python.org/3/library/venv.html).
```bash
git clone https://github.com//
cd
./create_venv.sh
```
**Step 3.** Open repository directory in Visual Studio Code.
```bash
code -r .
```
**Step 4.** Select created virtual environment as python interpreter.
**Step 5.** Open `local.env` and insert your values here. Learn more about environment variables in our [guide](/getting-started/environment-variables)
```python
TASK_ID=10 # ⬅️ requires to use advanced debugging
TEAM_ID=447 # ⬅️ change it
WORKSPACE_ID=680 # ⬅️ change it
PROJECT_ID=20934 # ⬅️ ID of the project that you want to export
DATASET_ID=64985 # ⬅️ ID of the dataset that you want to export (leave empty if you want to export whole project)
SLY_APP_DATA_DIR="results/" # ⬅️ path to directory for local debugging
```
Please note that the path you specify in the `SLY_APP_DATA_DIR` variable will be used for saving application results and temporary files (temporary files will be removed at the end).
For example:
* path on your local computer could be `/Users/maxim/my_data/`
* path in the current project folder on your local computer could be `results/`
> Don't forget to add this path to `.gitignore` to exclude it from the list of files tracked by Git.

When running the app from Supervisely platform: Project and Dataset IDs will be automatically detected depending on how you run your application.
# From template - simple
A step-by-step tutorial of how to create custom export app from SDK export template class \`sly.app.Export\`.
## Introduction
In this tutorial, you will learn how to create custom export app for exporting your data from Supervisely platform using an export template class [`sly.app.Export`](https://github.com/supervisely/supervisely/blob/master/supervisely/app/export_template.py) that we have prepared for you.
We will go through the following steps:
[**Step 0.**](#set-up-the-working-environment) Set up the working environment.
[**Step 1.**](#write-an-export-script) Write an export script.
[**Step 2.**](#debug-export-app) Debug export app.
[**Step 3.**](#advanced-debugging) Advanced debugging.
[**Step 4.**](#release-and-run-the-app-in-supervisely) Release and run the app in Supervisely.
Everything you need to reproduce [this tutorial is on GitHub](https://github.com/supervisely-ecosystem/template-export-app): source code and additional app files.
## Overview of the simple (illustrative) example we will use in tutorial
* original images
* annotations in json format
Output example:
```
🗃️.tar
┣ 📂ds0
┃ ┣ 🖼️image_1.jpg
┃ ┣ 🖼️image_2.jpg
┃ ┗ 📜labels.json
┗ 📂ds1
┣ 🖼️image_1.jpg
┣ 🖼️image_2.jpg
┗ 📜labels.json
```
For each dataset `label.json` files contain annotations for images with class names and coordinate points for bounding boxes of each label.
```
{
"image_1.jpg": [
{
"class_name": "cat",
"coordinates": [top, left, right, bottom]
},
{
"class_name": "cat",
"coordinates": [top, left, right, bottom]
},
{
"class_name": "dog",
"coordinates": [top, left, right, bottom]
}
...
],
"image_2.jpg": [
...
],
"image_3.jpg": [
...
]
}
```
## Set up the working environment
Before we begin, please clone the [template-export-app](https://github.com/supervisely-ecosystem/template-export-app.git) repository and set up the working environment - [here is a link with a description of the steps](/app-development/create-export-app/overview#set-up-an-environment-for-development).
## Write an export script
You can find source code for this example [here](https://github.com/supervisely-ecosystem/template-export-app/blob/master/src/main.py)
**Step 1. Import libraries**
```python
import json, os
import supervisely as sly
from dotenv import load_dotenv
from tqdm import tqdm
```
**Step 2. Load environment variables**
Load ENV variables for debug, has no effect in production
```python
load_dotenv("local.env")
load_dotenv(os.path.expanduser("~/supervisely.env"))
```
**Step 3. Write Export script**
Create a class that inherits from `sly.app.Export` and write `process` method that will handle the `team_id`, `workspace_id`, `project_id` and `dataset_id` that you specified in the `local.env`. In this example our class called `MyExport`.
`sly.app.Export` class will handle export routines for you:
* it will check that selected project or dataset exist and that you have access to work with it,
* it will upload your result data to Team Files and clean temporary folder, containing result archive in remote container or local hard drive if you are debugging your app.
* Your application must return string, containing path to result archive or folder. If you return path to folder - this folder will be automatically archived.
`sly.app.Export` has a `Context` subclass which contains all required information that you need for exporting your data from Supervisely platform:
* `Team ID` - shows team id where exporting project or dataset is located
* `Workspace ID` - shows workspace id where exporting project or dataset is located
* `Project ID` - id of exporting project
* `Dataset ID` - id of exporting dataset (detected only if the export is performed from dataset context menu)
`context` variable is passed as an argument to `process` method of class `MyExport` and `context` object will be created automatically when you execute export script.
```python
class MyExport(sly.app.Export):
def process(self, context: sly.app.Export.Context):
print(context)
```
Output:
```
Team ID: 447
Workspace ID: 680
Project ID: 20934
Dataset ID: 64985
```
Now let's get to the code part
```python
STORAGE_DIR = sly.app.get_data_dir() # path to directory for temp files and result archive
ANN_FILE_NAME = "labels.json"
class MyExport(sly.app.Export):
def process(self, context: sly.app.Export.Context):
# create api object to communicate with Supervisely Server
api = sly.Api.from_env()
# get project info from server
project_info = api.project.get_info_by_id(id=context.project_id)
# make project directory path
data_dir = os.path.join(STORAGE_DIR, f"{project_info.id}_{project_info.name}")
# get project meta
meta_json = api.project.get_meta(id=context.project_id)
project_meta = sly.ProjectMeta.from_json(meta_json)
# Check if the app runs from the context menu of the dataset.
if context.dataset_id is not None:
# If so, get the dataset info from the server.
dataset_infos = [api.dataset.get_info_by_id(context.dataset_id)]
else:
# If it does not, obtain all datasets infos from the current project.
dataset_infos = api.dataset.get_list(context.project_id)
# iterate over datasets in project
for dataset in dataset_infos:
result_anns = {}
# get dataset images info
images_infos = api.image.get_list(dataset.id)
# track progress using Tqdm
with tqdm(total=dataset.items_count) as pbar:
# iterate over images in dataset
for image_info in images_infos:
labels = []
# create path for each image and download it from server
image_path = os.path.join(data_dir, dataset.name, image_info.name)
api.image.download(image_info.id, image_path)
# download annotation for current image
ann_json = api.annotation.download_json(image_info.id)
ann = sly.Annotation.from_json(ann_json, project_meta)
# iterate over labels in current annotation
for label in ann.labels:
# get obj class name
name = label.obj_class.name
# get bounding box coordinates for label
bbox = label.geometry.to_bbox()
labels.append(
{
"class_name": name,
"coordinates": [
bbox.top,
bbox.left,
bbox.bottom,
bbox.right,
],
}
)
result_anns[image_info.name] = labels
# increment the current progress counter by 1
pbar.update(1)
# create JSON annotation in new format
filename = os.path.join(data_dir, dataset.name, ANN_FILE_NAME)
with open(filename, "w") as file:
json.dump(result_anns, file, indent=2)
return data_dir
```
Create `MyExport` object and execute `run` method to start export
```python
app = MyExport()
app.run()
```
## Debug export app
In this tutorial, we will be using the **Run & Debug** section of the VSCode to debug our export app.
The export template has 2 launch options for debugging: `Debug` and `Advanced Debug`. The settings for these options are configured in the `launch.json` file. Lets start from option #1 - `Debug`

This option is a good starting point. In this case, the resulting archive or folder with the exported data will remain on your computer and be saved in the path that we defined in the `local.env` file (`SLY_APP_DATA_DIR="results/"`).
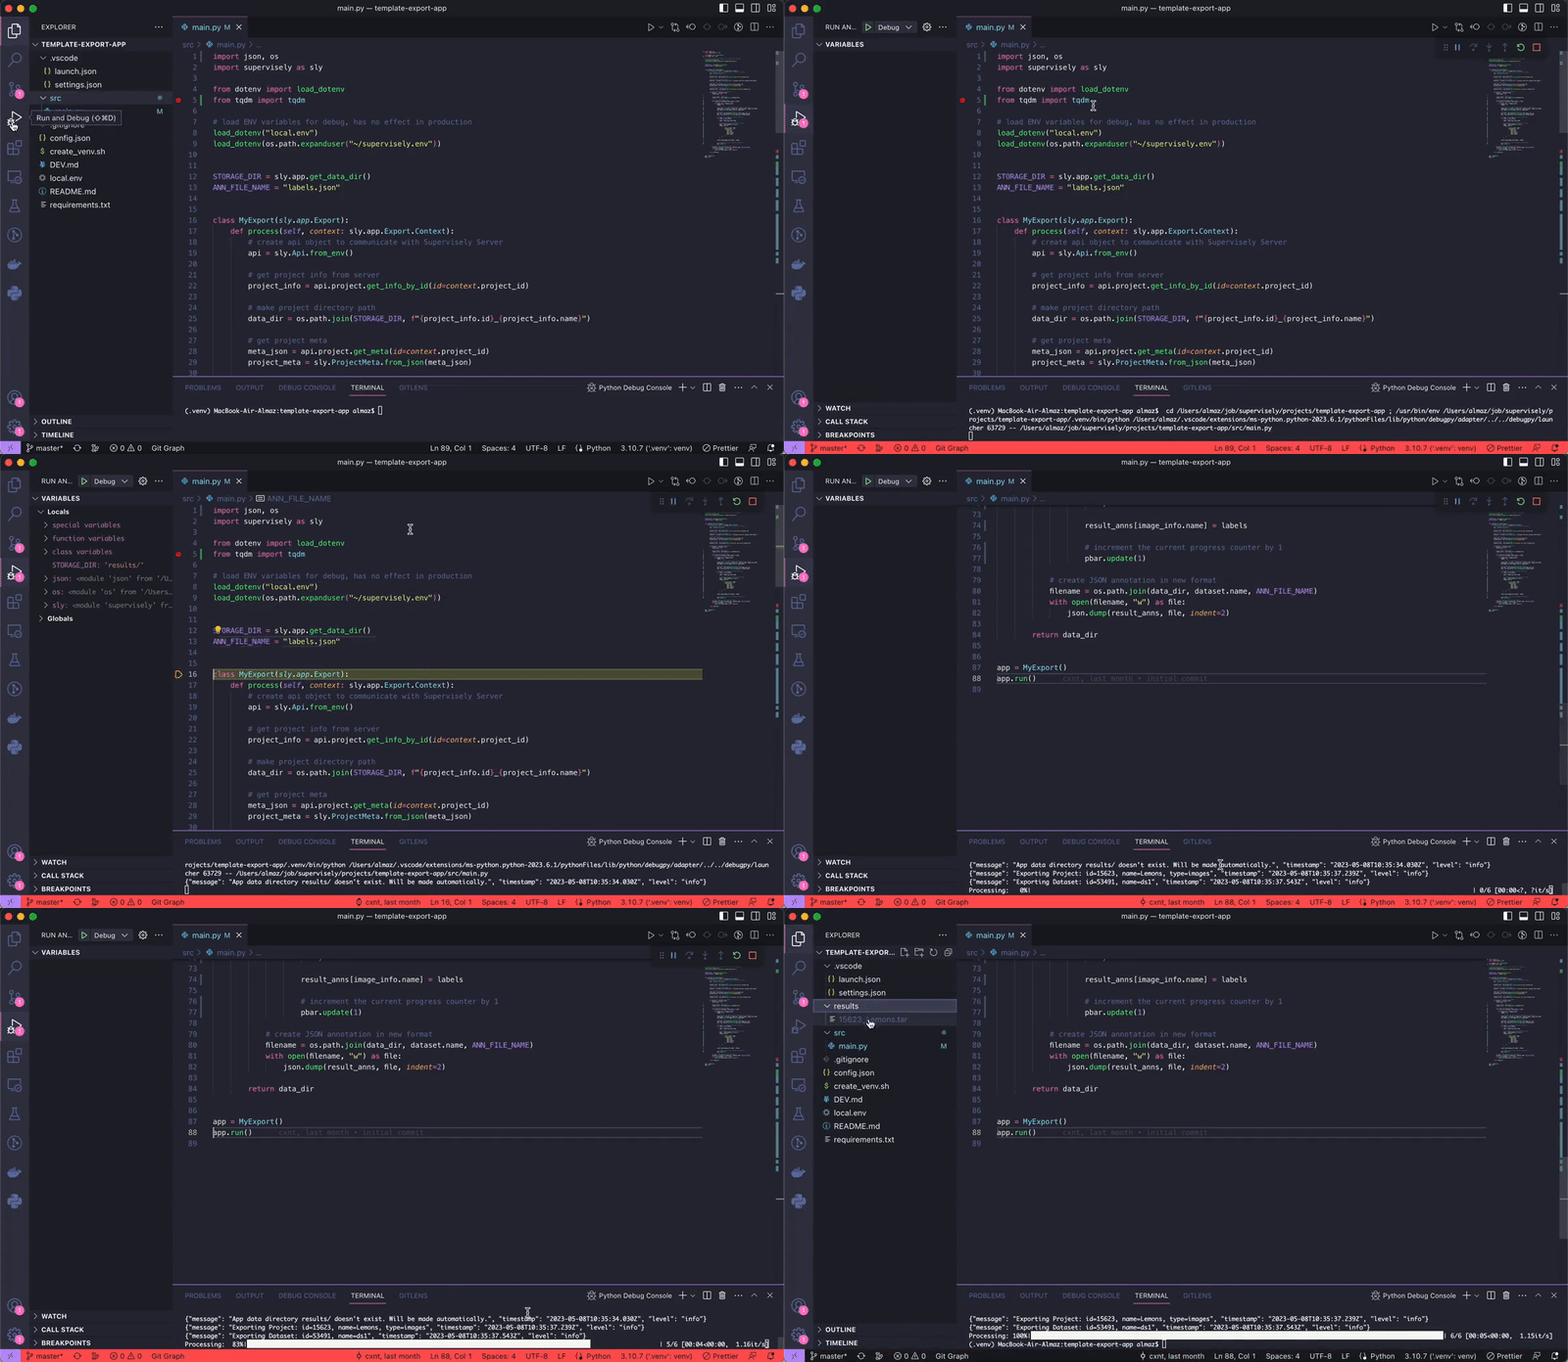
Output of this python program:
```
{"message": "Exporting Project: id=20934, name=Model predictions, type=images", "timestamp": "2023-05-08T11:30:06.341Z", "level": "info"}
{"message": "Exporting Dataset: id=64895, name=Week # 1", "timestamp": "2023-05-08T11:30:06.651Z", "level": "info"}
Processing: 100%|████████████████████████████████████████████████████████████████████████████████████| 6/6 [00:06<00:00, 1.12s/it]
```
## Advanced debugging
In addition to the regular debug option, this template also includes setting for `Advanced debugging`.

The advanced debugging option is somewhat identical, however it will upload result archive or folder with data to `Team Files` instead (Path to result archive - `/tmp/supervisely/export/Supervisely App//_.tar`). This option is an example of how production apps work in Supervisely platform.

Output of this python program:
```
{"message": "App data directory results/ doesn't exist. Will be made automatically.", "timestamp": "2023-05-08T10:39:15.626Z", "level": "info"}
{"message": "Exporting Project: id=20934, name=Model predictions, type=images", "timestamp": "2023-05-08T10:39:17.918Z", "level": "info"}
{"message": "Exporting Dataset: id=64895, name=Week # 1", "timestamp": "2023-05-08T10:39:18.209Z", "level": "info"}
{"message": "progress", "event_type": "EventType.PROGRESS", "subtask": "Processing", "current": 0, "total": 6, "timestamp": "2023-05-08T10:39:19.478Z", "level": "info"}
{"message": "progress", "event_type": "EventType.PROGRESS", "subtask": "Processing", "current": 1, "total": 6, "timestamp": "2023-05-08T10:39:20.592Z", "level": "info"}
...
{"message": "progress", "event_type": "EventType.PROGRESS", "subtask": "Processing", "current": 6, "total": 6, "timestamp": "2023-05-08T10:39:25.918Z", "level": "info"}
{"message": "progress", "event_type": "EventType.PROGRESS", "subtask": "Uploading '20934_Model predictions.tar'", "current": 0, "total": 4567476, "current_label": "0.0 B", "total_label": "4.4 MiB", "timestamp": "2023-05-08T10:39:26.135Z", "level": "info"}
{"message": "progress", "event_type": "EventType.PROGRESS", "subtask": "Uploading '20934_Model predictions.tar'", "current": 1048576, "total": 4567476, "current_label": "1.0 MiB", "total_label": "4.4 MiB", "timestamp": "2023-05-08T10:39:26.676Z", "level": "info"}
...
{"message": "progress", "event_type": "EventType.PROGRESS", "subtask": "Uploading '20934_Model predictions.tar'", "current": 4567476, "total": 4567476, "current_label": "4.4 MiB", "total_label": "4.4 MiB", "timestamp": "2023-05-08T10:39:36.578Z", "level": "info"}
{"message": "Remote file: id=1273718, name=20934_Model predictions.tar", "timestamp": "2023-05-08T10:39:37.451Z", "level": "info"}
```
## Release and run the app in Supervisely
Submitting an app to the Supervisely Ecosystem isn’t as simple as pushing code to github repository, but it’s not as complicated as you may think of it either.
Please follow this [link](/app-development/basics/add-private-app) for instructions on adding your app. We have produced a step-by-step guide on how to add your application to the Supervisely Ecosystem.

# From scratch - advanced
A step-by-step tutorial of how to create custom export app without using template from SDK (from scratch).
## Introduction
It is more recommended way to use SDK export template class `sly.app.Export` to create custom export app (we learned it in the previous tutorial - [learn more here](/app-development/create-export-app/create-export-app-from-template)). However, if your use case is not covered by our export template, you can create your own app **from scratch** without the template.
We will go through the following steps:
[**Step 0.**](#step-0-set-up-the-working-environment) Set up the working environment.
[**Step 1**](#step-1-how-to-write-an-export-script) How to write an export script.
[**Step 2.**](#step-2-how-to-debug-export-app) How to debug export app.
[**Step 3.**](#step-3-advanced-debug) Advanced debug.
[**Step 4.**](#step-4-how-to-run-it-in-supervisely) How to run it in Supervisely.
Everything you need to reproduce [this tutorial is on GitHub](https://github.com/supervisely-ecosystem/export-custom-format): source code and additional app files.
## Overview of the simple (illustrative) example we will use in tutorial
In this tutorial, we will create a custom export app that exports data from Supervisely into a `.tar` archive. See the overview of this example [here](/app-development/create-export-app/create-export-app-from-template#overview-of-the-simple-illustrative-example-we-will-use-in-tutorial)
## Step 0. Set up the working environment
Before we begin, please clone this [export-custom-format](https://github.com/supervisely-ecosystem/export-custom-format.git) repository and set up the working environment - [here is a link with a description of the steps](/app-development/create-export-app/overview#set-up-an-environment-for-development).
## Step 1. How to write an export script
Find source code for this example [here](https://github.com/supervisely-ecosystem/export-custom-format/blob/master/src/main.py)
**Step 1. Import libraries**
```python
import json, os
import supervisely as sly
from dotenv import load_dotenv
from tqdm import tqdm
```
**Step 2. Load environment variables**
Load ENV variables for debug, has no effect in production
```python
load_dotenv("local.env")
load_dotenv(os.path.expanduser("~/supervisely.env"))
```
Get variables
```python
TASK_ID = sly.env.task_id()
TEAM_ID = sly.env.team_id()
WORKSPACE_ID = sly.env.workspace_id()
PROJECT_ID = sly.env.project_id()
DATASET_ID = sly.env.dataset_id(raise_not_found=False)
IS_PRODUCTION = sly.is_production()
```
**Step 3. Write Export script**
```python
STORAGE_DIR = sly.app.get_data_dir() # path to directory for temp files and result archive
PROJECT_DIR = os.path.join(STORAGE_DIR, str(PROJECT_ID)) # project directory path
sly.io.fs.mkdir(PROJECT_DIR, True)
ANN_FILE_NAME = "labels.json"
app = sly.Application() # run app
# get project info from server
project_info = api.project.get_info_by_id(id=PROJECT_ID)
if project_info is None:
raise ValueError(
f"Project with ID: '{PROJECT_ID}' either doesn't exist, archived or you don't have access to it"
)
sly.logger.info(
f"Exporting Project: id={project_info.id}, name={project_info.name}, type={project_info.type}",
)
meta_json = api.project.get_meta(id=PROJECT_ID)
project_meta = sly.ProjectMeta.from_json(meta_json)
# Check if the app runs from the context menu of the dataset.
if DATASET_ID is not None:
# If so, get the dataset info from the server.
dataset_infos = [api.dataset.get_info_by_id(DATASET_ID)]
if dataset_infos is None:
raise ValueError(
f"Dataset with ID: '{DATASET_ID}' either doesn't exist, archived or you don't have access to it"
)
sly.logger.info(f"Exporting Dataset: id={dataset_infos[0].id}, name={dataset_infos[0].name}")
else:
# If it does not, obtain all datasets infos from the current project.
dataset_infos = api.dataset.get_list(PROJECT_ID)
sly.logger.info(f"Exporting all datasets from project.")
# track progress datasets processing using Tqdm
with tqdm(total=len(dataset_infos)) as ds_pbar:
# iterate over datasets in project
for dataset in dataset_infos:
result_anns = {}
# get dataset images info
images_infos = api.image.get_list(dataset.id)
# track progress using Tqdm
with tqdm(total=dataset.items_count) as pbar:
# iterate over images in dataset
for image_info in images_infos:
labels = []
# create path for each image and download it from server
image_path = os.path.join(PROJECT_DIR, dataset.name, image_info.name)
api.image.download(image_info.id, image_path)
# download annotation for current image
ann_json = api.annotation.download_json(image_info.id)
ann = sly.Annotation.from_json(ann_json, project_meta)
# iterate over labels in current annotation
for label in ann.labels:
# get obj class name
name = label.obj_class.name
# get bounding box coordinates for label
bbox = label.geometry.to_bbox()
labels.append(
{
"class_name": name,
"coordinates": [
bbox.top,
bbox.left,
bbox.bottom,
bbox.right,
],
}
)
result_anns[image_info.name] = labels
# increment the current images progress counter by 1
pbar.update(1)
# increment the current dataset progress counter by 1
ds_pbar.update(1)
# create JSON annotation in new format
filename = os.path.join(PROJECT_DIR, dataset.name, ANN_FILE_NAME)
with open(filename, "w") as file:
json.dump(result_anns, file, indent=2)
# prepare archive from result project dir
archive_path = f"{PROJECT_DIR}.tar"
sly.fs.archive_directory(PROJECT_DIR, archive_path)
sly.fs.remove_dir(PROJECT_DIR)
PROJECT_DIR = archive_path
# upload project to Supervsiely in production mode
if IS_PRODUCTION:
progress = tqdm(
desc=f"Uploading '{os.path.basename(PROJECT_DIR)}'",
total=sly.fs.get_directory_size(PROJECT_DIR),
unit="B",
unit_scale=True,
)
remote_path = os.path.join(
sly.team_files.RECOMMENDED_EXPORT_PATH,
"Supervisely App",
str(TASK_ID),
f"{sly.fs.get_file_name_with_ext(PROJECT_DIR)}",
)
file_info = api.file.upload(
team_id=TEAM_ID,
src=PROJECT_DIR,
dst=remote_path,
progress_cb=progress,
)
api.task.set_output_archive(
task_id=TASK_ID, file_id=file_info.id, file_name=file_info.name
)
sly.logger.info(f"Remote file: id={file_info.id}, name={file_info.name}")
sly.fs.silent_remove(PROJECT_DIR) # remove local directory
app.shutdown() # stop app
```
## Step 2. How to debug export app
In this tutorial, we will be using the **Run & Debug** section of the VSCode to debug our export app.
The export template has 2 launch options for debugging: `Debug` and `Advanced Debug`. The settings for these options are configured in the `launch.json` file. Lets start from oprion #1 - `Debug`

This option is a good starting point. In this case, the resulting archive or folder with the exported data will remain on your computer and be saved in the path that we defined in the `local.env` file (`SLY_APP_DATA_DIR="results/"`).

Output of this python program:
```
{"message": "Exporting Project: id=20934, name=Model predictions, type=images", "timestamp": "2023-05-08T11:30:06.341Z", "level": "info"}
{"message": "Exporting Dataset: id=64895, name=Week # 1", "timestamp": "2023-05-08T11:30:06.651Z", "level": "info"}
Processing: 100%|████████████████████████████████████████████████████████████████████████████████████| 6/6 [00:06<00:00, 1.12s/it]
```
## Step 3. Advanced debug
In addition to the regular debug option, this template also includes setting for `Advanced debugging`.

The advanced debugging option is somewhat identical, however it will upload result archive or folder with data to `Team Files` instead (Path to result archive - `/tmp/supervisely/export/Supervisely App//_.tar`). This option is an example of how production apps work in Supervisely platform.

Output of this python program:
```
{"message": "progress", "event_type": "EventType.PROGRESS", "subtask": "Processing", "current": 0, "total": 1, "timestamp": "2023-05-08T17:25:24.404Z", "level": "info"}
{"message": "progress", "event_type": "EventType.PROGRESS", "subtask": "Processing", "current": 0, "total": 6, "timestamp": "2023-05-08T17:25:24.726Z", "level": "info"}
{"message": "progress", "event_type": "EventType.PROGRESS", "subtask": "Processing", "current": 1, "total": 6, "timestamp": "2023-05-08T17:25:25.949Z", "level": "info"}
...
{"message": "progress", "event_type": "EventType.PROGRESS", "subtask": "Processing", "current": 1, "total": 1, "timestamp": "2023-05-08T17:25:33.269Z", "level": "info"}
{"message": "progress", "event_type": "EventType.PROGRESS", "subtask": "Uploading '20934.tar'", "current": 0, "total": 4567440, "current_label": "0.0 B", "total_label": "0.0 B", "timestamp": "2023-05-08T17:26:05.111Z", "level": "info"}
...
{"message": "progress", "event_type": "EventType.PROGRESS", "subtask": "Uploading '20934.tar'", "current": 4567440, "total": 4567440, "current_label": "4.4 MiB", "total_label": "4.4 MiB", "timestamp": "2023-05-08T17:13:19.529Z", "level": "info"}
{"message": "Remote file: id=1274760, name=20934.tar", "timestamp": "2023-05-08T17:13:20.646Z", "level": "info"}
```
## Step 4. How to run it in Supervisely
Submitting an app to the Supervisely Ecosystem isn’t as simple as pushing code to github repository, but it’s not as complicated as you may think of it either.
Please follow this [link](/app-development/basics/add-private-app) for instructions on adding your app. We have produced a step-by-step guide on how to add your application to the Supervisely Ecosystem.

# Custom 3D AI Assistant app
Supervisely's 3D AI assistant is a universal tool for automating 3D point cloud labeling. It covers all types of labeling scenarios for 3D point clouds: 3D object detection, ground segmentation, 3D cuboid tracking, transfer of 2D annotations from photo context images to original 3D point clouds. But sometimes user may want to use its own algorithms for these task. In this tutorial, you will know how to build custom 3D AI Assistant app and release it to your instance as a private app.
This repository — [custom-3d-ai-assistant](https://github.com/supervisely-ecosystem/custom-3d-ai-assistant) — is a minimal end-to-end example. You can refer to this example in order to understand which endpoints have to be implemented, which information do they receive from the server and what should they return in response.
## 1. Overview
3D AI Assistant exposes six HTTP endpoints. Each one is invoked by a different action in the labeling tool:
* **`POST /interactive_3d_detection`** — predicts a cuboid for area circled by Smart Lasso tool.
* **`POST /track`** — propagates cuboids across consecutive frames of a point cloud episode.
* **`POST /generate_clusters`** — pre-computes labeling-proposal clusters for a whole point cloud.
* **`POST /get_labeling_proposal`** — automatically corrects manually created cuboid (can use clusters generated from the previous endpoint).
* **`POST /segment_ground`** — returns indices of points belonging to the ground.
* **`POST /transfer_masks_to_pcd`** — transfers 2D figures drawn on a photo-context image to 3D point clouds.
Before going further, read the [Supervisely Point Cloud Annotation Format](https://developer.supervisely.com/getting-started/supervisely-annotation-format/point-clouds) — it explains the geometries JSON shape, project structure and how photo-context images are tied to point clouds with extrinsic/intrinsic matrices.
***
## 2. Set up environment for development
The fastest way to get a reproducible dev environment is VS Code's [Dev Containers](https://code.visualstudio.com/docs/devcontainers/containers) extension. The repo ships a `.devcontainer/` folder that is ready to use — open the project in VS Code and choose **"Reopen in Container"**. Alternatively, you can use Dockerfile provided below in order to prepare development environment.
### Development Dockerfile
```dockerfile
FROM supervisely/base-py-sdk:6.73.560
ENV DEBIAN_FRONTEND=noninteractive
RUN pip3 install open3d==0.18.0
RUN apt-get -y install curl
RUN apt-get update && apt -y install wireguard iproute2
LABEL "role"="development"
```
Two things to notice:
* The base image `supervisely/base-py-sdk:6.73.560` already contains the Supervisely Python SDK.
* `wireguard` and `iproute2` are installed only because we want to run the app in advanced debug mode, which uses a WireGuard VPN tunnel into the Supervisely platform (see [§4 Advanced debug](#4-advanced-debug)). When you publish the released private app, you do not need these packages — see the slimmer production Dockerfile below.
### Dev container run arguments
Whether you use VS Code's Dev Containers extension or not, if you are developing your app inside some Docker container it is important to remember to run it with some specific arguments. You can see `devcontainer.json` example below, pay attention to `runArgs` - those are just arguments for running Docker container:
```json
{
"name": "custom_3d_ai_assistant_devcontainer",
"build": {
"dockerfile": "Dockerfile"
},
"customizations": {
"vscode": {
"extensions": [
"ms-python.python",
"ms-python.black-formatter"
]
}
},
"runArgs": [
"--gpus",
"all",
"--ipc=host",
"--cap-add",
"NET_ADMIN",
"--runtime=nvidia"
]
}
```
Each `runArgs` entry matters:
* **`--gpus all` + `--runtime=nvidia`** — give the container access to the host GPU. Required for any real deep-learning model (we do not use any neural networks in our example app, but you may want to use one in your implementation).
* **`--ipc=host`** — share host IPC namespace; needed by PyTorch DataLoaders that use shared memory.
* **`--cap-add NET_ADMIN`** — required by WireGuard so the container can bring up the VPN tunnel during advanced debug.
### Environment files
You will need two env files:
* `~/supervisely.env` — your real credentials (`SERVER_ADDRESS` and `API_TOKEN`).
* `debug.env` — placeholders for `TEAM_ID` and `WORKSPACE_ID`. Replace them with your own IDs before running advanced debug.
You can get information about environment variables [here](https://developer.supervisely.com/getting-started/environment-variables).
***
## 3. Create code base
You can find source code for implementing all endpoints in [main.py](https://github.com/supervisely-ecosystem/custom-3d-ai-assistant/blob/master/src/main.py).
The app is a standard FastAPI server bootstrapped through Supervisely:
```python
import supervisely as sly
app = sly.Application()
server = app.get_server()
```
Every handler receives a FastAPI `Request` whose `state` is populated by Supervisely's middleware. Three attributes matter:
* **`request.state.api`** — an authenticated `sly.Api` you can use to download point clouds, create figures, notify progress, etc.
* **`request.state.state`** — per-call payload from the labeling tool (e.g. `pcd_id`, `click_coordinate`).
* **`request.state.context`** — per-call context for tracking jobs (e.g. `trackId`, `pointCloudIds`, `objectIds`).
The response convention is a JSON object with two keys: `{"result": , "error": }`. Synchronous endpoints wrap their body in `try/except` and return `{"result": None, "error": repr(e)}` on failure so the UI can surface the error.
Below is a per-endpoint reference. For full implementations including the random-stub bodies, see [main.py](https://github.com/supervisely-ecosystem/custom-3d-ai-assistant/blob/master/src/main.py).
### `POST /interactive_3d_detection`
Called when the user circles target object with Smart Lasso tool:
{% embed url="" %}
**Receives** (under `request.state.state`):
| Field | Type | Description |
| --------- | ---------- | ------------------------------------------- |
| `pcd_id` | int | ID of the point cloud the user is labeling. |
| `indices` | list\[int] | Point indices of the user's mask. |
**Returns**: `{"result": , "error": null}`. Use [Cuboid3d / Vector3d](https://supervisely.readthedocs.io/en/latest/sdk/supervisely.geometry.cuboid_3d.Cuboid3d.html) from `supervisely.geometry.cuboid_3d`. Serialize with `.to_json()`.
```python
@server.post("/interactive_3d_detection")
def detect_cuboids(request: Request):
api = request.state.api
state = request.state.state
current_pcd_id = state["pcd_id"]
current_pcd, _ = f.read_pcd(current_pcd_id, api)
mask_indices = state["indices"]
geometry = f.generate_random_cuboid(current_pcd, mask_indices) # replace with your model
return {"result": geometry.to_json(), "error": None}
```
Function `read_pcd` (in [functions.py](https://github.com/supervisely-ecosystem/custom-3d-ai-assistant/blob/master/src/functions.py)) downloads the `.pcd` file once and caches it on disk under `input_pcds/` directory.
### `POST /track`
Called when the user starts a tracking job. The platform expects an immediate acknowledgement — the actual work runs in a FastAPI `BackgroundTasks` worker. Progress and results are reported back over the Supervisely API as the work proceeds.
{% embed url="" %}
**Receives** (under `request.state.context`):
| Field | Type | Description |
| --------------- | ---------- | ------------------------------------------------------------------------ |
| `trackId` | str | UUID of the tracking job; required for progress and error notifications. |
| `datasetId` | int | ID of the episode dataset. |
| `pointCloudIds` | list\[int] | Frames to track through, in chronological order. |
| `direction` | str | `"forward"` or `"backward"`; reverse `pointCloudIds` if backward. |
| `objectIds` | list\[int] | Supervisely object IDs being tracked. |
| `figureIds` | list\[int] | Source figure IDs; used to size the progress bar. |
**Returns** (immediate): `{"message": "Track task started."}`.
**Background work must**:
1. Load the source cuboids from the first frame via `api.pointcloud.annotation.download(first_pcd_id)`, deserialized with `sly.deserialize_geometry`.
2. For each subsequent frame, predict a new cuboid per object and write it back via `api.pointcloud_episode.figure.create(pcd_id, object_id, geom_json, "cuboid_3d", track_id)`.
3. Notify the UI after each step via `api.pointcloud_episode.notify_progress(track_id, dataset_id, pcd_ids, current, total)`.
4. Catch all exceptions inside the background task and report them through `point-clouds.episodes.notify-annotation-tool` — otherwise the UI's tracking spinner will hang forever. The repo provides a `send_error_data` decorator that does this; reuse it.
```python
@server.post("/track")
def start_track(request: Request, task: BackgroundTasks):
task.add_task(track_cuboids, request)
return {"message": "Track task started."}
@send_error_data
def track_cuboids(request: Request):
api = request.state.api
context = request.state.context
track_id = context["trackId"]
pcd_ids = context["pointCloudIds"]
if context["direction"] == "backward":
pcd_ids = pcd_ids[::-1]
object_ids = context["objectIds"]
# ... run your model, then for each frame:
# api.pointcloud_episode.figure.create(...)
# api.pointcloud_episode.notify_progress(...)
```
See the full `start_track` handler, the `track_cuboids` background worker, and the `send_error_data` decorator in [main.py](https://github.com/supervisely-ecosystem/custom-3d-ai-assistant/blob/master/src/main.py).
### `POST /generate_clusters`
Called once per point cloud, before the user starts requesting labeling proposals. It is a side-effect endpoint: it pre-computes proposal clusters and stores them in memory keyed by `pcd_id`.
**Receives** (under `request.state.state`):
| Field | Type | Description |
| -------- | ---- | --------------------------------- |
| `pcd_id` | int | ID of the point cloud to cluster. |
**Returns**: should not return anything.
```python
@server.post("/generate_clusters")
def generate_clusters(request: Request):
api = request.state.api
state = request.state.state
pcd_id = state["pcd_id"]
pcd, _ = f.read_pcd(pcd_id, api)
f.labeling_proposals[pcd_id] = f.generate_random_clusters(pcd) # replace with your model
```
The clusters are kept in the module-level `labeling_proposals` dict. Your real implementation of `/get_labeling_proposal` (next) can use these generated clusters, but it depends on your implementation. If you don't need it, you can just skip implementation of this endpoint.
### `POST /get_labeling_proposal`
Called when user enables `Smart Auto-Fit` option in AI Assistance tools and places manually created cuboid after that - a request to this endpoint will be sent in order to try to automatically fit cuboid to target object instead of correcting it manually%
{% embed url="" %}
**Receives** (under `request.state.state`):
| Field | Type | Description |
| ------------------ | ------------ | -------------------------------- |
| `pcd_id` | int | ID of the point cloud. |
| `click_coordinate` | list\[float] | `[x, y, z]` of the user's click. |
**Returns**: `{"result": | null, "error": null}`. Return `null` for `result` when no labeling proposals are available near the click.
```python
@server.post("/get_labeling_proposal")
def get_labeling_proposal(request: Request):
api = request.state.api
state = request.state.state
pcd_id = state["pcd_id"]
click_coordinate = np.asarray(state["click_coordinate"])
# Pick a cluster from f.labeling_proposals[pcd_id] near click_coordinate,
# build a Cuboid3d from it, and return its JSON. Or use any other
# algorithm in order to generate cuboid near given coordinate
return {"result": cluster_cuboid.to_json(), "error": None}
```
### `POST /segment_ground`
Called when the user selects `Ground Segmentation` option in AI Assistance tools:
{% embed url="" %}
**Receives** (under `request.state.state`):
| Field | Type | Description |
| -------- | ---- | --------------------------------- |
| `pcd_id` | int | ID of the point cloud to segment. |
**Returns**: `{"result": [int, int, ...], "error": null}` — a list of indices into the point cloud's `points` array that belong to the ground plane.
```python
@server.post("/segment_ground")
def get_ground_indices(request: Request):
api = request.state.api
state = request.state.state
pcd_id = state["pcd_id"]
pcd, _ = f.read_pcd(pcd_id, api)
ground_indexes = run_your_ground_segmentation_model(pcd) # returns numpy int array
return {"result": ground_indexes.tolist(), "error": None}
```
### `POST /transfer_masks_to_pcd`
Called when the user has drawn 2D annotations (rectangles, polygons, bitmaps) on a photo-context image and wants to transfer them to 3D space (e.g. bounding boxes -> cuboids):
{% embed url="" %}
**Receives** (under `request.state.state`):
| Field | Type | Description |
| ------------ | ----------------------- | ------------------------------------------------------------------------------------- |
| `pcd_id` | int | ID of the target point cloud. |
| `image_id` | int | ID of the photo-context image carrying the 2D figures. |
| `figure_ids` | list\[int] *(optional)* | If present, only transfer these figures. Otherwise transfer all figures on the image. |
**Returns**: `{"result": [, ...]}` where each entry is
```json
{
"geometryType": "cuboid_3d",
"geometry": { "...": "Cuboid3d JSON" },
"srcFigureId": 12345
}
```
`srcFigureId` is mandatory — the labeling tool uses it to link the resulting 3D cuboid back to the originating 2D figure.
```python
@server.post("/transfer_masks_to_pcd")
def transfer_masks_to_pcd(request: Request):
api = request.state.api
state = request.state.state
pcd_id = state["pcd_id"]
photo_context_img_id = state["image_id"]
figure_ids = state.get("figure_ids", [])
dataset_id = api.pointcloud.get_info_by_id(pcd_id).dataset_id
figures = api.image.figure.download(dataset_id, [photo_context_img_id])[photo_context_img_id]
if figure_ids:
figures = [fig for fig in figures if fig.id in figure_ids]
anns_3d = []
for fig in figures:
cuboid = run_your_2d_to_3d_lifting(fig, ...)
anns_3d.append({
"geometryType": "cuboid_3d",
"geometry": cuboid.to_json(),
"srcFigureId": fig.id,
})
return {"result": anns_3d}
```
For real implementations you will probably need the photo-context image and its camera calibration, plus a way to rasterize the 2D figures. The repo ships two helpers in [functions.py](https://github.com/supervisely-ecosystem/custom-3d-ai-assistant/blob/master/src/functions.py) that the random-stub `transfer_masks_to_pcd` handler does not call but that you will almost certainly want.
`load_photo_context_data` downloads the related image and pulls the 3×4 extrinsic and 3×3 intrinsic matrices out of the point cloud's image metadata:
```python
def load_photo_context_data(dataset_id, image_id, api):
filters = [{"field": ApiField.ID, "operator": "=", "value": image_id}]
img_info = api.pointcloud.get_list_all_pages(
"point-clouds.images.list",
{ApiField.DATASET_ID: dataset_id, ApiField.FILTER: filters},
convert_json_info_cb=lambda x: x,
)[0]
photo_context_img_path = f"related_images/{image_id}.jpg"
api.pointcloud.download_related_image(img_info["id"], photo_context_img_path)
photo_context_img = sly.image.read(photo_context_img_path)
extrinsic_matrix = np.asarray(img_info["meta"]["sensorsData"]["extrinsicMatrix"]).reshape((3, 4))
intrinsic_matrix = np.asarray(img_info["meta"]["sensorsData"]["intrinsicMatrix"]).reshape((3, 3))
return {
"image": photo_context_img,
"extrinsic_matrix": extrinsic_matrix,
"intrinsic_matrix": intrinsic_matrix,
}
```
`get_2d_anns` turns each Supervisely 2D figure into a numpy mask (for bitmaps and polygons), a `[left, top, right, bottom]` bbox (for rectangles), or a list of `[col, row]` points (for polylines):
```python
def get_2d_anns(image_id, dataset_id, photo_context_img, api, figure_ids):
figures = api.image.figure.download(dataset_id, [image_id])[image_id]
anns_2d = []
for figure in figures:
if len(figure_ids) > 0 and figure.id not in figure_ids:
continue
if figure.geometry_type == "bitmap":
geometry = sly.Bitmap.from_json(figure.geometry)
mask = np.zeros(photo_context_img.shape, dtype=np.uint8)
geometry.draw(bitmap=mask, color=[1, 1, 1])
anns_2d.append(("bitmap", mask[:, :, :2], figure.id))
elif figure.geometry_type == "rectangle":
geometry = sly.Rectangle.from_json(figure.geometry)
bbox = [geometry.left, geometry.top, geometry.right, geometry.bottom]
anns_2d.append(("rectangle", bbox, figure.id))
elif figure.geometry_type == "polygon":
polygon_label = sly.Label(
sly.Polygon.from_json(figure.geometry),
sly.ObjClass("polygon", sly.Polygon),
)
bitmap_label = polygon_label.convert(sly.ObjClass("bitmap", sly.Bitmap))[0]
mask = np.zeros(photo_context_img.shape, dtype=np.uint8)
bitmap_label.geometry.draw(bitmap=mask, color=[1, 1, 1])
anns_2d.append(("polygon", mask[:, :, :2], figure.id))
elif figure.geometry_type == "line":
geometry = sly.Polyline.from_json(figure.geometry)
line_points = [[p.col, p.row] for p in geometry.exterior]
anns_2d.append(("line", line_points, figure.id))
return anns_2d
```
A real `transfer_masks_to_pcd` handler typically chains the two: call `load_photo_context_data` to get the image and matrices, call `get_2d_anns` to get rasterized 2D figures, then project each figure into the point cloud using the extrinsic/intrinsic matrices and fit a `Cuboid3d` around the resulting 3D points.
> **See also:** the [Supervisely Point Cloud Annotation Format](https://developer.supervisely.com/getting-started/supervisely-annotation-format/point-clouds) for the canonical JSON shape of `cuboid_3d`, dataset structure, and photo-context fields.
***
## 4. Advanced debug
Once the code is written, it's time to test it right in the Supervisely platform as a debugging app. In advanced debug mode the app runs locally on your machine but is reachable from the platform through a WireGuard VPN tunnel — so you can hit the real labeling-tool requests against your local breakpoints.
The repo already ships the launch configuration. [.vscode/launch.json](https://github.com/supervisely-ecosystem/custom-3d-ai-assistant/blob/master/.vscode/launch.json):
```json
{
"version": "0.2.0",
"configurations": [
{
"name": "Advanced debug",
"type": "debugpy",
"cwd": "${workspaceFolder}",
"request": "launch",
"module": "uvicorn",
"args": [
"src.main:app",
"--host",
"0.0.0.0",
"--port",
"8000",
"--ws",
"websockets"
],
"jinja": true,
"justMyCode": false,
"env": {
"PYTHONPATH": "${workspaceFolder}:${PYTHONPATH}",
"LOG_LEVEL": "DEBUG",
"ENV": "production",
"FOLDER": "./my_model",
"DEBUG_WITH_SLY_NET": "1",
"SLY_APP_DATA_DIR": "${workspaceFolder}/results"
}
}
]
}
```
You can read more about advanced debug mode [here](https://developer.supervisely.com/app-development/advanced/advanced-debugging).
After that:
1. If you develop in a Docker container, run the container with `--cap-add NET_ADMIN` — already configured in [devcontainer.json](https://github.com/supervisely-ecosystem/custom-3d-ai-assistant/blob/master/.devcontainer/devcontainer.json).
2. Install `wireguard` and `iproute2` — already done in [Dockerfile](https://github.com/supervisely-ecosystem/custom-3d-ai-assistant/blob/master/.devcontainer/Dockerfile). On macOS use `brew install wireguard-tools`.
3. Define your `TEAM_ID` (and `WORKSPACE_ID`) in `debug.env`. The other env variables that advanced debug needs are already set in `.vscode/launch.json`.
4. Switch the `launch.json` config to **"Advanced debug"**:

5. Run the code.
✅ It will deploy the app in the Supervisely platform as a REST API service.
Here is how an advanced-debug launch looks like:
{% embed url="" %}
After advanced debug launch you must be able to debug your app via the **Develop & Debug** app (just select Develop & Debug session in session selector).
{% embed url="" %}
***
## 5. App configuration
Use the [config.json](https://github.com/supervisely-ecosystem/custom-3d-ai-assistant/blob/master/config.json) from example repository as a starting point:
```json
{
"name": "Custom 3D AI assistant",
"type": "app",
"version": "2.0.0",
"categories": [
"neural network",
"pointclouds",
"detection & tracking",
"serve"
],
"description": "Deploy custom labeling assistant for 3D point clouds as REST API service",
"docker_image": "supervisely/custom-3d-ai-assistant:1.0.0",
"entrypoint": "python3 -m uvicorn src.main:app --host 0.0.0.0 --port 8000 --ws websockets",
"port": 8000,
"task_location": "application_sessions",
"min_instance_version": "6.15.35",
"isolate": true,
"session_tags": [
"3d_smart_tool",
"sly_point_cloud_tracking"
],
"community_agent": false,
"headless": true,
"is3DAIAssistant": true
}
```
Two fields are critical for an app to be recognized as a 3D AI Assistant:
* **`"is3DAIAssistant": true`** — without this flag the platform will not surface your app as a 3D assistant in the labeling tool.
* **`"session_tags": ["3d_smart_tool", "sly_point_cloud_tracking"]`** — the labeling tool and the tracker look up running sessions by these tags. Drop either tag and the corresponding feature (interactive smart tool or episode tracking) will not be wired to your app.
Other fields to keep aligned:
* **`"headless": true`** — this is a serving app with no UI.
* **`"port"`** and **`"entrypoint"`** must match the uvicorn command (8000 / `src.main:app`).
* **`"docker_image"`** must point to a published production image. Do not forget to build and push it before releasing app.
***
## 6. App release
Once you've tested the code, it's time to release it into the platform. It can be released as an App that is shared with the all Supervisely community, or as your own private App.
Refer to [How to Release your App](https://developer.supervisely.com/app-development/basics/from-script-to-supervisely-app) for all releasing details. For a private app check also [Private App Tutorial](https://developer.supervisely.com/app-development/basics/add-private-app).
# Neural Network integration
# Overview
In the upcoming tutorial series we will cover all the ways of how you can bring together your custom NN model and all the benefits of the Supervisely platform.
There are several ways how to do that with different tradeoffs of the amount of work needed to be done and the depth of integration with the Supervisely platform. We suggest the following roadmap:
## The levels of the NN integration: from simple python scripts to fully-featured training dashboards
### Level 0. Run your model locally
Write a python script that tests your model locally on several images. It's a good point to start before actual integration. This initial step allows you to check the model predictions and make sure that your inference code is correct and you can visualize the predictions as well. As a result you will have just a python script.
### Level 1. Run the model on a Supervisely Project via API
Write a python script that downloads images from your Supervisely project via API, gets the model predictions for the images, converts it to Supervisely format and uploads it back to the platform into a new project. At this step you can modify the script from level 0. This way you'll get the basic experience of working with the Supervisely API in your python code. We have a number of tutorials for that:
* [Iterating projects and datasets](/getting-started/python-sdk-tutorials/common/iterate-over-a-project)
* [Downloading and Uploading images to the platform](/getting-started/python-sdk-tutorials/images/image)
* [Labeling an image from code](/getting-started/python-sdk-tutorials/images/spatial-labels-on-images)
### Level 2. Integrate the model as a Serving App
Implement your model as a subclass of one of the Supervisely base classes for integration. At this point your model starts to be a regular Serving App that you've may already used in Supervisely. Generally speaking, your model will be compatible with the entire ecosystem of applications in Supervisely.
* Check the in-depth tutorial: [NN Integration Intro](/app-development/neural-network-integration/inference/overview-nn-integration)
* Also you can check already existing serving apps. Their source code are publicly available and can be utilized as additional examples: [NN Integration Example](https://github.com/supervisely-ecosystem/integrate-inst-seg-model), [Serve Detectron2](https://github.com/supervisely-ecosystem/detectron2/tree/main/supervisely/instance_segmentation/serve)
### Level 3. Integrate the Inference along with the Training App
Implement both the Inference App and the Training App as a pair of Supervisely Apps with a user-friendly GUI and a flexible settings for all your needs.
* The in-depth tutorial: [Training dashboard](/app-development/neural-network-integration/training/training-dashboard)
# Serving App
# Introduction
In this tutorial series you will learn how to integrate your custom model into Supervisely by creating a simple serving app.
✅ **Integration process is simple** - the only thing you need is to implement a method of how your model gets prediction of an image. Supervisely SDK will handle the rest automatically.
{% hint style="info" %}
If you are using popular machine learning frameworks, you can skip integration and start using already existing apps in [Supervisely Ecosystem](https://ecosystem.supervisely.com/). Most popular neural network frameworks are already integrated into Supervisely. Users can train these models on their data and test them (inference) right in the platform in a few clicks.
We highly recommend to explore apps in [Supervisely Ecosystem](https://ecosystem.supervisely.com/), here are several examples of ready-to-use frameworks for instance segmentation:
* MMDetection [](https://camo.githubusercontent.com/bf25a249878d6417d7ab913069e1868e6e1c56baa2ec4f6dd4c5806e6d9c578f/68747470733a2f2f696d672e736869656c64732e696f2f6769746875622f73746172732f6f70656e2d6d6d6c61622f6d6d646574656374696f6e3f7374796c653d736f6369616c) - apps for [training](https://ecosystem.supervisely.com/apps/mmdetection/train) and [inference](https://ecosystem.supervisely.com/apps/mmdetection/serve)
* Detectron2 [](https://camo.githubusercontent.com/709465743709c522feb07a94a3a9598a3585cc3e2b54324cb4f7bdce107a6506/68747470733a2f2f696d672e736869656c64732e696f2f6769746875622f73746172732f66616365626f6f6b72657365617263682f646574656374726f6e323f7374796c653d736f6369616c) - apps for [training](https://ecosystem.supervisely.com/apps/detectron2/supervisely/train) and [inference](https://ecosystem.supervisely.com/apps/detectron2/supervisely/instance_segmentation/serve)
If your favorite NN framework is not in our Ecosystem yet, you can send us a feature request in [Supervisely Ideas Exchange](https://ideas.supervisely.com/).
{% endhint %}
## Benefits
Once you implement a serving application for your NN architecture, you can do a lot of things, like inference on your data for pre-labeling to speed up annotation, perform active learning, analyze and debug your model with various data science tools, combine models into pipelines and many more.
Find more use cases and video tutorials on [our youtube channel](https://www.youtube.com/c/Supervisely).
{% hint style="success" %}
Generally speaking, your model will be compatible with the entire ecosystem of applications in Supervisely.
{% endhint %}
Here are the examples of apps you might be interested to use with your model:
* [`Apply NN to Images Project` app](https://ecosystem.supervisely.com/apps/nn-image-labeling/project-dataset) - apply NN to your images and save predictions
* [`NN Image Labeling` app](https://ecosystem.supervisely.com/apps/nn-image-labeling/annotation-tool) - use NN right in labeling interface
* [`Apply Detection and Classification Models to Images Project` app](https://ecosystem.supervisely.com/apps/apply-det-and-cls-models-to-project) - combine models into pipelines
* [`Apply NN to Videos Project` app](https://ecosystem.supervisely.com/apps/apply-nn-to-videos-project) - predict and track objects on videos
* Analyze model performance metrics ([app1](https://ecosystem.supervisely.com/apps/review_object_detection_metrics/supervisely), [app2](https://ecosystem.supervisely.com/apps/semantic-segmentation-metrics-dashboard))
* **Inference via Session API:** You can also connect to the model and get the inference in a couple of lines with the help of the `sly.nn.inference.Session` class. See our [Inference API Tutorial](/app-development/neural-network-integration/inference-api-tutorial).
## We have tutorials for all CV tasks
**Just pick one you need and get started:**
* [Object Detection](/app-development/neural-network-integration/inference/object-detection)
* [Instance Segmentation](/app-development/neural-network-integration/inference/instance-segmentation)
* [Semantic Segmentation](/app-development/neural-network-integration/inference/semantic-segmentation)
* [Pose Estimation](/app-development/neural-network-integration/inference/pose-estimation)
# Instance segmentation
Step-by-step tutorial of how to integrate custom instance segmentation neural network into Supervisely platform on the example of detectron2.
## Introduction
In this tutorial you will learn how to integrate your custom instance segmentation model into Supervisely by creating a simple serving app. As an example, we will use [Facebook's detectron2](https://github.com/facebookresearch/detectron2) repository, which implements a set of detection models.
## Getting started
**Step 1.** Prepare `~/supervisely.env` file with credentials. [Learn more here.](https://developer.supervisely.com/app-development/neural-network-integration/inference/pages/2TS0DqIIblacweum1NCW#use-.env-file-recommended)
**Step 2.** Clone [repository](https://github.com/supervisely-ecosystem/integrate-inst-seg-model) with source code and create [Virtual Environment](https://docs.python.org/3/library/venv.html).
```bash
git clone https://github.com/supervisely-ecosystem/integrate-inst-seg-model
cd integrate-inst-seg-model
./create_venv.sh
```
**Step 3.** Open the repository directory in Visual Studio Code.
```bash
code -r .
```
**Step 4.** Run debug for script `src/main.py`
## Python script
The integration script is simple:
1. Automatically downloads NN weights to `./my_model` folder
2. Loads model on the CPU or GPU device
3. Runs inference on a demo image
4. Visualizes predictions on top of the input image
The entire integration Python script takes only 👍 **90 lines** of code (including comments) and can be found in [GitHub repository](https://github.com/supervisely-ecosystem/integrate-inst-seg-model) for this tutorial.
## Implementation details
To integrate your model, you need to subclass **`sly.nn.inference.InstanceSegmentation`** and implement 3 methods:
* `load_on_device` method for downloading the weights and initializing the model on a specific device. Takes a `model_dir` argument, that is a directory for all model files (like configs, weights, etc). The second argument is a `device` - a torch.device like `cuda:0`, `cpu`.
* `get_classes` method should return a list of class names (strings) that model can predict.
* `predict`. The core implementation of a model inference. It takes a path to an image and inference settings as arguments, applies the model inference to the image and returns a list of predictions (which are `sly.nn.PredictionMask` objects).
### Overall structure
The overall structure of the class we will implement is looking like this:
```python
class MyModel(sly.nn.inference.InstanceSegmentation):
def load_on_device(
self,
model_dir: str,
device: Literal["cpu", "cuda", "cuda:0", "cuda:1", "cuda:2", "cuda:3"] = "cpu",
):
# preparing the model: model instantiating, downloading weights, loading it on device.
pass
def get_classes(self) -> List[str]:
# returns a list of supported classes, e.g. ["cat", "dog", ...]
# ...
return class_names
def predict(self, image_path: str, settings: Dict[str, Any]) -> List[sly.nn.PredictionMask]:
# the inference of a model here
# ...
return prediction
```
The superclass has a `serve()` method. For running the code on the Supervisely platform, `m.serve()` method should be executed:
```python
if sly.is_production():
m.serve()
else:
# ...
```
And here is the beauty comes in. The method `serve()` internally handles everything and deploys your model as a **REST API** service on the Supervisely platform. It means that other applications are able to communicate with your model and get predictions from it.
So let's implement the class.
### Step-by-step implementation
**Defining imports and global variables**
```python
import os
from typing_extensions import Literal
from typing import List, Any, Dict
import cv2
from dotenv import load_dotenv
import torch
import supervisely as sly
from detectron2 import model_zoo
from detectron2.engine import DefaultPredictor
from detectron2.config import get_cfg
from detectron2.data import MetadataCatalog
load_dotenv("local.env")
load_dotenv(os.path.expanduser("~/supervisely.env"))
weights_url = "https://dl.fbaipublicfiles.com/detectron2/COCO-InstanceSegmentation/mask_rcnn_R_50_FPN_3x/137849600/model_final_f10217.pkl"
device = "cuda" if torch.cuda.is_available() else "cpu"
print("Using device:", device)
```
**1. load\_on\_device**
The following code downloads model weights, creates the model according to config `my_model/model_info.json` (which will instantiate one of detectron2 architecture). Also it will keep the model as a `self.predictor` and classes as `self.class_names` for further use:
```python
class MyModel(sly.nn.inference.InstanceSegmentation):
def load_on_device(
self,
model_dir: str,
device: Literal["cpu", "cuda", "cuda:0", "cuda:1", "cuda:2", "cuda:3"] = "cpu",
):
weights_path = self.download(weights_url)
model_info = sly.json.load_json_file(os.path.join(model_dir, "model_info.json"))
architecture_name = model_info["architecture"]
cfg = get_cfg()
cfg.merge_from_file(model_zoo.get_config_file(architecture_name))
cfg.MODEL.DEVICE = device # learn more in torch.device
cfg.MODEL.WEIGHTS = weights_path
self.predictor = DefaultPredictor(cfg)
self.class_names = MetadataCatalog.get(cfg.DATASETS.TRAIN[0]).get("thing_classes")
print(f"✅ Model has been successfully loaded on {device.upper()} device")
```
{% hint style="info" %}
Here we are downloading the model weights by **url**, but it can be also downloaded by path in Supervisely **Team Files**. You can even pass a path to folder with the model, then an entire folder will be downloaded.
{% endhint %}
**2. get\_classes**
Simply returns previously saved **class\_names**:
```python
def get_classes(self) -> List[str]:
return self.class_names # e.g. ["cat", "dog", ...]
```
**3. predict**
The core method for model inference. Here we are reading an image and getting an inference of the model. The code here is usually borrowed from the framework or the model you use, that is **detectron2** in our case. It let us simply use `self.predictor(image)`. Then we wrap model predictions into `sly.nn.PredictionMask` and do some post-processing steps.
```python
def predict(self, image_path: str, settings: Dict[str, Any]) -> List[sly.nn.PredictionMask]:
confidence_threshold = settings.get("confidence_threshold", 0.5)
image = cv2.imread(image_path) # BGR
outputs = self.predictor(image) # get predictions from Detectron2 model
pred_classes = outputs["instances"].pred_classes.detach().numpy()
pred_class_names = [self.class_names[pred_class] for pred_class in pred_classes]
pred_scores = outputs["instances"].scores.detach().numpy().tolist()
pred_masks = outputs["instances"].pred_masks.detach().numpy()
results = []
for score, class_name, mask in zip(pred_scores, pred_class_names, pred_masks):
# filter predictions by confidence
if score >= confidence_threshold:
results.append(sly.nn.PredictionMask(class_name, mask, score))
return results
```
It **must** return exactly a list of `sly.nn.PredictionMask` objects for compatibility with Supervisely. Your code should just wrap the prediction: `sly.nn.PredictionMask(class_name, mask, score)`, where the mask is a `np.array` prediction mask and the score is a float `confidence_score`.
**Usage of our class**
Once the class is created, here we initialize it and get one test prediction for debugging.
{% hint style="info" %}
In the code below a `custom_inference_settings` is used. It allows us to provide a custom settings that could be used in `predict()` (See more in [Customized Inference Tutorial](/app-development/neural-network-integration/inference/customize-inference))
{% endhint %}
```python
model_dir = "my_model" # model weights will be downloaded into this dir
settings = {"confidence_threshold": 0.7}
m = MyModel(model_dir=model_dir, custom_inference_settings=settings)
m.load_on_device(model_dir=model_dir, device=device)
if sly.is_production():
# this code block is running on Supervisely platform in production
# just ignore it during development
m.serve()
else:
# for local development and debugging
image_path = "./demo_data/image_01.jpg"
results = m.predict(image_path, settings)
vis_path = "./demo_data/image_01_prediction.jpg"
m.visualize(results, image_path, vis_path)
print(f"predictions and visualization have been saved: {vis_path}")
```
Here are the input image and output predictions:
| Input | Output |
| ---------------------------------------------------------------------------------------------------------- | ---------------------------------------------------------------------------------------------------------- |
|  |  |
## Run and debug
The beauty of this class is that you can easily debug your code locally in your favorite IDE.
{% hint style="info" %}
For now, we recommend using **Visual Studio Code** IDE, because our repositories have prepared settings for convenient debugging in VSCode. It is the easiest way to start.
{% endhint %}
### Local debug
You can run the code locally for debugging. For **Visual Studio Code** we've created a `launch.json` config file that can be selected:

### Debug in Supervisely platform
Once the code seems working locally, it's time to test the code right in the Supervisely platform as a debugging app. For that:
1. If you develop in a Docker container, you should run the container with `--cap_add=NET_ADMIN` option.
2. Install `sudo apt-get install wireguard iproute2`.
3. Define your `TEAM_ID` in the `local.env` file. *Actually there are other env variables that is needed, but they are already provided in `./vscode/launch.json` for you.*
4. Switch the `launch.json` config to the `Advanced debug in Supervisely platform`:

5. Run the code.
✅ It will deploy the model in the Supervisely platform as a regular serving App that is able to communicate with all others app in the platform:

{% hint style="success" %}
Now you can use apps like [Apply NN to Images](https://ecosystem.supervisely.com/apps/nn-image-labeling/project-dataset), [Apply NN to videos](https://ecosystem.supervisely.com/apps/apply-nn-to-videos-project) with your deployed model.
Or get the model inference via **Python API** with the help of `sly.nn.inference.Session` class just in one line of code. See [Inference API Tutorial](/app-development/neural-network-integration/inference-api-tutorial).
{% endhint %}
## Release your code as a Supervisely App.
Once you've tested the code, it's time to release it into the platform. It can be released as an App that shared with the all Supervisely community, or as your own private App.
Refer to [How to Release your App](/app-development/basics/from-script-to-supervisely-app) for all releasing details. For a private app check also [Private App Tutorial](/app-development/basics/add-private-app).
In this tutorial we'll quickly observe the key concepts of our app.
### Repository structure
The structure of [our GitHub repository](https://github.com/supervisely-ecosystem/integrate-inst-seg-model) is the following:
```
.
├── README.md
├── config.json
├── create_venv.sh
├── requirements.txt
├── demo_data
│ ├── image_01.jpg
│ └── image_01_prediction.jpg
├── docker
│ ├── Dockerfile
│ └── publish.sh
├── local.env
├── my_model
│ └── model_info.json
└── src
└── main.py
```
Explanation:
* `src/main.py` - main inference script
* `my_model` - directory with model weights and additional config files
* `demo_data` - directory with demo image for inference
* `README.md` - readme of your application, it is the main page of an application in Ecosystem with some images, videos, and how-to-use guides
* `config.json` - configuration of the Supervisely application, which defines the name and description of the app, its context menu, icon, poster, and running settings
* `create_venv.sh` - creates a virtual environment, installs detectron2 framework, includes the support of Apple CPUs (m1 / m2 ...)
* `requirements.txt` - all packages needed for debugging
* `local.env` - file with variables used for debugging
* `docker` - directory with the custom Dockerfile for this application and the script that builds it and publishes it to the docker registry
### App configuration
App configuration is stored in `config.json` file. A detailed explanation of all possible fields is covered in this [Configuration Tutorial](/app-development/basics/app-json-config/config-json). Let's check the config for our current app:
```json
{
"type": "app",
"version": "2.0.0",
"name": "Serve custom instance segmentation model",
"description": "Demo app for integrating your custom instance segmentation model",
"categories": [
"neural network",
"images",
"videos",
"instance segmentation",
"segmentation & tracking",
"serve",
"development"
],
"session_tags": ["deployed_nn"],
"need_gpu": true,
"community_agent": false,
"docker_image": "supervisely/detectron2-demo:1.0.3",
"entrypoint": "python -m uvicorn src.main:m.app --host 0.0.0.0 --port 8000",
"port": 8000,
"headless": true
}
```
Here is the explanation for the fields:
* `type` - type of the module in Supervisely Ecosystem
* `version` - version of Supervisely App Engine. Just keep it by default
* `name` - the name of the application
* `description` - the description of the application
* `categories` - these tags are used to place the application in the correct category in Ecosystem.
* `session_tags` - these tags will be assigned to every running session of the application. They can be used by other apps to find and filter all running sessions
* `"need_gpu": true` - should be true if you want to use any `cuda` devices.
* `"community_agent": false` - this means that this app can not be run on the agents started by Supervisely team, so users have to connect their own computers and run the app only on their own agents. Only applicable in Community Edition. Enterprise customers use their private instances so they can ignore current option
* `docker_image` - Docker container will be started from the defined Docker image, github repository will be downloaded and mounted inside the container.
* `entrypoint` - the command that starts our application in a container
* `port` - port inside the container
* `"headless": true` means that the app has no User Interface
# Object detection
Step-by-step tutorial of how to integrate custom object detection neural network into Supervisely platform on the example of detectron2.
## Introduction
In this tutorial you will learn how to integrate your custom object detection model into Supervisely by creating a simple serving app. As an example, we will use [detectron2](https://github.com/facebookresearch/detectron2) repository.
## Getting started
**Step 1.** Prepare `~/supervisely.env` file with credentials. [Learn more here.](https://developer.supervisely.com/app-development/neural-network-integration/inference/pages/2TS0DqIIblacweum1NCW#use-.env-file-recommended)
**Step 2.** Clone [repository](https://github.com/supervisely-ecosystem/integrate-obj-det-model) with source code and create [Virtual Environment](https://docs.python.org/3/library/venv.html).
```bash
git clone https://github.com/supervisely-ecosystem/integrate-obj-det-model
cd integrate-obj-det-model
./create_venv.sh
```
**Step 3.** Open the repository directory in Visual Studio Code.
```bash
code -r .
```
**Step 4.** Run debug for script `src/main.py`
## Python script
The integration script is simple:
1. Automatically downloads NN weights to `./my_model` folder
2. Loads model on the CPU or GPU device
3. Runs inference on a demo image
4. Visualizes predictions on top of the input image
The entire integration Python script takes only 👍 **90 lines** of code (including comments) and can be found in [GitHub repository](https://github.com/supervisely-ecosystem/integrate-obj-det-model) for this tutorial.
## Implementation details
To integrate object detection model, you need to subclass **`sly.nn.inference.ObjectDetection`** and implement 3 methods:
* `load_on_device` method for downloading the weights and initializing the model on a specific device. Takes a `model_dir` argument, that is a directory for all model files (like configs, weights, etc). The second argument is a `device` - a `torch.device` like `cuda:0`, `cpu`.
* `get_classes` method should return a list of class names (strings) that model can predict.
* `predict`. The core implementation of a model inference. It takes a path to an image and inference settings as arguments, applies the model inference to the image and returns a list of predictions (which are `sly.nn.PredictionBBox` objects).
### Overall structure
The overall structure of the class we will implement is looking like this:
```python
class MyModel(sly.nn.inference.ObjectDetection):
def load_on_device(
self,
model_dir: str,
device: Literal["cpu", "cuda", "cuda:0", "cuda:1", "cuda:2", "cuda:3"] = "cpu",
):
# preparing the model: model instantiating, downloading weights, loading it on device.
pass
def get_classes(self) -> List[str]:
# returns a list of supported classes, e.g. ["cat", "dog", ...]
# ...
return class_names
def predict(self, image_path: str, settings: Dict[str, Any]) -> List[sly.nn.PredictionBBox]:
# the inference of a model here
# ...
return prediction
```
The superclass has a `serve()` method. To run the code and deploy the model on the Supervisely platform, `m.serve()` method should be executed:
```python
if sly.is_production():
m.serve()
else:
# ...
```
And here is the beauty comes in. The method `serve()` internally handles everything and deploys your model as a **REST API** service on the Supervisely platform. It means that other applications are able to communicate with your model and get predictions from it.
So let's implement the class.
### Step-by-step implementation
**Defining imports and global variables**
```python
import os
from typing_extensions import Literal
from typing import List, Any, Dict
import cv2
import json
from dotenv import load_dotenv
import torch
import supervisely as sly
from detectron2 import model_zoo
from detectron2.engine import DefaultPredictor
from detectron2.config import get_cfg
from detectron2.data import MetadataCatalog
load_dotenv("local.env")
load_dotenv(os.path.expanduser("~/supervisely.env"))
device = "cuda" if torch.cuda.is_available() else "cpu"
print("Using device:", device)
weights_url = "https://dl.fbaipublicfiles.com/detectron2/COCO-Detection/faster_rcnn_R_50_FPN_3x/137849458/model_final_280758.pkl"
```
**1. load\_on\_device**
The following code downloads model weights and builds the model according to config in `my_model/model_info.json`. Also it will keep the model as a `self.predictor` and classes as `self.class_names` for further use:
```python
class MyModel(sly.nn.inference.ObjectDetection):
def load_on_device(
self,
model_dir: str,
device: Literal["cpu", "cuda", "cuda:0", "cuda:1", "cuda:2", "cuda:3"] = "cpu",
):
####### CUSTOM CODE FOR MY MODEL STARTS (e.g. DETECTRON2) #######
weights_path = self.download(weights_url)
model_info = sly.json.load_json_file(os.path.join(model_dir, "model_info.json"))
architecture_name = model_info["architecture"]
cfg = get_cfg()
cfg.merge_from_file(model_zoo.get_config_file(architecture_name))
cfg.MODEL.DEVICE = device # learn more in torch.device
cfg.MODEL.WEIGHTS = weights_path
self.predictor = DefaultPredictor(cfg)
self.class_names = MetadataCatalog.get(cfg.DATASETS.TRAIN[0]).get("thing_classes")
####### CUSTOM CODE FOR MY MODEL ENDS (e.g. DETECTRON2) ########
print(f"✅ Model has been successfully loaded on {device.upper()} device")
```
{% hint style="info" %}
Here we are downloading the model weights by **url**, but it can be also downloaded by path in Supervisely **Team Files**. You can even pass a path to folder with the model, then an entire folder will be downloaded.
{% endhint %}
**2. get\_classes**
Simply returns previously saved **class\_names**:
```python
def get_classes(self) -> List[str]:
return self.class_names # e.g. ["cat", "dog", ...]
```
**3. predict**
The core method for model inference. Here we are reading an image and getting an inference of the model. The code here is usually borrowed from the framework or the model you use, that is **detectron2** in our case. Then we wrap the model prediction into a `sly.nn.PredictionBBox` class and do some post-processing steps.
```python
def predict(
self, image_path: str, settings: Dict[str, Any]
) -> List[sly.nn.PredictionBBox]:
confidence_threshold = settings.get("confidence_threshold", 0.5)
image = cv2.imread(image_path) # BGR
####### CUSTOM CODE FOR MY MODEL STARTS (e.g. DETECTRON2) #######
outputs = self.predictor(image) # get predictions from Detectron2 model
pred_classes = outputs["instances"].pred_classes.detach().cpu().numpy()
pred_class_names = [self.class_names[pred_class] for pred_class in pred_classes]
pred_scores = outputs["instances"].scores.detach().cpu().numpy().tolist()
pred_bboxes = outputs["instances"].pred_boxes.tensor.detach().cpu().numpy()
####### CUSTOM CODE FOR MY MODEL ENDS (e.g. DETECTRON2) ########
results = []
for score, class_name, bbox in zip(pred_scores, pred_class_names, pred_bboxes):
# filter predictions by confidence
if score >= confidence_threshold:
bbox = [bbox[1], bbox[0], bbox[3], bbox[2]]
results.append(sly.nn.PredictionBBox(class_name, bbox, score))
return results
```
It **must** return exactly the list of `sly.nn.PredictionBBox` objects for compatibility with Supervisely. Your code should just wrap the model predictions: `sly.nn.PredictionBBox(class_name, bbox, score)`, where the `class_name` is a `str`, `bbox` is a list of 4 int coordinates `[top, left, bottom, right]` and the `score` is a model `confidence_score`.
**Usage of our class**
Once the class is created, here we initialize it and get one test prediction for debugging.
{% hint style="info" %}
In the code below a `custom_inference_settings` is used. It allows us to provide a custom settings that could be used in `predict()` (See more in [Customized Inference Tutorial](/app-development/neural-network-integration/inference/customize-inference))
{% endhint %}
```python
model_dir = "my_model" # model weights will be downloaded into this dir
settings = {"confidence_threshold": 0.7}
m = MyModel(model_dir=model_dir, custom_inference_settings=settings)
m.load_on_device(model_dir=model_dir, device=device)
if sly.is_production():
# this code block is running on Supervisely platform in production
# just ignore it during development
m.serve()
else:
# for local development and debugging
image_path = "./demo_data/image_01.jpg"
results = m.predict(image_path, settings)
vis_path = "./demo_data/image_01_prediction.jpg"
m.visualize(results, image_path, vis_path)
print(f"predictions and visualization have been saved: {vis_path}")
```
Here are the input image and output predictions:
| Input | Output |
| ---------------------------------------------------------------------------------------------------------- | -------------------------------------------------------------------------------------------------------------------------- |
|  |  |
## Run and debug
The beauty of this class is that you can easily debug your code locally in your favorite IDE.
{% hint style="info" %}
For now, we recommend using **Visual Studio Code** IDE, because our repositories have prepared settings for convenient debugging in VSCode. It is the easiest way to start.
{% endhint %}
### Local debug
You can run the code locally for debugging. For **Visual Studio Code** we've created a `launch.json` config file that can be selected:

### Debug in Supervisely platform
Once the code seems working locally, it's time to test the code right in the Supervisely platform as a debugging app. For that:
1. If you develop in a Docker container, you should run the container with `--cap_add=NET_ADMIN` option.
2. Install `sudo apt-get install wireguard iproute2`.
3. Define your `TEAM_ID` in the `local.env` file. *Actually there are other env variables that is needed, but they are already provided in `./vscode/launch.json` for you.*
4. Switch the `launch.json` config to the `Advanced debug in Supervisely platform`:

5. Run the code.
✅ It will deploy the model in the Supervisely platform as a regular serving App that is able to communicate with all others app in the platform:

{% hint style="success" %}
Now you can use apps like [Apply NN to Images](https://ecosystem.supervisely.com/apps/nn-image-labeling/project-dataset), [Apply NN to videos](https://ecosystem.supervisely.com/apps/apply-nn-to-videos-project) with your deployed model.
Or get the model inference via **Python API** with the help of `sly.nn.inference.Session` class just in one line of code. See [Inference API Tutorial](/app-development/neural-network-integration/inference-api-tutorial).
{% endhint %}
## Release your code as a Supervisely App.
Once you've tested the code, it's time to release it into the platform. It can be released as an App that shared with the all Supervisely community, or as your own private App.
Refer to [How to Release your App](/app-development/basics/from-script-to-supervisely-app) for all releasing details. For a private app check also [Private App Tutorial](/app-development/basics/add-private-app).
In this tutorial we'll quickly observe the key concepts of our app.
### Repository structure
The structure of [our GitHub repository](https://github.com/supervisely-ecosystem/integrate-obj-det-model) is the following:
```
.
├── README.md
├── config.json
├── create_venv.sh
├── requirements.txt
├── demo_data
│ ├── image_01.jpg
│ └── image_01_prediction.jpg
├── docker
│ ├── Dockerfile
│ └── publish.sh
├── local.env
├── my_model
│ └── model_info.json
└── src
└── main.py
```
Explanation:
* `src/main.py` - main inference script
* `my_model` - directory with model weights and additional config files
* `demo_data` - directory with demo image for inference
* `README.md` - readme of your application, it is the main page of an application in Ecosystem with some images, videos, and how-to-use guides
* `config.json` - configuration of the Supervisely application, which defines the name and description of the app, its context menu, icon, poster, and running settings
* `create_venv.sh` - creates a virtual environment, installs detectron2 and requirements.
* `requirements.txt` - all needed packages
* `local.env` - file with env variables used for debugging
* `docker` - directory with the custom Dockerfile for this application and the script that builds it and publishes it to the docker registry
### App configuration
App configuration is stored in `config.json` file. A detailed explanation of all possible fields is covered in this [Configuration Tutorial](/app-development/basics/app-json-config/config-json). Let's check the config for our current app:
```json
{
"type": "app",
"version": "2.0.0",
"name": "Serve custom object detection model",
"description": "Demo app of integrating your custom object detection model",
"categories": [
"neural network",
"images",
"videos",
"object detection",
"detection & tracking",
"serve",
"development"
],
"session_tags": ["deployed_nn"],
"need_gpu": true,
"community_agent": false,
"docker_image": "supervisely/detectron2-demo:1.0.3",
"entrypoint": "python -m uvicorn src.main:m.app --host 0.0.0.0 --port 8000",
"port": 8000,
"headless": true
}
```
Here is an explanation for the fields:
* `type` - type of the module in Supervisely Ecosystem
* `version` - version of Supervisely App Engine. Just keep it by default
* `name` - the name of the application
* `description` - the description of the application
* `categories` - these tags are used to place the application in the correct category in Ecosystem.
* `session_tags` - these tags will be assigned to every running session of the application. They can be used by other apps to find and filter all running sessions
* `"need_gpu": true` - should be true if you want to use any `cuda` devices.
* `"community_agent": false` - this means that this app can not be run on the agents started by Supervisely team, so users have to connect their own computers and run the app only on their own agents. Only applicable in Community Edition. Enterprise customers use their private instances so they can ignore current option
* `docker_image` - Docker container will be started from the defined Docker image, github repository will be downloaded and mounted inside the container.
* `entrypoint` - the command that starts our application in a container
* `port` - port inside the container
* `"headless": true` means that the app has no User Interface
# Semantic segmentation
Step-by-step tutorial of how to integrate custom semantic segmentation neural network into Supervisely platform on the example of mmsegmentation.
## Introduction
In this tutorial you will learn how to integrate your custom semantic segmentation model into Supervisely by creating a simple serving app. As an example, we will use [mmsegmentation](https://github.com/open-mmlab/mmsegmentation) repository.
## Getting started
**Step 1.** Prepare `~/supervisely.env` file with credentials. [Learn more here.](https://developer.supervisely.com/app-development/neural-network-integration/inference/pages/2TS0DqIIblacweum1NCW#use-.env-file-recommended)
**Step 2.** Clone [repository](https://github.com/supervisely-ecosystem/integrate-sem-seg-model) with source code and create [Virtual Environment](https://docs.python.org/3/library/venv.html).
```bash
git clone https://github.com/supervisely-ecosystem/integrate-sem-seg-model
cd integrate-sem-seg-model
./create_venv.sh
```
**Step 3.** Open the repository directory in Visual Studio Code.
```bash
code -r .
```
**Step 4.** Run debug for script `src/main.py`
## Python script
The integration script is simple:
1. Automatically downloads NN weights to `./my_model` folder
2. Loads model on the CPU or GPU device
3. Runs inference on a demo image
4. Visualizes predictions on top of the input image
The entire integration Python script takes only 👍 **75 lines** of code (including comments) and can be found in [GitHub repository](https://github.com/supervisely-ecosystem/integrate-sem-seg-model) for this tutorial.
## Implementation details
To integrate semantic segmentation model, you need to subclass **`sly.nn.inference.SemanticSegmentation`** and implement 3 methods:
* `load_on_device` method for downloading the weights and initializing the model on a specific device. Takes a `model_dir` argument, that is a directory for all model files (like configs, weights, etc). The second argument is a `device` - a `torch.device` like `cuda:0`, `cpu`.
* `get_classes` method should return a list of class names (strings) that model can predict.
* `predict`. The core implementation of a model inference. It takes a path to an image and inference settings as arguments, applies the model inference to the image and returns a list of predictions (which are `sly.nn.PredictionSegmentation` objects).
### Overall structure
The overall structure of the class we will implement is looking like this:
```python
class MyModel(sly.nn.inference.SemanticSegmentation):
def load_on_device(
self,
model_dir: str,
device: Literal["cpu", "cuda", "cuda:0", "cuda:1", "cuda:2", "cuda:3"] = "cpu",
):
# preparing the model: model instantiating, downloading weights, loading it on device.
pass
def get_classes(self) -> List[str]:
# returns a list of supported classes, e.g. ["cat", "dog", ...]
# ...
return class_names
def predict(self, image_path: str, settings: Dict[str, Any]) -> List[sly.nn.PredictionSegmentation]:
# the inference of a model here
# ...
return prediction
```
The superclass has a `serve()` method. To run the code and deploy the model on the Supervisely platform, `m.serve()` method should be executed:
```python
if sly.is_production():
m.serve()
else:
# ...
```
And here is the beauty comes in. The method `serve()` internally handles everything and deploys your model as a **REST API** service on the Supervisely platform. It means that other applications are able to communicate with your model and get predictions from it.
So let's implement the class.
### Step-by-step implementation
**Defining imports and global variables**
```python
import os
from typing_extensions import Literal
from typing import List, Any, Dict
import numpy as np
from dotenv import load_dotenv
import torch
import supervisely as sly
from mmcv import Config
from mmcv.cnn.utils import revert_sync_batchnorm
from mmcv.runner import load_checkpoint
from mmseg.models import build_segmentor
from mmseg.apis.inference import inference_segmentor, init_segmentor
load_dotenv("local.env")
load_dotenv(os.path.expanduser("~/supervisely.env"))
device = "cuda" if torch.cuda.is_available() else "cpu"
print("Using device:", device)
weights_url = "https://download.openmmlab.com/mmsegmentation/v0.5/segformer/segformer_mit-b3_512x512_160k_ade20k/segformer_mit-b3_512x512_160k_ade20k_20210726_081410-962b98d2.pth"
```
**1. load\_on\_device**
The following code downloads model weights and builds the model according to config in `my_model/model_config.py`. Also it will keep the model as a `self.model` and classes as `self.class_names` for further use:
```python
class MyModel(sly.nn.inference.SemanticSegmentation):
def load_on_device(
self,
model_dir: str,
device: Literal["cpu", "cuda", "cuda:0", "cuda:1", "cuda:2", "cuda:3"] = "cpu",
):
####### CUSTOM CODE FOR MY MODEL STARTS (e.g. MMSEGMENTATION) #######
weights_path = self.download(weights_url)
cfg = Config.fromfile(os.path.join(model_dir, "model_config.py"))
self.model = build_segmentor(cfg.model, test_cfg=cfg.get("test_cfg"))
checkpoint = load_checkpoint(self.model, weights_path, map_location=device)
self.class_names = checkpoint["meta"]["CLASSES"]
self.model.CLASSES = self.class_names
self.model.cfg = cfg
self.model.to(device)
self.model.eval()
self.model = revert_sync_batchnorm(self.model)
####### CUSTOM CODE FOR MY MODEL ENDS (e.g. MMSEGMENTATION) ########
print(f"✅ Model has been successfully loaded on {device.upper()} device")
```
{% hint style="info" %}
Here we are downloading the model weights by **url**, but it can be also downloaded by path in Supervisely **Team Files**. You can even pass a path to folder with the model, then an entire folder will be downloaded.
{% endhint %}
**2. get\_classes**
Simply returns previously saved **class\_names**:
```python
def get_classes(self) -> List[str]:
return self.class_names # e.g. ["cat", "dog", ...]
```
**3. predict**
The core method for model inference. The code here is very simple thanks to the **mmsegmentation** framework. We need just wrap the model prediction into a `sly.nn.PredictionSegmentation` class:
```python
def predict(
self, image_path: str, settings: Dict[str, Any]
) -> List[sly.nn.PredictionSegmentation]:
####### CUSTOM CODE FOR MY MODEL STARTS (e.g. DETECTRON2) #######
segmented_image = inference_segmentor(self.model, image_path)[0]
####### CUSTOM CODE FOR MY MODEL ENDS (e.g. DETECTRON2) ########
return [sly.nn.PredictionSegmentation(segmented_image)]
```
It **must** return exactly the list of `sly.nn.PredictionSegmentation` objects for compatibility with Supervisely. Your code should just wrap the model predictions: `sly.nn.PredictionSegmentation(mask)`, where the mask is a np.array mask.
**Usage of our class**
Once the class is created, here we initialize it and get one test prediction for debugging.
{% hint style="info" %}
In the code below a `custom_inference_settings` is used. It allows us to provide a custom settings that could be used in `predict()` (See more in [Customized Inference Tutorial](/app-development/neural-network-integration/inference/customize-inference))
{% endhint %}
```python
model_dir = "my_model" # model weights will be downloaded into this dir
m = MyModel(model_dir=model_dir)
m.load_on_device(model_dir=model_dir, device=device)
if sly.is_production():
# this code block is running on Supervisely platform in production
# just ignore it during development
m.serve()
else:
# for local development and debugging
image_path = "./demo_data/image_01.jpg"
results = m.predict(image_path, {})
vis_path = "./demo_data/image_01_prediction.jpg"
m.visualize(results, image_path, vis_path, thickness=2)
print(f"predictions and visualization have been saved: {vis_path}")
```
Here are the input image and output predictions:
| Input | Output |
| ---------------------------------------------------------------------------------------------------------- | ----------------------------------------------------------------------------------------------------------------------------- |
|  | 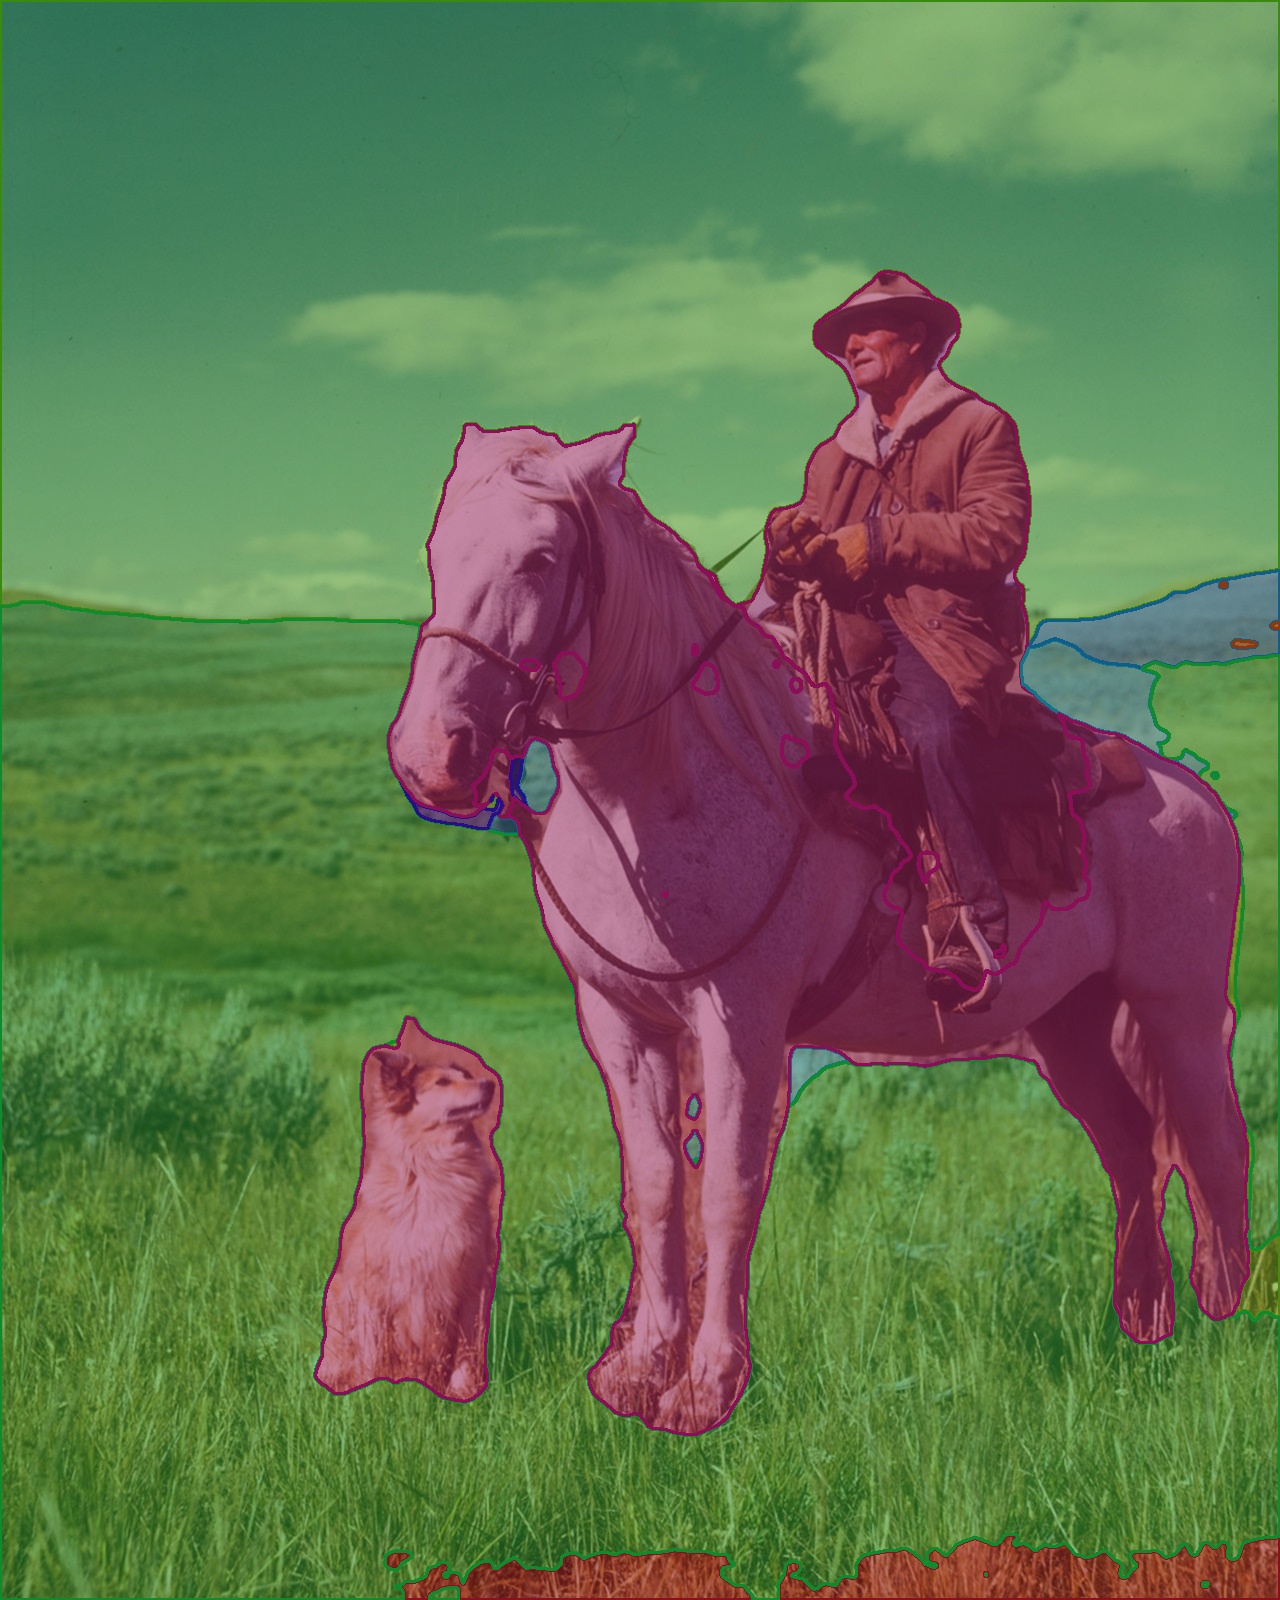 |
## Run and debug
The beauty of this class is that you can easily debug your code locally in your favorite IDE.
{% hint style="info" %}
For now, we recommend using **Visual Studio Code** IDE, because our repositories have prepared settings for convenient debugging in VSCode. It is the easiest way to start.
{% endhint %}
### Local debug
You can run the code locally for debugging. For **Visual Studio Code** we've created a `launch.json` config file that can be selected:

### Debug in Supervisely platform
Once the code seems working locally, it's time to test the code right in the Supervisely platform as a debugging app. For that:
1. If you develop in a Docker container, you should run the container with `--cap_add=NET_ADMIN` option.
2. Install `sudo apt-get install wireguard iproute2`.
3. Define your `TEAM_ID` in the `local.env` file. *Actually there are other env variables that is needed, but they are already provided in `./vscode/launch.json` for you.*
4. Switch the `launch.json` config to the `Advanced debug in Supervisely platform`:

5. Run the code.
✅ It will deploy the model in the Supervisely platform as a regular serving App that is able to communicate with all others app in the platform:

{% hint style="success" %}
Now you can use apps like [Apply NN to Images](https://ecosystem.supervisely.com/apps/nn-image-labeling/project-dataset), [Apply NN to videos](https://ecosystem.supervisely.com/apps/apply-nn-to-videos-project) with your deployed model.
Or get the model inference via **Python API** with the help of `sly.nn.inference.Session` class just in one line of code. See [Inference API Tutorial](/app-development/neural-network-integration/inference-api-tutorial).
{% endhint %}
## Release your code as a Supervisely App.
Once you've tested the code, it's time to release it into the platform. It can be released as an App that shared with the all Supervisely community, or as your own private App.
Refer to [How to Release your App](/app-development/basics/from-script-to-supervisely-app) for all releasing details. For a private app check also [Private App Tutorial](/app-development/basics/add-private-app).
In this tutorial we'll quickly observe the key concepts of our app.
### Repository structure
The structure of [our GitHub repository](https://github.com/supervisely-ecosystem/integrate-sem-seg-model) is the following:
```
.
├── README.md
├── config.json
├── create_venv.sh
├── requirements.txt
├── demo_data
│ ├── image_01.jpg
│ └── image_01_prediction.jpg
├── docker
│ ├── Dockerfile
│ └── publish.sh
├── local.env
├── my_model
│ └── model_config.py
└── src
└── main.py
```
Explanation:
* `src/main.py` - main inference script
* `my_model` - directory with model weights and additional config files
* `demo_data` - directory with demo image for inference
* `README.md` - readme of your application, it is the main page of an application in Ecosystem with some images, videos, and how-to-use guides
* `config.json` - configuration of the Supervisely application, which defines the name and description of the app, its context menu, icon, poster, and running settings
* `create_venv.sh` - creates a virtual environment, installs mmsegmentation and requirements.
* `requirements.txt` - all needed packages
* `local.env` - file with env variables used for debugging
* `docker` - directory with the custom Dockerfile for this application and the script that builds it and publishes it to the docker registry
### App configuration
App configuration is stored in `config.json` file. A detailed explanation of all possible fields is covered in this [Configuration Tutorial](/app-development/basics/app-json-config/config-json). Let's check the config for our current app:
```json
{
"type": "app",
"version": "2.0.0",
"name": "Serve custom semantic segmentation model",
"description": "Demo app of integrating your custom semantic segmentation model",
"categories": [
"neural network",
"images",
"videos",
"semantic segmentation",
"segmentation & tracking",
"serve",
"development"
],
"session_tags": ["deployed_nn"],
"need_gpu": true,
"community_agent": false,
"docker_image": "supervisely/mmsegmentation-demo:1.0.1",
"entrypoint": "python -m uvicorn src.main:m.app --host 0.0.0.0 --port 8000",
"port": 8000,
"headless": true
}
```
Here is an explanation for the fields:
* `type` - type of the module in Supervisely Ecosystem
* `version` - version of Supervisely App Engine. Just keep it by default
* `name` - the name of the application
* `description` - the description of the application
* `categories` - these tags are used to place the application in the correct category in Ecosystem.
* `session_tags` - these tags will be assigned to every running session of the application. They can be used by other apps to find and filter all running sessions
* `"need_gpu": true` - should be true if you want to use any `cuda` devices.
* `"community_agent": false` - this means that this app can not be run on the agents started by Supervisely team, so users have to connect their own computers and run the app only on their own agents. Only applicable in Community Edition. Enterprise customers use their private instances so they can ignore current option
* `docker_image` - Docker container will be started from the defined Docker image, github repository will be downloaded and mounted inside the container.
* `entrypoint` - the command that starts our application in a container
* `port` - port inside the container
* `"headless": true` means that the app has no User Interface
# Pose estimation
Step-by-step tutorial of how to integrate custom pose estimation neural network into Supervisely platform on the example of ViTPose.
## Introduction
In this tutorial you will learn how to integrate your custom pose estimation model into Supervisely by creating a simple serving app. As an example, we will use [ViTPose](https://github.com/ViTAE-Transformer/ViTPose) repository.
## Getting started
**Step 1.** Prepare `~/supervisely.env` file with credentials. [Learn more here.](https://developer.supervisely.com/app-development/neural-network-integration/inference/pages/2TS0DqIIblacweum1NCW#use-.env-file-recommended)
**Step 2.** Clone [repository](https://github.com/supervisely-ecosystem/integrate-pose-estim-model) with source code and create [Virtual Environment](https://docs.python.org/3/library/venv.html).
```bash
git clone https://github.com/supervisely-ecosystem/integrate-pose-estim-model
cd integrate-pose-estim-model
./create_venv.sh
```
**Step 3.** Open the repository directory in Visual Studio Code.
```bash
code -r .
```
**Step 4.** Run debug for script `src/main.py`
## Python script
The integration script is simple:
1. Automatically downloads NN weights to `./my_model` folder
2. Loads model on the CPU or GPU device
3. Runs inference on a demo image
4. Visualizes predictions on top of the input image
The entire integration Python script can be found in [GitHub repository](https://github.com/supervisely-ecosystem/integrate-pose-estim-model) for this tutorial.
## Implementation details
To integrate pose estimation model, you need to subclass **`sly.nn.inference.PoseEstimation`** and implement 3 methods:
* `load_on_device` method for downloading the weights and initializing the model on a specific device. Takes a `model_dir` argument, that is a directory for all model files (like configs, weights, etc). The second argument is a `device` - a `torch.device` like `cuda:0`, `cpu`.
* `get_classes` method should return a list of class names (strings) that model can predict.
* `predict`. The core implementation of a model inference. It takes a path to an image and inference settings as arguments, applies the model inference to the image and returns a list of predictions (which are `sly.nn.PredictionKeypoints` objects).
### Overall structure
The overall structure of the class we will implement is looking like this:
```python
class MyModel(sly.nn.inference.PoseEstimation):
def load_on_device(
self,
model_dir: str,
device: Literal["cpu", "cuda", "cuda:0", "cuda:1", "cuda:2", "cuda:3"] = "cpu",
):
# preparing the model: model instantiating, downloading weights, loading it on device.
pass
def get_classes(self) -> List[str]:
# returns a list of supported classes, e.g. ["cat", "dog", ...]
# ...
return class_names
def predict(self, image_path: str, settings: Dict[str, Any]) -> List[sly.nn.PredictionKeypoints]:
# the inference of a model here
# ...
return prediction
```
The superclass has a `serve()` method. To run the code and deploy the model on the Supervisely platform, `m.serve()` method should be executed:
```python
if sly.is_production():
m.serve()
else:
# ...
```
And here is the beauty comes in. The method `serve()` internally handles everything and deploys your model as a **REST API** service on the Supervisely platform. It means that other applications are able to communicate with your model and get predictions from it.
So let's implement the class.
### Step-by-step implementation
**Defining imports and global variables**
```python
import supervisely as sly
from typing_extensions import Literal
from typing import List, Any, Dict, Optional
import warnings
warnings.filterwarnings("ignore")
import torch
from dotenv import load_dotenv
from mmpose.apis import inference_top_down_pose_model, init_pose_model
import numpy as np
import os
from src.keypoints_template import template
load_dotenv("local.env")
load_dotenv(os.path.expanduser("~/supervisely.env"))
device = "cuda" if torch.cuda.is_available() else "cpu"
print("Using device:", device)
weights_url = "https://4mizfq.sn.files.1drv.com/y4mmN4HVKiAoyjCvPyKAWSK2Tkv5UaooeY2XmcUdxRwftMfZZ35N2kOIeyvgHzCiB2wW6yhYBdjU_nsoa2eHkSE7iWL903bTmUPrFWR3U5fPeMEXWOLVZwN2HaD-JRETuuDiLF249A_zeR3ZyxCLjnF4svHU2RLo3lgy918r59l5yA5UBrOCIE2-KpUFiF3nFo8Ae4Hf8ybzWYv7t7mbwotTQ"
```
**1. load\_on\_device**
The following code downloads model weights and builds the model according to config in `my_model/pose_config.py`. Also it will keep the model as a `self.pose_model` and classes as `self.class_names` for further use:
```python
class MyModel(sly.nn.inference.PoseEstimation):
def load_on_device(
self,
model_dir: str,
device: Literal["cpu", "cuda", "cuda:0", "cuda:1", "cuda:2", "cuda:3"] = "cpu"
):
# download model weights
dst_weights_path = f"{model_dir}/vitpose-b.pth"
if not os.path.exists(dst_weights_path):
self.download(weights_url, dst_weights_path)
# define model config and checkpoint
pose_config = os.path.join(model_dir, "pose_config.py")
pose_checkpoint = os.path.join(model_dir, "vitpose-b.pth")
# buid model
self.pose_model = init_pose_model(pose_config, pose_checkpoint, device=device)
# define class names
self.class_names = ["person_keypoints"]
print(f"✅ Model has been successfully loaded on {device.upper()} device")
```
{% hint style="info" %}
Here we are downloading the model weights by **url**, but it can be also downloaded by path in Supervisely **Team Files**. You can even pass a path to folder with the model, then an entire folder will be downloaded.
{% endhint %}
**2. get\_classes**
Simply returns previously saved **class\_names**:
```python
def get_classes(self) -> List[str]:
return self.class_names # e.g. ["cat", "dog", ...]
```
**3. predict**
Here we are reading an image and get inference of the model. The code here is usually borrowed from the framework or the model you use, that is **ViTPose** in our case. Then we wrap model predictions into `sly.nn.PredictionKeypoints` and do some post-processing steps.
```python
def predict(
self, image_path: str, settings: Dict[str, Any]
) -> List[sly.nn.PredictionKeypoints]:
# transfer crop from annotation tool to bounding box
input_image = sly.image.read(image_path)
img_height, img_width = input_image.shape[:2]
bbox = [{"bbox": np.array([0, 0, img_width, img_height, 1.0])}]
# get point labels
point_labels = self.keypoints_template.point_names
# inference pose estimator
if "local_bboxes" in settings:
bboxes = settings["local_bboxes"]
elif "detected_bboxes" in settings:
bboxes = settings["detected_bboxes"]
for i in range(len(bboxes)):
box = bboxes[i]["bbox"]
bboxes[i] = {"bbox": np.array(box)}
else:
bboxes = bbox
pose_results, returned_outputs = inference_top_down_pose_model(
self.pose_model,
image_path,
bboxes,
format="xyxy",
dataset=self.pose_model.cfg.data.test.type,
)
# postprocess results
point_threshold = settings.get("point_threshold", 0.01)
results = []
for result in pose_results:
included_labels, included_point_coordinates = [], []
point_coordinates, point_scores = result["keypoints"][:, :2], result["keypoints"][:, 2]
for i, (point_coordinate, point_score) in enumerate(
zip(point_coordinates, point_scores)
):
if point_score >= point_threshold:
included_labels.append(point_labels[i])
included_point_coordinates.append(point_coordinate)
results.append(
sly.nn.PredictionKeypoints(
"person_keypoints", included_labels, included_point_coordinates
)
)
return results
```
It **must** return exactly a list of `sly.nn.PredictionKeypoints` objects for compatibility with Supervisely format. Your code should just wrap the model predictions: `sly.nn.PredictionKeypoints(class_name, point_labels, point_coordinates)`.
**A Keypoints Template**
In the `predict()` above we have used a `self.keypoints_template`. It is a `sly.geometry.graph.KeypointsTemplate` object, just a graph of keypoints. You can think of it as a skeleton of an object. For example, a human has a skeleton graph that is different for a cat's one. You may inspect the full code in `src/keypoints_template.py` where it is creating. Here is a shorted version of that:
```python
from supervisely.geometry.graph import KeypointsTemplate
# build keypoints template
template = KeypointsTemplate()
# add nodes
template.add_point(label="nose", row=635, col=427)
template.add_point(label="left_eye", row=597, col=404)
template.add_point(label="right_eye", row=685, col=401)
# ...
# ...
# add edges
template.add_edge(src="left_ankle", dst="left_knee")
template.add_edge(src="left_knee", dst="left_hip")
template.add_edge(src="right_ankle", dst="right_knee")
# ...
# ...
```
**Usage of our class**
Once the class is created, here we initialize it and get one test prediction for debugging.
{% hint style="info" %}
In the code below a `custom_inference_settings` is used. It allows us to provide a custom settings that could be used in `predict()` (See more in [Customized Inference Tutorial](/app-development/neural-network-integration/inference/customize-inference))
{% endhint %}
```python
model_dir = "my_model" # model weights will be downloaded into this dir
settings = {"point_threshold": 0.1}
if not sly.is_production():
# proposal bboxes are hardcoded for the example image.
local_bboxes = [
{"bbox": np.array([245, 72, 411, 375, 1.0])},
{"bbox": np.array([450, 204, 633, 419, 1.0])},
{"bbox": np.array([35, 69, 69, 164, 1.0])},
{"bbox": np.array([551, 99, 604, 216, 1.0])},
{"bbox": np.array([440, 72, 458, 106, 1.0])},
]
settings["local_bboxes"] = local_bboxes
m = MyModel(
model_dir=model_dir,
custom_inference_settings=settings,
keypoints_template=template,
)
m.load_on_device(model_dir=model_dir, device=device)
if sly.is_production():
# this code block is running on Supervisely platform in production
# just ignore it during development
m.serve()
else:
image_path = "./demo_data/image_01.jpg"
results = m.predict(image_path, settings)
vis_path = "./demo_data/image_01_prediction.jpg"
m.visualize(results, image_path, vis_path, thickness=2)
print(f"Predictions and visualization have been saved: {vis_path}")
```
Here are the input image and output predictions:
| Input | Output |
| --------------------------------------------------------------------------------------------------------------------- | -------------------------------------------------------------------------------------------------------------------------------- |
|  |  |
***
## Run and debug
The beauty of this class is that you can easily debug your code locally in your favorite IDE.
{% hint style="info" %}
For now, we recommend using **Visual Studio Code** IDE, because our repositories have prepared settings for convenient debugging in VSCode. It is the easiest way to start.
{% endhint %}
### Local debug
You can run the code locally for debugging. For **Visual Studio Code** we've created a `launch.json` config file that can be selected:

### Debug in Supervisely platform
Once the code seems working locally, it's time to test the code right in the Supervisely platform as a debugging app. For that:
1. If you develop in a Docker container, you should run the container with `--cap_add=NET_ADMIN` option.
2. Install `sudo apt-get install wireguard iproute2`.
3. Define your `TEAM_ID` in the `local.env` file. *Actually there are other env variables that is needed, but they are already provided in `./vscode/launch.json` for you.*
4. Switch the `launch.json` config to the `Advanced debug in Supervisely platform`:

5. Run the code.
✅ It will deploy the model in the Supervisely platform as a regular serving App that is able to communicate with all others app in the platform:

{% hint style="success" %}
Now you can use apps like [Apply NN to Images](https://ecosystem.supervisely.com/apps/nn-image-labeling/project-dataset), [Apply NN to videos](https://ecosystem.supervisely.com/apps/apply-nn-to-videos-project) with your deployed model.
Or get the model inference via **Python API** with the help of `sly.nn.inference.Session` class just in one line of code. See [Inference API Tutorial](/app-development/neural-network-integration/inference-api-tutorial).
{% endhint %}
## Release your code as a Supervisely App.
Once you've tested the code, it's time to release it into the platform. It can be released as an App that shared with the all Supervisely community, or as your own private App.
Refer to [How to Release your App](/app-development/basics/from-script-to-supervisely-app) for all releasing details. For a private app check also [Private App Tutorial](/app-development/basics/add-private-app).
In this tutorial we'll quickly observe the key concepts of our app.
### Repository structure
The structure of [our GitHub repository](https://github.com/supervisely-ecosystem/integrate-pose-estim-model) is the following:
```
.
├── README.md
├── config.json
├── create_venv.sh
├── requirements.txt
├── demo_data
│ ├── image_01.jpg
│ └── image_01_prediction.jpg
├── docker
│ ├── Dockerfile
│ └── publish.sh
├── local.env
├── my_model
│ └── pose_config.py
└── src
├── keypoints_template.py
└── main.py
```
Explanation:
* `src/main.py` - main inference script
* `src/keypoints_template.py` - auxiliary script for creating a KeypointsTemplate, a graph of keypoints
* `my_model` - directory with model weights and additional config files
* `demo_data` - directory with demo image for inference
* `README.md` - readme of your application, it is the main page of an application in Ecosystem with some images, videos, and how-to-use guides
* `config.json` - configuration of the Supervisely application, which defines the name and description of the app, its context menu, icon, poster, and running settings
* `create_venv.sh` - creates a virtual environment, installs ViTPose and requirements.
* `requirements.txt` - all needed packages
* `local.env` - file with env variables used for debugging
* `docker` - directory with the custom Dockerfile for this application and the script that builds it and publishes it to the docker registry
### App configuration
App configuration is stored in `config.json` file. A detailed explanation of all possible fields is covered in this [Configuration Tutorial](/app-development/basics/app-json-config/config-json). Let's check the config for our current app:
```json
{
"type": "app",
"version": "2.0.0",
"name": "Serve custom Pose Estimation model",
"description": "Demo app for integrating your custom pose estimation model",
"categories": [
"neural network",
"images",
"pose estimation",
"keypoints detection",
"serve",
"development"
],
"need_gpu": true,
"community_agent": false,
"session_tags": ["deployed_nn_keypoints"],
"docker_image": "supervisely/mmpose-demo:1.0.2",
"entrypoint": "python -m uvicorn src.main:m.app --host 0.0.0.0 --port 8000",
"port": 8000,
"headless": true
}
```
Here is an explanation for the fields:
* `type` - type of the module in Supervisely Ecosystem
* `version` - version of Supervisely App Engine. Just keep it by default
* `name` - the name of the application
* `description` - the description of the application
* `categories` - these tags are used to place the application in the correct category in Ecosystem.
* `session_tags` - these tags will be assigned to every running session of the application. They can be used by other apps to find and filter all running sessions
* `"need_gpu": true` - should be true if you want to use any `cuda` devices.
* `"community_agent": false` - this means that this app can not be run on the agents started by Supervisely team, so users have to connect their own computers and run the app only on their own agents. Only applicable in Community Edition. Enterprise customers use their private instances so they can ignore current option
* `docker_image` - Docker container will be started from the defined Docker image, github repository will be downloaded and mounted inside the container.
* `entrypoint` - the command that starts our application in a container
* `port` - port inside the container
* `"headless": true` means that the app has no User Interface
# Point tracking
Step-by-step tutorial on how to integrate custom point tracking neural network into Supervisely platform on the example of PIPs.
## Introduction
In this tutorial you will learn how to integrate your custom point tracking model into Supervisely by creating two simple serving apps. First, we will construct a straightforward model that only moves the original point as an illustration. The SOTA model [PIPs](https://github.com/aharley/pips), which already has the majority of the necessary functions implemented, will be used in the second part.
## Implementation details
To integrate your model, you need to subclass **`sly.nn.inference.PointTracking`** and implement 2 methods:
* `load_on_device` method for downloading the weights and initializing the model on a specific device. Takes a `model_dir` argument, which is a directory for all model files (like configs, weights, etc). The second argument is a `device` - a torch.device like `cuda:0`, `cpu`.
* `predict`. The core implementation of model inference. It takes a list of images of `np.ndarray` type, inference settings and point to track as arguments, applies the model inference to the images and returns a list of predictions (both input point and predicted points are `sly.nn.PredictionPoint` objects).
Currently, integrating models that can track several points simultaneously is not possible due to the implementation of the `sly.nn.inference.PointTracking` class.
### Overall structure
The overall structure of the class we will implement is looking like this:
```python
class MyModel(sly.nn.inference.PointTracking):
def load_on_device(
self,
model_dir: str,
device: Literal["cpu", "cuda", "cuda:0", "cuda:1", "cuda:2", "cuda:3"] = "cpu",
):
# preparing the model: model instantiating, downloading weights, loading it on the device.
pass
def predict(
self,
rgb_images: List[np.ndarray],
settings: Dict[str, Any],
start_object: PredictionPoint,
) -> List[PredictionPoint]:
# the inference of a model here
# ...
return prediction
```
The superclass has a `serve()` method. For running the code on the Supervisely platform, `m.serve()` method should be executed:
```python
if sly.is_production():
m.serve()
```
And here is the beauty comes in. The method `serve()` internally handles everything and deploys your model as a **REST API** service on the Supervisely platform. It means that other applications are able to communicate with your model and get predictions from it.
So let's implement the class.
## Simple model
### Getting started
**Step 1.** Prepare `~/supervisely.env` file with credentials. [Learn more here.](https://developer.supervisely.com/app-development/neural-network-integration/inference/pages/2TS0DqIIblacweum1NCW#use-.env-file-recommended)
**Step 2.** Create [Virtual Environment](https://docs.python.org/3/library/venv.html) and install `supervisely==6.72.11` in it.
### Step-by-step implementation
**Defining imports and global variables**
```python
import numpy as np
from dotenv import load_dotenv
from pathlib import Path
from typing import Any, Dict, List, Literal
from typing_extensions import Literal
import supervisely as sly
import supervisely.imaging.image as sly_image
from supervisely.nn.inference import PointTracking
from supervisely.nn.prediction_dto import PredictionPoint
load_dotenv("local.env")
load_dotenv(os.path.expanduser("~/supervisely.env"))
```
**1. load\_on\_device**
The following code creates the model according to config `model_settings.yaml`. Path to `.yaml` config is passed during initialization. This settings can also be given as a python dictionary. Config in the form of a dictionary becomes available in `self.custom_inference_settings_dict` attribute. Also `load_on_device` will keep the model as a `self.model` for further use:
```python
class MyModel(PointTracking):
def load_on_device(
self,
model_dir: str,
device: Literal["cpu", "cuda", "cuda:0", "cuda:1", "cuda:2", "cuda:3"] = "cpu",
):
col_shift = self.custom_inference_settings_dict.get("col_shift", 10)
row_shift = self.custom_inference_settings_dict.get("row_shift", 7)
self.model = lambda point, name: PredictionPoint(
class_name=name,
col=point.col + col_shift,
row=point.row + row_shift,
)
```
Our `settings.yaml` file:
```yaml
col_shift: 20
row_shift: 15
```
**2. predict**
The core method for model inference. Here we will use the defined model and make sure that predicted points are not outside of the bounds.
```python
def predict(
self,
rgb_images: List[np.ndarray],
settings: Dict[str, Any],
start_object: PredictionPoint,
) -> List[PredictionPoint]:
name = start_object.class_name
pred_points = []
frame_range = len(rgb_images)
point = start_object
maxh, maxw, _ = rgb_images[0].shape
for _ in range(frame_range):
# predict next point
new_point = self.model(point, name)
# check bounds
new_point.col = min(new_point.col, maxh - 1)
new_point.row = min(new_point.row, maxw - 1)
pred_points.append(new_point)
# next point
point = new_point
return pred_points
```
It **must** return exactly a list of `sly.nn.PredictionPoint` objects for compatibility with Supervisely. **Notice, that the first frame is not in the list.**
**Usage of our class**
Once the class is created, here we initialize it and get one test prediction for debugging.
```python
settings = "model_settings.yaml"
# or just use dict
# settings = {"col_shift": 20, "row_shift": 15}
images_path = Path("demo_images")
m = MyModel(model_dir="", custom_inference_settings=settings)
if sly.is_production():
# this code block is running on Supervisely platform in production
# just ignore it during development
m.serve()
else:
# for local debugging
settings = m.custom_inference_settings_dict
img_names = sorted(os.listdir(images_path))
frames = []
# load frames
for name in img_names:
pth = images_path / name
frames.append(sly_image.read(str(pth)))
# make predictions
start_point = PredictionPoint("", col=100, row=100)
pred_points = m.predict(frames, settings, start_point)
# save frames with predicted points
m.visualize(
pred_points,
frames[1:], # skip first frame
vis_path="predictions", # folder to save images
thickness=10,
)
```
Here are the output predictions of our simple model:

## PIPs tracking model
Let's now implement the class for pre-trained model. The majority of the code used to load and run the model is taken directly from the original repository.
### Getting started
**Step 1.** Prepare `~/supervisely.env` file with credentials. [Learn more here.](https://developer.supervisely.com/app-development/neural-network-integration/inference/pages/2TS0DqIIblacweum1NCW#use-.env-file-recommended)
**Step 2.** Clone [repository](https://github.com/supervisely-ecosystem/pips) with source code and create [Virtual Environment](https://docs.python.org/3/library/venv.html).
```bash
git clone https://github.com/supervisely-ecosystem/pips
cd pips
source .venv/bin/activate
pip3 install -r requirements.txt
```
It's feasible to run the present model on the `CPU`, thus installing `CUDA` requirements is not required.
**Step 3.** Load model weights.
```bash
./get_reference_model.sh
```
**Step 4.** Open the repository directory in Visual Studio Code.
```bash
code -r .
```
**Step 5.** Run debug for script `src/main.py`
## Python script
The integration script is simple:
1. Initialize model.
2. Runs inference on a demo images.
3. Predictions adds and new frames saves in chronological order.
### Step-by-step implementation
**Defining imports and global variables**
```python
import os
import numpy as np
import saverloader
import torch
from dotenv import load_dotenv
from pathlib import Path
from typing import Any, Dict, List, Literal
from typing_extensions import Literal
from nets.pips import Pips
import sly_functions
import supervisely as sly
import supervisely.imaging.image as sly_image
from supervisely.nn.inference import PointTracking
from supervisely.nn.prediction_dto import PredictionPoint
root = (Path(__file__).parent / ".." / ".." / "..").resolve().absolute()
load_dotenv(root / "local.env")
load_dotenv(os.path.expanduser("~/supervisely.env"))
```
**1. load\_on\_device**
The following code creates the model according to config `supervisely/serve/model_settings.yaml`. Path to `.yaml` config is passed during initialization. The `saverloader.load` function provided by the creator of the original repository loads the model state dict from `model_dir`. Also `load_on_device` will keep the model as a `self.model` and the device as `self.device` for further use:
```python
class PipsTracker(PointTracking):
def load_on_device(
self,
model_dir: str,
device: Literal["cpu", "cuda", "cuda:0", "cuda:1", "cuda:2", "cuda:3"] = "cpu",
):
frames_per_iter = self.custom_inference_settings_dict.get("frames_per_iter", 8)
stride = self.custom_inference_settings_dict.get("stride", 4)
self.model = Pips(S=frames_per_iter, stride=stride).to(torch.device(device))
if model_dir:
_ = saverloader.load(str(model_dir), self.model, device=device)
self.model.eval()
self.device = device
```
{% hint style="info" %}
Here we are downloading the model weights from local storage, but it can be also downloaded by path in Supervisely **Team Files**.
{% endhint %}
**2. predict**
The core method for model inference. Here we are preparing images and getting an inference of the model. The function `sly_functions.run_model` is borrowed from the original repository. However, there are a few changes that can be made to improve quality: preserve the aspect ratio, apply padding before resizing and make sure that predicted points are not outside of the bounds. Then we wrap model predictions into `sly.nn.PredictionPoint`.
```python
def predict(
self,
rgb_images: List[np.ndarray],
settings: Dict[str, Any],
start_object: PredictionPoint,
) -> List[PredictionPoint]:
class_name = start_object.class_name
h_resized = settings.get("h_resized", 360)
w_resized = settings.get("w_resized", 640)
frames_per_iter = settings.get("frames_per_iter", 8)
rgbs = [torch.from_numpy(rgb_img).permute(2, 0, 1) for rgb_img in rgb_images]
rgbs = torch.stack(rgbs, dim=0).unsqueeze(0)
point = torch.tensor([[start_object.col, start_object.row]], dtype=float)
with torch.no_grad():
traj = sly_functions.run_model(
self.model,
rgbs,
point,
(h_resized, w_resized),
frames_per_iter,
device=self.device,
)
pred_points = [PredictionPoint(class_name, col=p[0], row=p[1]) for p in traj[1:]]
return pred_points
```
It **must** return exactly a list of `sly.nn.PredictionPoint` objects for compatibility with Supervisely.
**Usage of our class**
Once the class is created, here we initialize it and get one test prediction for debugging.
{% hint style="info" %}
In the code below a `custom_inference_settings` is used. It allows us to provide custom settings that could be used in `predict()` (See more in [Customized Inference Tutorial](/app-development/neural-network-integration/inference/customize-inference))
{% endhint %}
```python
settings = root / "supervisely" / "serve" / "model_settings.yaml"
if sly.is_debug_with_sly_net() or not sly.is_production():
model_dir = root / "reference_model" # local debug
else:
model_dir = Path("/weights") # path in Docker
pips = PipsTracker(model_dir=str(model_dir), custom_inference_settings=str(settings))
if sly.is_production():
# this code block is running on Supervisely platform in production
# just ignore it during development
pips.serve()
else:
pth = Path("demo_images")
img_names = sorted(os.listdir(pth))
imgs = []
for name in img_names:
if "jpg" in name:
imgs.append(sly_image.read(str(pth / name)))
traj = pips.predict(
imgs,
pips.custom_inference_settings_dict,
PredictionPoint("", 448, 98),
)
pips.visualize(
traj,
imgs[1:],
vis_path="preds",
thickness=7,
)
```
Here are the output predictions of our PIPs model:

## Run and debug
The beauty of this class is that you can easily debug your code locally in your favorite IDE.
{% hint style="info" %}
For now, we recommend using **Visual Studio Code** IDE, because our repositories have prepared settings for convenient debugging in VSCode. It is the easiest way to start.
{% endhint %}
### Local debug
You can run the code locally for debugging. For **Visual Studio Code** we've created a `launch.json` config file that can be selected:

### Debug in Supervisely platform
Once the code seems working locally, it's time to test the code right in the Supervisely platform as a debugging app. For that:
1. If you develop in a Docker container, you should run the container with `--cap_add=NET_ADMIN` option.
2. Install `sudo apt-get install wireguard iproute2`.
3. Define your `TEAM_ID` in the `local.env` file. *Actually there are other env variables that is needed, but they are already provided in `./vscode/launch.json` for you.*
4. Switch the `launch.json` config to the `Advanced debug in Supervisely platform`:

5. Run the code.
✅ It will deploy the model in the Supervisely platform as a regular serving App that is able to communicate with all other apps in the platform:

{% hint style="success" %}
Now you can use apps like [Apply NN to Images](https://ecosystem.supervisely.com/apps/nn-image-labeling/project-dataset), [Apply NN to videos](https://ecosystem.supervisely.com/apps/apply-nn-to-videos-project) with your deployed model.
Or get the model inference via **Python API** with the help of `sly.nn.inference.Session` class just in one line of code. See [Inference API Tutorial](/app-development/neural-network-integration/inference-api-tutorial).
{% endhint %}
## Release your code as a Supervisely App.
Once you've tested the code, it's time to release it into the platform. It can be released as an App that is shared with the all Supervisely community, or as your own private App.
Refer to [How to Release your App](/app-development/basics/from-script-to-supervisely-app) for all releasing details. For a private app check also [Private App Tutorial](/app-development/basics/add-private-app).
### Repository structure
The structure of [our GitHub repository](https://github.com/supervisely-ecosystem/pips) is the following:
```
.
├── LICENSE
├── README.md
├── badjadataset.py
├── chain_demo.py
├── crohddataset.py
├── demo.py
├── demo_images
│ ├── 000100.jpg
| | ...
│ └── extract_frames.sh
├── filter_trajs.py
├── flyingthingsdataset.py
├── get_reference_model.sh
├── local.env
├── make_occlusions.py
├── make_trajs.py
├── nets
│ ├── pips.py
│ ├── raft_core
│ │ ├── __init__.py
│ │ ├── corr.py
│ │ ├── datasets.py
│ │ ├── extractor.py
│ │ ├── raft.py
│ │ ├── update.py
│ │ └── util.py
│ └── raftnet.py
├── reference_model
│ └── model-000200000.pth
├── requirements.txt
├── saverloader.py
├── supervisely
│ ├── docker
│ │ └── Dockerfile
│ └── serve
│ ├── README.md
│ ├── config.json
│ ├── local.env
│ ├── model_settings.yaml
│ └── src
│ ├── main.py
│ └── sly_functions.py
├── test_on_badja.py
├── test_on_crohd.py
├── test_on_davis.py
├── test_on_flt.py
├── train.py
└── utils
├── basic.py
├── bremm.png
├── improc.py
├── misc.py
├── samp.py
└── test.py
```
Explanation:
* `supervisely/serve/src/main.py` - main inference script
* `supervisely/serve/src/sly_functions.py` - functions to run the PIPs model based on the original repository code
* `reference_model` - directory with model weights; will be created automatically in `get_reference_model.sh`
* `demo_images` - directory with demo frames for inference
* `supervisely/serve/README.md` - readme of your application, it is the main page of an application in Ecosystem with some images, videos, and how-to-use guides
* `supervisely/serve/config.json` - configuration of the Supervisely application, which defines the name and description of the app, its context menu, icon, poster, and running settings
* `requirements.txt` - all packages needed for debugging
* `local.env` - file with variables used for debugging
* `supervisely/serve/docker` - directory with the custom Dockerfile for this application and the script that builds it and publishes it to the docker registry
### App configuration
App configuration is stored in `config.json` file. A detailed explanation of all possible fields is covered in this [Configuration Tutorial](/app-development/basics/app-json-config/config-json). Let's check the config for our current app:
```json
{
"name": "PIPs object tracking",
"type": "app",
"version": "2.0.0",
"poster": "https://user-images.githubusercontent.com/115161827/233959102-9c48949f-b353-4a4b-ab7d-c1da99dfd914.jpg",
"icon_cover": true,
"icon": "https://user-images.githubusercontent.com/115161827/233959116-9d0922c6-e6fc-4f3a-958d-430742533f3a.jpg",
"categories": [
"neural network",
"videos",
"detection & tracking",
"serve"
],
"description": "serve and use in videos annotator",
"docker_image": "supervisely/pips:1.0.0",
"entrypoint": "python -m uvicorn main:pips.app --app-dir ./supervisely/serve/src --host 0.0.0.0 --port 8000 --ws websockets",
"port": 8000,
"task_location": "application_sessions",
"headless": true,
"need_gpu": true,
"restart_policy": "on_error",
"session_tags": [
"sly_video_tracking"
],
"community_agent": false,
"allowed_shapes": [
"point",
"polygon",
"graph"
]
}
```
Here is the explanation for the fields:
* `type` - type of the module in Supervisely Ecosystem
* `version` - version of Supervisely App Engine. Just keep it by default
* `name` - the name of the application
* `description` - the description of the application
* `categories` - these tags are used to place the application in the correct category in Ecosystem.
* `session_tags` - these tags will be assigned to every running session of the application. They can be used by other apps to find and filter all running sessions
* `"need_gpu": true` - should be true if you want to use any `cuda` devices.
* `"community_agent": false` - this means that this app can not be run on the agents started by Supervisely team, so users have to connect their own computers and run the app only on their own agents. Only applicable in Community Edition. Enterprise customers use their private instances so they can ignore the current option
* `docker_image` - Docker container will be started from the defined Docker image, github repository will be downloaded and mounted inside the container.
* `entrypoint` - the command that starts our application in a container
* `port` - port inside the container
* `"headless": true` means that the app has no User Interface
* `allowed_shapes` - shapes can be tracked with this model. Сonversion of figures to a set of points and vice versa is implemented in the base class, so you can keep this field default.
# Object tracking
Step-by-step tutorial on how to integrate custom visual object tracking neural network into Supervisely platform on the example of MixFormer model.
## Introduction
In this tutorial, you will learn how to integrate your custom object-tracking model into Supervisely by creating two simple serving apps. First, we will construct a straightforward model that only moves the original bound box as an illustration. The SOTA model [MixFormer](https://github.com/MCG-NJU/MixFormer), which already has the majority of the necessary functions implemented, will be used in the second part.
## Implementation details
To integrate your model, you need to subclass **`sly.nn.inference.BBoxTracking`** and implement 3 methods:
* `load_on_device` method for downloading the weights and initializing the model on a specific device. Takes a `model_dir` argument, which is a directory for all model files (like configs, weights, etc). The second argument is the `device` - `torch.device` like `cuda:0`, `cpu`.
* `initialize` method passes the image and the bound box of the object, which the model should track during the prediction step.
* `predict`. The core implementation of model inference. It takes the frame of type `np.ndarray`, inference settings, previous (or initial) frame and bound box as arguments, applies the model inference to the current frame and returns a prediction (both input bound box and predicted are `sly.nn.PredictionBBox` objects).
Currently, integrating models that can track several objects simultaneously is not possible due to the implementation of the `sly.nn.inference.BBox` class. However, multiobject tracking is available: objects will be tracked one by one and the model will be re-initialized for each object.
### Overall structure
The overall structure of the class we will implement is looking like this:
```python
class MyModel(sly.nn.inference.BBoxTracking):
def load_on_device(
self,
model_dir: str,
device: Literal["cpu", "cuda", "cuda:0", "cuda:1", "cuda:2", "cuda:3"] = "cpu",
):
# preparing the model: model instantiating, downloading weights, loading it on the device.
pass
def initialize(
self, init_rgb_image: np.ndarray, target_bbox: PredictionBBox
) -> None:
# initialize model with target object
pass
def predict(
self,
rgb_image: np.ndarray,
settings: Dict[str, Any],
prev_rgb_image: np.ndarray,
target_bbox: PredictionBBox,
) -> PredictionBBox:
# the inference of a model here
# ...
return prediction
```
The superclass has a `serve()` method. For running the code on the Supervisely platform, `m.serve()` method should be executed:
```python
if sly.is_production():
m.serve()
```
And here is the beauty comes in. The method `serve()` internally handles everything and deploys your model as a **REST API** service on the Supervisely platform. It means that other applications can communicate with your model and get predictions from it.
So let's implement the class.
## Simple model
### Getting started
**Step 1.** Prepare `~/supervisely.env` file with credentials. [Learn more here.](https://developer.supervisely.com/app-development/neural-network-integration/inference/pages/2TS0DqIIblacweum1NCW#use-.env-file-recommended)
**Step 2.** Create [Virtual Environment](https://docs.python.org/3/library/venv.html) and install `supervisely==6.72.32` in it.
### Step-by-step implementation
**Defining imports and global variables**
```python
import numpy as np
from dotenv import load_dotenv
from pathlib import Path
from typing import Any, Dict, List, Literal
from typing_extensions import Literal
import supervisely as sly
import supervisely.imaging.image as sly_image
from supervisely.nn.inference import BBoxTracking
from supervisely.nn.prediction_dto import PredictionBBox
load_dotenv("local.env")
load_dotenv(os.path.expanduser("~/supervisely.env"))
```
**1. load\_on\_device**
The following code creates the model according to config `model_settings.yaml`. Path to `.yaml` config is passed during initialization. These settings can also be given as a Python dictionary. Config in the form of a dictionary becomes available in `self.custom_inference_settings_dict` attribute. Also, `load_on_device` will keep the model as a `self.model` for further use:
```python
class MyModel(BBoxTracking):
def load_on_device(
self,
model_dir: str,
device: Literal["cpu", "cuda", "cuda:0", "cuda:1", "cuda:2", "cuda:3"] = "cpu",
):
col_shift = self.custom_inference_settings_dict.get("col_shift", 10)
row_shift = self.custom_inference_settings_dict.get("row_shift", 7)
shift_list = lambda tlbr: [
tlbr[0] + row_shift,
tlbr[1] + col_shift,
tlbr[2] + row_shift,
tlbr[3] + col_shift,
]
self.model = lambda bbox: PredictionBBox(
class_name="",
bbox_tlbr=shift_list(bbox.bbox_tlbr),
score=None,
)
```
Our `settings.yaml` file:
```yaml
col_shift: 20
row_shift: 15
```
**2. initialize and predict**
The core methods for model inference. Here we will use the defined model and make sure that the predicted bound box is not outside of the bounds.
```python
def initialize(self, init_rgb_image: np.ndarray, target_bbox: PredictionBBox) -> None:
pass
def predict(
self,
rgb_image: np.ndarray,
settings: Dict[str, Any],
prev_rgb_image: np.ndarray,
target_bbox: PredictionBBox,
) -> PredictionBBox:
pred_bbox = self.model(target_bbox)
h, w = rgb_image.shape[0], rgb_image.shape[1]
cur = pred_bbox.bbox_tlbr
tlbr = [
min(max(0, cur[0]), h),
min(max(0, cur[1]), w),
min(max(0, cur[2]), h),
min(max(0, cur[3]), w),
]
pred_bbox.bbox_tlbr = tlbr
return pred_bbox
```
It **must** return exactly an `sly.nn.PredictionBBox` object for compatibility with Supervisely.
**Usage of our class**
Once the class is created, here we initialize it and get one test prediction for debugging.
```python
settings = {"col_shift": 20, "row_shift": 15}
# or path to settings file
# settings = "model_settings.yaml"
m = MyModel(custom_inference_settings=settings)
if sly.is_production():
# this code block is running on Supervisely platform in production
# just ignore it during development
m.serve()
else:
images_path = Path("demo_images") / "racing"
out = img_path / "predicted"
out.mkdir(exist_ok=True, parents=True)
# sort frames
imgs_names = sorted(os.listdir(img_path))
start, end = 80, 90
imgs_pth = [img_path / name for name in imgs_names[start:end] if "jpg" in name]
# top left bottom right order
start_object = PredictionBBox("", [187, 244, 236, 365], None)
# load frames
images = [sly_image.read(str(pth)) for pth in imgs_pth]
preds = []
model.initialize(images[0], start_object)
for image in tqdm(images[1:]):
preds.append(model.predict(image, {}, images[0], start_object))
start_object = preds[-1]
model.visualize(
preds,
images[1:],
out,
thickness=5,
)
```
Here are the output predictions of our simple model:

## MixFormer tracking model
Let's now implement the class for a pre-trained model. The majority of the code used to load and run the model is taken directly from the original repository. We will also include the option to choose a model before launching the app because the authors provide two pre-trained models.
### Getting started
**Step 1.** Prepare `~/supervisely.env` file with credentials. [Learn more here.](https://developer.supervisely.com/app-development/neural-network-integration/inference/pages/2TS0DqIIblacweum1NCW#use-.env-file-recommended)
**Step 2.** Clone the [repository](https://github.com/supervisely-ecosystem/MixFormer) with source code and create [Virtual Environment](https://docs.python.org/3/library/venv.html).
```bash
git clone git@github.com:supervisely-ecosystem/MixFormer.git
cd MixFormer
source .venv/bin/activate
pip3 install torch==1.8.1+cu111 torchvision==0.9.1+cu111 -f https://download.pytorch.org/whl/torch_stable.html
pip3 install -r requirements.txt
```
**Step 3.** Load model weights.
```bash
mkdir -p save/models
wget --no-check-certificate 'https://github.com/supervisely-ecosystem/MixFormer/releases/download/v0.0.1-alpha/mixformer_vit_large_online.pth.tar' -O save/models/mixformer_vit_large_online.pth.tar
wget --no-check-certificate 'https://github.com/supervisely-ecosystem/MixFormer/releases/download/v0.0.1-alpha/mixformer_convmae_large_online.pth.tar' -O save/models/mixformer_convmae_large_online.pth.tar
```
**Step 4.** Open the repository directory in Visual Studio Code.
```bash
code -r .
```
**Step 5.** Run debug for script `src/main.py`
## Python script
The integration script is simple:
1. Initialize model.
2. Run inference on demo images.
3. Collect predictions and save them in chronological order.
### Step-by-step implementation
**Defining imports and global variables**
```python
import os
import numpy as np
from dotenv import load_dotenv
from pathlib import Path
from typing import Any, Dict, Literal
from typing_extensions import Literal
from tqdm import tqdm
from lib.test.evaluation import create_default_local_file_ITP_test
from lib.train.admin import create_default_local_file_ITP_train
import sly_functions as F
import supervisely as sly
import supervisely.imaging.image as sly_image
from supervisely.nn.inference import BBoxTracking
from supervisely.nn.prediction_dto import PredictionBBox
# one of pre-trained model name
NAME = os.environ.get("modal.state.modelName", "mixformer_vit_online")
root = (Path(__file__).parent / ".." / ".." / "..").resolve().absolute()
load_dotenv(os.path.expanduser("~/supervisely.env"))
```
**1. load\_on\_device**
The following code creates the model which will keep as a `self.model`. The `SupportedModels` class is simply an `Enum` class that was built to prevent working with raw strings. The `Tracker` class is a collection of functions supplied by the original repository's creator to create and use pre-trained models ([check implementation here](https://github.com/supervisely-ecosystem/MixFormer/blob/1a4f52db2a4ba8d8cacd18046e22d8f72be73163/serve/serve/src/sly_functions.py#LL18C9-L18C9))
```python
class MixFormer(BBoxTracking):
def load_on_device(
self,
model_dir: str,
device: Literal["cpu", "cuda", "cuda:0", "cuda:1", "cuda:2", "cuda:3"] = "cpu",
):
name = F.SupportedModels.instance_by_name(NAME)
self.model = F.Tracker(name)
```
{% hint style="info" %}
Here we are downloading the model weights from local storage, but it can be also downloaded by path in Supervisely **Team Files**.
{% endhint %}
**2. initialize and predict**
The core methods for model inference. Here we are preparing the initial bound box in initialization and wrapping model predictions into `sly.nn.PredictionBBox`.
```python
def initialize(
self, init_rgb_image: np.ndarray, target_bbox: PredictionBBox
) -> None:
y1, x1, y2, x2 = target_bbox.bbox_tlbr
w = abs(x2 - x1)
h = abs(y2 - y1)
self.model.initialize(init_rgb_image, x1, y1, w, h)
def predict(
self,
rgb_image: np.ndarray,
settings: Dict[str, Any],
prev_rgb_image: np.ndarray,
target_bbox: PredictionBBox,
) -> PredictionBBox:
class_name = target_bbox.class_name
x, y, w, h = self.model.track(rgb_image)
tlbr = [int(y), int(x), int(y + h), int(x + w)]
return PredictionBBox(class_name, tlbr, None)
```
It **must** return exactly a list of `sly.nn.PredictionBBox` objects for compatibility with Supervisely.
**Usage of our class**
Once the class is created, here we initialize it and get one test prediction for debugging.
```python
if sly.is_debug_with_sly_net() or not sly.is_production():
# paths for local use
create_default_local_file_ITP_test(str(root), "", str(root / "save"))
create_default_local_file_ITP_train(str(root), "")
else:
# paths inside docker cpntainer for production use
create_default_local_file_ITP_test(str(root), "", "/weights")
create_default_local_file_ITP_train(str(root), "")
mixformer = MixFormer()
if sly.is_production():
mixformer.serve()
else:
data_path = root / "data"
img_path = data_path / "racing"
out = img_path / "predicted"
out.mkdir(exist_ok=True, parents=True)
imgs_names = sorted(os.listdir(img_path))
start, end = 80, 180
imgs_pth = [img_path / name for name in imgs_names[start:end] if 'jpg' in name]
# top left bottom right order
start_object = PredictionBBox("", [187, 244, 236, 365], None)
images = [sly_image.read(str(pth)) for pth in imgs_pth]
preds = []
mixformer.initialize(images[0], start_object)
for image in tqdm(images[1:]):
preds.append(mixformer.predict(image, {}, images[0], start_object))
mixformer.visualize(
preds,
images[1:],
out,
thickness=5,
)
```
Here are the output predictions of our MixFormer model:

## Run and debug
The beauty of this class is that you can easily debug your code locally in your favorite IDE.
{% hint style="info" %}
For now, we recommend using **Visual Studio Code** IDE, because our repositories have prepared settings for convenient debugging in VSCode. It is the easiest way to start.
{% endhint %}
### Local debug
You can run the code locally for debugging. For **Visual Studio Code** we've created a `launch.json` config file that can be selected:

### Debug in Supervisely platform
Once the code seems working locally, it's time to test the code right in the Supervisely platform as a debugging app. For that:
1. If you develop in a Docker container, you should run the container with `--cap_add=NET_ADMIN` option.
2. Install `sudo apt-get install wireguard iproute2`.
3. Define your `TEAM_ID` in the `local.env` file. *Other env variables that are needed, are already provided in `./vscode/launch.json` for you.*
4. Switch the `launch.json` config to the `Advanced debug in Supervisely platform`:

5. Run the code.
✅ It will deploy the model in the Supervisely platform as a regular serving App that can communicate with all other apps in the platform:

{% hint style="success" %}
Now you can use apps like [Apply NN to Images](https://ecosystem.supervisely.com/apps/nn-image-labeling/project-dataset), [Apply NN to videos](https://ecosystem.supervisely.com/apps/apply-nn-to-videos-project) with your deployed model.
Or get the model inference via **Python API** with the help of `sly.nn.inference.Session` class just in one line of code. See [Inference API Tutorial](/app-development/neural-network-integration/inference-api-tutorial).
{% endhint %}
## Release your code as a Supervisely App.
Once you've tested the code, it's time to release it into the platform. It can be released as an App that is shared with the all Supervisely community, or as your own private App.
Refer to [How to Release your App](/app-development/basics/from-script-to-supervisely-app) for all releasing details. For a private app check also [Private App Tutorial](/app-development/basics/add-private-app).
### Repository structure
The structure of [our GitHub repository](https://github.com/supervisely-ecosystem/MixFormer) is the following:
```
.
├── LICENSE
├── README.md
├── app_data
│ └── models
├── data
│ └── racing
│ ├── 000001.jpg
│ ├── ...
│ └── 000260.jpg
├── experiments
│ └── # .yaml configs for models
├── external
│ └── # code for different datasets and utils connected to project
├── install_reqs.sh
├── lib
│ ├── __init__.py
│ ├── __pycache__
│ │ └── __init__.cpython-39.pyc
│ ├── config
│ │ └── # configs for different models
│ ├── models
│ │ ├── __init__.py
│ │ ├── mixformer_convmae
│ │ │ ├── __init__.py
│ │ │ ├── mixformer.py
│ │ │ └── mixformer_online.py
│ │ ├── mixformer_cvt
│ │ │ ├── __init__.py
│ │ │ ├── head.py
│ │ │ ├── mixformer.py
│ │ │ ├── mixformer_online.py
│ │ │ ├── score_decoder.py
│ │ │ └── utils.py
│ │ └── mixformer_vit
│ │ ├── __init__.py
│ │ ├── mixformer.py
│ │ ├── mixformer_online.py
│ │ └── pos_utils.py
│ ├── test
│ │ └── # scripts and utils for model testing on various datasets
│ ├── train
│ │ └── # scripts and utils for model training on various datasets
│ └── utils
│ ├── __init__.py
│ ├── box_ops.py
│ ├── classification_loss.py
│ ├── lmdb_utils.py
│ ├── lr_shed.py
│ ├── merge.py
│ ├── misc.py
│ └── tensor.py
├── save
| └── models
| ├── mixformer_convmae_large_online.pth.tar
│ └── mixformer_vit_large_online.pth.tar
├── requirements.txt
├── serve
│ ├── docker
│ │ └── Dockerfile
│ └── serve
│ ├── README.md
│ ├── config.json
│ ├── local.env
│ └── src
│ ├── main.py
│ ├── modal.html
│ └── sly_functions.py
└── tracking
└── # some author scripts
```
Explanation:
* `serve/serve/src/main.py` - main inference script
* `serve/serve/src/sly_functions.py` - functions to run the MixFormer model based on the original repository code
* `serve/serve/src/modal.html` - modal window template; a simple way to control ENV variables (e.g. model type)
* `save/models` - directory with model weights
* `data/racing` - directory with demo frames for inference
* `serve/serve/README.md` - readme of your application, it is the main page of an application in Ecosystem with some images, videos, and how-to-use guides
* `serve/serve/config.json` - configuration of the Supervisely application, which defines the name and description of the app, its context menu, icon, poster, and running settings
* `requirements.txt` - all packages needed for debugging
* `local.env` - file with variables used for debugging
* `serve/serve/docker` - directory with the custom Dockerfile for this application and the script that builds it and publishes it to the docker registry
### modal.html
The author of the original repository provides us with different models. We create a basic html file with a selector so that users may choose a model before launching the application. It is now sufficient to correctly specify the configuration, and the model name will be accessible via environment variables.
```python
NAME = os.environ.get("modal.state.modelName", "mixformer_vit_online")
```
```html
```

### App configuration
App configuration is stored in `config.json` file. A detailed explanation of all possible fields is covered in this [Configuration Tutorial](/app-development/basics/app-json-config/config-json). Let's check the config for our current app:
```json
{
"name": "MixFormer object tracking",
"type": "app",
"version": "2.0.0",
"categories": [
"neural network",
"videos",
"detection & tracking",
"serve"
],
"description": "serve and use in videos annotator",
"docker_image": "supervisely/mixformer:1.0.2",
"entrypoint": "python -m uvicorn main:mixformer.app --app-dir ./serve/serve/src --host 0.0.0.0 --port 8000 --ws websockets",
"port": 8000,
"modal_template": "serve/serve/src/modal.html",
"modal_template_state": {
"modelName": "mixformer_vit_online"
},
"task_location": "application_sessions",
"isolate": true,
"headless": true,
"need_gpu": true,
"instance_version": "6.7.40",
"restart_policy": "on_error",
"session_tags": [
"sly_video_tracking"
],
"community_agent": false,
"allowed_shapes": [
"rectangle"
]
}
```
Here is the explanation for the fields:
* `type` - a type of the module in Supervisely Ecosystem
* `version` - version of Supervisely App Engine. Just keep it by default
* `name` - the name of the application
* `description` - the description of the application
* `categories` - these tags are used to place the application in the correct category in Ecosystem.
* `session_tags` - these tags will be assigned to every running session of the application. They can be used by other apps to find and filter all running sessions
* `modal_template` - path to modal window template (`modal.html` file previously described)
* `modal_template_state` - list of default values for all states
* `"need_gpu": true` - should be true if you want to use any `cuda` devices.
* `"community_agent": false` - this means that this app can not be run on the agents started by Supervisely team, so users have to connect their computers and run the app only on their agents. Only applicable in Community Edition. Enterprise customers use their private instances so they can ignore the current option
* `docker_image` - Docker container will be started from the defined Docker image, GitHub repository will be downloaded and mounted inside the container.
* `entrypoint` - the command that starts our application in a container
* `port` - port inside the container
* `"headless": true` means that the app has no User Interface
* `allowed_shapes` - shapes can be tracked with this model
# Mask tracking
Step-by-step tutorial on how to integrate custom video object segmentation neural network into Supervisely platform on the example of XMem.
## Introduction
In this tutorial you will learn how to integrate your video object segmentation model into Supervisely Ecosystem. Supervisely Python SDK allows to integrate models for numerous video object tracking tasks, such as tracking of bounding boxes, masks, keypoints, polylines, etc. This tutorial takes XMem video object segmentation model as an example and provides a complete instruction to integrate it as an application into Supervisely Ecosystem. You can find and try XMem Supervisely integration [here](https://ecosystem.supervisely.com/apps/xmem/supervisely_integration/serve?_ga=2.80998423.145311054.1690275176-20372024.1680355531).
## Implementation details
To integrate your custom video object segmentation model, you need to subclass **`sly.nn.inference.MaskTracking`** and implement 2 methods:
* `load_on_device` method for loading the weights and initializing the model on a specific device. Takes a `model_dir` argument, which is a directory for all model files (like configs, weights, etc.), and a `device` argument - a torch.device like `cuda:0`, `cpu`.
* `predict` method for model inference. It takes a `frames` argument - a list of numpy arrays, which represents a set of video frames, and an `input_mask` agrument - a mask with the objects in the first frame of the video. These objects will be tracked on all input frames. It should be a numpy array of shape (H, W), where 0 values represent the background, and other numbers represent the target objects (for example, if you have 2 target objects, than input\_mask array will consist of 0, 1 and 2 values).
### Overall structure
The overall structure of the class we will implement looks like this:
```python
import supervisely as sly
import torch
import numpy as np
class MyModel(sly.nn.inference.MaskTracking):
def load_on_device(
self,
model_dir: str,
device: Literal["cpu", "cuda", "cuda:0", "cuda:1", "cuda:2", "cuda:3"] = "cpu",
):
# initialize model, load weights, load model on device
pass
def predict(
self,
frames: List[np.ndarray],
input_mask: np.ndarray,
) -> List[np.ndarray]:
# a simple code example
# disable gradient calculation
torch.set_grad_enabled(False)
results = []
# pass input mask to your model, run it on given list of frames (frame-by-frame)
for frame in frames:
prediction = self.model(input_mask, frame)
# save predictions to a list
results.append(prediction)
# update progress bar on each iteration
self.video_interface._notify(task="mask tracking")
return results
```
The superclass has a `serve` method. For running the code on the Supervisely platform, `serve` method should be executed:
```python
model = MyModel()
model.serve()
```
The `serve` method deploys your model as a **REST API** service on the Supervisely platform. It means that other applications are able to send requests to your model and get predictions from it.
## XMem video object segmentation model
Now let's implement the class specifically for XMem.
### Getting started
**Step 1.** Prepare `~/supervisely.env` file with credentials. [Learn more here](https://developer.supervisely.com/getting-started/basics-of-authentication#use-.env-file-recommended)
**Step 2.** Clone [repository](https://github.com/hkchengrex/XMem) with source code and create [Virtual Environment](https://docs.python.org/3/library/venv.html).
```bash
git clone https://github.com/hkchengrex/XMem.git
cd XMem
source .venv/bin/activate
pip3 install torch==1.13.1+cu117 --extra-index-url https://download.pytorch.org/whl/cu117
pip3 install torchvision==0.14.1+cu117 --extra-index-url https://download.pytorch.org/whl/cu117
pip3 install supervisely==6.72.87
```
**Step 3.** Download model weights.
```bash
cd XMem
wget -P ./weights/ https://github.com/hkchengrex/XMem/releases/download/v1.0/XMem.pth
```
**Step 4.** Open the repository directory in Visual Studio Code.
```bash
code -r .
```
### Step-by-step implementation
**Creating necessary files and directories**
After cloning original repo we will create `supervisely_integration` folder, where all code for integration will be stored. There will be 2 directories - `docker` (we will put our Dockerfile here) and `serve` (app directory). Inside `serve` directory we will create `src` subdirectory and put `main.py` file there. Inside `serve` folder we will also create `debug.env` file - it will contain your [team id](https://developer.supervisely.com/getting-started/environment-variables#team_id):
```python
TEAM_ID=your_team_id
```
We will also create `requirements.txt` file, where all app dependencies will be stored:
```python
supervisely==6.72.87
--extra-index-url https://download.pytorch.org/whl/cu117
torch==1.13.1+cu117
torchvision==0.14.1+cu117
```
Now we can start coding our `main.py` file.
**Defining imports and global variables**
```python
import supervisely as sly
import os
from dotenv import load_dotenv
from typing_extensions import Literal
from typing import List
import numpy as np
import torch
from model.network import XMem
from inference.inference_core import InferenceCore
from dataset.range_transform import im_normalization
from inference.interact.interactive_utils import index_numpy_to_one_hot_torch
# for debug, has no effect in production
load_dotenv("supervisely_integration/serve/debug.env")
load_dotenv(os.path.expanduser("~/supervisely.env"))
weights_location_path = "/weights/XMem.pth"
```
**1. load\_on\_device**
The following code creates XMem model with default hyperparameters recommended by original repository and defines resolution to which input video will be resized (we will use 480 as in original work). Also `load_on_device` will keep the model as a `self.model` and the device as `self.device` for further use:
```python
class XMemTracker(sly.nn.inference.MaskTracking):
def load_on_device(
self,
model_dir: str,
device: Literal["cpu", "cuda", "cuda:0", "cuda:1", "cuda:2", "cuda:3"] = "cpu",
):
# define model configuration (default hyperparameters)
self.config = {
"top_k": 30,
"mem_every": 5,
"deep_update_every": -1,
"enable_long_term": True,
"enable_long_term_count_usage": True,
"num_prototypes": 128,
"min_mid_term_frames": 5,
"max_mid_term_frames": 10,
"max_long_term_elements": 10000,
}
# define resolution to which input video will be resized (was taken from original repository)
self.resolution = 480
# build model
self.device = torch.device(device)
self.model = XMem(self.config, weights_location_path, map_location=self.device).eval()
self.model = self.model.to(self.device)
```
{% hint style="info" %}
For local debug we can load model weights from local storage, but in production we recommend to save weights to a Docker image.
{% endhint %}
**2. predict**
The core method for model inference. Here we are disabling gradient calculation, resizing input mask and frames via interpolation, inference XMem model frame-by-frame, saving postprocessed predictions to a list and updating progress bar on every iteration.
The method must return a list of numpy arrays with a length equal to the number of input frames. Each array is a predicted mask of shape (H, W), which represents the objects in one frame. In other words it should have format similar to the `input_mask`. For instance, if you're tracking two objects over 20 frames, your input `frames` variable will be a list of 20 numpy arrays, the `input_mask` will be a numpy array with shape (H, W), containing values of 0, 1, and 2. Similarly, the `results` variable will contain a list of 20 numpy arrays, with each individual array also shaped (H, W) and filled with 0, 1, and 2 values.
In the end of each iteration we update a progress bar via `self.video_interface._notify(task="mask tracking")` - it is necessary for app UI to look correctly:
```python
def predict(
self,
frames: List[np.ndarray],
input_mask: np.ndarray,
) -> List[np.ndarray]:
# disable gradient calculation
torch.set_grad_enabled(False)
# empty cache
if torch.cuda.is_available():
torch.cuda.empty_cache()
# object IDs should be consecutive and start from 1 (0 represents the background)
num_objects = len(np.unique(input_mask)) - 1
# load processor
processor = InferenceCore(self.model, config=self.config)
processor.set_all_labels(range(1, num_objects + 1))
# resize input mask
original_width, original_height = input_mask.shape[1], input_mask.shape[0]
scaler = min(original_width, original_height) / self.resolution
resized_width = int(original_width / scaler)
resized_height = int(original_height / scaler)
input_mask = torch.from_numpy(input_mask)
input_mask = input_mask.view(1, 1, input_mask.shape[0], input_mask.shape[1])
input_mask = torch.nn.functional.interpolate(input_mask, (resized_height, resized_width), mode="nearest")
input_mask = input_mask.squeeze().numpy()
results = []
# track input objects' masks
with torch.cuda.amp.autocast(enabled=True):
for i, frame in enumerate(frames):
# preprocess frame
frame = frame.transpose(2, 0, 1)
frame = torch.from_numpy(frame)
frame = torch.unsqueeze(frame, 0)
frame = torch.nn.functional.interpolate(frame, (resized_height, resized_width), mode="nearest")
frame = frame.squeeze()
frame = frame.float().to(self.device) / 255
frame = im_normalization(frame)
# inference model on a specific frame
if i == 0:
# preprocess input mask
input_mask = index_numpy_to_one_hot_torch(input_mask, num_objects + 1)
# the background mask is not fed into the model
input_mask = input_mask[1:]
input_mask = input_mask.to(self.device)
prediction = processor.step(frame, input_mask)
else:
prediction = processor.step(frame)
# postprocess prediction
prediction = torch.argmax(prediction, dim=0)
prediction = prediction.cpu().to(torch.uint8)
prediction = prediction.view(1, 1, prediction.shape[0], prediction.shape[1])
prediction = torch.nn.functional.interpolate(prediction, (original_height, original_width), mode="nearest")
prediction = prediction.squeeze().numpy()
# save predicted mask
results.append(prediction)
# update progress bar
self.video_interface._notify(task="mask tracking")
return results
```
{% hint style="info" %}
It is crucial to disable gradient calculation in predict method, not in load\_on\_device, because these methods are being executed in different threads, so if you try disabling gradient calculation in load\_on\_device method, then it will have no effect during inference, which can significantly increase GPU memory consumption.
{% endhint %}
When `load_on_device` and `predict` methods are implemented, it is necessary to initialize our model class and execute `serve` method:
```python
model = XMemTracker()
model.serve()
```
## Debug in Supervisely platform
Once the code is written, it's time to test it right in the Supervisely platform as a debugging app.
First of all it is necessary to create `.vscode` folder and `launch.json` file inside this folder. Your `launch.json` file should contain the following:
```json
{
"version": "0.2.0",
"configurations": [
{
"name": "Advanced Debug in Supervisely platform",
"type": "python",
"request": "launch",
"module": "uvicorn",
"args": [
"main:model.app",
"--app-dir",
"./supervisely_integration/serve/src",
"--host",
"0.0.0.0",
"--port",
"8000",
"--ws",
"websockets"
],
"jinja": true,
"justMyCode": false,
"env": {
"PYTHONPATH": "${workspaceFolder}/supervisely_integration/serve/src:${PYTHONPATH}",
"LOG_LEVEL": "DEBUG",
"ENV": "production",
"DEBUG_WITH_SLY_NET": "1",
"SLY_APP_DATA_DIR": "${workspaceFolder}/app_data"
}
}
]
}
```
You can read more about advanced debug mode [here](https://developer.supervisely.com/app-development/advanced/advanced-debugging).
After that:
1. If you develop in a Docker container, you should run the container with `--cap_add=NET_ADMIN` option.
2. Install `sudo apt-get install wireguard iproute2` or `brew install wireguard-tools` for Mac.
3. Define your `TEAM_ID` in the `debug.env` file. \*Actually there are other env variables that is needed, but they are already provided in `./vscode/launch.json` for you.
4. Switch the `launch.json` config to the `Advanced debug in Supervisely platform`:

5. Run the code.
✅ It will deploy the model in the Supervisely platform as a REST API.
Here is how advanced debug mode launch looks like:
{% embed url="" %}
After advanced debug launch you must be able to debug your app via `Develop & Debug` app:
{% embed url="" %}
## Release your code as a Supervisely App
### Repository structure
The structure of [our GitHub repository](https://github.com/supervisely-ecosystem/XMem/tree/main) is the following:
```
├── LICENSE
├── README.md
├── app_data\
├── dataset\
├── docs\
├── eval.py
├── inference\
├── interactive_demo.py
├── merge_multi_scale.py
├── model\
├── requirements.txt
├── requirements_demo.txt
├── scripts\
├── supervisely_integration
│ ├── docker
│ │ ├── Dockerfile
│ │ └── publish.sh
│ └── serve
│ ├── README.md
│ ├── config.json
│ ├── debug.env
│ ├── requirements.txt
│ └── src
│ └── main.py
├── train.py
└── util\
```
Explanation:
* `supervisely_integration/serve/src/main.py` - main inference script
* `supervisely_integration/serve/README.md` - readme of your application, it is the main page of an application in Ecosystem with some images, videos, and how-to-use guides
* `supervisely_integration/serve/config.json` - configuration of the Supervisely application, which defines the name and description of the app, its context menu, icon, poster, and running settings
* `supervisely_integration/serve/requirements.txt` - all packages needed for debugging
* `supervisely_integration/serve/debug.env` - file with variables used for debugging
* `supervisely_integration/docker` - directory with the custom Dockerfile for this application and the script that builds it and publishes it to the docker registry
### App configuration
App configuration is stored in `config.json` file. A detailed explanation of all possible fields is covered in this [Configuration Tutorial](https://developer.supervisely.com/app-development/basics/app-json-config/config.json). Let's check the config for our current app:
```json
{
"name": "XMem Video Object Segmentation",
"type": "app",
"version": "2.0.0",
"categories": [
"neural network",
"videos",
"segmentation & tracking",
"serve"
],
"description": "Semi-supervised, works with both long and short videos",
"docker_image": "supervisely/xmem:1.0.1",
"entrypoint": "python -m uvicorn main:model.app --app-dir ./supervisely_integration/serve/src --host 0.0.0.0 --port 8000 --ws websockets",
"port": 8000,
"task_location": "application_sessions",
"icon": "https://github.com/supervisely-ecosystem/XMem/assets/119248312/bd2d09c8-db8c-4ae5-aec8-1f53f39afdcc",
"icon_cover": true,
"poster": "https://github.com/supervisely-ecosystem/XMem/assets/119248312/67188dc4-cc6b-47bd-b62e-d3d2b71ad7ac",
"headless": true,
"need_gpu": true,
"gpu": "required",
"instance_version": "6.7.40",
"session_tags": [
"sly_video_tracking"
],
"community_agent": false,
"allowed_shapes": [
"bitmap",
"polygon"
],
"license": {
"type": "GPL-3.0"
}
}
```
Here is the explanation for the fields:
* `type` - type of the module in Supervisely Ecosystem
* `version` - version of Supervisely App Engine. Just keep it by default
* `name` - the name of the application
* `description` - the description of the application
* `categories` - these tags are used to place the application in the correct category in Ecosystem.
* `session_tags` - these tags will be assigned to every running session of the application. They can be used by other apps to find and filter all running sessions
* `need_gpu: true` - should be true if you want to use any `cuda` devices
* `gpu: required` - app can be runned on both CPU and GPU devices, but it is recommended to use GPU for higher inference speed
* `community_agent: false` - this means that this app can not be run on the agents started by Supervisely team, so users have to connect their own computers and run the app only on their own agents. Only applicable in Community Edition. Enterprise customers use their private instances so they can ignore the current option
* `docker_image` - Docker container will be started from the defined Docker image, github repository will be downloaded and mounted inside the container.
* `entrypoint` - the command that starts our application in a container
* `port` - port inside the container
* `headless: true` means that the app has no User Interface
* `allowed_shapes` - shapes can be tracked with this model. In Supervisely masks can be represented by bitmap and polygon geometries.
### App release
Once you've tested the code, it's time to release it into the platform. It can be released as an App that is shared with the all Supervisely community, or as your own private App.
Refer to [How to Release your App](https://developer.supervisely.com/app-development/basics/from-script-to-supervisely-app) for all releasing details. For a private app check also [Private App Tutorial](https://developer.supervisely.com/app-development/basics/add-private-app).
# Image matting
Step-by-step tutorial on how to integrate custom interactive image matting neural network into Supervisely platform on the example of Matte Anything.
## Introduction
In this tutorial you will learn how to integrate custom interactive image matting model into Supervisely Ecosystem. Supervisely Python SDK allows to easily integrate models for numerous image processing tasks. This tutorial takes [Matte Anything](https://github.com/hustvl/Matte-Anything/tree/main?tab=readme-ov-file) image matting model (to be more precise, it is a combination of several models united into a single pipeline) as an example and provides a complete instruction to integrate it as an application into Supervisely Ecosystem. You can find and try Matte Anything Supervisely integration [here](https://ecosystem.supervisely.com/apps/serve-matte-anything/serving_app). The code for integration can be found [here](https://github.com/supervisely-ecosystem/Serve-Matte-Anything/tree/master).
## Implementation details
To integrate your custom video object segmentation model, you need to subclass **`sly.nn.inference.PromptableSegmentation`** and implement 4 main methods:
* `initialize_custom_gui` method for building custom GUI for your model;
* `get_params_from_gui` method for getting necessary parameters for model deployment from GUI;
* `load_model` method for loading model on device (CPU / GPU);
* `serve` for serving model as REST API on Supervisely platform - it means that other applications are able to send requests to your model and get predictions from it.
### Overall structure
The overall structure of the class we will implement looks like this:
```python
import supervisely as sly
from supervisely.app.widgets import *
from fastapi import Response, Request
class MyModel(sly.nn.inference.PromptableSegmentation):
def initialize_custom_gui(self):
# build custom UI from supervisely widgets, put them into Container and return it
custom_gui = Container(
widgets=list_of_widgets,
)
return custom_gui
def get_params_from_gui(self):
# extract parameters which will be used in load_model method from GUI and return them as a dictionary
return deploy_params
def load_model(self):
# initialize model architecture, load weights and put model on device
pass
def serve(self):
super().serve()
server = self._app.get_server()
@server.post("/smart_segmentation")
def smart_segmentation(response: Response, request: Request):
pass
model = MyModel()
model.serve()
```
As you can see from the code snippet above, it will be necessary to add `smart_segmentation` endpoint in `serve` method - it is necessary to enable model to take requests on segmentation from Supervisely image labeling tool.
## Matte Anything interactive image matting model
Now let's implement the class specifically for Matte Anything.
### Installing necessary packages
We recommend to develop apps using VS Code [Dev Containers](https://code.visualstudio.com/docs/devcontainers/tutorial) extension - it will simplify installation of necessary packages.
Here is a Dockerfile for Serve Matte Anything app development:
```docker
FROM nvidia/cuda:11.8.0-cudnn8-devel-ubuntu20.04
ENV DEBIAN_FRONTEND=noninteractive
RUN apt update && apt install python3-pip -y
RUN apt-get install -y git
ARG USE_CUDA=0
ENV DEBIAN_FRONTEND=noninteractive
ENV AM_I_DOCKER True
ENV BUILD_WITH_CUDA "${USE_CUDA}"
ENV TORCH_CUDA_ARCH_LIST "8.9"
ENV CUDA_HOME /usr/local/cuda-11.8
RUN pip3 install networkx==2.8.8
RUN pip3 install torch==2.2.0 torchvision==0.17.0 torchaudio==2.2.0 --index-url https://download.pytorch.org/whl/cu118
RUN apt-get install ffmpeg libgeos-dev libsm6 libxext6 libexiv2-dev libxrender-dev libboost-all-dev -y
RUN git clone https://github.com/hustvl/Matte-Anything.git
RUN pip3 install git+https://github.com/facebookresearch/segment-anything.git
RUN python3 -m pip install 'git+https://github.com/facebookresearch/detectron2.git'
WORKDIR ./Matte-Anything
RUN git clone https://github.com/IDEA-Research/GroundingDINO.git
RUN python3 -m pip install --no-cache-dir wheel
RUN python3 -m pip install --no-cache-dir --no-build-isolation -e GroundingDINO
RUN pip3 install opencv-python==4.8.0.74
RUN pip3 install gradio==3.41.2
RUN pip3 install fairscale
RUN python3 -m pip install supervisely==6.73.82
RUN pip3 install urllib3==1.26.17
RUN pip3 install einops==0.8.0
RUN apt-get -y install curl
RUN apt -y install wireguard iproute2
RUN apt-get -y install wget
RUN apt-get install nano
```
### Downloading weights of models
After installing all necessary packages, it will be also necessary to download weights of models (Matte Anything uses [Segment Anything](https://github.com/facebookresearch/segment-anything), [Groundin DINO](https://github.com/IDEA-Research/GroundingDINO) and [ViTMatte](https://github.com/hustvl/ViTMatte/tree/main)) and put them into `pretrained` folder. Here are the links for [Segment Anything](https://github.com/facebookresearch/segment-anything?tab=readme-ov-file#model-checkpoints), [Grounding DINO](https://github.com/IDEA-Research/GroundingDINO?tab=readme-ov-file#luggage-checkpoints) and [ViTMatte](https://github.com/hustvl/ViTMatte/tree/main?tab=readme-ov-file#results) pretrained checkpoints. For local debug we can load model weights from local storage, but in production we recommend to save weights to a Docker image.
### Preparing json files with models data
We will need to create a json file for each model group - this data will be used to create model tables in UI and load models in code.
Here are json files for Segment Anything, Grounding DINO and ViTMatte respectively:
```json
[
{
"Model": "ViT-B SAM",
"Number of parameters": "91M",
"Size": "375 MB",
"mIoU": "69",
"weights": "/pretrained/sam_vit_b.pth"
},
{
"Model": "ViT-L SAM",
"Number of parameters": "308M",
"Size": "1.25 GB",
"mIoU": "72",
"weights": "/pretrained/sam_vit_l.pth"
},
{
"Model": "ViT-H SAM",
"Number of parameters": "636M",
"Size": "2.56 GB",
"mIoU": "74",
"weights": "/pretrained/sam_vit_h.pth"
}
]
```
```json
[
{
"Model": "GroundingDINO-T",
"backbone": "Swin-T",
"Datasets": "O365, GoldG, Cap4M",
"box AP on COCO": "57.2",
"config": "./GroundingDINO/groundingdino/config/GroundingDINO_SwinT_OGC.py",
"weights": "/pretrained/groundingdino_swint_ogc.pth"
},
{
"Model": "GroundingDINO-B",
"backbone": "Swin-B",
"Datasets": "COCO, O365, GoldG, Cap4M, OpenImage, ODinW-35, RefCOCO",
"box AP on COCO": "56.7",
"config": "./GroundingDINO/groundingdino/config/GroundingDINO_SwinB_cogcoor.py",
"weights": "/pretrained/groundingdino_swinb_cfg.pth"
}
]
```
```json
[
{
"Model": "ViTMatte-S (Composition-1k)",
"SAD": "21.46",
"MSE": "3.3",
"Grad": "7.24",
"Conn": "16.21",
"weights": "/pretrained/vitmatte_s_com.pth",
"config": "./configs/vitmatte_s.py"
},
{
"Model": "ViTMatte-S (Distinctionctions-646)",
"SAD": "21.22",
"MSE": "2.1",
"Grad": "8.78",
"Conn": "17.55",
"weights": "/pretrained/vitmatte_s_dis.pth",
"config": "./configs/vitmatte_s.py"
},
{
"Model": "ViTMatte-B (Composition-1k)",
"SAD": "20.33",
"MSE": "3.0",
"Grad": "6.74",
"Conn": "14.78",
"weights": "/pretrained/vitmatte_b_com.pth",
"config": "./configs/vitmatte_b.py"
},
{
"Model": "ViTMatte-B (Distinctionctions-646)",
"SAD": "17.05",
"MSE": "1.5",
"Grad": "7.03",
"Conn": "12.95",
"weights": "/pretrained/vitmatte_b_dis.pth",
"config": "./configs/vitmatte_b.py"
}
]
```
We will put these files into `models_data` directory.
### Step-by-step class implementation
**Defining imports and global variables**
```python
import os
import cv2
import torch
import numpy as np
from PIL import Image
from torchvision.ops import box_convert
from torchvision.transforms import functional as F
from detectron2.config import LazyConfig, instantiate
from detectron2.checkpoint import DetectionCheckpointer
from segment_anything import sam_model_registry, SamPredictor
import groundingdino.datasets.transforms as T
from groundingdino.util.inference import (
load_model as dino_load_model,
predict as dino_predict,
)
import supervisely as sly
from typing import Literal
from typing import List, Any, Dict
import threading
from cachetools import LRUCache
from cacheout import Cache
from supervisely.sly_logger import logger
from supervisely.nn.inference.interactive_segmentation import functional
from supervisely.app.content import get_data_dir
from supervisely.imaging import image as sly_image
from supervisely._utils import rand_str
from fastapi import Response, Request, status
import time
import base64
from PIL import Image
from dotenv import load_dotenv
from supervisely.app.widgets import (
RadioTable,
Field,
Checkbox,
Input,
InputNumber,
Container,
Empty,
)
load_dotenv("local.env")
load_dotenv("supervisely.env")
is_debug_session = bool(os.environ.get("IS_DEBUG_SESSION", False))
original_dir = os.getcwd()
```
**initialize\_custom\_gui**
The following code builds custom GUI from Supervisely [widgets](https://developer.supervisely.com/app-development/widgets) (we will also need `get_models` method in order to read json files with models data and preprocess extracted data):
```python
def get_models(self):
model_types = ["Segment Anything", "Grounding DINO", "ViTMatte"]
self.models_dict = {}
for model_type in model_types:
if model_type == "Segment Anything":
model_data_path = "./models_data/segment_anything.json"
elif model_type == "Grounding DINO":
model_data_path = "./models_data/grounding_dino.json"
elif model_type == "ViTMatte":
model_data_path = "./models_data/vitmatte.json"
model_data = sly.json.load_json_file(model_data_path)
self.models_dict[model_type] = model_data
return self.models_dict
def initialize_custom_gui(self):
models_data = self.get_models()
def remove_unnecessary_keys(data_dict):
new_dict = data_dict.copy()
new_dict.pop("weights", None)
new_dict.pop("config", None)
return new_dict
sam_model_data = models_data["Segment Anything"]
sam_model_data = [remove_unnecessary_keys(d) for d in sam_model_data]
gr_dino_model_data = models_data["Grounding DINO"]
gr_dino_model_data = [remove_unnecessary_keys(d) for d in gr_dino_model_data]
vitmatte_model_data = models_data["ViTMatte"]
vitmatte_model_data = [remove_unnecessary_keys(d) for d in vitmatte_model_data]
self.sam_table = RadioTable(
columns=list(sam_model_data[0].keys()),
rows=[list(element.values()) for element in sam_model_data],
)
self.sam_table.select_row(2)
sam_table_f = Field(
content=self.sam_table,
title="Pretrained Segment Anything models",
)
self.vitmatte_table = RadioTable(
columns=list(vitmatte_model_data[0].keys()),
rows=[list(element.values()) for element in vitmatte_model_data],
)
self.vitmatte_table.select_row(3)
vitmatte_table_f = Field(
content=self.vitmatte_table,
title="Pretrained ViTMatte models",
)
self.erode_input = InputNumber(value=20, min=1, max=30, step=1)
erode_input_f = Field(
content=self.erode_input,
title="Erode kernel size",
)
self.dilate_input = InputNumber(value=20, min=1, max=30, step=1)
dilate_input_f = Field(
content=self.dilate_input,
title="Dilate kernel size",
)
erode_dilate_inputs = Container(
widgets=[erode_input_f, dilate_input_f, Empty()],
direction="horizontal",
fractions=[1, 1, 2],
)
self.gr_dino_checkbox = Checkbox(content="use Grounding DINO", checked=False)
gr_dino_checkbox_f = Field(
content=self.gr_dino_checkbox,
title="Choose whether to use Grounding DINO or not",
description=(
"If selected, then Grounding DINO will be used to detect transparent objects on images "
"and correct trimap based on detected objects"
),
)
self.gr_dino_table = RadioTable(
columns=list(gr_dino_model_data[0].keys()),
rows=[list(element.values()) for element in gr_dino_model_data],
)
gr_dino_table_f = Field(
content=self.gr_dino_table,
title="Pretrained Grounding DINO models",
)
gr_dino_table_f.hide()
self.dino_text_prompt = Input(
"glass, lens, crystal, diamond, bubble, bulb, web, grid"
)
self.dino_text_prompt.hide()
dino_text_input_f = Field(
content=self.dino_text_prompt,
title="Text prompt for detecting transparent objects using Grounding DINO",
)
dino_text_input_f.hide()
self.dino_text_thresh_input = InputNumber(
value=0.25, min=0.1, max=0.9, step=0.05
)
dino_text_thresh_input_f = Field(
content=self.dino_text_thresh_input,
title="Grounding DINO text confindence threshold",
)
self.dino_box_thresh_input = InputNumber(value=0.5, min=0.1, max=0.9, step=0.1)
dino_box_thresh_input_f = Field(
content=self.dino_box_thresh_input,
title="Grounding DINO box confindence threshold",
)
dino_thresh_inputs = Container(
widgets=[dino_text_thresh_input_f, dino_box_thresh_input_f, Empty()],
direction="horizontal",
fractions=[1, 1, 2],
)
dino_thresh_inputs.hide()
@self.gr_dino_checkbox.value_changed
def change_dino_ui(value):
if value:
gr_dino_table_f.show()
self.dino_text_prompt.show()
dino_text_input_f.show()
dino_thresh_inputs.show()
else:
gr_dino_table_f.hide()
self.dino_text_prompt.hide()
dino_text_input_f.hide()
dino_thresh_inputs.hide()
custom_gui = Container(
widgets=[
sam_table_f,
vitmatte_table_f,
erode_dilate_inputs,
gr_dino_checkbox_f,
gr_dino_table_f,
dino_text_input_f,
dino_thresh_inputs,
],
gap=25,
)
return custom_gui
```
As you can see from the code above, there are two functions inside `initialize_custom_gui` method: `remove_unnecessary_keys` and `change_dino_ui`. The first one is used in order to remove config and checkpoint paths from model tables since we do not want this data to be displayed in UI, we will need this data only in our code. The second one is used for interaction witb user: if user chooses to use Grounding DINO, then part of UI with Grounding DINO settings will appear.
**load\_model**
The code below initializes Segment Anything, ViTMatte and (if necessary) Grounding DINO models, loads their checkpoints and puts them on device:
```python
def init_segment_anything(self, model_type, checkpoint_path):
sam = sam_model_registry[model_type](checkpoint=checkpoint_path).to(self.device)
predictor = SamPredictor(sam)
return predictor
def init_vitmatte(self, config_path, checkpoint_path):
cfg = LazyConfig.load(config_path)
vitmatte = instantiate(cfg.model)
vitmatte.to(self.device)
vitmatte.eval()
DetectionCheckpointer(vitmatte).load(checkpoint_path)
return vitmatte
def load_model(
self,
device: Literal["cpu", "cuda", "cuda:0", "cuda:1", "cuda:2", "cuda:3"] = "cpu",
):
os.chdir(original_dir)
# load segment anything
sam_row_index = self.sam_table.get_selected_row_index()
sam_dict = self.models_dict["Segment Anything"][sam_row_index]
sam_model = sam_dict["Model"].lower()[:5].replace("-", "_")
sam_checkpoint_path = sam_dict["weights"]
if is_debug_session:
sam_checkpoint_path = "." + sam_checkpoint_path
self.predictor = self.init_segment_anything(sam_model, sam_checkpoint_path)
# load vitmatte
vitmatte_row_index = self.vitmatte_table.get_selected_row_index()
vitmatte_dict = self.models_dict["ViTMatte"][vitmatte_row_index]
vitmatte_config_path = vitmatte_dict["config"]
vitmatte_checkpoint_path = vitmatte_dict["weights"]
if is_debug_session:
vitmatte_checkpoint_path = "." + vitmatte_checkpoint_path
self.is_vitmatte = True
self.vitmatte = self.init_vitmatte(
vitmatte_config_path, vitmatte_checkpoint_path
)
# load grounding dino if necessary
if self.gr_dino_checkbox.is_checked():
grounding_dino_row_index = self.gr_dino_table.get_selected_row_index()
gr_dino_dict = self.models_dict["Grounding DINO"][grounding_dino_row_index]
gr_dino_config_path = gr_dino_dict["config"]
gr_dino_checkpoint_path = gr_dino_dict["weights"]
if is_debug_session:
gr_dino_checkpoint_path = "." + gr_dino_checkpoint_path
self.grounding_dino = dino_load_model(
gr_dino_config_path, gr_dino_checkpoint_path
)
# define list of class names
self.class_names = ["alpha_mask"]
# variable for storing image ids from previous inference iterations
self.previous_image_id = None
# dict for storing model variables to avoid unnecessary calculations
self.cache = Cache(maxsize=100, ttl=5 * 60)
```
We will also need some additional methods for serving our model on Supervisely platform:
```python
def get_info(self):
info = super().get_info()
info["videos_support"] = False
info["async_video_inference_support"] = False
return info
def get_classes(self) -> List[str]:
return self.class_names
@property
def model_meta(self):
if self._model_meta is None:
self._model_meta = sly.ProjectMeta(
[sly.ObjClass(self.class_names[0], sly.Bitmap, [255, 0, 0])]
)
self._get_confidence_tag_meta()
return self._model_meta
```
After we have initialized necessary models, we can start implementing `serve` method. But before doing it, we will have to implement some methods which we will use to process image data and generate trimaps artificially:
```python
def generate_trimap(self, mask, erode_kernel_size=10, dilate_kernel_size=10):
erode_kernel = np.ones((erode_kernel_size, erode_kernel_size), np.uint8)
dilate_kernel = np.ones((dilate_kernel_size, dilate_kernel_size), np.uint8)
eroded = cv2.erode(mask, erode_kernel, iterations=5)
dilated = cv2.dilate(mask, dilate_kernel, iterations=5)
trimap = np.zeros_like(mask)
trimap[dilated == 255] = 128
trimap[eroded == 255] = 255
return trimap
def convert_pixels(self, gray_image, boxes):
converted_image = np.copy(gray_image)
for box in boxes:
x1, y1, x2, y2 = box
x1, y1, x2, y2 = int(x1), int(y1), int(x2), int(y2)
converted_image[y1:y2, x1:x2][converted_image[y1:y2, x1:x2] == 1] = 0.5
return converted_image
def set_image_data(self, input_image, input_image_id):
if input_image_id != self.previous_image_id:
if input_image_id not in self.cache:
self.predictor.set_image(input_image)
self.cache.set(
input_image_id,
{
"features": self.predictor.features,
"input_size": self.predictor.input_size,
"original_size": self.predictor.original_size,
},
)
else:
cached_data = self.cache.get(input_image_id)
self.predictor.features = cached_data["features"]
self.predictor.input_size = cached_data["input_size"]
self.predictor.original_size = cached_data["original_size"]
```
Image matting task usually assumes usage of trimap - specific mask which divides input image into three types of areas: foreground, background, and transition region. But manual creation of trimap can be very time-consuming. Matte Anything uses segmentation mask predicted by Segment Anything and processes it via erosion and dilation (in code it is implemented in `generate_trimap` method) to generate trimap automatically. ViTMatte uses this trimap as an input to predict alpha mask. If user has chosen to use Grounding DINO, then this model will be used for detecting transparent objects - if such objects were found on image, then trimap will be corrected based on this information - `convert_pixels` method is used in order to put such objects into transition area of trimap. `set_image_data` method is used to avoid unnecessary calculations - if given image id is in cache, then it means that predictor features for this image are already calculated and we can simply take them from cache instead of calculating them again from scratch.
**serve**
The code below implements `serve` method with `smart_segmentation` endpoint for taking requests on segmentation and sending responses with encoded mask to the platform:
```python
def serve(self):
super().serve()
server = self._app.get_server()
@server.post("/smart_segmentation")
def smart_segmentation(response: Response, request: Request):
try:
smtool_state = request.state.context
api = request.state.api
crop = smtool_state["crop"]
except Exception as exc:
logger.warn("Error parsing request:" + str(exc), exc_info=True)
response.status_code = status.HTTP_400_BAD_REQUEST
return {"message": "400: Bad request.", "success": False}
torch.set_grad_enabled(False)
image_np = api.image.download_np(smtool_state["image_id"])
self.set_image_data(image_np, smtool_state["image_id"])
dino_transform = T.Compose(
[
T.RandomResize([800], max_size=1333),
T.ToTensor(),
T.Normalize([0.485, 0.456, 0.406], [0.229, 0.224, 0.225]),
]
)
image_transformed, _ = dino_transform(Image.fromarray(image_np), None)
positive_clicks, negative_clicks = (
smtool_state["positive"],
smtool_state["negative"],
)
clicks = [{**click, "is_positive": True} for click in positive_clicks]
clicks += [{**click, "is_positive": False} for click in negative_clicks]
point_coordinates, point_labels = [], []
for click in clicks:
point_coordinates.append([click["x"], click["y"]])
if click["is_positive"]:
point_labels.append(1)
else:
point_labels.append(0)
points = torch.Tensor(point_coordinates).to(self.device).unsqueeze(1)
labels = torch.Tensor(point_labels).to(self.device).unsqueeze(1)
transformed_points = self.predictor.transform.apply_coords_torch(
points, image_np.shape[:2]
)
point_coords = transformed_points.permute(1, 0, 2)
point_labels = labels.permute(1, 0)
bbox_coordinates = torch.Tensor(
[
crop[0]["x"],
crop[0]["y"],
crop[1]["x"],
crop[1]["y"],
]
).to(self.device)
transformed_boxes = self.predictor.transform.apply_boxes_torch(
bbox_coordinates, image_np.shape[:2]
)
masks, scores, logits = self.predictor.predict_torch(
point_coords=point_coords,
point_labels=point_labels,
boxes=transformed_boxes,
multimask_output=False,
)
masks = masks.cpu().detach().numpy()
mask_all = np.ones((image_np.shape[0], image_np.shape[1], 3))
for ann in masks:
color_mask = np.random.random((1, 3)).tolist()[0]
for i in range(3):
mask_all[ann[0] == True, i] = color_mask[i]
torch.cuda.empty_cache()
mask = masks[0][0].astype(np.uint8) * 255
erode_kernel_size = self.erode_input.get_value()
dilate_kernel_size = self.dilate_input.get_value()
trimap = self.generate_trimap(
mask, erode_kernel_size, dilate_kernel_size
).astype(np.float32)
trimap[trimap == 128] = 0.5
trimap[trimap == 255] = 1
if self.gr_dino_checkbox.is_checked():
tr_box_threshold = self.dino_box_thresh_input.get_value()
tr_text_threshold = self.dino_text_thresh_input.get_value()
tr_caption = self.dino_text_prompt.get_value()
boxes, logits, phrases = dino_predict(
model=self.grounding_dino,
image=image_transformed,
caption=tr_caption,
box_threshold=tr_box_threshold,
text_threshold=tr_text_threshold,
device=self.device,
)
if boxes.shape[0] == 0:
# no transparent object detected
pass
else:
h, w, _ = image_np.shape
boxes = boxes * torch.Tensor([w, h, w, h])
xyxy = box_convert(
boxes=boxes, in_fmt="cxcywh", out_fmt="xyxy"
).numpy()
trimap = self.convert_pixels(trimap, xyxy)
input = {
"image": torch.from_numpy(image_np).permute(2, 0, 1).unsqueeze(0) / 255,
"trimap": torch.from_numpy(trimap).unsqueeze(0).unsqueeze(0),
}
torch.cuda.empty_cache()
alpha = self.vitmatte(input)["phas"].flatten(0, 2)
alpha = alpha.detach().cpu().numpy()
torch.cuda.empty_cache()
alpha = alpha[crop[0]["y"] : crop[1]["y"], crop[0]["x"] : crop[1]["x"], ...]
im = F.to_pil_image(alpha)
im.save("alpha.png")
with open("alpha.png", "rb") as image_file:
encoded_string = base64.b64encode(image_file.read())
os.remove("alpha.png")
origin = {
"x": crop[0]["x"],
"y": crop[0]["y"],
}
response = {
"data": encoded_string,
"origin": origin,
"success": True,
"error": None,
}
return response
```
After implementing class we will have to initialize it and execute `serve` method:
```python
m = MatteAnythingModel(model_dir="app_data", use_gui=True)
m.serve()
```
## Debug in Supervisely platform
Once the code is written, it's time to test it right in the Supervisely platform as a debugging app.
First of all it is necessary to create `.vscode` folder and `launch.json` file inside this folder. Your `launch.json` file should contain the following:
```json
{
"version": "0.2.0",
"configurations": [
{
"name": "Advanced mode for Supervisely Team",
"type": "python",
"request": "launch",
"module": "uvicorn",
"args": [
"serving_app.main:m.app",
"--host",
"0.0.0.0",
"--port",
"8000",
"--ws",
"websockets"
],
"jinja": true,
"justMyCode": false,
"env": {
"PYTHONPATH": "${workspaceFolder}:${PYTHONPATH}",
"LOG_LEVEL": "DEBUG",
"ENV": "production",
"FOLDER": "./my_model",
"DEBUG_WITH_SLY_NET": "1",
"SLY_APP_DATA_DIR": "${workspaceFolder}/results"
}
}
]
}
```
You can read more about advanced debug mode [here](https://developer.supervisely.com/app-development/advanced/advanced-debugging).
After that:
1. If you develop in a Docker container, you should run the container with `--cap_add=NET_ADMIN` option.
2. Install `sudo apt-get install wireguard iproute2` or `brew install wireguard-tools` for Mac.
3. Define your `TEAM_ID` in the `debug.env` file. \*Actually there are other env variables that is needed, but they are already provided in `./vscode/launch.json` for you.
4. Switch the `launch.json` config to the `Advanced debug in Supervisely platform`:

5. Run the code.
✅ It will deploy the model in the Supervisely platform as a REST API.
Here is how advanced debug mode launch looks like:
{% embed url="" %}
After advanced debug launch you must be able to debug your app via `Develop & Debug` app:
{% embed url="" %}
## Release your code as a Supervisely App
### Repository structure
The structure of [our GitHub repository](https://github.com/supervisely-ecosystem/Serve-Matte-Anything/tree/master) is the following:
```
|-- GroundingDINO
| |-- Dockerfile
| |-- LICENSE
| |-- README.md
| |-- demo
| | |-- create_coco_dataset.py
| | |-- gradio_app.py
| | |-- image_editing_with_groundingdino_gligen.ipynb
| | |-- image_editing_with_groundingdino_stablediffusion.ipynb
| | |-- inference_on_a_image.py
| | `-- test_ap_on_coco.py
| |-- docker_test.py
| |-- environment.yaml
| |-- groundingdino
| | |-- __init__.py
| | |-- config
| | | |-- GroundingDINO_SwinB_cfg.py
| | | |-- GroundingDINO_SwinT_OGC.py
| | | `-- __init__.py
| | |-- datasets
| | | |-- __init__.py
| | | |-- cocogrounding_eval.py
| | | `-- transforms.py
| | |-- models
| | | |-- GroundingDINO
| | | | |-- __init__.py
| | | | |-- backbone
| | | | | |-- __init__.py
| | | | | |-- backbone.py
| | | | | |-- position_encoding.py
| | | | | `-- swin_transformer.py
| | | | |-- bertwarper.py
| | | | |-- csrc
| | | | | |-- MsDeformAttn
| | | | | | |-- ms_deform_attn.h
| | | | | | |-- ms_deform_attn_cpu.cpp
| | | | | | |-- ms_deform_attn_cpu.h
| | | | | | |-- ms_deform_attn_cuda.cu
| | | | | | |-- ms_deform_attn_cuda.h
| | | | | | `-- ms_deform_im2col_cuda.cuh
| | | | | |-- cuda_version.cu
| | | | | `-- vision.cpp
| | | | |-- fuse_modules.py
| | | | |-- groundingdino.py
| | | | |-- ms_deform_attn.py
| | | | |-- transformer.py
| | | | |-- transformer_vanilla.py
| | | | `-- utils.py
| | | |-- __init__.py
| | | `-- registry.py
| | `-- util
| | |-- __init__.py
| | |-- box_ops.py
| | |-- get_tokenlizer.py
| | |-- inference.py
| | |-- logger.py
| | |-- misc.py
| | |-- slconfig.py
| | |-- slio.py
| | |-- time_counter.py
| | |-- utils.py
| | |-- visualizer.py
| | `-- vl_utils.py
| |-- requirements.txt
| |-- setup.py
| `-- test.ipynb
|-- configs
| |-- common
| | |-- dataloader.py
| | |-- model.py
| | |-- optimizer.py
| | |-- scheduler.py
| | `-- train.py
| |-- vitmatte_b.py
| `-- vitmatte_s.py
|-- docker
| |-- Dockerfile
| `-- publish.sh
|-- local.env
|-- media
| |-- deployed.png
| |-- icon.png
| |-- matte-anything.png
| |-- matting_example.mp4
| |-- matting_project_settings.mp4
| |-- poster.png
| `-- pretrained_models.png
|-- modeling
| |-- __init__.py
| |-- __pycache__
| | |-- __init__.cpython-310.pyc
| | `-- __init__.cpython-38.pyc
| |-- backbone
| | |-- __init__.py
| | |-- __pycache__
| | | |-- __init__.cpython-310.pyc
| | | |-- __init__.cpython-38.pyc
| | | |-- backbone.cpython-310.pyc
| | | |-- backbone.cpython-38.pyc
| | | |-- utils.cpython-310.pyc
| | | |-- utils.cpython-38.pyc
| | | |-- vit.cpython-310.pyc
| | | `-- vit.cpython-38.pyc
| | |-- backbone.py
| | |-- utils.py
| | `-- vit.py
| |-- criterion
| | |-- __init__.py
| | |-- __pycache__
| | | |-- __init__.cpython-310.pyc
| | | |-- __init__.cpython-38.pyc
| | | |-- matting_criterion.cpython-310.pyc
| | | `-- matting_criterion.cpython-38.pyc
| | `-- matting_criterion.py
| |-- decoder
| | |-- __init__.py
| | |-- __pycache__
| | | |-- __init__.cpython-310.pyc
| | | |-- __init__.cpython-38.pyc
| | | |-- detail_capture.cpython-310.pyc
| | | `-- detail_capture.cpython-38.pyc
| | `-- detail_capture.py
| `-- meta_arch
| |-- __init__.py
| |-- __pycache__
| | |-- __init__.cpython-310.pyc
| | |-- __init__.cpython-38.pyc
| | |-- vitmatte.cpython-310.pyc
| | `-- vitmatte.cpython-38.pyc
| `-- vitmatte.py
|-- models_data
| |-- grounding_dino.json
| |-- segment_anything.json
| `-- vitmatte.json
|-- pretrained
| |-- groundingdino_swinb_cogcoor.pth
| |-- groundingdino_swint_ogc.pth
| |-- sam_vit_b.pth
| |-- sam_vit_h.pth
| |-- sam_vit_l.pth
| |-- vitmatte_b_com.pth
| |-- vitmatte_b_dis.pth
| |-- vitmatte_s_com.pth
| `-- vitmatte_s_dis.pth
|-- serving_app
| |-- README.md
| |-- config.json
| `-- main.py
`-- supervisely.env
```
Explanation:
* `serving_app/main.py` - main inference script
* `serving_app/README.md` - readme of your application, it is the main page of an application in Ecosystem with some images, videos, and how-to-use guides
* `serving_app/config.json` - configuration of the Supervisely application, which defines the name and description of the app, its context menu, icon, poster, and running settings
* `supervisely.env` - file with variables used for debugging
* `docker/` - directory with the custom Dockerfile for this application and the script that builds it and publishes it to the docker registry
### App configuration
App configuration is stored in `config.json` file. A detailed explanation of all possible fields is covered in this [Configuration Tutorial](https://developer.supervisely.com/app-development/basics/app-json-config/config.json). Let's check the config for our current app:
```json
{
"name": "Serve Matte Anything",
"type": "app",
"version": "2.0.0",
"description": "Deploy Matte Anything as REST API service",
"categories": [
"neural network",
"images",
"interactive segmentation",
"image matting",
"serve"
],
"need_gpu": true,
"gpu": "required",
"session_tags": [
"deployed_nn_object_segmentation"
],
"community_agent": false,
"docker_image": "supervisely/serve-matte-anything:1.0.1",
"instance_version": "6.9.22",
"entrypoint": "python3 -m uvicorn serving_app.main:m.app --app-dir ./serve --host 0.0.0.0 --port 8000 --ws websockets",
"port": 8000,
"icon": "https://github.com/supervisely-ecosystem/Serve-Matte-Anything/releases/download/v0.0.1/icon.png",
"icon_cover": true,
"poster": "https://github.com/supervisely-ecosystem/Serve-Matte-Anything/releases/download/v0.0.1/poster.png",
"task_location": "application_sessions",
"license": {
"type": "MIT"
}
}
```
Here is the explanation for the fields:
* `type` - type of the module in Supervisely Ecosystem
* `version` - version of Supervisely App Engine. Just keep it by default
* `name` - the name of the application
* `description` - the description of the application
* `categories` - these tags are used to place the application in the correct category in Ecosystem
* `session_tags` - these tags will be assigned to every running session of the application. They can be used by other apps to find and filter all running sessions
* `need_gpu: true` - should be true if you want to use any `cuda` devices
* `gpu: required` - app can be runned only on GPU devices
* `community_agent: false` - this means that this app can not be run on the agents started by Supervisely team, so users have to connect their own computers and run the app only on their own agents. Only applicable in Community Edition. Enterprise customers use their private instances so they can ignore the current option
* `docker_image` - Docker container will be started from the defined Docker image, github repository will be downloaded and mounted inside the container
* `entrypoint` - the command that starts our application in a container
* `port` - port inside the container
### App release
Once you've tested the code, it's time to release it into the platform. It can be released as an App that is shared with the all Supervisely community, or as your own private App.
Refer to [How to Release your App](https://developer.supervisely.com/app-development/basics/from-script-to-supervisely-app) for all releasing details. For a private app check also [Private App Tutorial](https://developer.supervisely.com/app-development/basics/add-private-app).
# How to customize model inference
This document outlines some of the features of the `Inference` class that can be useful in customizing your model's behavior.
### Custom Inference Settings
Your neural network (NN) model can use various parameters that you may want to expose to the user. These parameters might include confidence threshold, intersection over union (IoU) threshold, and others. We have provided a way to allow users to set up some of these parameters when they connect to your model from the Inference dashboard or the Labeling Tool.
To support such parameters in your model, you should provide a dictionary or YAML file with default values to your model class, like this:
```python
settings = { 'confidence_threshold': 0.5 }
m = MyModel(model_dir=model_dir, custom_inference_settings=settings)
```
These parameters will be provided to the `predict(image_path, settings)` method as the `settings` parameter. In this method, you can use these parameters as needed, as shown in the following example from the [Integrate Instance Segmentation model repository](https://github.com/supervisely-ecosystem/integrate-inst-seg-model):
```python
def predict(self, image_path: str, settings: Dict[str, Any]) -> List[sly.nn.PredictionMask]:
confidence_threshold = settings.get("confidence_threshold", 0.5)
image = cv2.imread(image_path) # BGR
####### CUSTOM CODE FOR MY MODEL STARTS (e.g. DETECTRON2) #######
outputs = self.predictor(image) # get predictions from Detectron2 model
pred_classes = outputs["instances"].pred_classes.detach().cpu().numpy()
pred_class_names = [self.class_names[pred_class] for pred_class in pred_classes]
pred_scores = outputs["instances"].scores.detach().cpu().numpy().tolist()
pred_masks = outputs["instances"].pred_masks.detach().cpu().numpy()
####### CUSTOM CODE FOR MY MODEL ENDS (e.g. DETECTRON2) ########
results = []
for score, class_name, mask in zip(pred_scores, pred_class_names, pred_masks):
# filter predictions by confidence
if score >= confidence_threshold:
results.append(sly.nn.PredictionMask(class_name, mask, score))
return results
```
In this example, all predictions with a confidence score lower than the `confidence_threshold` parameter value will not be included in the result annotation.
If a user wants to change a parameter value before the inference, they can do so. For example, if they use the [Apply NN to Images Project](https://ecosystem.supervisely.com/apps/nn-image-labeling/project-dataset) app to label a project using your NN model, they will see these parameters in the `Inference settings` > `Additional settings` section.
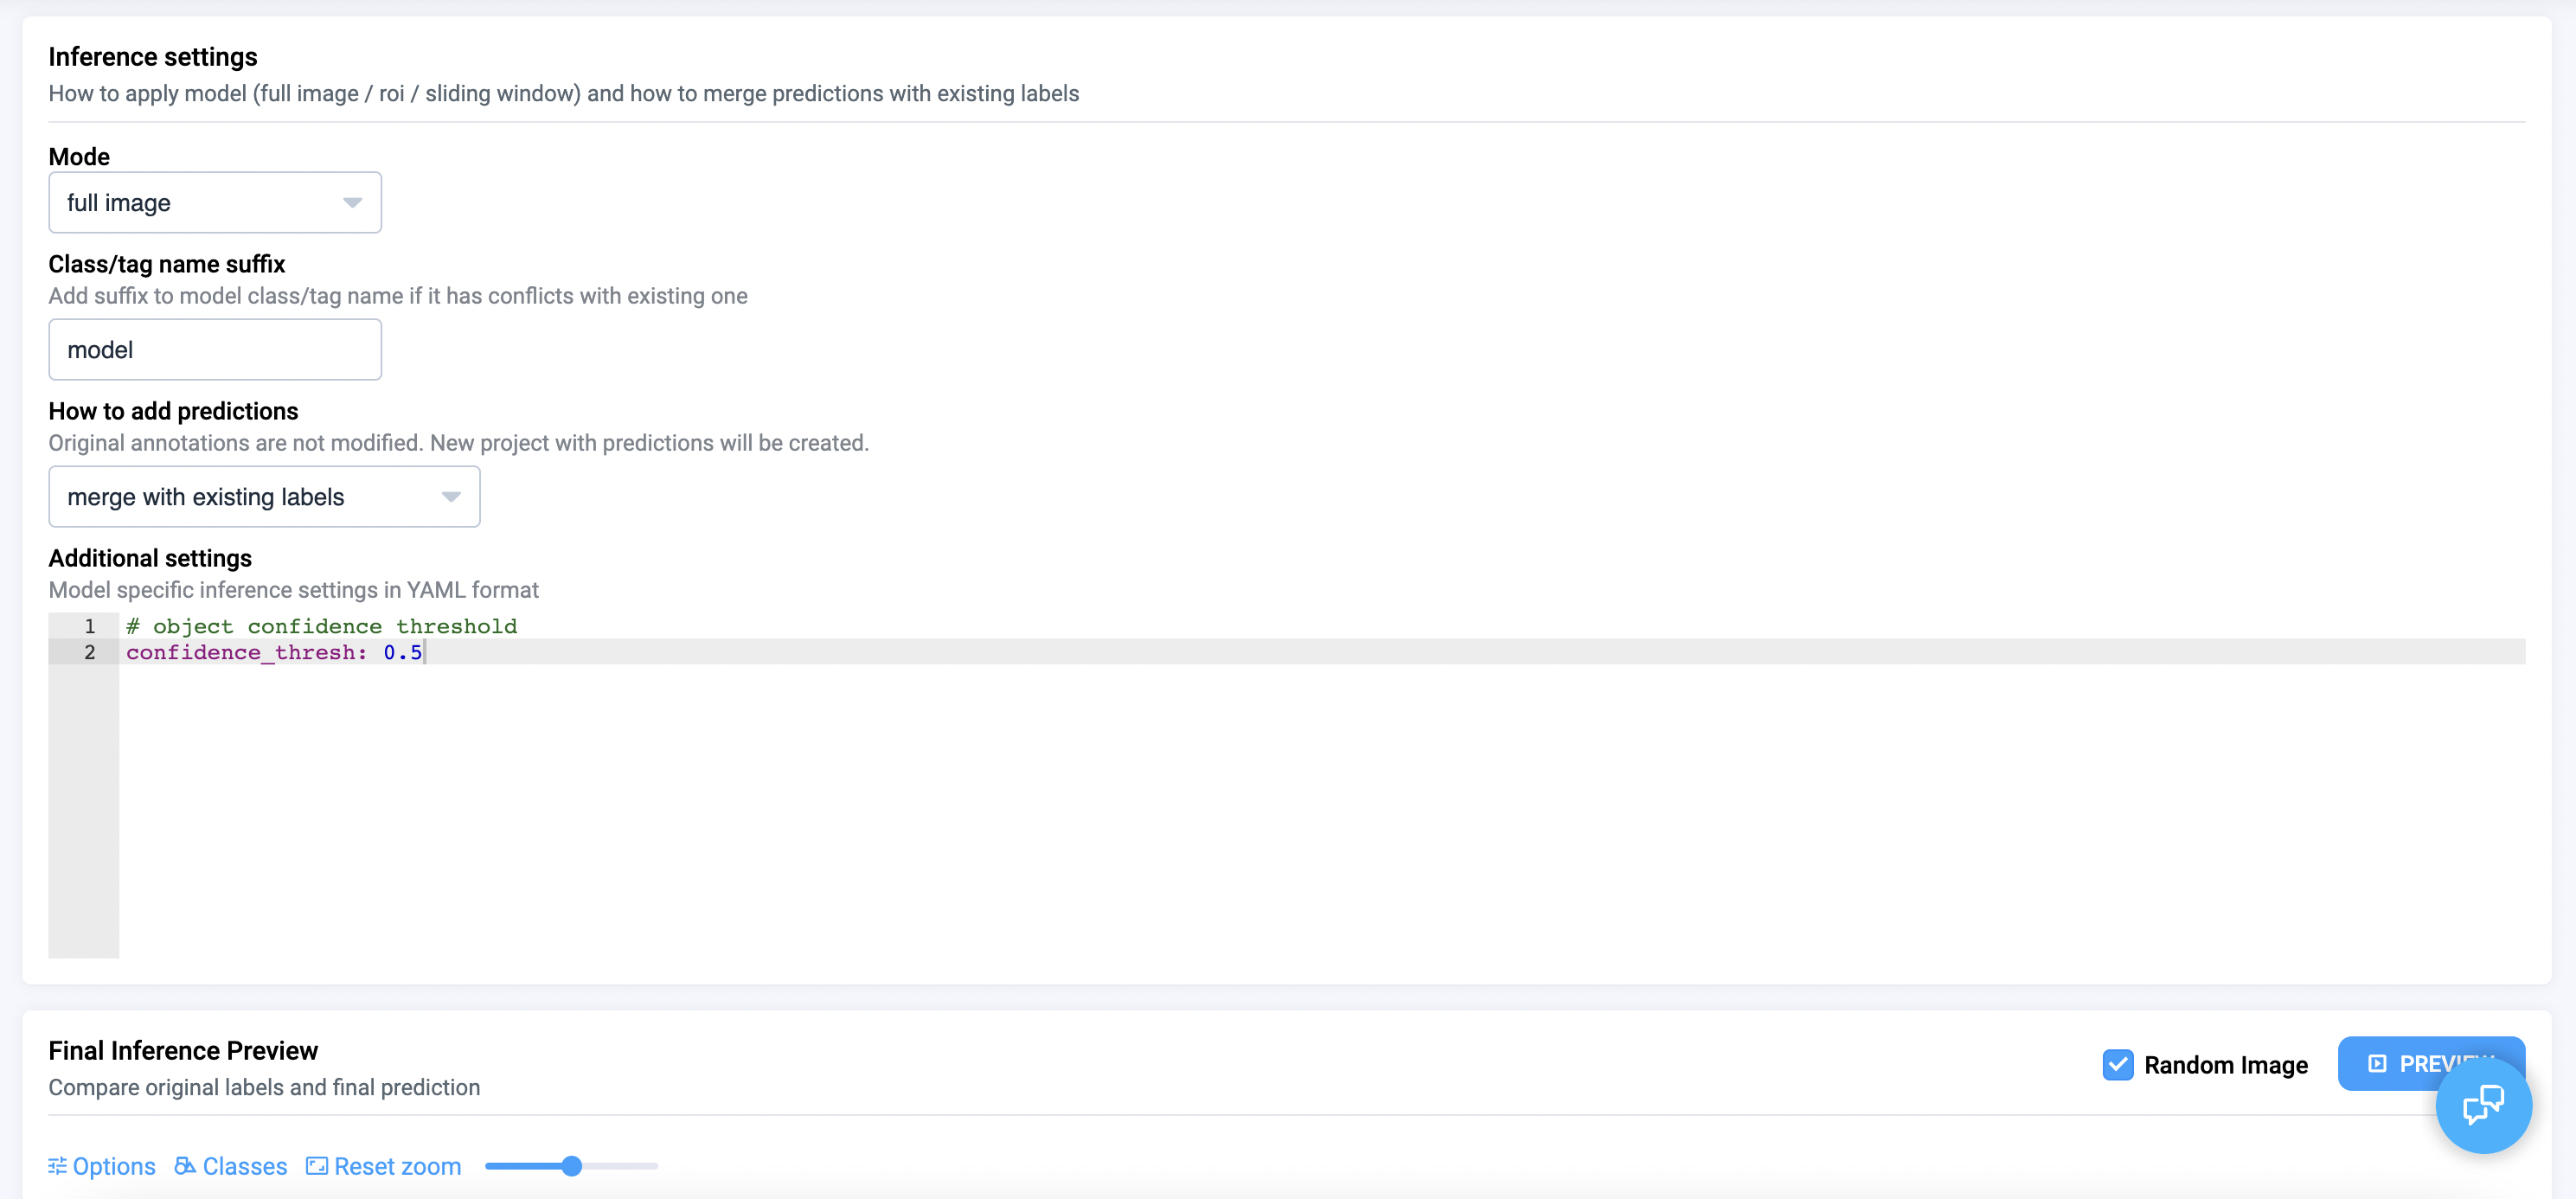
After the user changes the parameter, the new value will be provided to your serving app in the request, and the `settings` dictionary will contain the new values in the `predict()` method.
If you want to add comments to your settings, as shown in the screenshot above, it is recommended to provide a path to a YAML file with comments to the `custom_inference_settings` parameter instead of a dictionary.
### Model Information
When users use your served model, they will connect to your app from another app, which sets up parameters to apply your neural network to data projects.
To ensure that users have chosen a suitable model for their task, it can be helpful to provide additional information about your served model. You can provide this information using the `get_info()` method, which returns a dictionary of parameters.
By default, these parameters are related to the chosen computer vision problem, but you can add additional information. We recommend overriding this method in your model class and adding such information as `model_name`, `checkpoint_name`, `pretrained_on_dataset`, and `device`. Of course, you can add any custom parameters.
```python
def get_info(self) -> dict:
info = super().get_info()
info["model_name"] = self.selected_model_name
info["checkpoint_name"] = self.checkpoint_name
info["pretrained_on_dataset"] = self.dataset_name
info["device"] = self.device
return info
```
It's important to understand that method `get_info()` of the `Inference` class calls method `get_classes()`, which is not implemented by default and must be declared explicitly for each model.
### Sliding window mode
One problem with neural network model inference is that it can be challenging to apply them to large images with small objects. We provide tools to split the image into smaller parts, infer each part independently, and merge the results afterward.
This problem is significant for some computer vision tasks, but not for all. Therefore, it is crucial to consider this issue at the beginning.
We provide three modes to use sliding window:
* `none`
This means not to use sliding window and prevent users from setting up sliding window parameters from Inference interfaces. In this mode, you will get the path to the full image as the parameter `image_path` in the `predict(image_path, settings)` method.
* `basic`
In this mode, users can set up sliding window parameters, and you will get the path to a part of the image as the parameter `image_path` in the `predict(image_path, settings)` method.
In basic mode, all predictions are combined from all image parts into one result annotation.
* `advanced`
`basic` mode has the same problem as object detection neural networks without non-maximum suppression post-processing. Many labels from different image parts can collide, overlap and be split. We support the option to improve `basic` mode and add the [NMS post-processing](https://pytorch.org/vision/main/generated/torchvision.ops.nms.html) to predicted labels.
In `advanced` sliding window mode, you should implement the `predict_raw()` method which will predict the objects like `predict()` method, but they will be changed after by NMS algorithm. This approach is more appropriate for the object detection task.
You can refer to the [Serve YOLOv5 app repository](https://github.com/supervisely-ecosystem/yolov5/blob/master/supervisely/serve/src/main.py) as an example of using advanced sliding window mode.
To ensure that your app uses the required sliding window mode, see the class of the task from which your model class inherits (for example, `supervisely.nn.inference.InstanceSegmentation`) and check the `sliding_window_mode` parameter in the constructor of the class.
If you want to change this parameter in your model class, provide the correct mode value to the `sliding_window_mode` parameter of your model constructor:
```python
m = MyModel(sliding_window_mode="none")
```
### Model files storage
To simplify data manipulations, we support the `model_dir` parameter which is used as the location for all files needed for model inference. This folder must be provided to the `load_on_device(model_dir, device)` method to prepare your model.
You can also use the `download(src_path, dst_path)` method of the model class to download all the required files in the `load_on_device(model_dir, device)` method. Currently, you can provide external URLs or the path to a file or folder in Team Files as the src\_path. By default, the destination path is `{model_dir}/{filename}`, but you can specify a different destination path to change the location or rename the downloaded file.
```python
model_name = 'MaskRCNN'
self.download(src_path=weights_url, dst_path=f'{model_dir}/{model_name}.pth')
```
It is recommended to provide the `model_dir` parameter in the constructor of your model to ensure that the `download()` method works correctly.
### Model meta for multitask models
A served model can provide additional info about its state through `model_meta` property. (e.g. description of annotation classes, type of predicted object). This data helps inference GUI and other supervisely applications to display correct model properties and visualize predictions.

More information about model meta can be found [in this section](/app-development/neural-network-integration/inference-api-tutorial#model-meta-classes-and-tags).
In most cases this property is automatically generated within the SDK, so you don't have to worry about it. But for multitasking applications it's important to check if `model_meta` is built correctly for the chosen task/model.
Let's look closely at how to correctly define `model_meta` for your custom model. The type of `model_meta` is `ProjectMeta` and it contains information about class names, shapes and colors (autogenerate feature). This property will be constructed automatically only once the first time it is called.
```python
@property
def model_meta(self) -> ProjectMeta:
if self._model_meta is None:
self.update_model_meta()
return self._model_meta
def update_model_meta(self):
"""
Update model meta.
Make sure `self._get_obj_class_shape()` method returns the correct shape.
"""
colors = get_predefined_colors(len(self.get_classes()))
classes = []
for name, rgb in zip(self.get_classes(), colors):
classes.append(ObjClass(name, self._get_obj_class_shape(), rgb))
self._model_meta = ProjectMeta(classes)
self._get_confidence_tag_meta()
```
Since the `model_meta` is specific to a chosen model, it can be guaranteed that the property will not be called before the `self.load_on_device()` function is called. Therefore, it is important to make sure that after calling `self.load_on_device()`, the `self.get_classes()` and `self._get_obj_class_shape()` functions work correctly for your instance.
There's nothing complicated with `self.get_classes()`:
```python
def get_classes(self) -> List[str]:
return self.class_names
def load_on_device(
self,
model_dir: str,
device: Literal["cpu", "cuda", "cuda:0", "cuda:1", "cuda:2", "cuda:3"] = "cpu",
):
####### CUSTOM CODE: model instantiating, downloading weights, loading it on device.
# define `class_names` list for chosen model
# overwrite `self.class_names` attribute
self.class_names = class_names
self.update_model_meta()
```
{% hint style="info" %}
Notice that `model_meta` property is "lazy" and will not update automatically if `self._model_meta` is already defined. So, if your serving app supports several models that can be chosen via GUI, you should update your `model_meta` manually by calling `self.update_model_meta()` at the end of `self.load_on_device()`.
{% endhint %}
The `self._get_obj_class_shape()` is a bit tricky. Most serving apps are designed to solve only one task at a time and for this reason, this method is protected. For example, if you inherit from `sly.nn.inference.ObjectDetection` class, `self._get_obj_class_shape()` will always return `sly.Rectangle` shape. But some API allows you to create app that can handle multiple tasks (e.g. YOLOv8, open-mmlab/mmdetection). In this case, the method must be overridden.
```python
def _get_obj_class_shape(self):
if self.task_type == "object detection":
return sly.Rectangle
elif self.task_type == "instance segmentation":
return sly.Bitmap
raise ValueError(f"Unknown task type: {self.task_type}")
def load_on_device(
self,
model_dir: str,
device: Literal["cpu", "cuda", "cuda:0", "cuda:1", "cuda:2", "cuda:3"] = "cpu",
):
####### CUSTOM CODE: model instantiating, downloading weights, loading it on device.
self.class_names = class_names
# define `task_type` for chosen model
# overwrite `self.task_type` attribute
self.task_type = "object detection" # or instance segmentation
self.update_model_meta()
```
If for some reason this functionality is not enough for your serving app, you can freely define all needed attributes as well as overwrite `self._model_meta` right inside the `load_on_device()` method. For example, it is currently impossible to construct `ObjClass` for `sly.GraphNodes` because `geometry_config` should be passed into constructor.
```python
def load_on_device(
self,
model_dir: str,
device: Literal["cpu", "cuda", "cuda:0", "cuda:1", "cuda:2", "cuda:3"] = "cpu",
):
####### CUSTOM CODE: model instantiating, downloading weights, loading it on device.
self.class_names = class_names
obj_classes = [sly.ObjClass(name, sly.GraphNodes, geometry_config=self.keypoints_template) for name in self.class_names]
# Overwrite `_model_meta`, so there is no need to call `update_model_meta` after
self._model_meta = sly.ProjectMeta(obj_classes=sly.ObjClassCollection(obj_classes))
```
# Example: Custom model inference with probability maps
{% hint style="info" %}
We have prepared a [GitHub repository](https://github.com/supervisely-ecosystem/tutorial-custom-inference) with the source code and resources for this guide (including the model checkpoint, test images, and other resources). You can clone the repository and follow the instructions to run the example on your local machine.
{% endhint %}
In this guide, we will demonstrate a practical and hands-on example of implementing custom model inference in Supervisely. Before we begin, please check out the [Custom Model Integration](https://docs.supervisely.com/neural-networks/overview-2) section in the documentation for detailed information on integrating custom models at various levels of the platform, including training, inference, and benchmarking.
In this example, our custom model in addition to binary masks returns probability maps, where each pixel represents a probability of the class (0 for 0% probability, 255 for 100% probability, and any value in between).
{% hint style="warning" %}
Disclaimer: To simplify the demonstration, we will use a pretrained YOLO model to generate binary masks and apply a Gaussian blur to simulate probability maps. In the real-world scenario, you would use a model that returns probability maps directly. Please note that this is a specific use case, and the principles and techniques can be applied to a wide range of custom models and tasks. You can adapt the code and methods to suit your specific requirements, check out the [integrate custom inference](https://docs.supervisely.com/neural-networks/overview-2/integrate-custom-inference) documentation for more details.
{% endhint %}
For this example, we've chosen a model trained on the [*Coffee Leaf Biotic Stress Dataset*](https://datasetninja.com/coffee-leaf-biotic-stress) from Dataset Ninja. The model checkpoint and all related materials are included in the repository, allowing you to follow along step by step.
## Overview
To implement custom inference in Supervisely, you need to create a subclass of the `sly.nn.inference.Inference` base class. This class provides a set of built-in methods that handle various aspects of the inference process, such as loading the model, making predictions, creating annotations, or even built-in GUI, and more. Depending on your requirements, you may need to override some of these methods to customize the behavior of your model.
Here is a basic outline of the steps involved in this example:
1. Create a subclass of `sly.nn.inference.Inference` and implement methods to load the model, make predictions, and create annotations.
2. Prepare a simple script to deploy the model and infer images.
3. *Optional*: Render the heatmaps on the images to visualize the probability maps.
4. Prepare the app to serve the model with GUI.
5. Release the app as a private app in Supervisely.
6. Predict using the app and explore the results in the platform.
## Prerequisites
Before we begin, make sure you have the necessary tools and libraries installed. Clone the [repository](https://github.com/supervisely-ecosystem/tutorial-custom-inference) with the example and install the dependencies: We recommend using a virtual environment to manage the dependencies.
```bash
git clone git@github.com:supervisely-ecosystem/tutorial-custom-inference.git
cd tutorial-custom-inference
python3 -m venv venv
source venv/bin/activate
pip install -r requirements.txt
```
## Step 1. Custom Inference class
Before we start, let's create an `yaml` file with the inference settings, for example, `src/custom_settings.yaml`. This file will be used to configure the model and set the inference parameters. You can specify any parameters you want to use for inference, such as confidence threshold, IoU threshold, maximum number of detections, etc. In our example, we have added a `return_heatmaps` setting to return probability maps in addition to binary masks.
```yaml
# bounding box confidence threshold
conf: 0.25
# intersection over union (IoU) threshold for NMS
iou: 0.7
# use half precision (FP16)
half: False
# maximum number of detections per image
max_det: 300
# whether to use class-agnostic NMS or not
agnostic_nms: False
# whether to return heatmaps or not (for prabability maps)
return_heatmaps: True # ⬅︎ This setting will be used to return probability maps
```
Create a `src/custom_model.py` file and define a subclass of `sly.nn.inference.Inference` to implement the custom model. Depending on the CV task, you may inherit from appropriate subclass, such as `sly.nn.inference.SemanticSegmentation`, `sly.nn.inference.InstanceSegmentation`, `sly.nn.inference.ObjectDetection`, etc. Refer to the [documentation](https://docs.supervisely.com/neural-networks/overview-2/integrate-custom-inference#step-4.-create-inference-class) for more details.
```python
# src/custom_model.py
from typing import Dict, List, Optional
import cv2
import numpy as np
import supervisely as sly
from ultralytics import YOLO
class CustomModel(sly.nn.inference.InstanceSegmentation):
INFERENCE_SETTINGS = "src/custom_settings.yaml" # ⬅︎ Inference settings
```
Now, let's add `FRAMEWORK_NAME` and `MODELS` attributes to the `CustomModel` class ― these attributes will be used to generate the GUI for the app. The `MODELS` attribute should point to a JSON file with information about the pretrained models. This file will be used to display the available models in the GUI.
```python
class CustomModel(sly.nn.inference.InstanceSegmentation):
INFERENCE_SETTINGS = "src/custom_settings.yaml"
FRAMEWORK_NAME = "Custom YOLO" # ⬅︎ Framework name
MODELS = "src/demo_data/models_data.json" # ⬅︎ path to the pretrained models data
# ... other methods and attributes (will be added in the next steps)
```
Example of the `models_data.json` file (click to expand)
```json
[
{
"Model": "YOLO11n-seg-custom",
"Size (pixels)": "640",
"mAP": "32.0",
"params (M)": "2.9",
"FLOPs (B)": "10.4",
"meta": {
"task_type": "instance segmentation",
"model_name": "Custom yolo-n",
"model_files": {
"checkpoint": "https://github.com/supervisely-ecosystem/tutorial-custom-inference/releases/download/v0.0.1/best.pt"
}
}
},
{
"Model": "YOLO11n-seg",
"Size (pixels)": "640",
"mAP": "32.0",
"params (M)": "2.9",
"FLOPs (B)": "10.4",
"meta": {
"task_type": "instance segmentation",
"model_name": "Original yolo-n",
"model_files": {
"checkpoint": "https://github.com/ultralytics/assets/releases/download/v8.3.0/yolo11n-seg.pt"
}
}
}
]
```
Next, let's implement the `load_model_meta` method to create a `ProjectMeta` object that describes the classes and geometry of the model. We will define two `ObjClass` objects for each class: one for binary masks and one for probability maps.
```python
class CustomModel(sly.nn.inference.InstanceSegmentation):
# ... other methods
def load_model_meta(self):
"""Create a ProjectMeta object that describes the classes and geometry of the model."""
obj_classes = []
for name in self.classes: # ⬅︎ we will define classes later
obj_classes.append(sly.ObjClass(name, sly.Bitmap)) # binary mask
obj_classes.append(sly.ObjClass(f"{name}_heatmap", sly.AlphaMask)) # probability map
self._model_meta = sly.ProjectMeta(obj_classes=obj_classes)
```
Now, let's implement the `load_model` method to initialize the model and prepare it for inference. We will use the pretrained `YOLO` model for demonstration purposes.
```python
class CustomModel(sly.nn.inference.InstanceSegmentation):
# ... other methods
def load_model(
self,
model_files: dict,
model_source: str,
model_info: Optional[dict] = None,
device: Optional[str] = "cuda",
runtime: Optional[str] = None,
**kwargs,
):
"""Initialize the model and load the weights into memory."""
checkpoint_path = model_files["checkpoint"]
self.model = YOLO(checkpoint_path)
self.classes = list(self.model.names.values()) # ⬅︎ 80 COCO classes
self.model.to(device)
self.load_model_meta()
```
Next, let's implement a method to make predictions. Here you can define the `predict` or `predict_batch` method to make predictions on a single image or a batch of images.
```python
class CustomModel(sly.nn.inference.InstanceSegmentation):
# ... other methods
def predict_batch(
self, images_np: List[np.ndarray], settings: Dict
) -> List[List[sly.nn.Prediction]]:
"""
Make predictions on a batch of images.
For each image, return a list of DTOs (Data Transfer Objects) that represent the detected objects.
"""
# RGB to BGR
images_np = [cv2.cvtColor(img, cv2.COLOR_RGB2BGR) for img in images_np]
# Predict
predictions = self.model(
source=images_np,
conf=settings["conf"],
iou=settings["iou"],
half=settings["half"],
device=self.device,
max_det=settings["max_det"],
agnostic_nms=settings["agnostic_nms"],
retina_masks=True,
)
# Convert predictions to DTO (Data Transfer Object)
results = self.to_dto(predictions, settings) # ⬅︎ we will implement this method later
return results
```
Different models may require different post-processing steps to convert the raw predictions into annotations. To handle this, we will implement the `to_dto` method to prepare the predictions for conversion to annotations. In our case, we will convert the predictions to `PredictionMask` (for binary masks) and `ProbabilityMask` (for probability maps) objects.
{% hint style="warning" %}
Disclaimer: To simplify the demonstration, we will simulate probability maps by applying a Gaussian blur to the binary masks. In a real-world scenario, you would use a model that returns probability maps directly.
{% endhint %}
```python
class CustomModel(sly.nn.inference.InstanceSegmentation):
# ... other methods
def to_dto(self, predictions: List, settings: Dict) -> List[List[sly.nn.Prediction]]:
"""Convert predictions to ProbabilityMask (DTO) objects."""
# Check if we want to return probability maps
return_heatmaps = settings.get("return_heatmaps", False)
results = []
for prediction in predictions:
if not prediction.masks:
continue
temp_results = []
for data, mask in zip(prediction.boxes.data, prediction.masks.data):
mask_class_name = self.classes[int(data[5])]
mask = mask.cpu().numpy()
mask = np.where(mask > 0.5, 255, 0).astype(np.uint8)
dto = sly.nn.PredictionMask(mask_class_name, mask)
temp_results.append(dto)
if return_heatmaps: # If we want to return probability maps
mask = cv2.GaussianBlur(mask, (91, 91), 0) # only for example purposes
heatmap_dto = sly.nn.ProbabilityMask(mask_class_name, mask)
temp_results.append(heatmap_dto)
results.append(temp_results)
return results
```
{% hint style="info" %}
`sly.nn.PredictionMask` and `sly.nn.ProbabilityMask` are subclasses of `sly.nn.Prediction`, which is a simple Data Transfer Object (DTO) that represents the raw predicted object.
For more advanced use cases, you can implement a custom subclass of `sly.nn.Prediction` to handle specific types of predictions. This allows you to define custom logic for creating annotations from the model predictions. Refer to the [documentation](https://docs.supervisely.com/neural-networks/overview-2/integrate-custom-inference#custom-task-type) for more information.
{% endhint %}
Once the predictions are converted to DTO objects, we can create annotations from them. Lastly, we will implement the `_create_label` method to create a `sly.Label` object from the DTO object. This method will be used to create annotations in Supervisely format from the predictions.
```python
class CustomModel(sly.nn.inference.InstanceSegmentation):
# ... other methods
def _create_label(self, dto: Union[sly.nn.ProbabilityMask, sly.nn.PredictionMask]) -> sly.Label:
if not dto.mask.any():
sly.logger.debug(f"Mask of class {name} is empty and will be skipped")
return None
name = dto.class_name
if isinstance(dto, sly.nn.PredictionMask):
geometry = sly.Bitmap(dto.mask, extra_validation=False)
elif isinstance(dto, sly.nn.ProbabilityMask):
name = f"{name}_heatmap"
geometry = sly.AlphaMask(dto.mask, extra_validation=False)
obj_class = self.model_meta.get_obj_class(name)
return sly.Label(geometry, obj_class)
```
That's it! You have successfully implemented a custom inference class that returns predictions with probability maps in addition to binary masks.
💫 Moreover, this class provides a GUI for the app, where you can select the model and deploy it. The GUI is generated based on the `FRAMEWORK_NAME` and `MODELS` attributes of the class.
Next, we will create a simple script to deploy the model as a serving app and make predictions.
## Step 2: Run Inference Locally
Once you have implemented the custom inference class, you can create a simple script to deploy the model and infer images. The following script demonstrates how to deploy the model and make predictions on a batch of images. As a result, you will get a list of annotations in Supervisely format.
```python
# src/main.py
import os
import supervisely as sly
from dotenv import load_dotenv
from src.custom_model import CustomModel
if sly.is_development():
load_dotenv("local.env")
load_dotenv(os.path.expanduser("~/supervisely.env"))
api = sly.Api.from_env()
m = CustomModel(use_gui=True, use_serving_gui_template=True)
m.serve()
```
Run the application locally to test the GUI. If you are using VS Code, you can use provided launch configurations to run using uvicorn, or you can run the following command:
```bash
uvicorn src.main:m.app --host 0.0.0.0 --port 8000 --ws websockets
```
The app will be available at .
By clicking the `Serve` button, you can deploy the model.
{% hint style="info" %}
Please note that the `Custom Models` tab in GUI may be empty if you have not pretrained any custom models in Supervisely. Train a custom model using the platform's training tools, and available models will be displayed in this tab.
Useful links:
* [documentation for the custom inference implementation](https://docs.supervisely.com/neural-networks/overview-2/integrate-custom-inference#step-by-step-implementation).
* [documentation for the custom training implementation](https://docs.supervisely.com/neural-networks/overview-2/integrate-custom-training).
{% endhint %}
Now, when the model is deployed locally, you can connect to it and make predictions. Prepare a simple script in `src/session_inference.py` and run it `python src/session_inference.py`:
```python
# src/session_inference.py
import os
import supervisely as sly
from dotenv import load_dotenv
if sly.is_development():
load_dotenv("local.env")
load_dotenv(os.path.expanduser("~/supervisely.env"))
api = sly.Api()
app_url = "http://localhost:8000"
session = sly.nn.inference.SessionJSON(
api, session_url=app_url, inference_settings={"return_heatmaps": True}
)
image_path = "src/demo_data/input/2.jpg" # ⬅︎ Put your image path here
ann = session.inference_image_path(image_path)
print(ann)
print("✅ Success!")
```
See more details in [Inference API Tutorial](https://developer.supervisely.com/app-development/neural-network-integration/inference-api-tutorial).
## Optional: Visualize Predictions
For local testing, you can visualize the predictions generated by the model. You can draw predictions on images or render heatmaps on the images:
```python
from render_heatmaps import render_heatmaps_on_image
output_dir = "src/demo_data/output"
sly.fs.mkdir(output_dir, remove_content_if_exists=True)
img = sly.image.read(image_path)
# ann.draw(img) # ⬅︎ draw predictions on the image
# or render heatmaps
img = render_heatmaps_on_image(image_path, ann)
sly.image.write(os.path.join(output_dir, os.path.basename(image_path)), img)
```
Render Heatmaps Script (click to expand)
```python
import cv2
import numpy as np
import supervisely as sly
def color_map(img_size, data: np.ndarray, origin: sly.PointLocation) -> np.ndarray:
mask = np.zeros(img_size, dtype=np.uint8)
x, y = origin.col, origin.row
h, w = data.shape[:2]
mask[y : y + h, x : x + w] = data
cv2.normalize(mask, mask, 0, 255, cv2.NORM_MINMAX)
mask = cv2.applyColorMap(mask, cv2.COLORMAP_JET)
BG_COLOR = np.array([128, 0, 0], dtype=np.uint8)
mask = np.where(mask == BG_COLOR, 0, mask)
return mask
def render_heatmaps_on_image(img_path: str, ann: sly.Annotation) -> np.ndarray:
img = cv2.imread(img_path)
img = cv2.cvtColor(img, cv2.COLOR_BGR2RGB)
temp = img.copy()
for label in ann.labels[::-1]:
if isinstance(label.geometry, sly.AlphaMask):
mask = color_map(ann.img_size, label.geometry.data, label.geometry.origin)
mask = cv2.cvtColor(mask, cv2.COLOR_BGR2RGB)
temp = np.where(np.any(mask > 0, axis=-1, keepdims=True), mask, temp)
result = cv2.addWeighted(img, 0.5, temp, 0.5, 0).astype(np.uint8)
return result
```
Binary Mask Predictions (`sly.Bitmap`)
Probability Map Predictions (`sly.AlphaMask`)
Heatmaps Rendered on Images
## Step 3. Release as Private App
Once you have tested the application locally and are satisfied with the results, you can release it as a Supervisely private app. Refer to the [documentation](https://docs.supervisely.com/neural-networks/overview-2/integrate-custom-inference#releasing-your-app) for detailed instructions on how to package and release the app.
Prepare the `config.json` file with the necessary information about the app:
config.json (click to expand)
```json
{
"type": "app",
"version": "2.0.0",
"name": "Serve custom model",
"description": "Custom model integration example",
"categories": [
"neural network",
"images",
"object detection",
"serve",
"development"
],
"session_tags": ["deployed_nn"],
"need_gpu": true,
"community_agent": false,
"docker_image": "supervisely/base-py-sdk:6.73.308",
"entrypoint": "python -m uvicorn src.main:m.app --host 0.0.0.0 --port 8000",
"port": 8000
}
```
And run the following command to release the app:
```bash
supervisely release
```


## Step 4. Predict
After the app is released, you can find it in the `Ecosystem Apps` section of the platform. You can share the app with your team members and use it to get predictions from your custom model directly in Supervisely.
Check out this [documentation page](https://docs.supervisely.com/neural-networks/overview#predict) with various options to get predictions from your custom model.
For example, you can run the [Apply NN to Images Project](https://ecosystem.supervisely.com/apps/nn-image-labeling/project-dataset) app, connect to deployed custom model, and apply it to all images in the project in a few clicks.
{% embed url="" %}
Open the project with predictions and explore the results. By activating the `image matting` labeling interface, you can take advantage of the `AlphaMask` geometry type to visualize the probability maps generated by the custom model.
Probability Maps in the Labeling Interface
***
**Summary**
In this guide, we have demonstrated how to implement custom model inference in Supervisely. By creating a custom inference class and integrating it with the platform, you can deploy your custom models and make predictions directly in Supervisely.
# Serving App with GUI
# Introduction

From this section you'll learn how to add user interface to your integrated neural network. This is a continuation of tutorial [Serving App](/app-development/neural-network-integration/inference/overview-nn-integration). if you have not read this before, it is recommended that you see this section first.
You can serve integrated neural network without GUI, but also you can add user interface to make your app more convinient and customizable. We propose base user interface tools for most-used cases and also support creation of custom user interface.
In this tutorial you learn how to:
1. use our base GUI for your list of pretrained models or models uploaded to Team Files in Supervisely
2. customize our base GUI to your case
3. develop your custom GUI using widgets from Supervisely
---
[Next Page](/llms-full.txt/1)