Object tracking
Step-by-step tutorial on how to integrate custom visual object tracking neural network into Supervisely platform on the example of MixFormer model.
Last updated
Was this helpful?
Step-by-step tutorial on how to integrate custom visual object tracking neural network into Supervisely platform on the example of MixFormer model.
Last updated
Was this helpful?
In this tutorial, you will learn how to integrate your custom object-tracking model into Supervisely by creating two simple serving apps. First, we will construct a straightforward model that only moves the original bound box as an illustration. The SOTA model , which already has the majority of the necessary functions implemented, will be used in the second part.
To integrate your model, you need to subclass sly.nn.inference.BBoxTracking and implement 3 methods:
load_on_device method for downloading the weights and initializing the model on a specific device. Takes a model_dir argument, which is a directory for all model files (like configs, weights, etc). The second argument is the device - torch.device like cuda:0, cpu.
initialize method passes the image and the bound box of the object, which the model should track during the prediction step.
predict. The core implementation of model inference. It takes the frame of type np.ndarray, inference settings, previous (or initial) frame and bound box as arguments, applies the model inference to the current frame and returns a prediction (both input bound box and predicted are sly.nn.PredictionBBox objects).
Currently, integrating models that can track several objects simultaneously is not possible due to the implementation of the sly.nn.inference.BBox class. However, multiobject tracking is available: objects will be tracked one by one and the model will be re-initialized for each object.
The overall structure of the class we will implement is looking like this:
The superclass has a serve() method. For running the code on the Supervisely platform, m.serve() method should be executed:
And here is the beauty comes in. The method serve() internally handles everything and deploys your model as a REST API service on the Supervisely platform. It means that other applications can communicate with your model and get predictions from it.
So let's implement the class.
Defining imports and global variables
1. load_on_device
The following code creates the model according to config model_settings.yaml. Path to .yaml config is passed during initialization. These settings can also be given as a Python dictionary. Config in the form of a dictionary becomes available in self.custom_inference_settings_dict attribute. Also, load_on_device will keep the model as a self.model for further use:
Our settings.yaml file:
2. initialize and predict
The core methods for model inference. Here we will use the defined model and make sure that the predicted bound box is not outside of the bounds.
It must return exactly an sly.nn.PredictionBBox object for compatibility with Supervisely.
Usage of our class
Once the class is created, here we initialize it and get one test prediction for debugging.
Here are the output predictions of our simple model:
Let's now implement the class for a pre-trained model. The majority of the code used to load and run the model is taken directly from the original repository. We will also include the option to choose a model before launching the app because the authors provide two pre-trained models.
Step 3. Load model weights.
Step 4. Open the repository directory in Visual Studio Code.
Step 5. Run debug for script src/main.py
The integration script is simple:
Initialize model.
Run inference on demo images.
Collect predictions and save them in chronological order.
Defining imports and global variables
1. load_on_device
2. initialize and predict
The core methods for model inference. Here we are preparing the initial bound box in initialization and wrapping model predictions into sly.nn.PredictionBBox.
It must return exactly a list of sly.nn.PredictionBBox objects for compatibility with Supervisely.
Usage of our class
Once the class is created, here we initialize it and get one test prediction for debugging.
Here are the output predictions of our MixFormer model:
The beauty of this class is that you can easily debug your code locally in your favorite IDE.
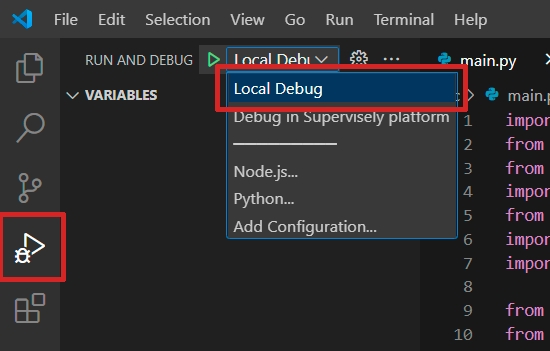
You can run the code locally for debugging. For Visual Studio Code we've created a launch.json config file that can be selected:
Once the code seems working locally, it's time to test the code right in the Supervisely platform as a debugging app. For that:
If you develop in a Docker container, you should run the container with --cap_add=NET_ADMIN option.
Install sudo apt-get install wireguard iproute2.
Define your TEAM_ID in the local.env file. Other env variables that are needed, are already provided in ./vscode/launch.json for you.
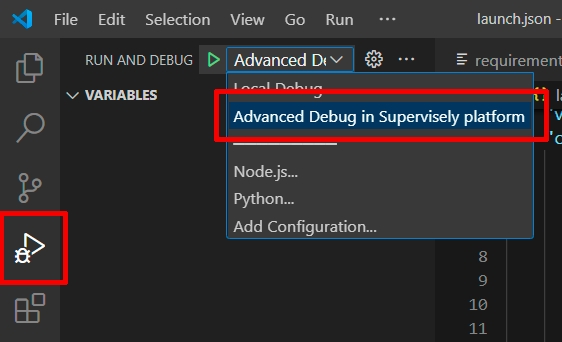
Switch the launch.json config to the Advanced debug in Supervisely platform:
Run the code.
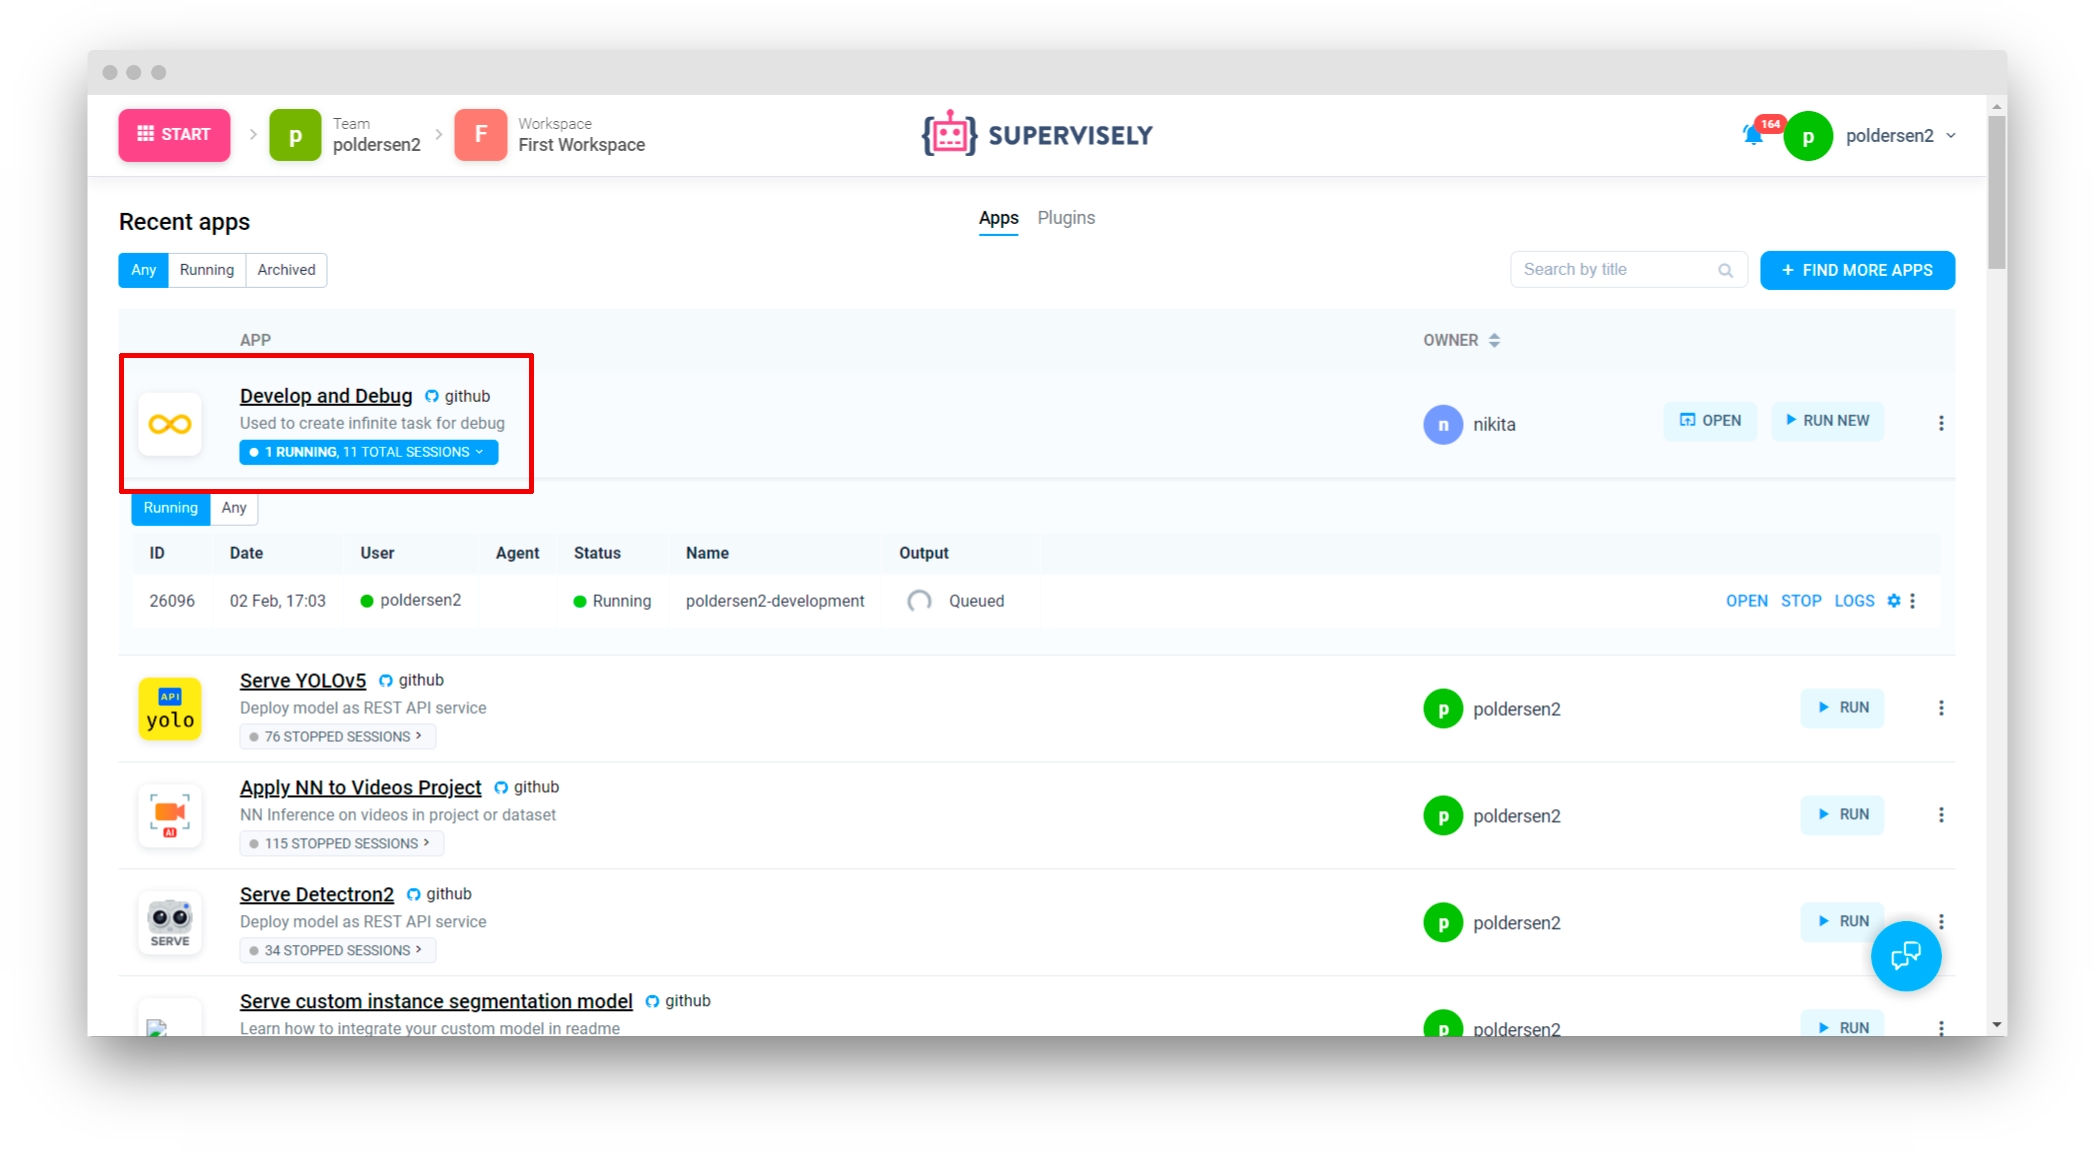
✅ It will deploy the model in the Supervisely platform as a regular serving App that can communicate with all other apps in the platform:
Once you've tested the code, it's time to release it into the platform. It can be released as an App that is shared with the all Supervisely community, or as your own private App.
Explanation:
serve/serve/src/main.py - main inference script
serve/serve/src/sly_functions.py - functions to run the MixFormer model based on the original repository code
serve/serve/src/modal.html - modal window template; a simple way to control ENV variables (e.g. model type)
save/models - directory with model weights
data/racing - directory with demo frames for inference
serve/serve/README.md - readme of your application, it is the main page of an application in Ecosystem with some images, videos, and how-to-use guides
serve/serve/config.json - configuration of the Supervisely application, which defines the name and description of the app, its context menu, icon, poster, and running settings
requirements.txt - all packages needed for debugging
local.env - file with variables used for debugging
serve/serve/docker - directory with the custom Dockerfile for this application and the script that builds it and publishes it to the docker registry
The author of the original repository provides us with different models. We create a basic html file with a selector so that users may choose a model before launching the application. It is now sufficient to correctly specify the configuration, and the model name will be accessible via environment variables.
Here is the explanation for the fields:
type - a type of the module in Supervisely Ecosystem
version - version of Supervisely App Engine. Just keep it by default
name - the name of the application
description - the description of the application
categories - these tags are used to place the application in the correct category in Ecosystem.
session_tags - these tags will be assigned to every running session of the application. They can be used by other apps to find and filter all running sessions
modal_template - path to modal window template (modal.html file previously described)
modal_template_state - list of default values for all states
"need_gpu": true - should be true if you want to use any cuda devices.
"community_agent": false - this means that this app can not be run on the agents started by Supervisely team, so users have to connect their computers and run the app only on their agents. Only applicable in Community Edition. Enterprise customers use their private instances so they can ignore the current option
docker_image - Docker container will be started from the defined Docker image, GitHub repository will be downloaded and mounted inside the container.
entrypoint - the command that starts our application in a container
port - port inside the container
"headless": true means that the app has no User Interface
allowed_shapes - shapes can be tracked with this model
Step 1. Prepare ~/supervisely.env file with credentials.
Step 2. Create and install supervisely==6.72.32 in it.
Step 1. Prepare ~/supervisely.env file with credentials.
Step 2. Clone the with source code and create .
The following code creates the model which will keep as a self.model. The SupportedModels class is simply an Enum class that was built to prevent working with raw strings. The Tracker class is a collection of functions supplied by the original repository's creator to create and use pre-trained models ()
Now you can use apps like , with your deployed model.
Or get the model inference via Python API with the help of sly.nn.inference.Session class just in one line of code. See .
Refer to for all releasing details. For a private app check also .
The structure of is the following:
App configuration is stored in config.json file. A detailed explanation of all possible fields is covered in this . Let's check the config for our current app: