> For the complete documentation index, see [llms.txt](https://developer.supervisely.com/llms.txt). Markdown versions of documentation pages are available by appending `.md` to page URLs; this page is available as [Markdown](https://developer.supervisely.com/advanced-user-guide/automate-with-python-sdk-and-api/training-api.md).
# Training API
## Introduction
This guide explains how to programmatically start and manage neural network training in Supervisely using the Training API. You'll learn how to configure training parameters, run multiple experiments in parallel, and automatically compare model performance.
### TrainApi overview
`TrainApi` is a high-level API that starts a **training application task** programmatically. It allows you to conveniently run a training app by providing parameters in the same structure that a user configures in the Training App GUI (TrainApp).
If you are not yet familiar with Supervisely environment variables you can read about it [here](/getting-started/environment-variables.md).
**Quick Example:**
```python
import os
from dotenv import load_dotenv
import supervisely as sly
from supervisely.api.nn.train_api import TrainApi
if sly.is_development():
load_dotenv("local.env")
load_dotenv(os.path.expanduser("~/supervisely.env"))
api = sly.Api.from_env()
project_id = sly.env.project_id()
train = TrainApi(api)
train.run(project_id=project_id, model="YOLO/YOLO26s-det")
```
### TrainApp overview
`TrainApp` in Supervisely is a template for a training application that guides the user through steps with training settings.
**Steps:**
1. **Select Project** - what data to train on and whether to cache this data for future use
2. **Select Model** - Pretrained model or custom checkpoint that was trained in Supervisely
3. **Select Classes** - List of classes names from the project
4. **Train/Val split** - Split the data into train and validation sets
5. **Hyperparameters** - YAML editor with training hyperparameters. Hyperparameters are different for each framework.
6. **Model Benchmark** - Run model benchmark and speed test. Can be disabled if not needed.
7. **Export** - Export the model to ONNX or TensorRT formats, if supported by the framework.
8. **Start training** - Start training.
## How to Start Training
To start training programmatically, call the `run()` method of the `TrainApi` class.
It will:
* Prepare the same app `state` that you would configure in TrainApp UI
* Detect a suitable **training app** for the chosen framework
* Start the training task on the selected agent
```python
train_api = TrainApi(api)
train_api.run(project_id=project_id, model="YOLO/YOLO26s-det")
```
### `TrainApi.run()` parameters
{% tabs %}
{% tab title="agent\_id" %}
**Type:** `int | None`
**Optional:** Yes (default: auto-select)
Agent ID where the training task will be started.
If not provided, TrainApi will automatically pick an available agent in the project team.
**Example:**
```python
train_api.run(project_id=project_id, model="YOLO/YOLO26s-det", agent_id=117)
```
{% endtab %}
{% tab title="project\_id" %}
**Type:** `int`
**Required:** Yes
Project ID with training data.
**Example:**
```python
train_api.run(project_id=6088, model="YOLO/YOLO26s-det")
```
{% endtab %}
{% tab title="model" %}
**Type:** `str`
**Required:** Yes
Model identifier in one of two formats:
* **Pretrained model**: `"framework/model_name"`
* **Custom checkpoint from Team Files**: checkpoint path in Team Files (absolute or relative)
**Examples:**
```python
# Pretrained model
train_api.run(project_id=project_id, model="YOLO/YOLO26s-det")
# Custom checkpoint
train_api.run(
project_id=project_id,
model="/experiments/55_My_Project/456_YOLO/checkpoints/best.pth",
)
```
{% endtab %}
{% tab title="classes" %}
**Type:** `list[str] | None`
**Optional:** Yes (default: all classes from project)
List of class names to train on. Classes that are not in the project meta are automatically filtered out by TrainApi.
If not provided, TrainApi uses **all** classes from the project.
**Example:**
```python
train_api.run(
project_id=project_id,
model="YOLO/YOLO26s-det",
classes=["person", "car"],
)
```
{% endtab %}
{% tab title="train\_val\_split" %}
**Type:** `RandomSplit | DatasetsSplit | TagsSplit | CollectionsSplit | None`
**Optional:** Yes (default: `RandomSplit()`)
Specify how to split your data into train/val sets.
**Available split types:**
* `DatasetsSplit` - Split by dataset IDs
* `RandomSplit` - Random split by percentage
* `TagsSplit` - Split by image tags
* `CollectionsSplit` - Split by collection IDs
**Examples:**
```python
from supervisely.api.nn.train_api import DatasetsSplit, RandomSplit, TagsSplit, CollectionsSplit
# By datasets
train_val_split = DatasetsSplit(train_datasets=[101, 102], val_datasets=[103])
# Random split (80% train, 20% val)
train_val_split = RandomSplit(percent=80, split="train")
# By tags
train_val_split = TagsSplit(train_tag="train", val_tag="val", untagged_action="train")
# By collections
train_val_split = CollectionsSplit(train_collections=[51, 52], val_collections=[53])
train_api.run(project_id=project_id, model="YOLO/YOLO26s-det", train_val_split=train_val_split)
```
{% endtab %}
{% tab title="hyperparameters" %}
**Type:** `str | None`
**Optional:** Yes (default: framework defaults)
Hyperparameters as a YAML **string**.
All list of available hyperparameters for the selected framework can usually be found in the training app repository in the `hyperparameters.yaml` file. For example, for YOLO app you can find the list of hyperparameters [here](https://github.com/supervisely-ecosystem/yolo/blob/master/supervisely_integration/train/hyperparameters.yaml).
Supervisely doesn't modify any hyperparameters input and uses parameter names as provided by the model authors. If you can't find the parameter that you want to use in the default hyperparameters provided by the training app, you can add it manually.
**Example:**
```python
with open("hyperparameters.yaml", "r", encoding="utf-8") as f:
hparams = f.read()
train_api.run(project_id=project_id, model="YOLO/YOLO26s-det", hyperparameters=hparams)
```
{% endtab %}
{% tab title="experiment\_name" %}
**Type:** `str | None`
**Optional:** Yes (default: auto-generated)
Name of the experiment.
If not provided, the name will be generated by TrainApp using the following format:
```python
experiment_name = f"{task_id} {project_info.name} {model_name}"
```
**Example:**
```python
train_api.run(
project_id=project_id,
model="YOLO/YOLO26s-det",
experiment_name="My Custom Experiment"
)
```
{% endtab %}
{% tab title="convert\_class\_shapes" %}
**Type:** `bool`
**Optional:** Yes (default: `True`)
Automatically convert class shapes for the model task type.
For example, if you have a project with polygons and you want to train a detection model, TrainApp will automatically convert polygons to rectangles for the detection model.
**Example:**
```python
train_api.run(project_id=project_id, model="YOLO/YOLO26s-det", convert_class_shapes=True)
```
{% endtab %}
{% tab title="enable\_benchmark" %}
**Type:** `bool`
**Optional:** Yes (default: `True`)
Runs model benchmark post-training and generate evaluation report.
Learn more about [Model Evaluation and Benchmark](https://docs.supervisely.com/neural-networks/model-evaluation-benchmark).
**Example:**
```python
train_api.run(project_id=project_id, model="YOLO/YOLO26s-det", enable_benchmark=True)
```
{% endtab %}
{% tab title="enable\_speedtest" %}
**Type:** `bool`
**Optional:** Yes (default: `False`)
Runs model speed test during model evaluation. Can be enabled only if `enable_benchmark` option is set to `True`.
**Example:**
```python
train_api.run(
project_id=project_id,
model="YOLO/YOLO26s-det",
enable_benchmark=True,
enable_speedtest=True
)
```
{% endtab %}
{% tab title="cache\_project" %}
**Type:** `bool`
**Optional:** Yes (default: `True`)
Cache project on agent to avoid downloading project again during next training runs. If project was changed since last training run, it will be updated and synced with the project on the server.
**Example:**
```python
train_api.run(project_id=project_id, model="YOLO/YOLO26s-det", cache_project=True)
```
{% endtab %}
{% tab title="export\_onnx" %}
**Type:** `bool`
**Optional:** Yes (default: `False`)
Export model to ONNX format.
If supported by the selected training app, the model will be exported to ONNX format after training. This option will not affect PyTorch checkpoints, they will be preserved.
**Example:**
```python
train_api.run(project_id=project_id, model="YOLO/YOLO26s-det", export_onnx=True)
```
{% endtab %}
{% tab title="export\_tensorrt" %}
**Type:** `bool`
**Optional:** Yes (default: `False`)
Export model to TensorRT format.
If supported by the selected training app, the model will be exported to TensorRT format after training. This option will not affect PyTorch checkpoints, they will be preserved.
**Example:**
```python
train_api.run(project_id=project_id, model="YOLO/YOLO26s-det", export_tensorrt=True)
```
{% endtab %}
{% tab title="autostart" %}
**Type:** `bool`
**Optional:** Yes (default: `True`)
If `True`, training is started automatically after all settings are applied. If `False`, training must be started manually from the training app UI by clicking the "Start Training" button.
**Example:**
```python
train_api.run(project_id=project_id, model="YOLO/YOLO26s-det", autostart=True)
```
{% endtab %}
{% endtabs %}
## Use Case: Run Multiple Experiments and Compare Results
This example demonstrates how to programmatically run multiple training experiments in parallel and compare their performance. This workflow is useful for:
* Testing different model architectures on the same dataset
* Comparing various hyperparameter configurations
* Benchmarking model performance across different experiments
The workflow consists of three main steps:
1. **Run training experiments** - Train multiple models in parallel using different agents
2. **Generate evaluation reports** - Each experiment automatically produces a benchmark report
3. **Compare results** - Use the Model Benchmark Compare application to analyze performance side-by-side
Learn more about [Training Experiments](https://docs.supervisely.com/neural-networks/training/experiments) and [Model Evaluation](https://docs.supervisely.com/neural-networks/model-evaluation-benchmark).
### Prerequisites
Create a `local.env` file with your environment configuration:
```env
TEAM_ID = 10
WORKSPACE_ID = 254
PROJECT_ID = 6088
AGENT_IDS = [117, 152]
TRAIN_DATASET_ID = 41825
VAL_DATASET_ID = 41826
```
### Complete example
```python
import os
import time
import json
import yaml
from concurrent.futures import ThreadPoolExecutor, as_completed
from pathlib import Path
from typing import List
import supervisely as sly
from dotenv import load_dotenv
from supervisely.api.nn.train_api import TrainApi, DatasetsSplit
from supervisely.api.task_api import TaskApi
from supervisely.nn.experiments import ExperimentInfo
# Load environment
if sly.is_development():
load_dotenv("local.env")
load_dotenv(os.path.expanduser("~/supervisely.env"))
api = sly.Api.from_env()
workspace_id = sly.env.workspace_id()
project_id = sly.env.project_id()
# Parse IDs from environment
agent_ids_str = os.getenv("AGENT_IDS", "[]")
agent_ids = json.loads(agent_ids_str)
train_dataset_id = int(os.getenv("TRAIN_DATASET_ID"))
val_dataset_id = int(os.getenv("VAL_DATASET_ID"))
# Prepare data splits for training
datasets_split = DatasetsSplit(
train_datasets=[train_dataset_id],
val_datasets=[val_dataset_id],
)
# -------------------------------- Utils -------------------------------- #
def poll_and_get_experiment(api: sly.Api, task_id: int, interval_sec: int = 10) -> ExperimentInfo:
"""Poll training task until finished and return experiment info."""
while True:
task_info = api.task.get_info_by_id(task_id)
if not task_info:
raise ValueError(f"Task {task_id} not found")
if task_info.get("status") == TaskApi.Status.FINISHED.value:
sly.logger.info(f"Training finished for task {task_id}")
time.sleep(5) # Wait for experiment registration
experiment_info = api.nn.get_experiment_info(task_id)
if experiment_info.evaluation_report_id is None:
raise ValueError(f"Evaluation report failed for task {task_id}")
return experiment_info
sly.logger.debug(f"Task {task_id} in progress...")
time.sleep(interval_sec)
def train_model(model_name: str, agent_id: int) -> ExperimentInfo:
"""Train single model on separate agent and return experiment info."""
sly.logger.info(f"Starting training: {model_name} on agent {agent_id}")
train = TrainApi(api)
# Optional: customize hyperparameters
# hyperparameters_yaml: str = yaml.dump({"epochs": 10})
task_json = train.run(
project_id=project_id,
model=model_name,
agent_id=agent_id,
description=f"{model_name.split('/')[-1]}",
# hyperparameters=hyperparameters_yaml,
train_val_split=datasets_split,
)
return poll_and_get_experiment(api, task_json["id"])
def run_comparison(report_ids: List[int], model_names: List[str]) -> str:
"""Run model comparison and return report URL."""
app_slug = "supervisely-ecosystem/model-benchmark/compare_models"
module_id = api.app.get_ecosystem_module_id(app_slug)
# Get evaluation directories from report IDs
eval_dirs = []
for report_id in report_ids:
file_info = api.file.get_info_by_id(report_id)
if not file_info:
raise ValueError(f"Report {report_id} not found")
p = Path(file_info.path)
eval_dir = str(p.parent.parent) if p.name == "template.vue" else str(p.parent)
eval_dirs.append(eval_dir)
# Start comparison task
task_info_json = api.task.start(
module_id=module_id,
agent_id=agent_ids[0], # Use first agent for comparison
workspace_id=workspace_id,
params={"state": {"eval_dirs": eval_dirs}},
description="{models}".format(models=" vs. ".join(model_names)),
)
task_id = task_info_json["id"]
# Wait for completion
while True:
task_info = api.task.get_info_by_id(task_id)
if not task_info:
raise ValueError(f"Comparison task {task_id} not found")
status = task_info.get("status")
if status == TaskApi.Status.FINISHED.value:
sly.logger.info(f"Comparison finished for task {task_id}")
break
elif status in [TaskApi.Status.ERROR.value, TaskApi.Status.STOPPED.value, TaskApi.Status.TERMINATING.value]:
raise RuntimeError(f"Comparison task {task_id} failed with status: {status}")
sly.logger.debug(f"Comparison task {task_id} in progress...")
time.sleep(10)
# Get report URL
task_info = api.task.get_info_by_id(task_id)
report_url = task_info.get("meta", {}).get("output", {}).get("general", {}).get("titleUrl")
if not report_url:
raise RuntimeError("Report URL not found")
if not report_url.startswith("http"):
report_url = f"{api.server_address.rstrip('/')}/{report_url.lstrip('/')}"
return report_url
# --------------------------- Main execution ---------------------------- #
if __name__ == "__main__":
# Define models to compare
models = [
"YOLO/YOLO11s-det",
"YOLO/YOLO26s-det"
]
model_names = [model.split("/")[-1] for model in models]
# Train models in parallel threads
sly.logger.info(f"Starting parallel training for {len(models)} models")
experiments: List[ExperimentInfo] = []
with ThreadPoolExecutor(max_workers=len(models)) as executor:
future_to_model = {
executor.submit(train_model, model, aid): model
for model, aid in zip(models, agent_ids)
}
for future in as_completed(future_to_model):
model = future_to_model[future]
try:
experiment = future.result()
experiments.append(experiment)
sly.logger.info(f"Completed: {model}")
except Exception as e:
sly.logger.error(f"Failed {model}: {e}")
raise
# Run comparison when all experiments are ready
sly.logger.info("All trainings completed, running comparison...")
report_ids = [exp.evaluation_report_id for exp in experiments]
report_url = run_comparison(report_ids, model_names)
print(f"\n{'='*60}")
print(f"Comparison report: {report_url}")
print(f"{'='*60}")
```
### Workflow results
After running the script, you can track the entire workflow through the Supervisely UI:
#### Training tasks
Monitor parallel training progress and comparison task execution in the **Tasks & Apps** section:
Multiple training tasks run simultaneously on different agents, reducing total training time. After training completes, the comparison task automatically starts.
#### Experiments
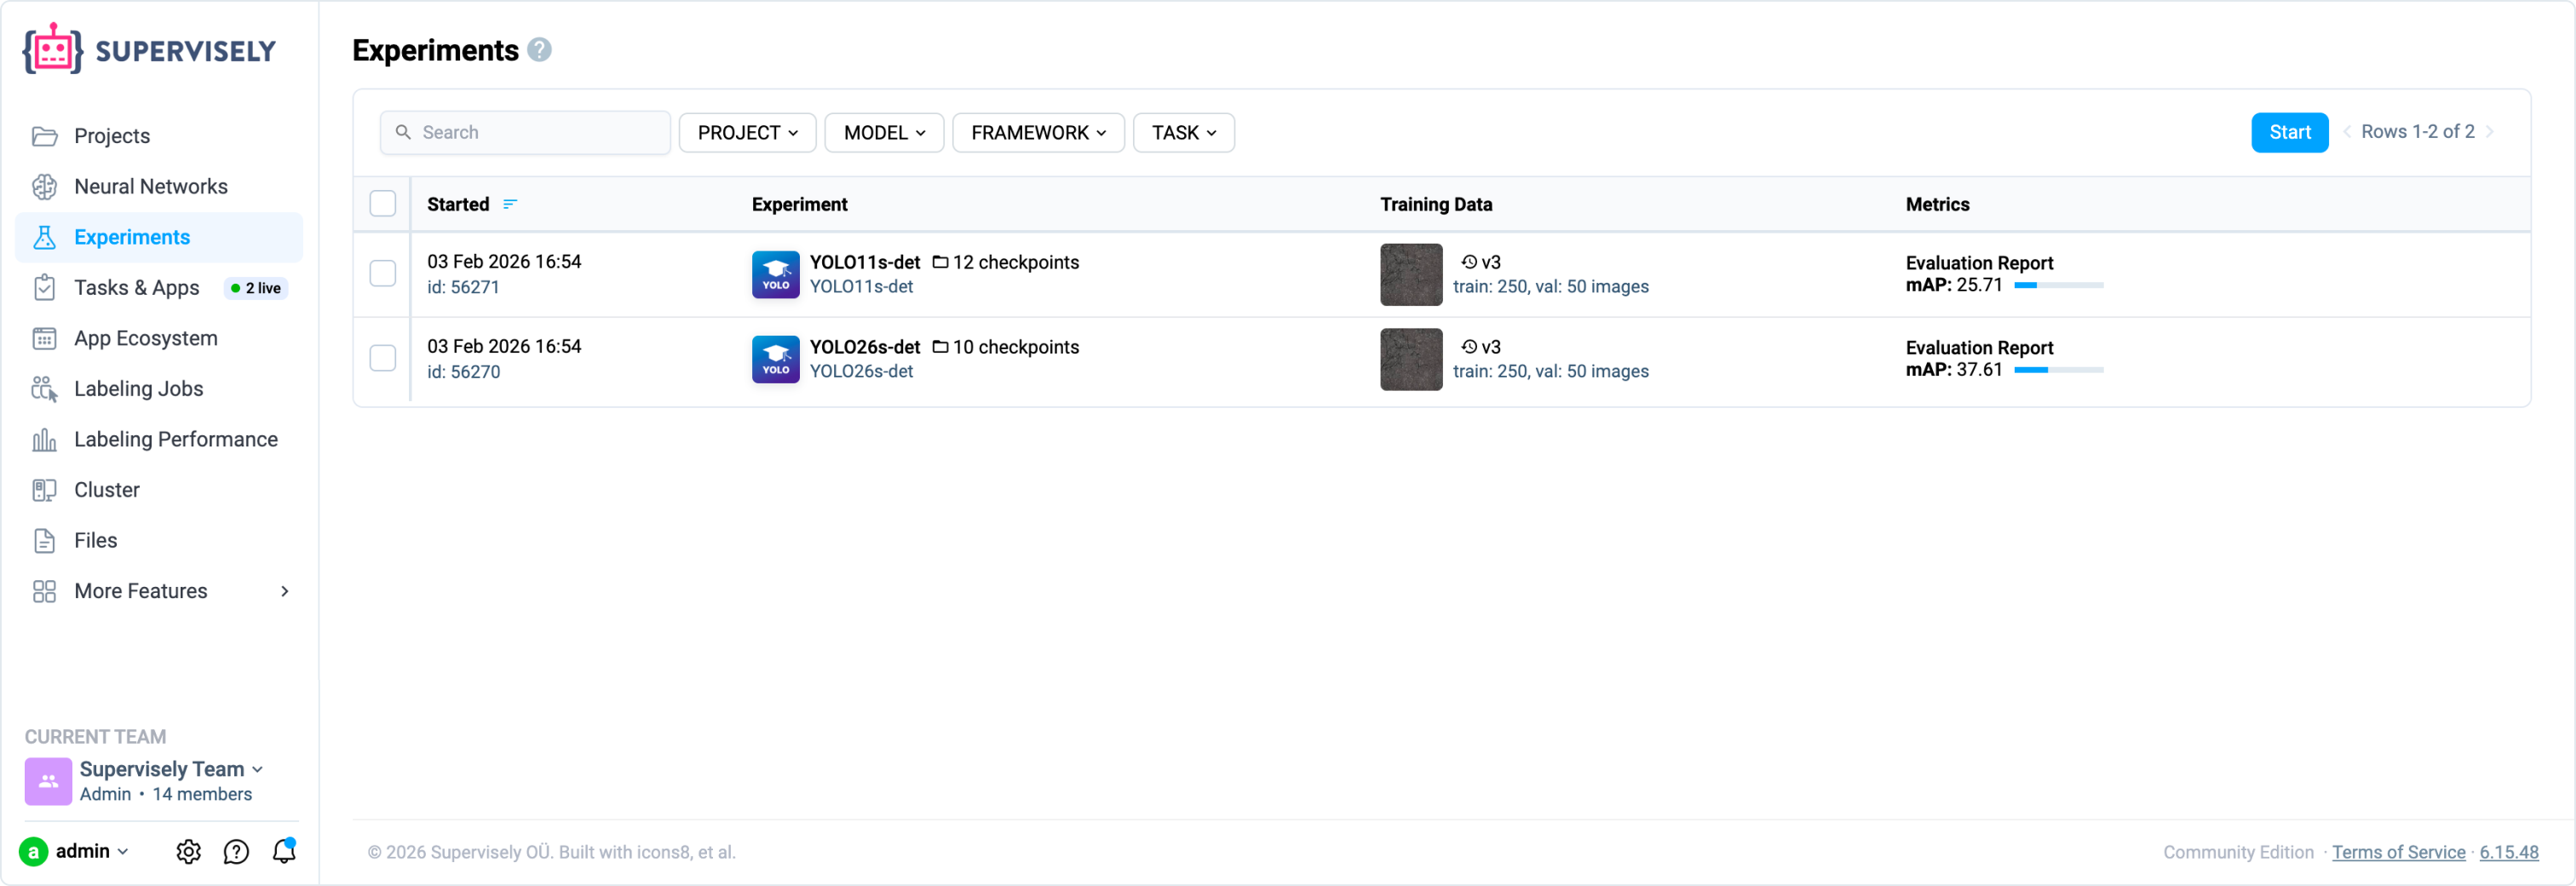
All training runs are automatically registered in the **Experiments** section with full tracking and metrics:
Each [experiment](https://docs.supervisely.com/neural-networks/training/experiments) includes training data, model checkpoints, and automatically generated [evaluation reports](https://docs.supervisely.com/neural-networks/model-evaluation-benchmark).
#### Model benchmark comparison
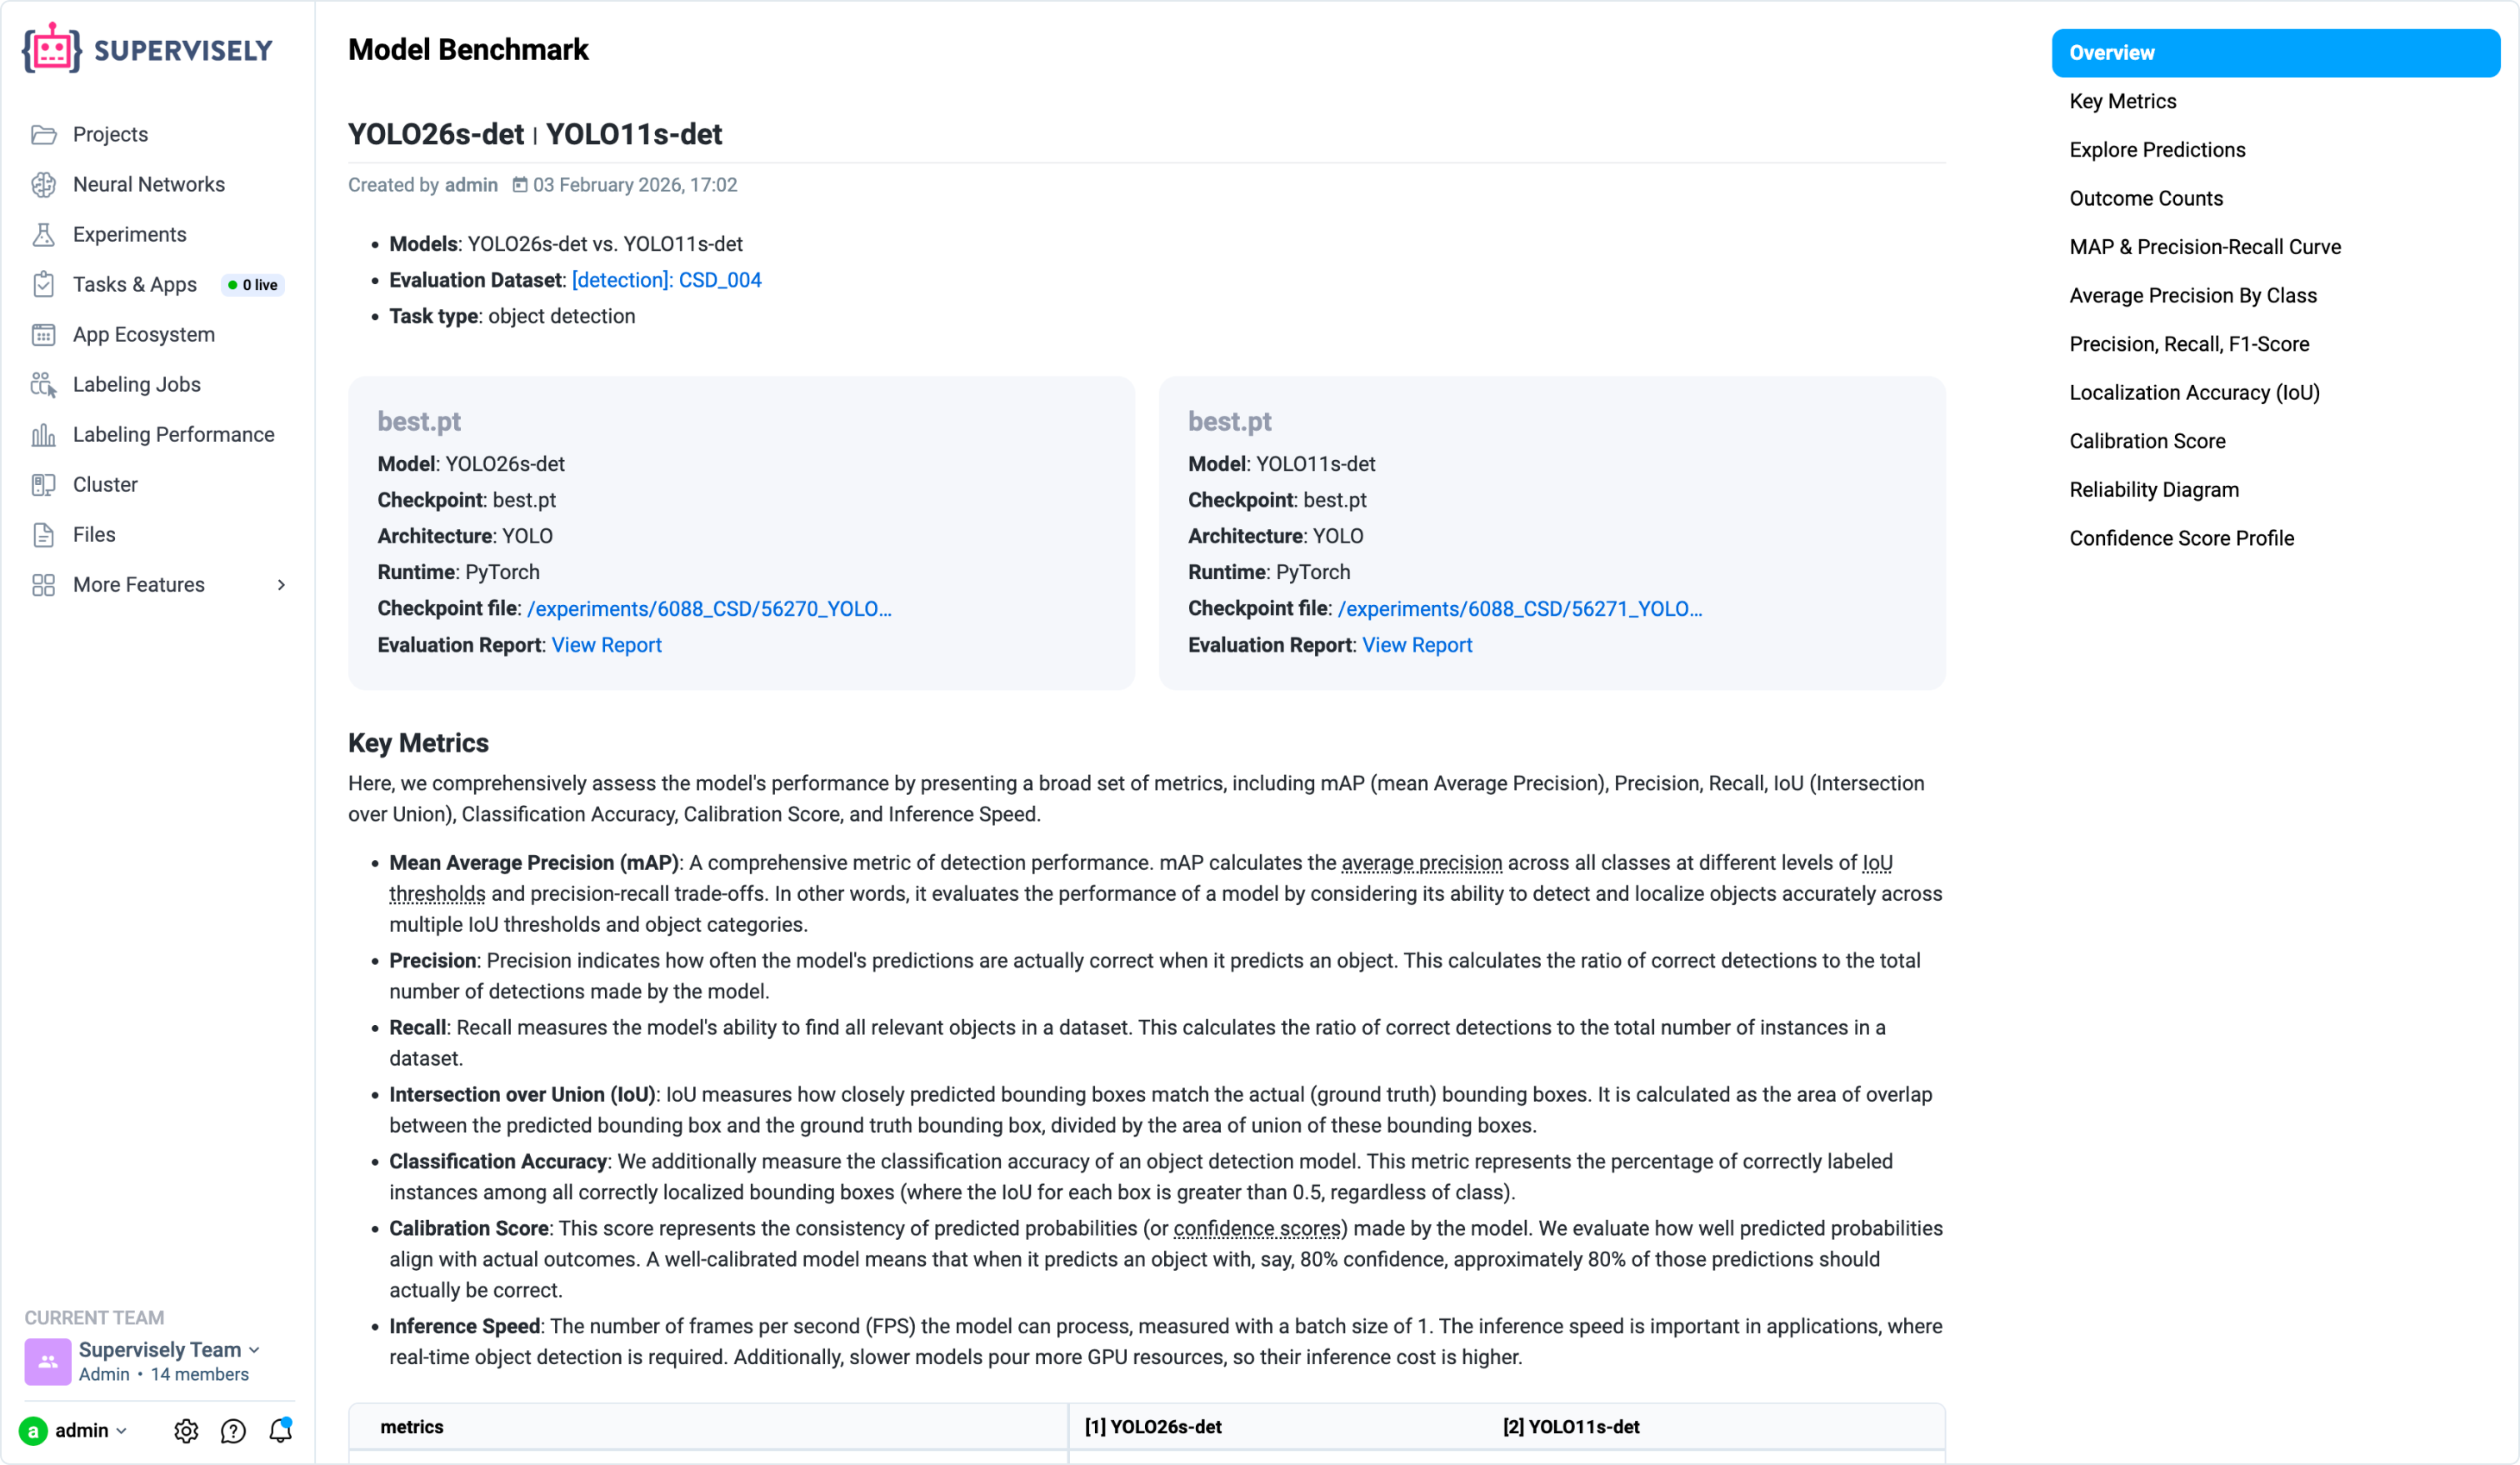
The final comparison report in **Model Benchmark** provides comprehensive side-by-side analysis:
Compare key metrics including mAP, precision, recall, inference speed, and per-class performance - making it easy to identify the best performing model for your use case.