> For the complete documentation index, see [llms.txt](https://developer.supervisely.com/llms.txt). Markdown versions of documentation pages are available by appending `.md` to page URLs; this page is available as [Markdown](https://developer.supervisely.com/getting-started/python-sdk-tutorials/videos/video-and-object-tags.md).
# Video and object tags
How to create, add, update and remove tags from Video and its objects, and how to constrain frame-based tags by length.
## **Introduction**
In this tutorial, you will learn how to create new tags for Video, its objects or frames and assign them, update its values or remove at all using the Supervisely SDK.
Supervisely supports different types of tags:
* NONE
* ANY\_NUMBER
* ANY\_STRING
* ONEOF\_STRING
* DATE
And could be applied to:
* ALL
* IMAGES\_ONLY - in our case this indicates Videos
* OBJECTS\_ONLY
You can find all the information about those types in the [Tags in Annotations](https://developer.supervisely.com/api-references/supervisely-annotation-json-format/tags) section and [SDK](https://supervisely.readthedocs.io/en/latest/sdk/supervisely.annotation.tag_meta.TagMeta.html) documentation.
You can learn more about working with Video using [Supervisely SDK](https://developer.supervisely.com/getting-started/python-sdk-tutorials/video) and what [Annotations for Video](https://developer.supervisely.com/api-references/supervisely-annotation-json-format/individual-video-annotations) are.
{% hint style="info" %}
Everything you need to reproduce [this tutorial is on GitHub](https://github.com/supervisely-ecosystem/how-to-work-with-video-object-tags): source code, Visual Studio Code configuration, and a shell script for creating virtual env.
{% endhint %}
## **How to debug this tutorial**
**Step 1.** Prepare `~/supervisely.env` file with credentials. [Learn more here.](https://developer.supervisely.com/getting-started/python-sdk-tutorials/videos/pages/2TS0DqIIblacweum1NCW#use-.env-file-recommended)
**Step 2.** Clone [repository](https://github.com/supervisely-ecosystem/how-to-work-with-video-object-tags) with source code and create [Virtual Environment](https://docs.python.org/3/library/venv.html).
```bash
git clone https://github.com/supervisely-ecosystem/how-to-work-with-video-object-tags
cd how-to-work-with-video-object-tags
./create_venv.sh
```
**Step 3.** Open repository directory in Visual Studio Code.
```bash
code -r .
```
**Step 4.** Create video project, for example, using this tutorial [Spatial labels on videos](https://developer.supervisely.com/getting-started/python-sdk-tutorials/spatial-labels-on-videos).
There you see project classes after project initialization.
Project tags metadata after its initialization. This data is empty.
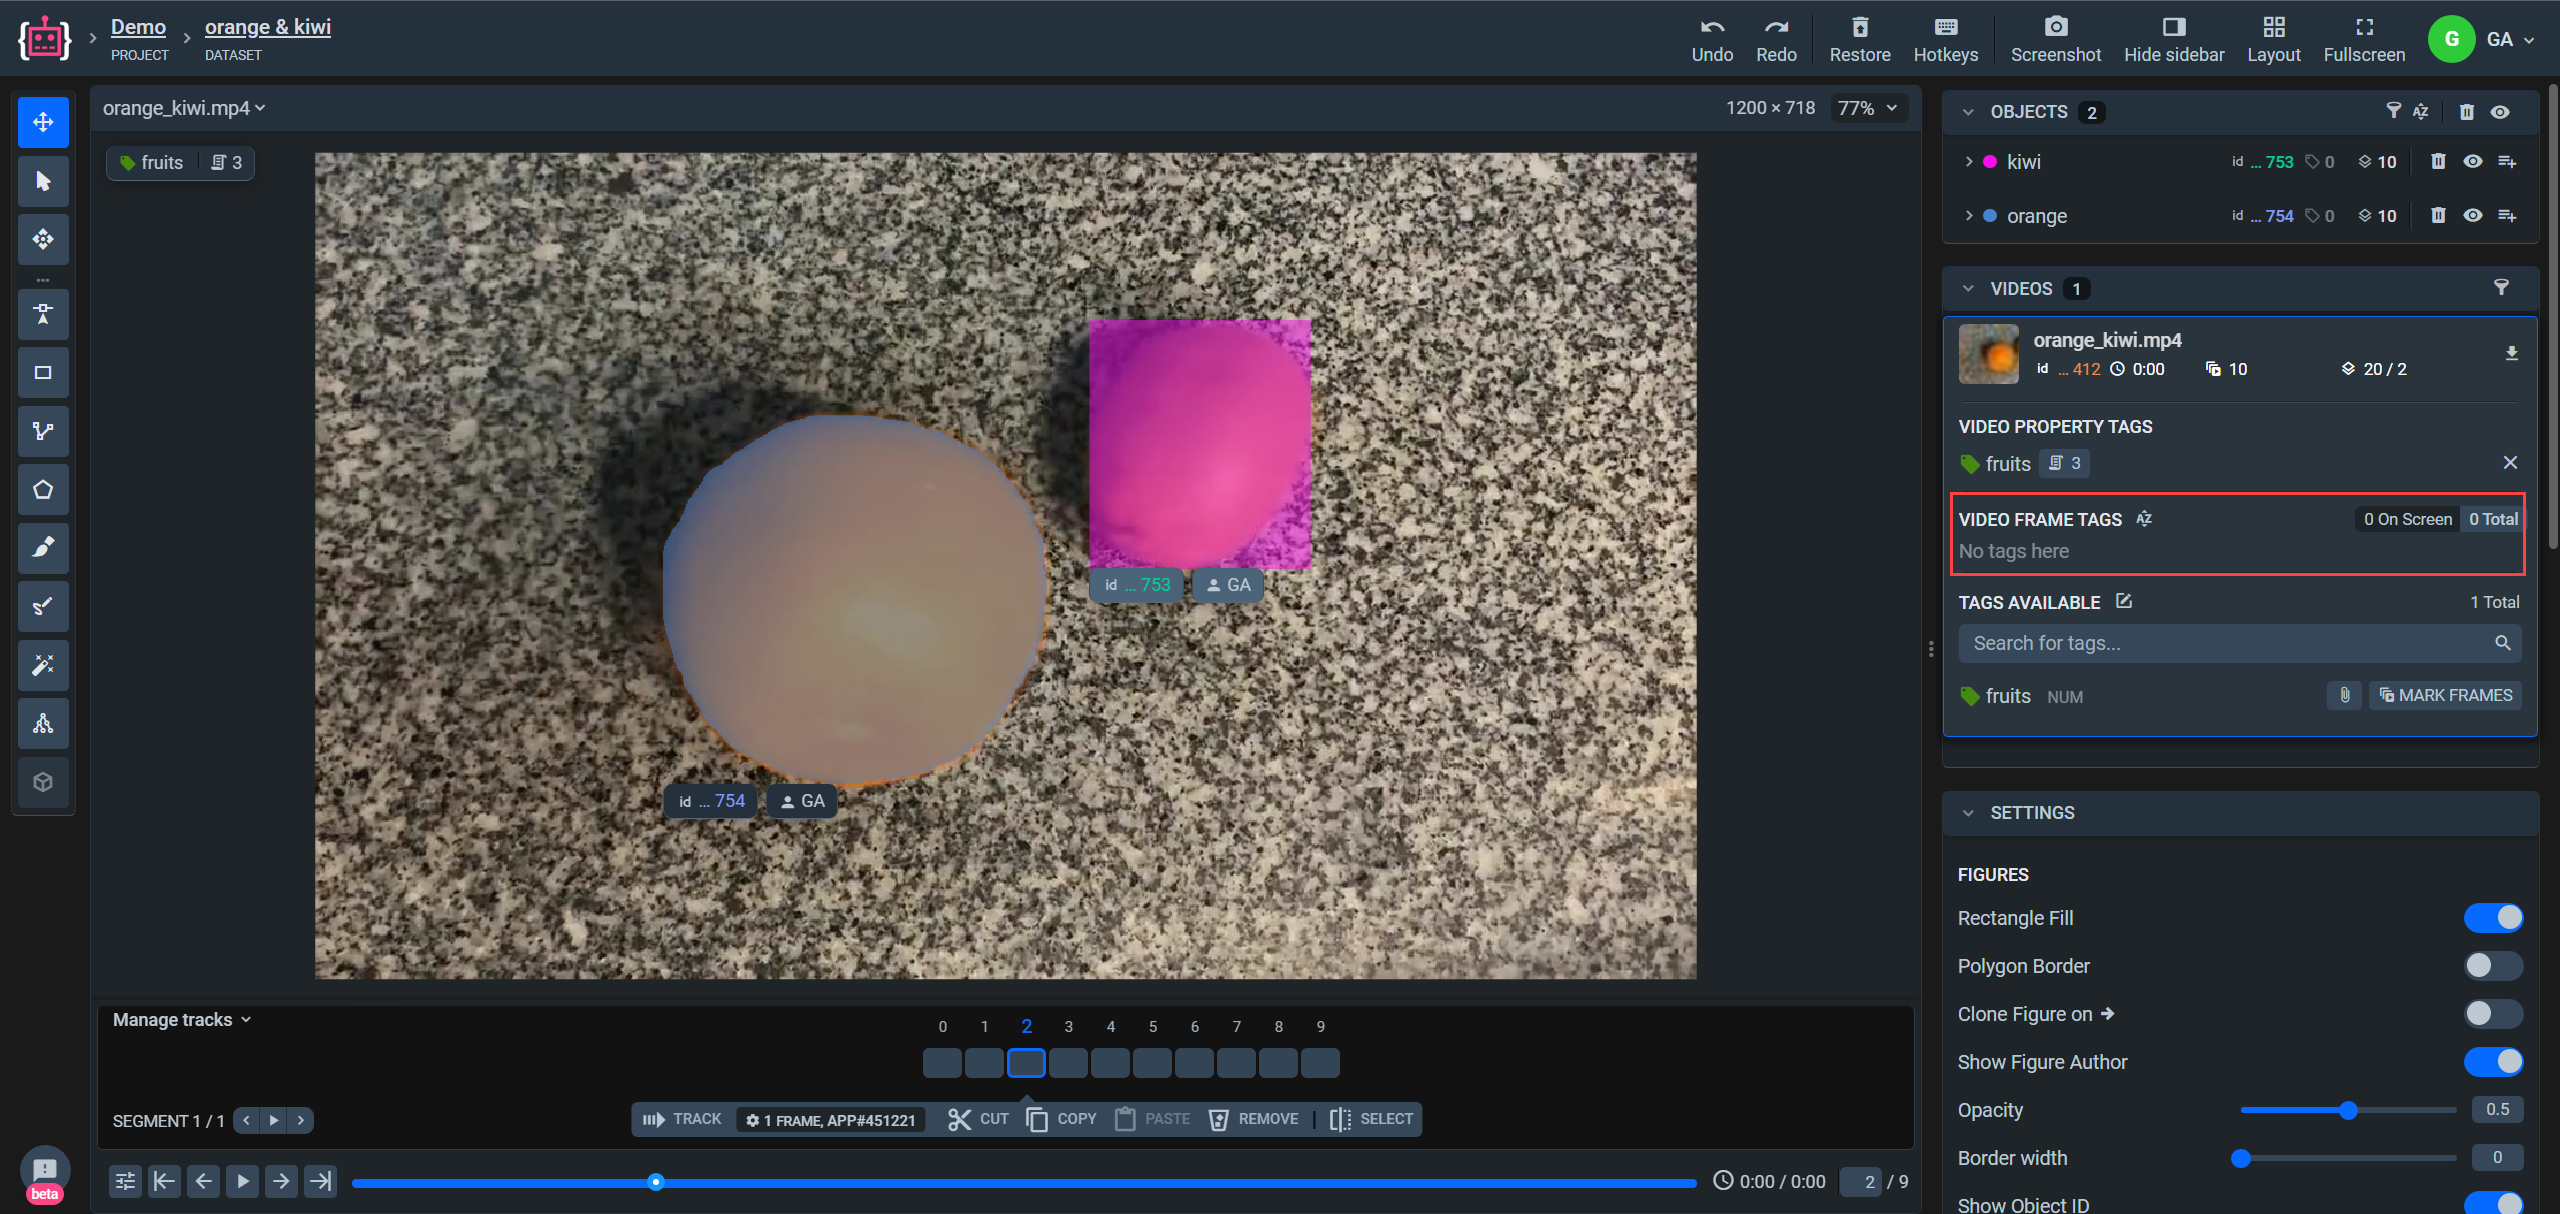
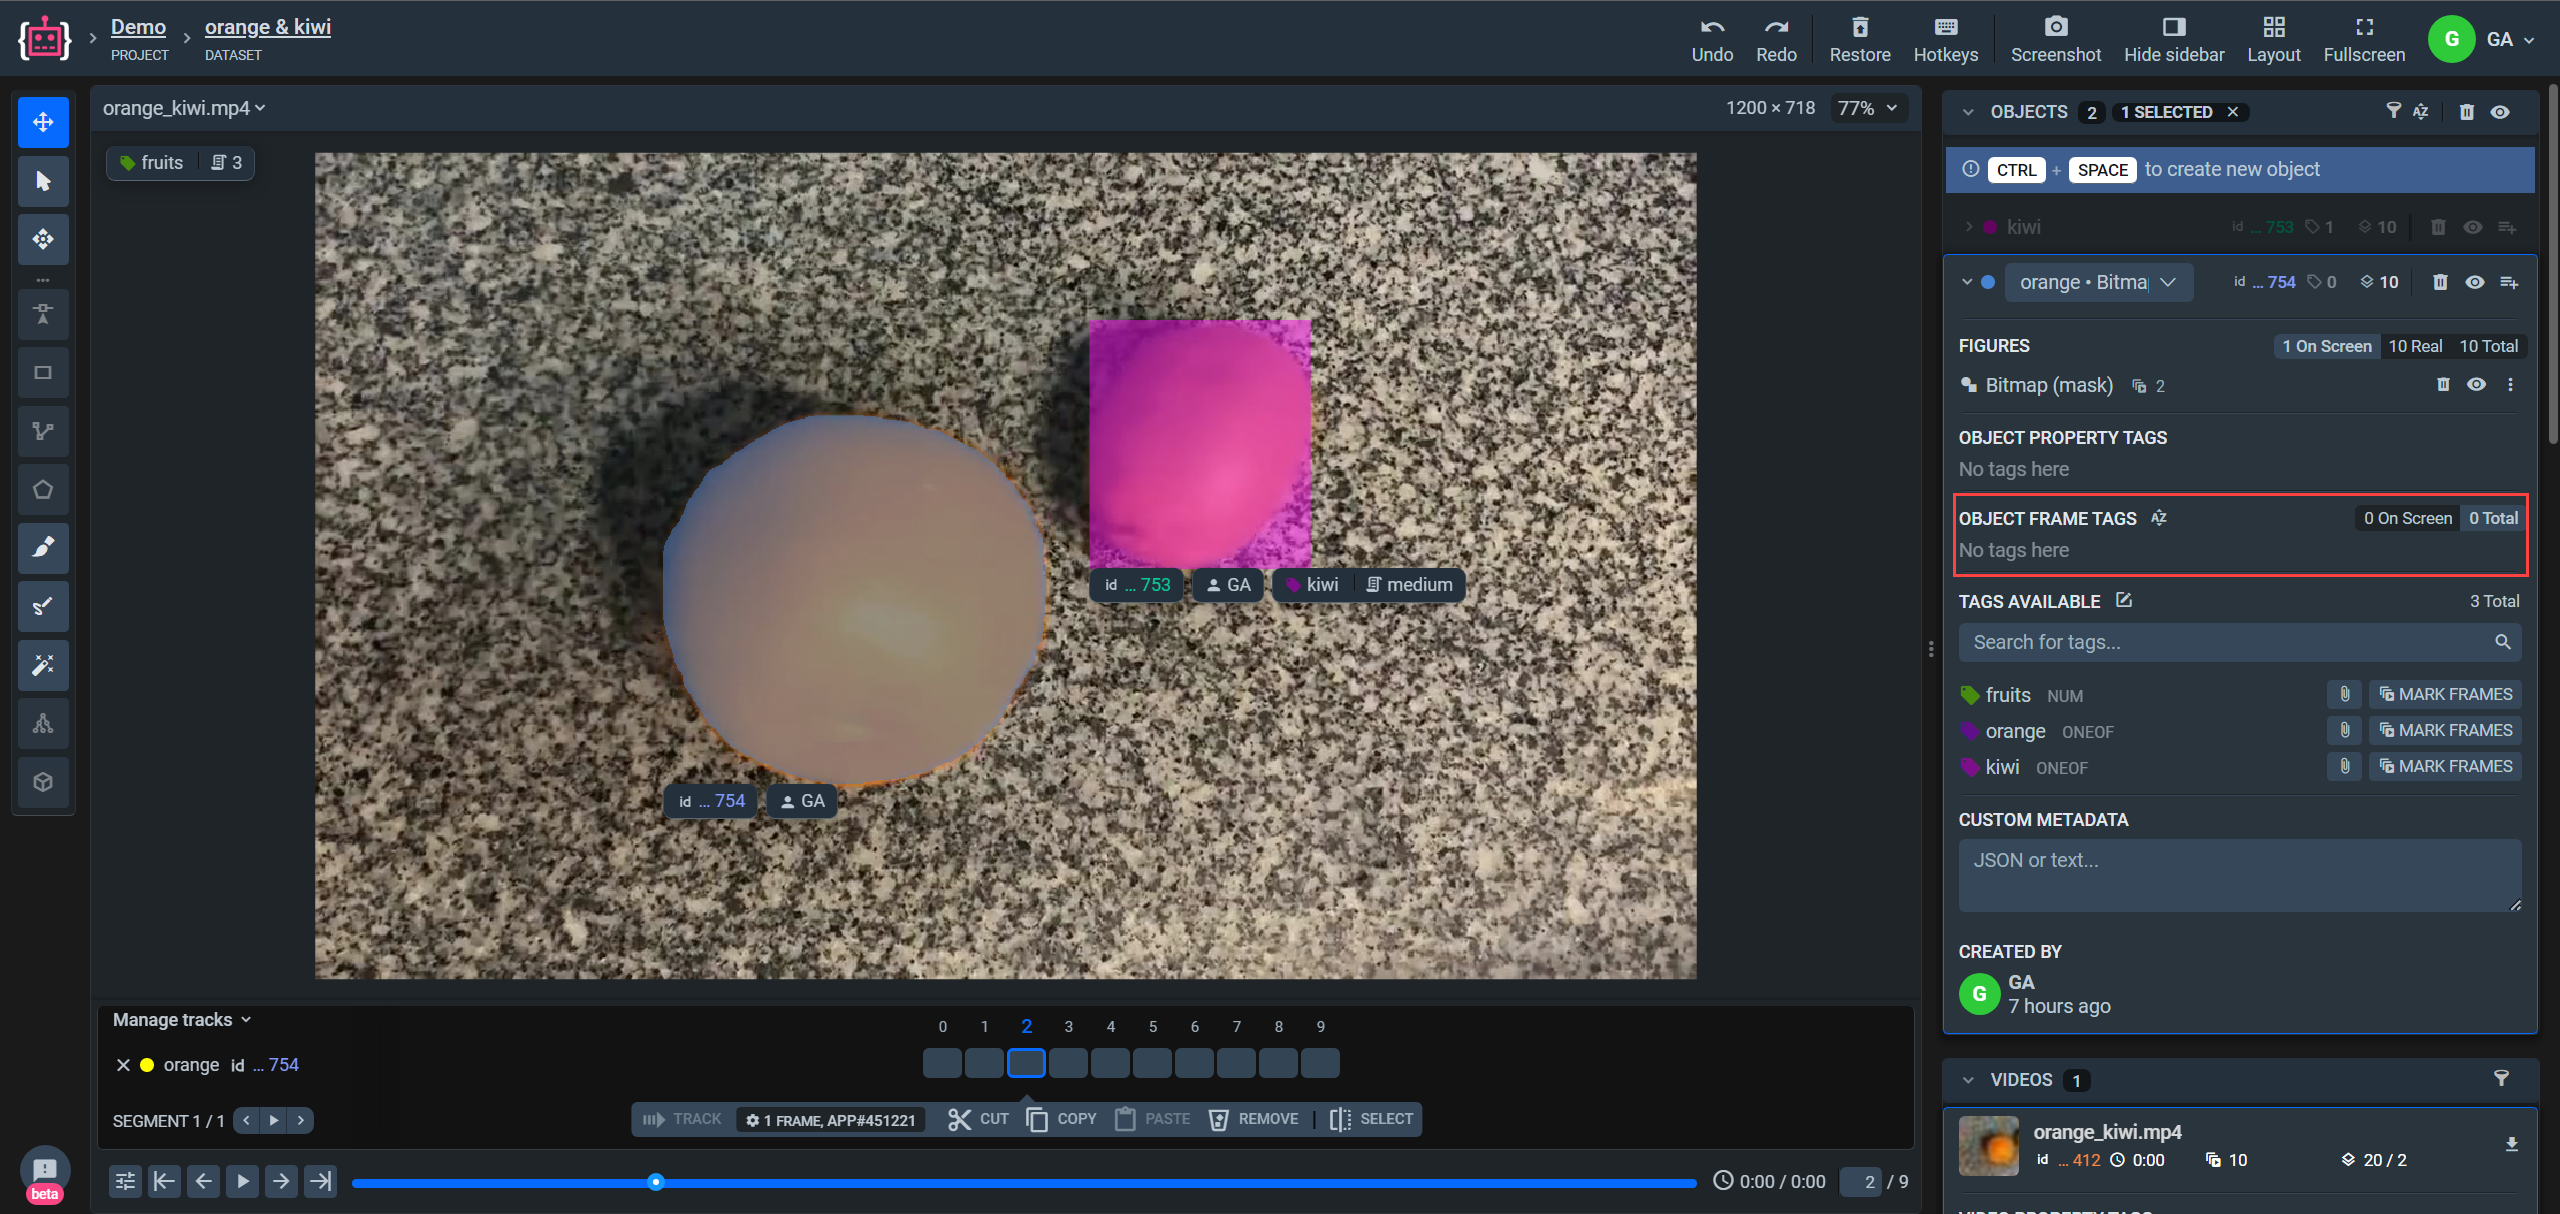
Visualization in Labeling Tool before we starting add tags.
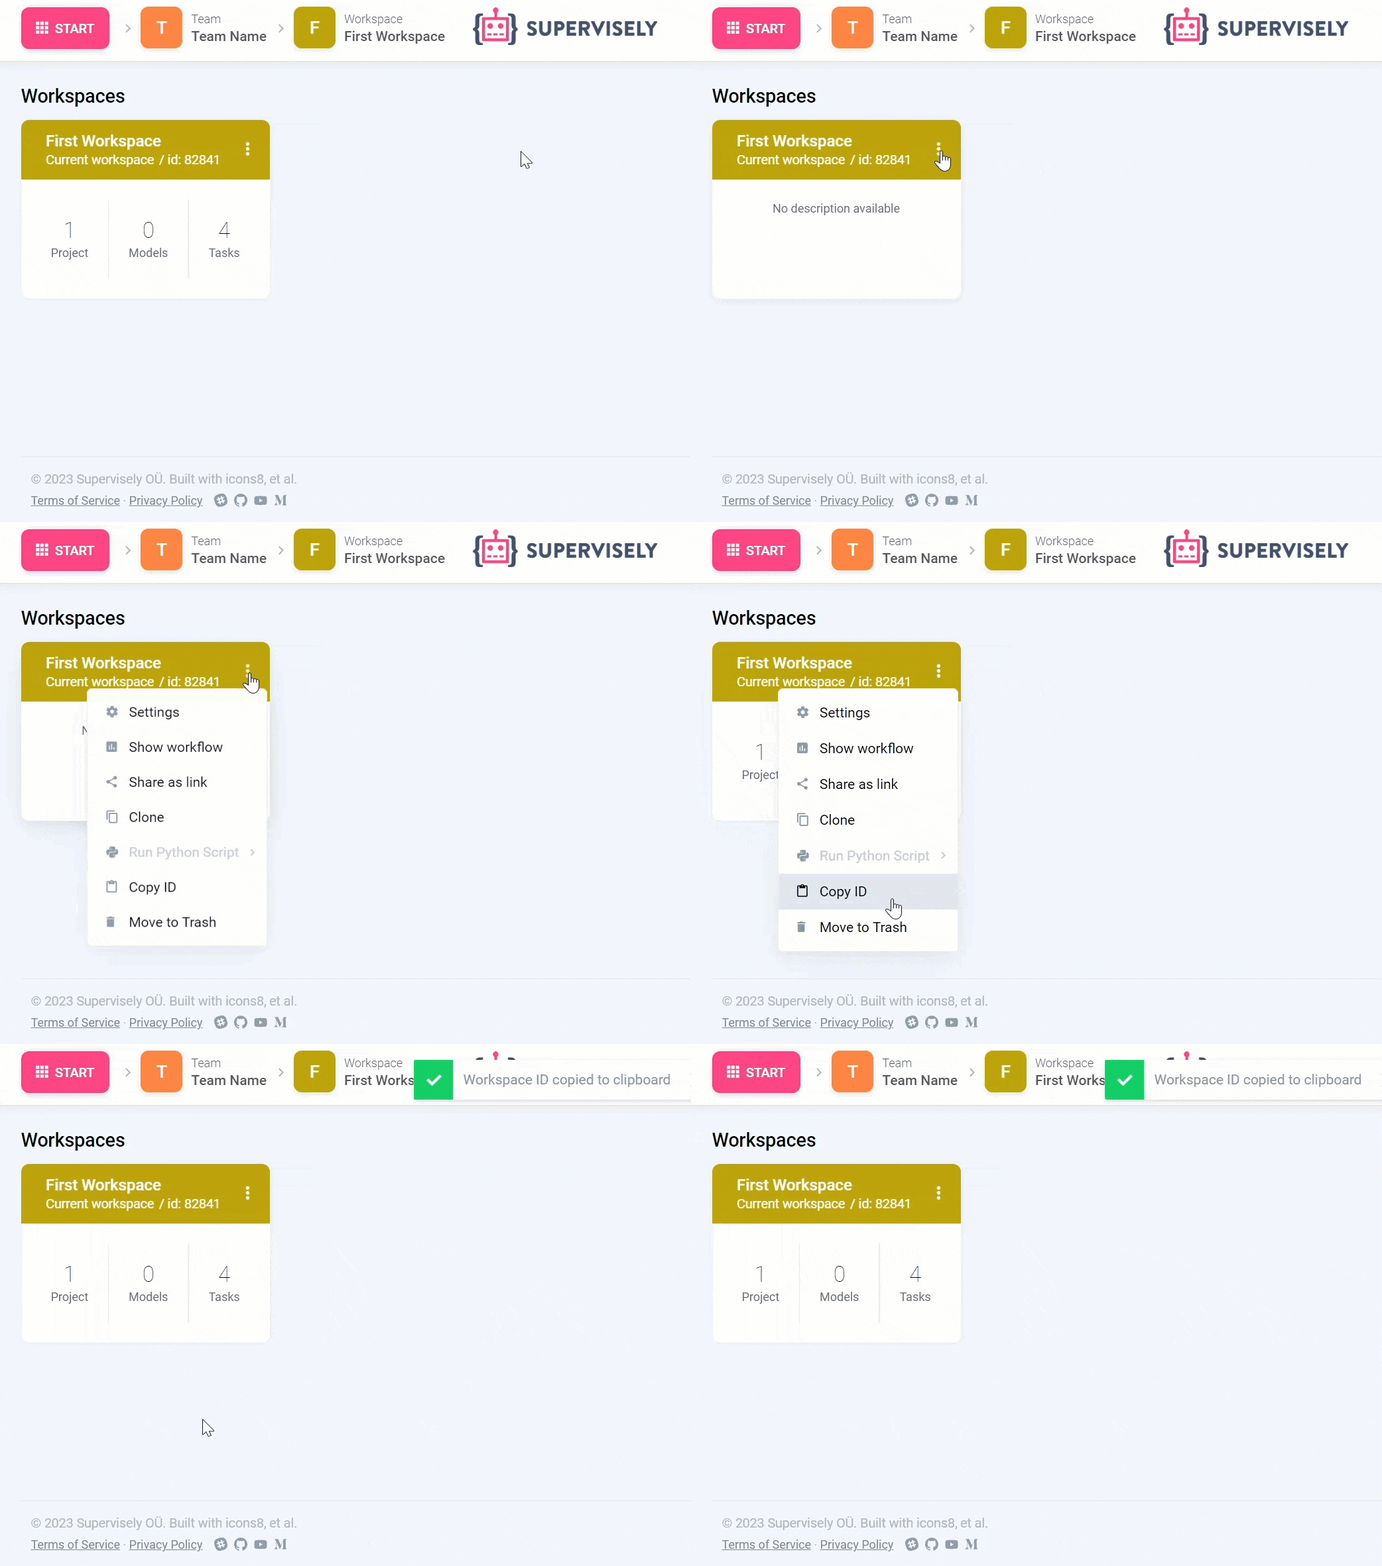
**Step 5.** Change Workspace ID in `local.env` file by copying the ID from the context menu of the workspace. Do the same for Project ID and Dataset ID .
```python
WORKSPACE_ID=82841 # ⬅️ change value
PROJECT_ID=240755 # ⬅️ change value
DATASET_ID=778169 # ⬅️ change value
```
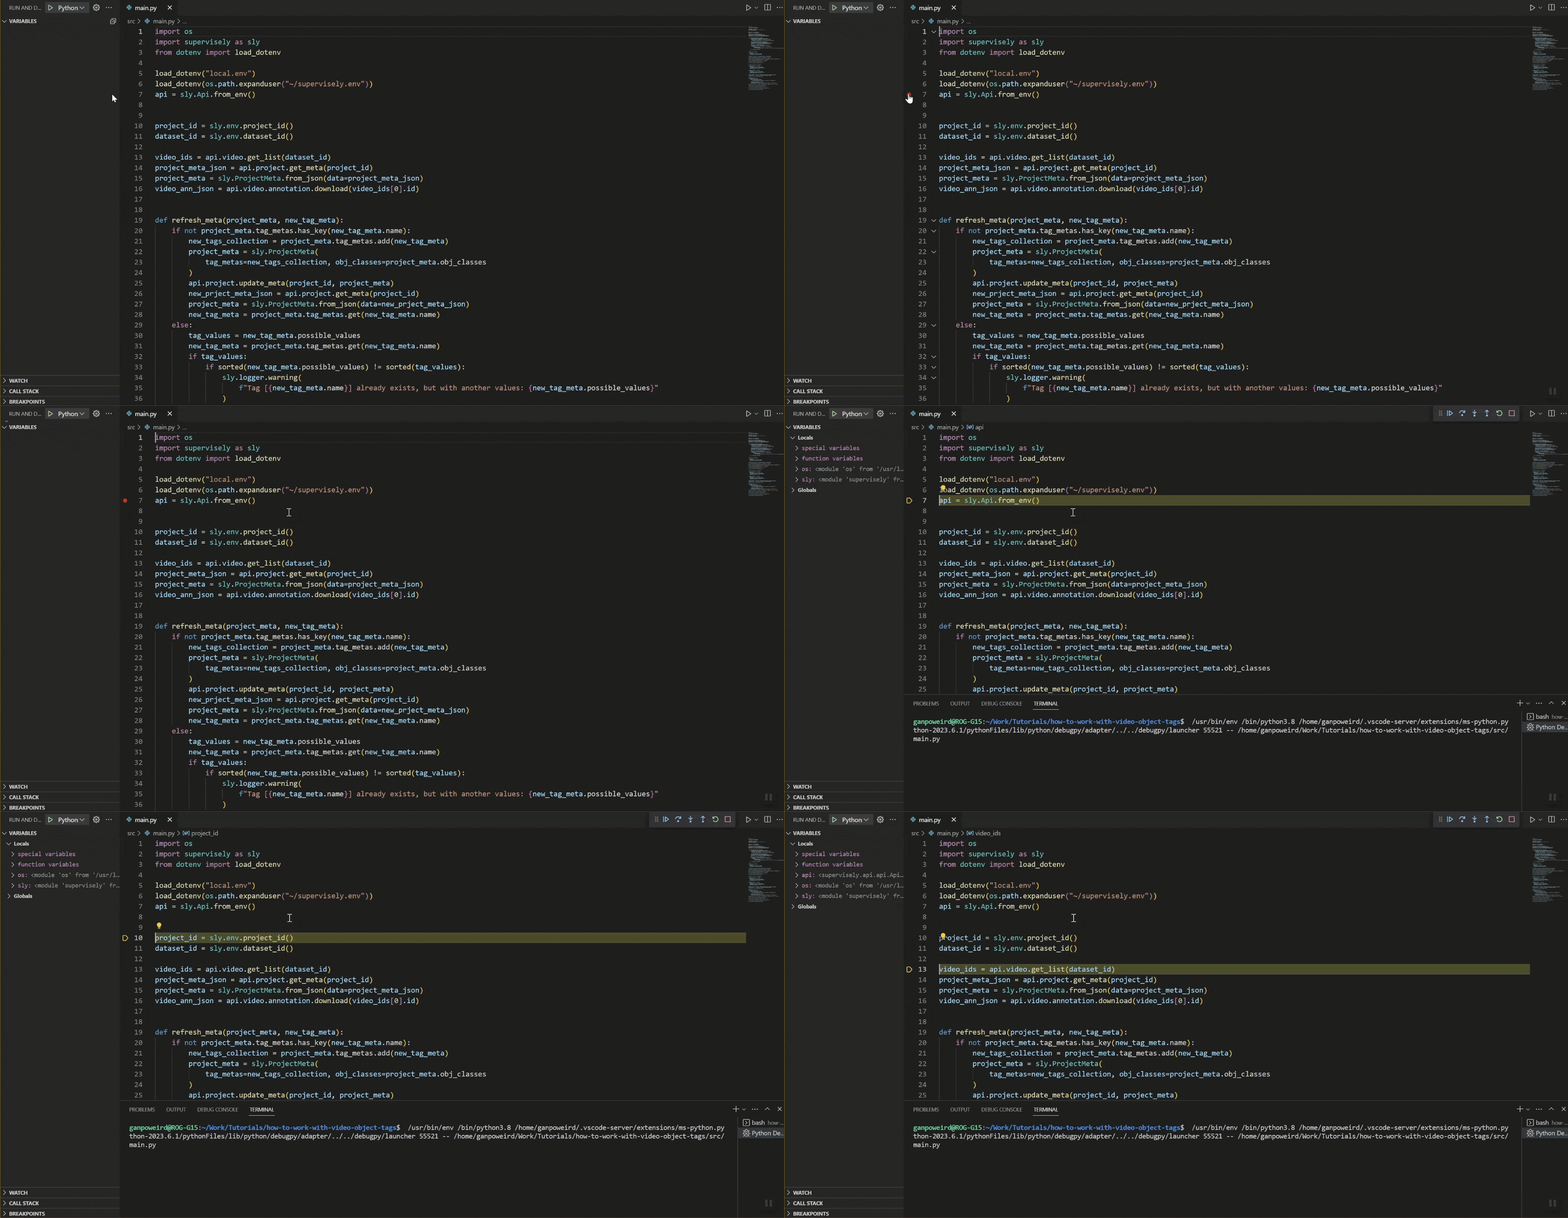
**Step 6.** Start debugging `src/main.py`
## **Python Code**
### **Import libraries**
```python
import os
import supervisely as sly
from dotenv import load_dotenv
```
### **Init API client**
Init `api` for communicating with Supervisely Instance. First, we load environment variables with credentials, Project and Dataset IDs:
```python
load_dotenv("local.env")
load_dotenv(os.path.expanduser("~/supervisely.env"))
api = sly.Api.from_env()
```
With next lines we will get values from `local.env`.
```python
project_id = sly.env.project_id()
dataset_id = sly.env.dataset_id()
```
By using these IDs, we can retrieve the project metadata and annotations, and define the values needed for the following operations.
```python
video_ids = api.video.get_list(dataset_id)
project_meta_json = api.project.get_meta(project_id)
project_meta = sly.ProjectMeta.from_json(data=project_meta_json)
video_ann_json = api.video.annotation.download(video_ids[0].id)
```
### **Define function to work with metadata**
This function is used to recreate the source project metadata with new tag metadata. Right after updating the metadata, we need to obtain added metadata again to work with it in the next steps. In case a tag with the `tag_name` already exists in the metadata, we could just use it if it fits our requirements. If this tag doesn't meet our requirements, it would be better to create a new one with a different name.
```python
def refresh_meta(project_meta, new_tag_meta):
if not project_meta.tag_metas.has_key(new_tag_meta.name):
new_tags_collection = project_meta.tag_metas.add(new_tag_meta)
project_meta = sly.ProjectMeta(
tag_metas=new_tags_collection, obj_classes=project_meta.obj_classes
)
api.project.update_meta(project_id, project_meta)
new_prject_meta_json = api.project.get_meta(project_id)
project_meta = sly.ProjectMeta.from_json(data=new_prject_meta_json)
new_tag_meta = project_meta.tag_metas.get(new_tag_meta.name)
else:
tag_values = new_tag_meta.possible_values
new_tag_meta = project_meta.tag_metas.get(new_tag_meta.name)
if tag_values:
if sorted(new_tag_meta.possible_values) != sorted(tag_values):
sly.logger.warning(
f"Tag [{new_tag_meta.name}] already exists, but with another values: {new_tag_meta.possible_values}"
)
return new_tag_meta, project_meta
```
### **Create new tag metadata for video**
Here, we are creating metadata for a video tag and using the function from the previous step to insert it into our project.
```python
video_tag_meta = sly.TagMeta(
name="fruits",
value_type=sly.TagValueType.ANY_NUMBER,
applicable_to=sly.TagApplicableTo.ALL,
)
new_tag_meta, project_meta = refresh_meta(project_meta, video_tag_meta)
```
### **Create new tag for video and its frames**
When you pass information from tag metadata using its ID to the object, a new tag is created and appended.
To add a tag with value, you must define the `value` argument with possible values.
If you want to add a tag to frames, you must define the `frame_range` argument.
```python
api.video.tag.add_tag(new_tag_meta.sly_id, video_ids[0].id, value=3)
tag_info = api.video.tag.add_tag(new_tag_meta.sly_id, video_ids[0].id, value=2, frame_range=[2, 6])
```
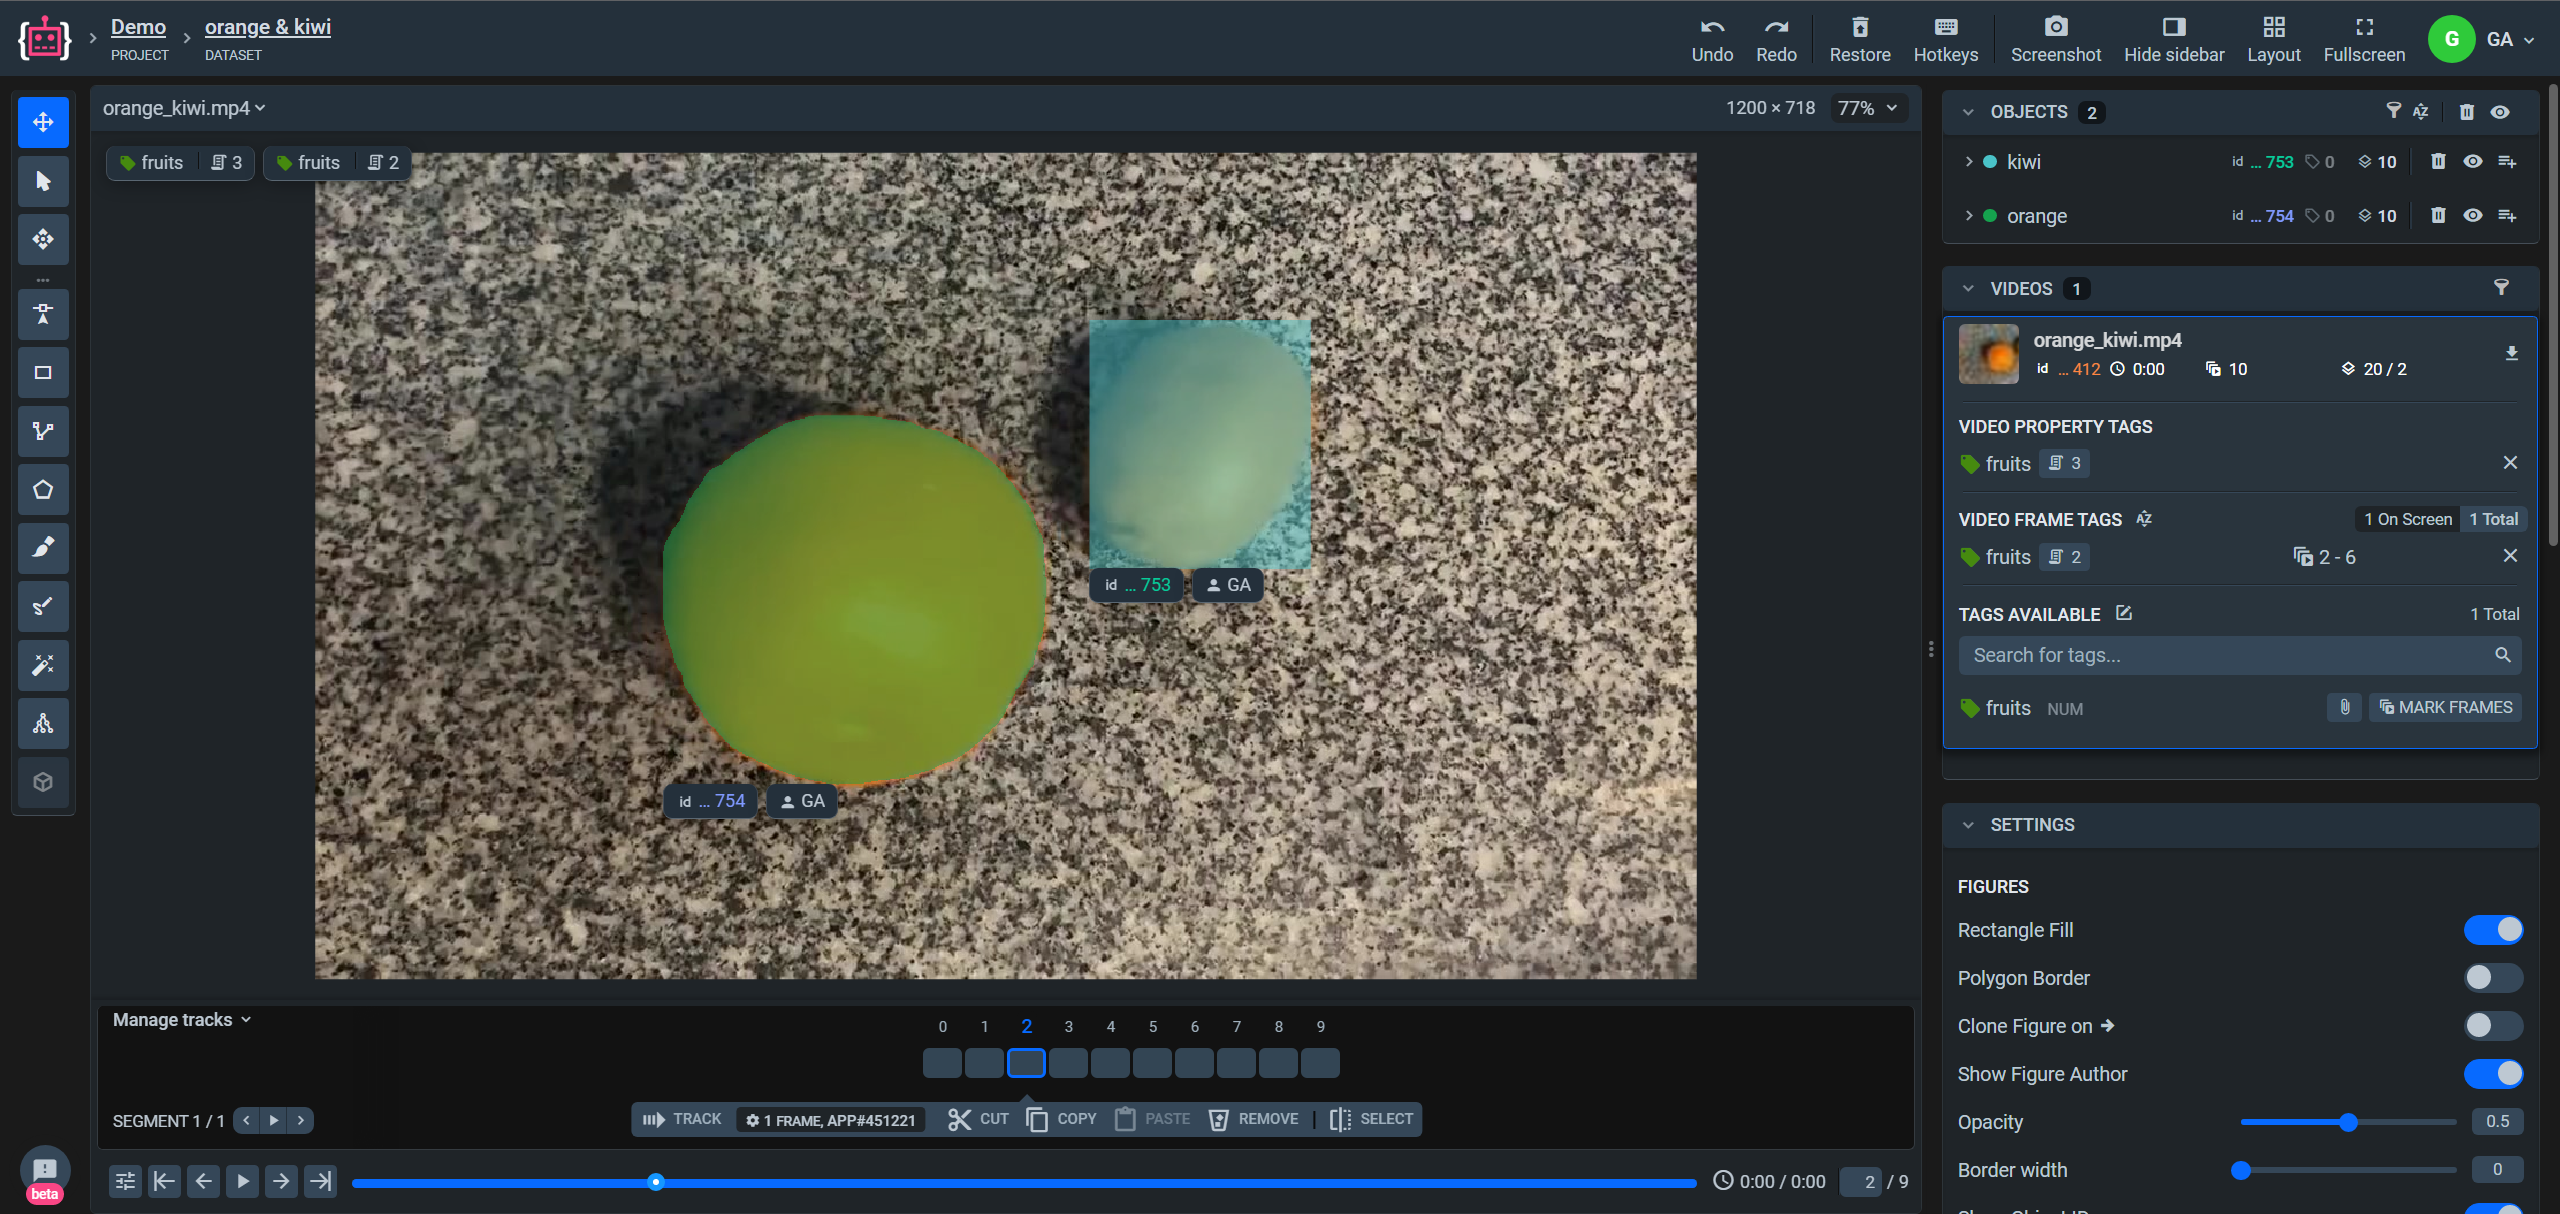
Visualization in Labeling Tool with new tags.
### **Update tag value and frame range for video**
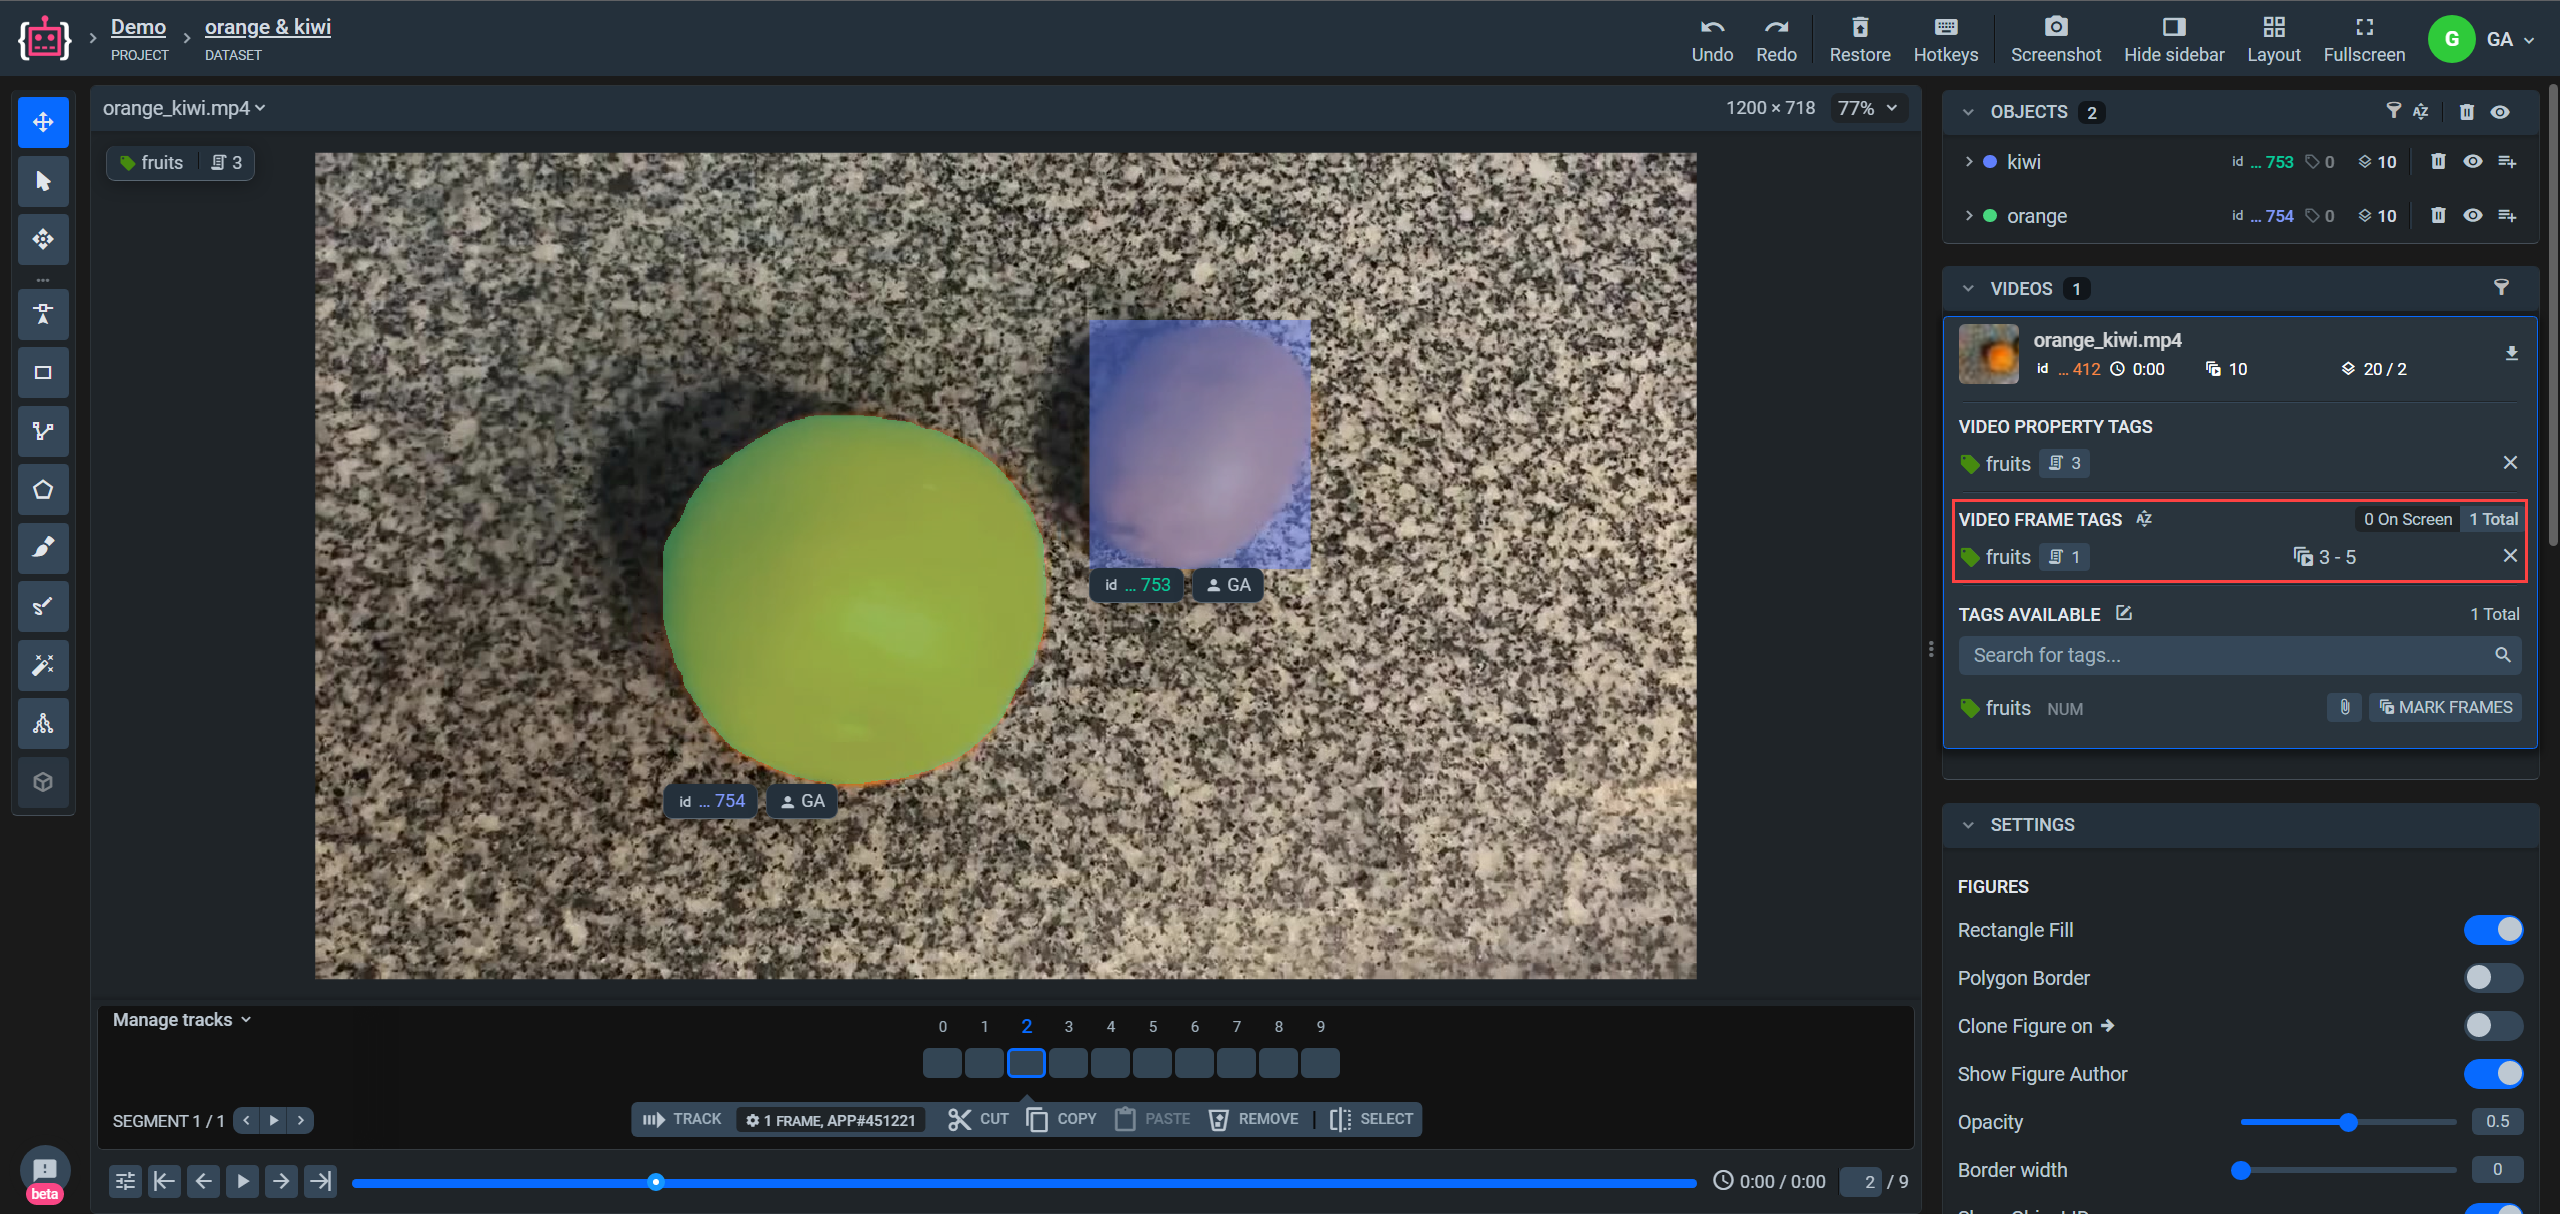
Also, if you need to correct tag values or frames, you can easily do so as follows:
```python
api.video.tag.update_value(tag_id=tag_info["id"], tag_value=1)
api.video.tag.update_frame_range(tag_info["id"], [3, 5])
```
### **Delete tag**
To remove a tag, all you need is its ID.
```python
api.video.tag.remove_from_video(tag_info["id"])
```
Please note that you are only deleting the tag from the object. To remove a tag from the project (`TagMeta`), you need to use other SDK methods.
### **Create new tag metadatas for objects in video**
The process is the same as for video, but now we strictly define the `applicable_to` parameter to specify which entities these tags can be added to. It is not necessary and depends solely on your desire to limit the types other than objects.
```python
orange_object_tag_meta = sly.TagMeta(
name="orange",
value_type=sly.TagValueType.ONEOF_STRING,
applicable_to=sly.TagApplicableTo.OBJECTS_ONLY,
possible_values=["small", "big"],
)
kiwi_object_tag_meta = sly.TagMeta(
name="kiwi",
value_type=sly.TagValueType.ONEOF_STRING,
applicable_to=sly.TagApplicableTo.OBJECTS_ONLY,
possible_values=["medium", "small"],
)
orange_new_tag_meta, project_meta = refresh_meta(project_meta, orange_object_tag_meta)
kiwi_new_tag_meta, _ = refresh_meta(project_meta, kiwi_object_tag_meta)
```
### **Create new tag for object and frames with this object**
There's nothing new that you haven't seen already, just added some lines to handle objects according to their classes. Collects only oranges tag ids for further processing.
```python
project_objects = video_ann_json.get("objects")
created_tag_ids = {}
orange_ids = []
for object in project_objects:
if object["classTitle"] == "orange":
tag_id = api.video.object.tag.add(
orange_new_tag_meta.sly_id, object["id"], value="big", frame_range=[2, 6]
)
created_tag_ids[object["id"]] = tag_id
orange_ids.append(object["id"])
elif object["classTitle"] == "kiwi":
api.video.object.tag.add(kiwi_new_tag_meta.sly_id, object["id"], value="medium")
```
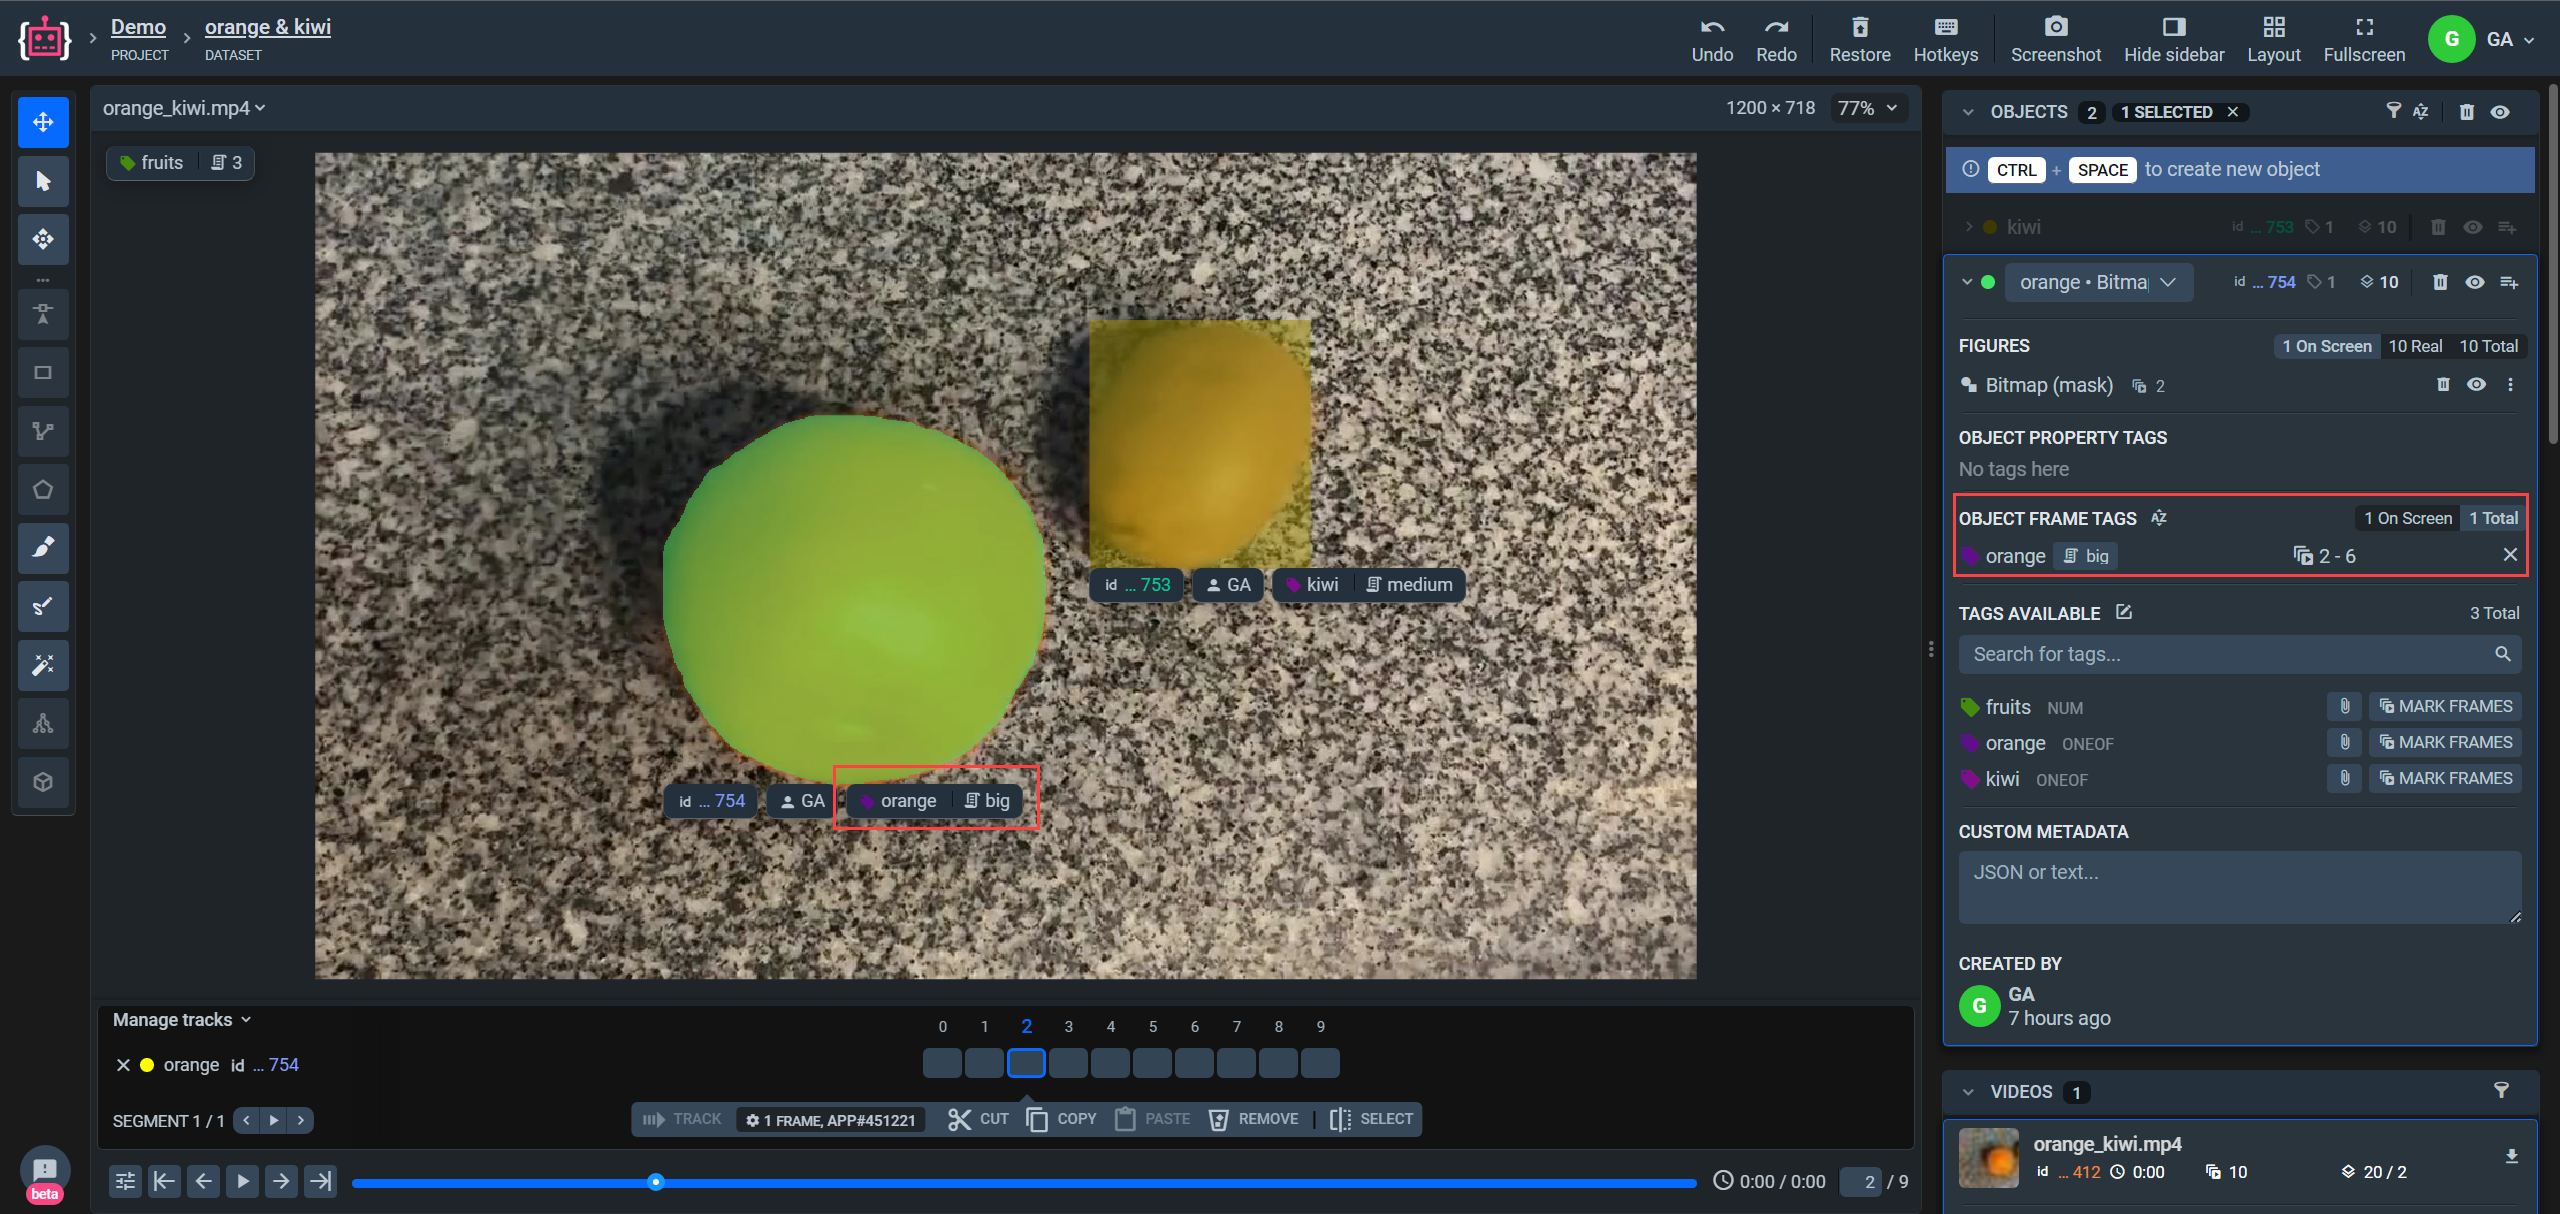
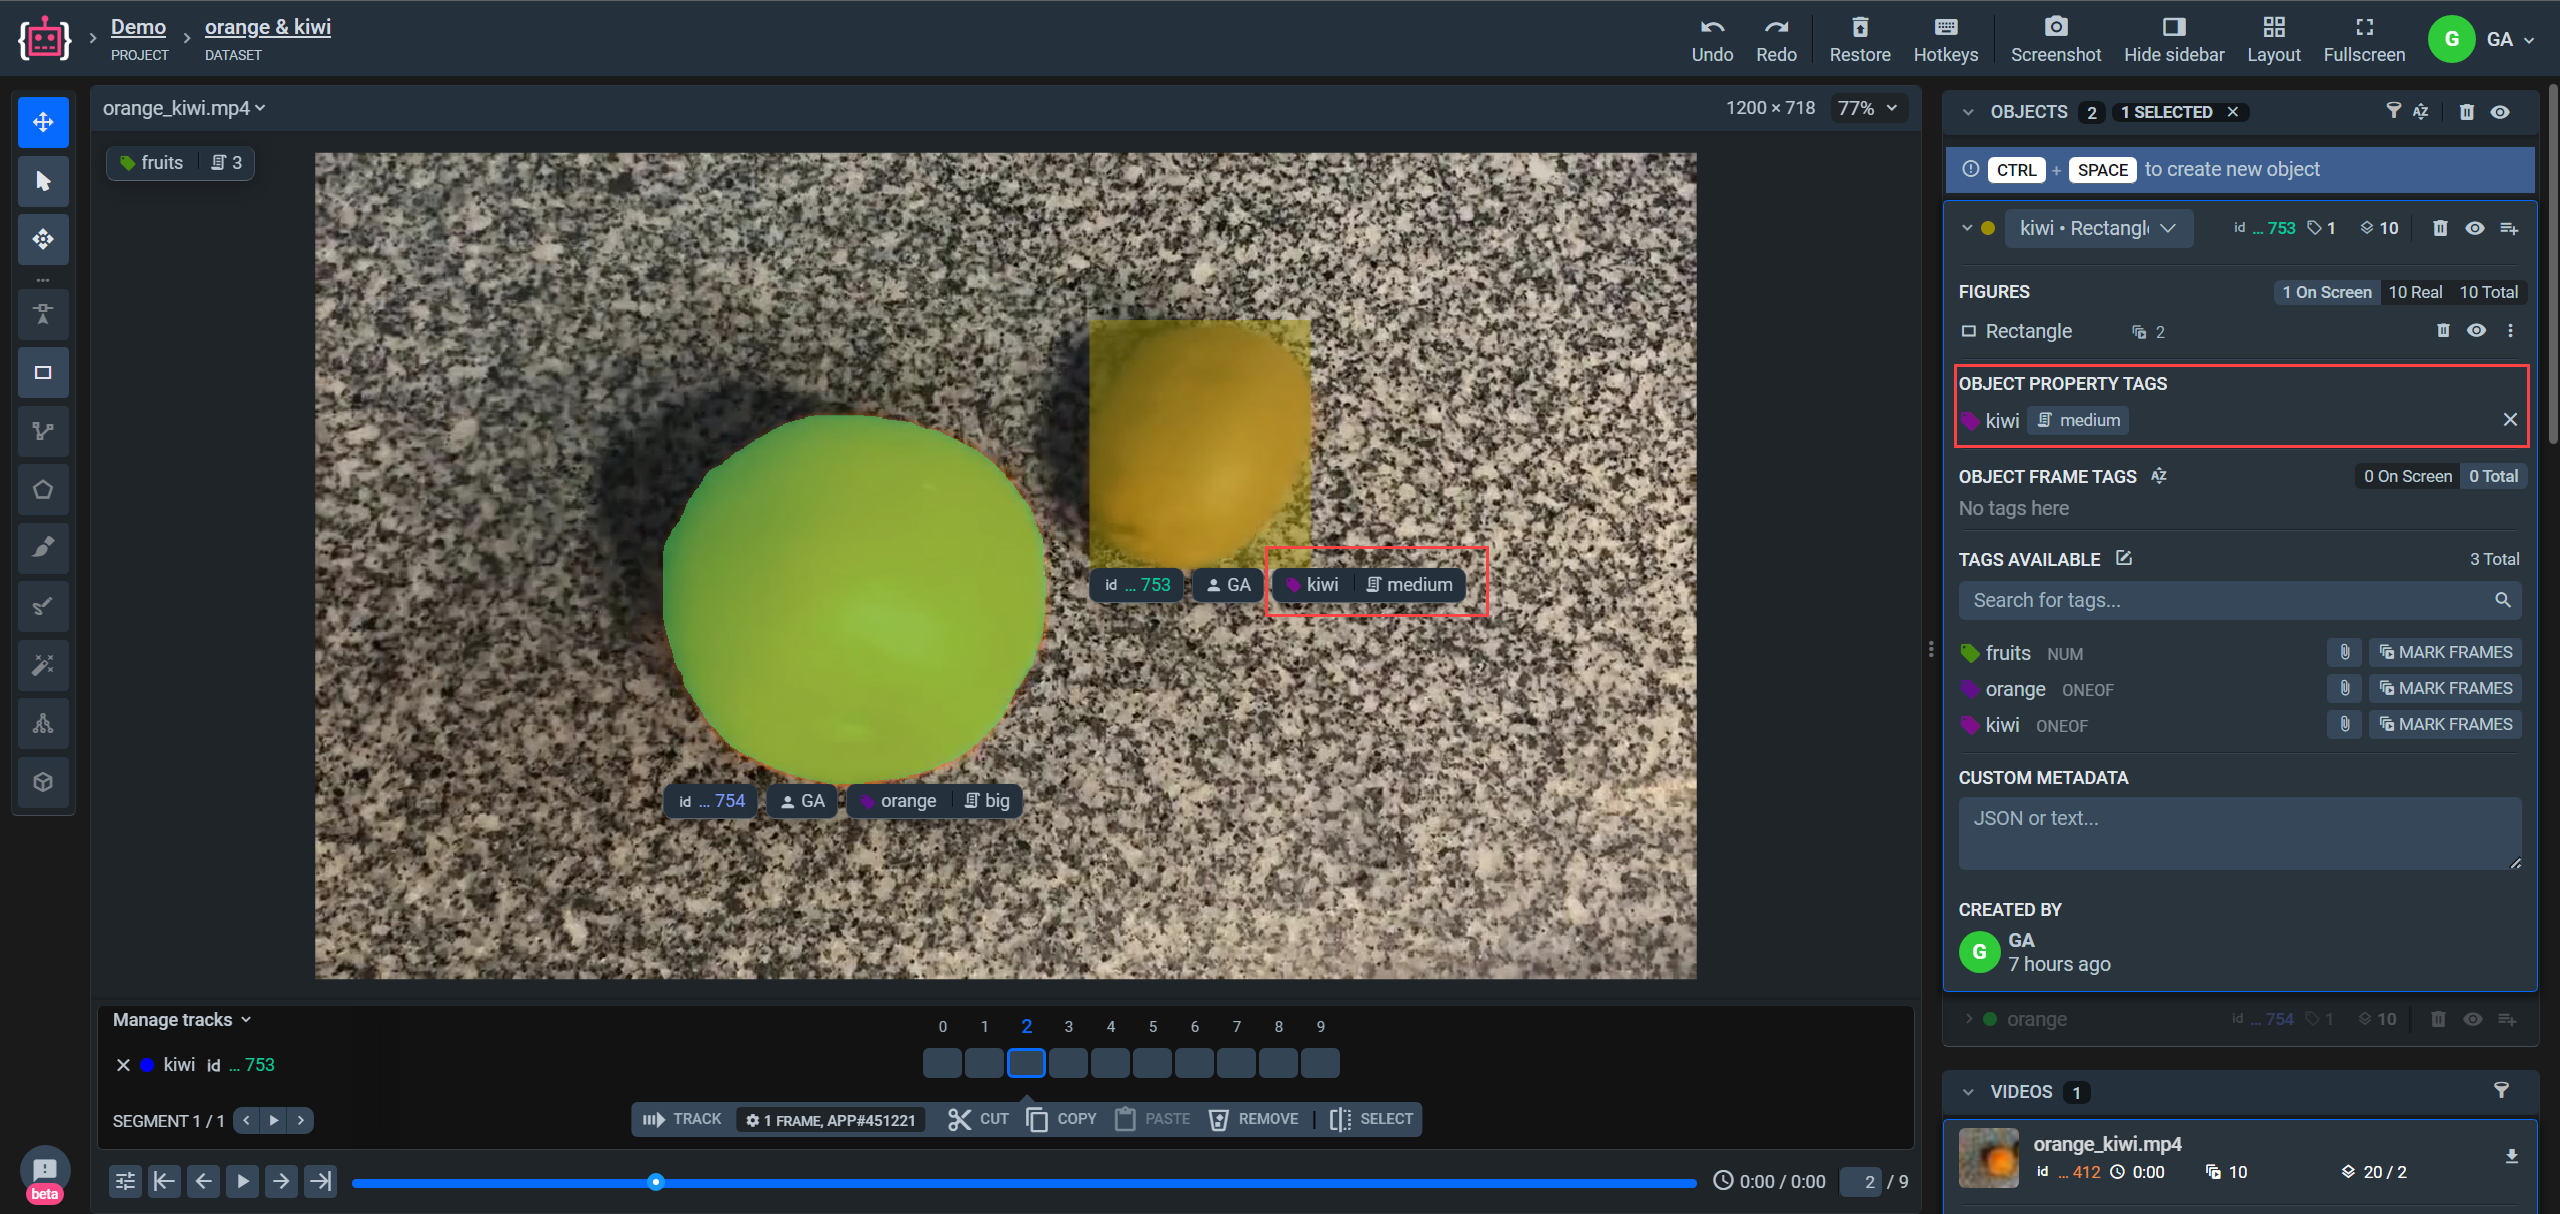
Visualization in Labeling Tool with new tags.
### **Update tag value and frame range for object**
To correct tag values for the first orange in list, do so as follows:
```python
tag_id_to_operate = created_tag_ids.get(orange_ids[0])
api.video.object.tag.update_value(tag_id_to_operate, "small")
api.video.object.tag.update_frame_range(tag_id_to_operate, [3, 5])
```
### **Delete tag from object**
```python
api.video.object.tag.remove(tag_id_to_operate)
```
## **Managing project tags (TagMeta)**
Everything above adds, edits and removes tags **on** a video or an object. The tag itself — its name, value type, scope and constraints — lives in the project meta as a `TagMeta`. The `refresh_meta` helper at the start of this tutorial creates one by rebuilding the whole project meta, which is the right approach when you are preparing many classes and tags at once.
When you only need to add or edit a tag, there are direct methods that take a `TagMeta` and touch nothing else:
```python
tag_meta = sly.TagMeta(
name="running",
value_type=sly.TagValueType.NONE,
target_type=sly.TagTargetType.FRAME_BASED,
)
created = api.video.tag.create(project_id, tag_meta)
# {'id': 32965996, 'name': 'running'}
```
Several at once, in one request:
```python
created = api.video.tag.create_bulk(project_id, [
sly.TagMeta("standing", sly.TagValueType.NONE, target_type=sly.TagTargetType.FRAME_BASED),
sly.TagMeta("sitting", sly.TagValueType.NONE, target_type=sly.TagTargetType.FRAME_BASED),
])
```
To edit an existing tag, pass its ID. This is a partial update — only the arguments you pass are changed:
```python
api.video.tag.update_meta(
created["id"],
project_id=project_id,
applicable_to=sly.TagApplicableTo.OBJECTS_ONLY,
applicable_classes=["person"],
)
```
{% hint style="info" %}
`project_id` is needed because the endpoint requires the tag's name and colour in every request; passing it lets the SDK read the current values for you. You can also pass `name` and `color` yourself instead.
{% endhint %}
`applicable_classes` takes class **names**, exactly as `TagMeta.applicable_classes` does — the SDK resolves them to the IDs the API expects. An empty list removes the restriction. A name that the project does not have raises a `ValueError` before anything is sent.
These methods are available for every entity type: `api.video.tag`, `api.image.tag`, `api.volume.tag`, `api.pointcloud.tag`.
## **Frame range length limits**
A frame-based tag can carry a minimum and a maximum length, in frames, measured on the finished tag. Use them when a tag is only meaningful over a certain span — a "running" segment shorter than five frames is more likely a mislabel than a real event. The limits apply to videos and point cloud episodes.
```python
tag_meta = sly.TagMeta(
name="running",
value_type=sly.TagValueType.NONE,
target_type=sly.TagTargetType.FRAME_BASED,
frame_range_min_length=5,
frame_range_max_length=30,
)
api.video.tag.create(project_id, tag_meta)
```
A labeler finishing a "running" tag shorter than 5 frames or longer than 30 now gets rejected by the platform.
Three things are worth knowing about how the limits behave:
* **Length is inclusive.** Frames 10 to 12 are a length of 3, not 2.
* **`0` means "no limit".** There is no separate on/off switch — a limit is active only while its value is above zero, so `0` (or `None`) disables it. That is also how you remove a limit later.
* **Only finished tags are checked.** A tag being drawn is not validated until it is completed, so a labeler can pass through invalid lengths on the way.
Reading the limits back from the project meta:
```python
project_meta = sly.ProjectMeta.from_json(api.project.get_meta(project_id))
tag_meta = project_meta.get_tag_meta("running")
tag_meta.frame_range_min_length # 5
tag_meta.frame_range_max_length # 30
tag_meta.frame_range_length_limits # (5, 30)
tag_meta.has_frame_range_length_limits # True
```
You can also check a range yourself before sending it, using the same inclusive arithmetic the platform applies:
```python
tag_meta.is_valid_frame_range(10, 12) # False, that is 3 frames
tag_meta.is_valid_frame_range(10, 19) # True, that is 10 frames
tag_meta.is_valid_frame_range_length(40) # False, above the maximum
```
### **Changing the limits**
On an existing tag, by ID. Pass `0` to drop a limit and leave an argument out to keep it as it is:
```python
# tighten both
api.video.tag.update_meta(tag_id, project_id=project_id,
frame_range_min_length=3, frame_range_max_length=12)
# drop the upper limit, keep the lower one
api.video.tag.update_meta(tag_id, project_id=project_id, frame_range_max_length=0)
```
Or through the project meta, which is convenient when you are already editing it. Note that `with_frame_range_length_limits` replaces **both** limits, so calling it with no arguments clears them:
```python
tag_meta = project_meta.get_tag_meta("running").with_frame_range_length_limits(4, 8)
project_meta = project_meta.delete_tag_meta("running").add_tag_meta(tag_meta)
api.project.update_meta(project_id, project_meta)
```
{% hint style="warning" %}
A minimum above a maximum would make the tag impossible to apply, so it is rejected. `TagMeta` raises a `ValueError` as soon as you construct it, before any request is sent:
```python
sly.TagMeta("bad", sly.TagValueType.NONE,
frame_range_min_length=30, frame_range_max_length=5)
# ValueError: frame range min_length = 30 must be less than or equal to max_length = 5
```
The check runs against the merged result, so raising the minimum above the stored maximum through `update_meta` is refused as well.
{% endhint %}